Problem
In this article, learn how to append columns to an existing SQL Server table as well as how to append data to a SQL Server table.
Solution
You can use SQL scripts or the SSMS graphical interface to add a column to an existing table, make table structure changes or insert new data. Let’s explore the different methods for adding columns and data to SQL tables using T-SQL and SSMS.
Add a Column in an Existing Table Using T-SQL
Suppose you have an existing Employee table with the following structure:
CREATE TABLE Employee
(
   ID Int,
   First_name varchar(20),
   Last_name varchar(20)
)
We need to add a new column [Age] in the Employee table. To add this column, we must alter the table. Using T-SQL, you can use the ALTER TABLE statement to add a column to the existing table in SQL Server.
Here’s an example:
ALTER TABLE Employee
ADD [Age] tinyint;

To verify the newly added column, you can run the command sp_help, which shows all columns in the Employee table.

If you right-click on the table in SSMS and select Script Table As > Create To it will create the script below that shows the column [Age] we just added.

![column [Age] with the NULL property](/wp-content/images-tips/7749_append-sql-table-sql-server.003.png)
We did not specify the property NULL or NOT NULL while adding the [Age] column in the Employee table. Therefore, SQL Server considers the default value as NULL.
If we want to add the column as NOT NULL, we would use this command.
ALTER TABLE Employee
ADD [Age] tinyint NOT NULL;
Note: if data already exists in the table and you try to add a new column using NOT NULL you will get the following error:
ALTER TABLE only allows columns to be added that can contain nulls, or have a DEFAULT definition specified, or the column being added is an identity or timestamp column, or alternatively if none of the previous conditions are satisfied the table must be empty to allow addition of this column. Column ‘Age’ cannot be added to non-empty table ‘Employee’ because it does not satisfy these conditions.
Add Multiple New Columns in an Existing Table Using T-SQL
If you need to add multiple columns to an existing table, use could use multiple Alter Table statements or specify all columns in a single Alter Table statement.
For example, the below code adds columns [Age], [Address], and [Contact Number] to the Employee table.
ALTER TABLE Employee
ADD [Age] tinyint NOT NULL,
    [Address] varchar(50),
    [Contact Number] varchar(10) NOT NULL
Add Column with Default Constraint Using T-SQL
Suppose you want to add the employee joining date column [DOJ], which should have the default value as the current date. If a new employee joins the organization and his\her records get created, DOJ should be automatically populated. The GETDATE() function is used with the DEFAULT clause in the below code.
ALTER TABLE Employee
ADD [DOJ] DATETIME DEFAULT GetDate()
Let’s insert an employee record and see how the default property would work.
INSERT INTO Employee (ID, First_name, Last_name) values (1, 'Rajendra', 'Gupta')
SELECT * FROM Employee
As you can see below, we did not specify the DOJ date. However, if we check the table record, the [DOJ] column was populated with the GETDATE() function value when the insert occurred.

Note: Adding a new column to an existing table can be time-consuming if the table contains a large amount of data. It’s a good idea to test any ALTER TABLE statements on a copy of the database before running them on the live database. Also, if you have existing data in a table and add new columns and specify NOT NULL it won’t allow you to make the change.
Add a New Column in an Existing Table Using SSMS
To add a new column to an existing table in SQL Server using SQL Server Management Studio (SSMS), follow these steps:
Step 1: Connect to your SQL instance in SSMS and expand databases and expand Tables.
Step 2: Right-click on the table where you want to add a new column and choose Design.

The table designer shows all existing columns and their properties. The Employee table structure is shown below for our example.

Step 3: To add a new column, click on the empty row, enter the column name and data type, and choose whether the column allows NULL.

If you right-click the column name, you get a few options such as Set Primary Key, Relationships, Indexes\Keys.

Suppose we want to add a non-clustered index on the newly added column [Address]. For this, choose the Indexes\Keys options.

Modify the Index Name and Columns from the Index\Key page.

Click Close, and it takes you back to the table designer.
Additionally, if you want to generate the script for the changes we performed in the table designer, choose the option – Generate Change Script. It opens the pop-up page with the script. As you can see below, the pop-up window contains scripts for:
- Adding a new column [Address] in the Employee table with data type varchar(50)
- Adding a new non-clustered index on the [Address] column.
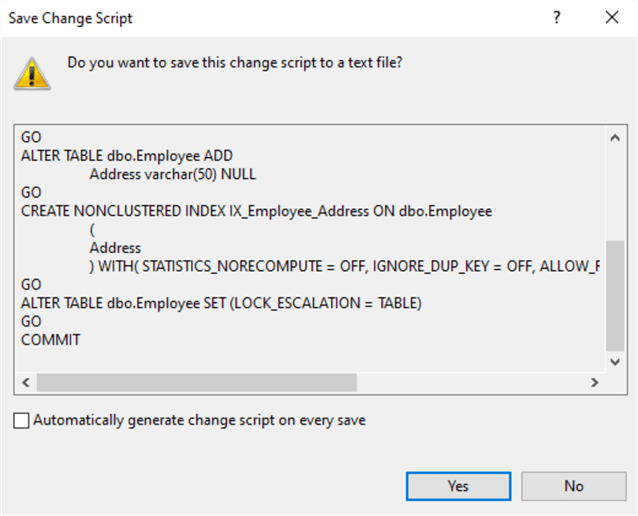
To save the script, click Yes. Else No to go back to table designer. Once you added all required columns, right-click on the table name and choose Save Employee.

It saves all changes you made in the table designer for the Employee table. Refresh the table in SSMS and expand Columns and Indexes to see new columns and indexes.
How to Add Rows to an Existing Table
Several common methods are available to add rows to an existing SQL Server table.
Using INSERT Statement
The INSERT statement can be used to add a row to the existing table, and its syntax is:
INSERT INTO TableName (Column1, Column2, Column3)
VALUES ('Value1', 'Value2', 'Value3')
For example, let’s create a new table and insert a few records.
Table [Demo] has two columns [ID],[Quantity]. The INSERT statement specifies column names before values.
CREATE TABLE Demo
(
   ID int,
   [Quantity] int
)
INSERT INTO Demo (ID, Quantity) values (1,1)
SELECT * FROM Demo
We can rewrite the INSERT statement without specifying the column names if we need to insert all values in all columns.
INSERT INTO Demo values (2,2)
SQL Server inserts NULL or default values on remaining columns. If we need to insert values in a specific column, you can specify the column name and enter the value below. However, note that the INSERT statement would raise an error if any column does not allow NULL and you do not insert values.
INSERT INTO DEMO(id) values (3)
SELECT * FROM Demo

Using INSERT…SELECT Statement
The INSERT…SELECT statement can be used to insert data in an existing table from the output of the SELECT statement.
In the example below, the SQL query inserts records into the Employee_new table from the SELECT statement output.
INSERT INTO Employee_new
SELECT
   [ID]
  ,[First_name]
  ,[Last_name]
  ,[DOJ]
  ,[Address]
FROM [test].[dbo].[Employee]
SELECT * FROM Employee_new
The benefit of the INSERT…SELECT approach is that you can join multiple tables in the SELECT statement or put the WHERE clause to filter data. The existing table should have the appropriate columns and data types per the SELECT query output.
In the following query, we put the WHERE predicate in the SELECT statement to insert selective data into the Employee_new table.
INSERT INTO Employee_new
SELECT
   [ID]
  ,[First_name]
  ,[Last_name]
  ,[DOJ]
  ,[Address]
FROM [test].[dbo].[Employee] WHERE ID > 1000
The SELECT statement can have joins from multiple tables to select required data and insert it into the SQL table. Below are the joins in SQL Server:
- INNER JOIN: An INNER JOIN returns only the rows from both tables with matching values in the specified columns.
- LEFT JOIN (or LEFT OUTER JOIN): A LEFT JOIN gives all the rows from the left table along with the matching rows from the right table and null values for any non-matching rows from the right table.
- RIGHT JOIN (or RIGHT OUTER JOIN): A RIGHT JOIN gives all the rows from the right table along with the matching rows from the left table and null values for any non-matching rows from the left table.
- FULL OUTER JOIN: A FULL OUTER JOIN returns all the rows from both tables and null values for any non-matching rows.
- CROSS JOIN: A CROSS JOIN returns the Cartesian product of both tables, which produces all possible combinations of rows from both tables.
You can explore SQL Server Join Examples to understand various SQL Server joins.
Using UNION \ UNION ALL
The UNION and UNION ALL operators can combine the multiple SELECT statements result into a single result set, which can then be inserted into a table.
- UNION: The UNION operator combines two or more SELECT statement results into a single result set, eliminating duplicate rows.
- UNION ALL: The UNION ALL operator combines two or more SELECT statements results into a single result set but does not eliminate duplicate rows. All rows from each SELECT statement are included in the final result set.
You can follow the tip, UNION vs. UNION ALL in SQL Server, to understand the UNION and UNION ALL clauses.
Using INSERT Data from CSV
In SSMS, you can insert data from an Excel file into an existing table. Here is how to do it.
Step 1: Right-click on the database in the Object Explorer and select Tasks > Import Flat File.

Step 2: Specify the input CSV file, new table name, and schema shown in the image below.

Step 3: Preview data from the CSV file.
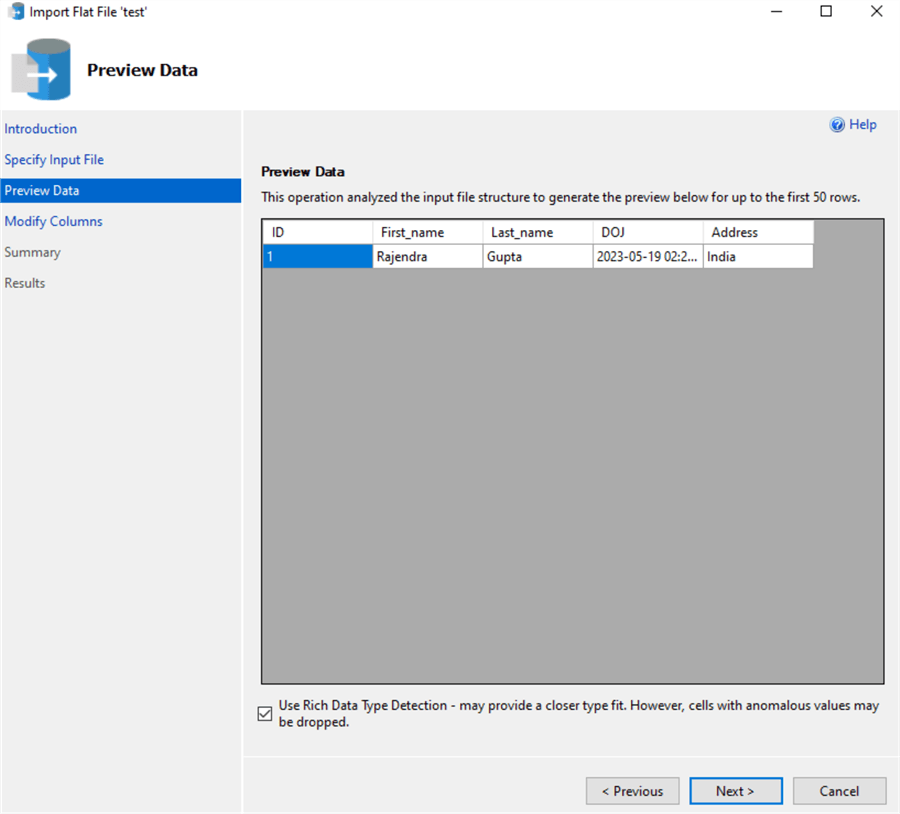
Step 4: Review the columns and their data types. You can change the column properties from the Modify Columns page if required.

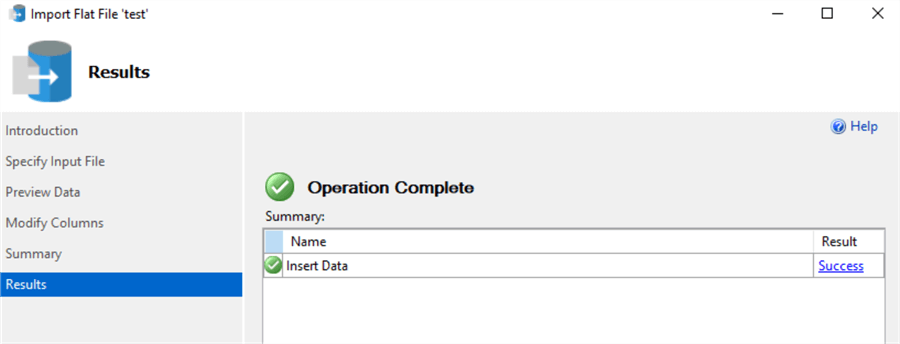
Step 5: Review the data transfer from Source to destination and click Finish. It shows the data transfer result as a success or failure.
Next Steps
- Explore various articles on SQL Server query development on MSSQLTips.

Hi! I am Rajendra Gupta, Database Specialist and Architect, helping organizations implement Microsoft SQL Server, Azure, Couchbase, AWS solutions fast and efficiently, fix related issues, and Performance Tuning with over 14 years of experience.
I am the author of the book “DP-300 Administering Relational Database on Microsoft Azure.” I can be reached at: Rajendra.gupta16@gmail.com for any consulting help.
- MSSQLTips Awards:
- Author of the Year – 2022 | Author Contender – 2021/2023/2024 | Champion Award (100+ tips) – 2020