Problem
How do you securely run a query across many Azure SQL databases within an Azure subscription without connecting and authenticating to each database one at a time?
As a DBA, you may need to pull information from several databases across multiple instances of Azure SQL databases in a subscription. Since Azure SQL databases are self-contained, we can’t use options like sp_msforeachdb to loop through multiple databases on an Azure SQL DB Server instance. Nor can you use T-SQL “Use DatabaseName” to change between databases. These characteristics of Azure SQL DBs differ from SQL Server or Azure SQL Managed Instance. So, what option is there to run a query across many instances of Azure SQL databases?
Solution
This tip will show a secure method to query multiple Azure SQL databases across multiple Azure SQL Servers within an Azure subscription and consolidate the results using PowerShell. I recently wrote an article on how to query multiple SQL databases across many SQL Servers: Query All Databases Across Multiple SQL Servers and Store Results in Table. That article is a good reference for querying on SQL Server and Azure SQL Managed instances. However, we will have to use a different technique for Azure SQL Database.
An Azure SQL DB instance can have one or more self-contained databases. If you are a DBA who manages many Azure SQL Databases and needs to query across all the databases in your Azure subscription, this tip may be helpful to you. For this, we will use a PowerShell script and a SQL script. I will use an Azure account with Multi-Factor authentication (MFA) for this example. Note: There are different alternatives, like setting up standard SQL logins in each of the Azure SQL DB databases; however, this may not be as secure and will not be covered in this tip.
Step 1: Get a List of All Azure SQL DB Databases
To start, you will need a list of servers and databases. One way to get a list of your Azure SQL databases is from the Azure Console. Click on “SQL Database” in the Azure Console to get the list of databases, then click “Export to CSV”. Note: This list does not include the master system database.


Another option to get a list of servers and databases might be from SQL Server Management Studio Registered Servers. If you have your Azure SQL database servers registered with the master database as the default, you can use the multi-query technique from my previous article, Combine Multiple SQL Server Query Results with Registered Servers. Use the query below from the master database to get a list of your Azure SQL servers and databases. Exclude system databases from your final list if you prefer.
Select @@servername, name From master.sys.databases
We will use the list later in Step 4 to build the PowerShell script.
Step 2: Create a SQL Script Input File
Create a SQL script that will be called from PowerShell to run on each Azure database. For this, I will pull a list of users from each database. This may be something you might do for an audit. Put the SQL code below into a file and save it to C:\temp as MSSQLTips_SQLScript.sql.
--Get All Database Users
SELECT @@Servername [Server], DB_Name() [DB], name, type_desc
FROM sys.database_principals
WHERE type_desc <> 'DATABASE_ROLE';
GO
Step 3: Build Out the PowerShell Script
You can manually build your PowerShell script with any text editor, or get your results into Excel and use Excel formulas to build your script. Regardless of your method, the script should include the line of code below with the Azure SQL DB Server and database names from your list substituted into “YourServer” and “YourDatabase” in the example below. The script can be saved as MSSQLTips.ps1, the PowerShell extension. The final script includes three variables:
- $access_token: This is used to store the Azure authenticated access token, which is reused for each connection. This eliminates being prompted for each SQL DB connection.
- $InFile: This is used to specify the path and file name of the SQL script file that will be run on each SQL database.
- $OutFile: This specifies the comma separated values output file. Note: The first line will not have the -append option, so the file can be recreated during each execution of the PS script. All other lines require the -append option!
Note: The parameter NoTypeInformation is included to eliminate extra type information not desired in the final output file. The parameter is required in the first command line but optional in the lines that include the append parameter. This parameter may not need to be included depending on the version of PowerShell you are using.
First Line recreates the Output file:
Invoke-Sqlcmd -ServerInstance YourServer.database.windows.net -Database YourDatabase -AccessToken $access_token -inputfile $InFile | Export-Csv -Path $OutFile -NoTypeInformation
The subsequent lines are identical, except they include the -append option:
Invoke-Sqlcmd -ServerInstance YourServer.database.windows.net -Database YourDatabase2 -AccessToken $access_token -inputfile $InFile | Export-Csv -Path $OutFile -NoTypeInformation -append
Below is my script that includes the code to connect to Azure to acquire the token for each database connection. You can run this in PowerShell script with as an Administrator or your regular Windows account.
### Obtain the Access Token: this will bring up the login dialog
Connect-AzAccount -UseDeviceAuthentication
$access_token = (Get-AzAccessToken -ResourceUrl https://database.windows.net).Token

# Set Input and Output files
$Infile = "C:\temp\MSSQLTips_SQLScript.sql"
$OutFile = "C:\temp\MSSQLTips_Out.csv"

Invoke-Sqlcmd -ServerInstance Server1.database.windows.net -Database DBName1 -AccessToken $access_token -inputfile $InFile | Export-Csv -Path $OutFile -NoTypeInformation

Invoke-Sqlcmd -ServerInstance Server2.database.windows.net -Database DBName1 -AccessToken $access_token -inputfile $InFile | Export-Csv -Path $OutFile -NoTypeInformation -append

Invoke-Sqlcmd -ServerInstance Server3.database.windows.net -Database AdventureWorksLT -AccessToken $access_token -inputfile $InFile | Export-Csv -Path $OutFile -NoTypeInformation -append

Invoke-Sqlcmd -ServerInstance Server4.database.windows.net -Database DBName2 -AccessToken $access_token -inputfile $InFile | Export-Csv -Path $OutFile -NoTypeInformation -append

Notepad $OutFile
Step 4: Set Up PowerShell
Launch PowerShell ISE with Run as Administrator, which includes a script editor. For this article, I am running Windows PowerShell 5.1. This will require the installation of two PowerShell modules, AZ and SQLServer, if not already installed. To install these, launch PowerShell as Administrator.
- AZ module: We will use Connect-AzAccount to log in to Azure and set a reusable access token. This will eliminate the need to manually authenticate each time we connect to an Azure SQL database.
- SQL Server module: We will use Invoke-Sqlcmd to connect to each Azure SQL database instance and execute a query outputting the results to a comma separated value .csv file consolidating the results.
Step 5: Put It All Together – Run It
My example only covers a few Azure SQL DB instances and several databases. This is most beneficial when you have many more than a few databases to connect to. A practical application may include 10, 40, or more Azure SQL databases.
Again, launch PowerShell ISE either as yourself or with Run as Administrator. Open or copy and paste the script you prepared into the PowerShell ISE editor.

You can run the first 2 lines of code separately or run the entire script. You only need to run the first lines once to authenticate and cache the access token.
### Obtain the Access Token: this will bring up the login dialog
Connect-AzAccount -UseDeviceAuthentication
$access_token = (Get-AzAccessToken -ResourceUrl https://database.windows.net).Token
A warning will be returned, providing a URL and an authorization code. Go to the URL in your browser and enter the authorization code when prompted.

Below is the prompt to enter the authorization code.
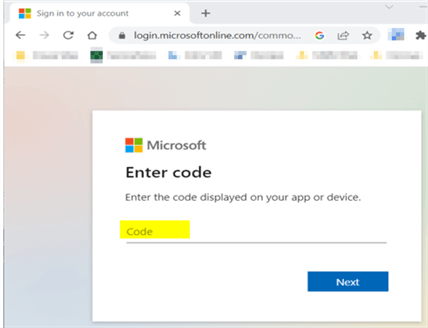
Next, you will be prompted to log into your Azure subscription.

Once authenticated to the Azure subscription for your Azure SQL databases, you will receive a notification that you successfully logged in. At this point, your PowerShell script has an access token populated, and you can run the rest of the PowerShell script connecting to each Azure SQL database.

The rest of the script will pass your SQL script specified in $Infile to each Azure SQL database, authenticating with the access token and returning the consolidated results to $OutFile. This part of the script is re-runnable without getting a new access token for this PowerShell session.

Step 6: View the Results
The results are shown in Notepad below. However, the result file will open in Excel nicely. Note: These results differ as I provided results from a working script rather than the mocked-up example script.

Examples of When You Might Use This Technique
If you have many Azure SQL databases across several Azure SQL servers, this is the best technique I have discovered to run queries across all databases in a subscription. Below are some examples of queries that you might run to pull and consolidate information on your databases:
- Get all database users in the db_owner group for audit purposes.
- Get all users and the roles they are assigned for audit.
- Get a list of tables per database across all servers.
- Get a list of table column names and data types per database across all servers to help identify HIPAA or PHI data.
- Get database backup history, even though Azure handles the backups, it is good to confirm.
There are numerous other queries that you may run to pull info from your Azure SQL databases. Please comment on the tip and suggest a few other queries you might execute across many SQL databases.
Wrap Up
The first time I attempted to run a query across many Azure SQL databases, I used an SQLCMD script and got prompted for connection info for each database connection. I decided to find a better, more streamlined way, and this is what I came up with. Another note on Azure databases that are auto-paused. In some cases, a database in my list had timed out. I believe it is because the database was auto-paused. I re-ran the script, and the database query ran successfully the second time. I hope this tip is useful. Review the links below for other good articles.
Next Steps
- Combine Multiple SQL Server Query Results with Registered Servers
- Query All Databases Across Multiple SQL Servers and Store Results in Table
- Learn about Azure SQL DB vs Managed Instance: Azure SQL Managed Instance vs. Azure SQL Database
- Is Azure SQL Database a Good Choice for your Database Applications?
- Introduction to Azure SQL Database Managed Instances

Jim Evans is an IT professional who has worked with SQL Server since 1995. He has a passion for SQL Servers and working with the people who utilize it. As a C++ programmer early in his career he was mentored to learn T-SQL with optimizing for performance always a goal. He has supported many corporate business units and application, taken part in designing many databases, managed DBAs, BI Developer and Data Management teams. He is always up for a challenge, embraces new features and functionalities as they are rolled out and enjoys sharing his knowledge. When not working on SQL Server he has spends time coaching youth sports, coaching in a disability softball league and volunteering with Black Dagger Military Hunt Club providing outdoor activities for veterans.
- MSSQLTips Awards: Trendsetter (25+ tips) – 2022 | Author Contender – 2021 | Rookie Contender – 2019