Problem
With the rise of OpenAI’s ChatGPT, millions have become familiar with the power of Generative AI and other Large Language Models (LLMs). The functionality of these models is also exposed by a set of APIs. This enables developers to create various solutions, including chatbots and business workflows that leverage LLMs.
Solution
In this article, you start diving into the OpenAI API: set up a development environment, create an OpenAI account, and generate an API key.
The APIs exposed by LLMs typically fall into two categories:
- Completions – Completions simply complete a sentence. A typical example would be: “The 31st president of the United States was” The LLM would reply with “Herbert Hoover,” completing the sentence.
- Chat Completion – Chat completion refers to the model’s ability to establish and maintain a conversation. The responses generated in a chat completion are based not only upon the last input but also on the context of the complete conversation. For example, ask, “Who won the 2021 Super Bowl?” and then ask a follow-up question like “Who was the MVP of that game?” The model would respond with, “The MVP (Most Valuable Player) of the 2021 Super Bowl (Super Bowl LV) was Tom Brady,” knowing that the conversation is about the 2021 Super Bowl, based upon the conversation context.
This article will demonstrate examples of both the completion and chat completion APIs. This will form a basis for the more complex tasks in the later articles in this series.
Next, you will provision an Azure OpenAI environment. The models you can deploy in Azure OpenAI are based on the OpenAI models. However, Azure adds the cloud platform’s security, scalability, and integration capabilities, making Azure OpenAI an excellent candidate for enterprise applications.
Getting Started
Sign Up for Both Services
For this introduction article, you will use both OpenAI and Azure OpenAI. You can use the setup instructions below to create accounts for both platforms:
- OpenAI API – This YouTube video shows how to create an OpenAI account and API key.
- Azure OpenAI – You will need a corporate (company) email and an existing Azure subscription to sign up for Azure Open AI. This article on the OpenAI website describes the Azure Open AI sign-up process.
Jupyter Notebooks and Visual Studio Code with Python
I will be using a combination of Jupyter Notebooks and Visual Studio Code Python programs throughout this series. Jupyter notebooks will typically be used to explore the API functionality. Notebooks allow us to run individual cells, study their output, make modifications, and then re-run the code snippet. This interactive process is excellent for exploration.
However, in specific cases, you want to write a complete program. For example, once you study Chains and Memory, you will create your first version of a simple chatbot. These programs present their own user interface as a complete stand-alone program, best developed in an integrated development environment such as Visual Studio Code.
In this section, you will set up your environment for Jupyter Notebooks since you will be exploring the Open AI and Azure OpenAI APIs. You will set up your Visual Studio Code environment in a later article.
Jupyter Notebooks is a web application that runs in the browser. Here is a YouTube reference for you on how to install both Python and Jupyter notebooks on your local machine.
Set Up a Virtual Environment for Jupyter Notebooks.
I recommend creating a virtual environment for your project. Virtual environments supply a pristine environment isolated from other projects. You can install only those packages needed for your task, enhancing the reproducibility of your work.
Follow these steps to run your notebooks in a virtual environment:
Step 1: Create a Virtual Environment. I am using the sql_mag_openai directory of my OneDrive as the home directory for this series. In a command prompt, I navigated to that directory and ran the following command to create the virtual environment:
python -m venv venv
Note: This will create a sub-directory called venv, as shown below:

Step 2: Activate the Virtual Environment. To activate the virtual environment, issue the following command:
venv\Scripts\activate
You will see the prompt change to include (venv) as an indicator that you are running in the virtual environment:

If you stay in the virtual environment, the packages you install here will be local to the environment and will not affect other components on your local machine.
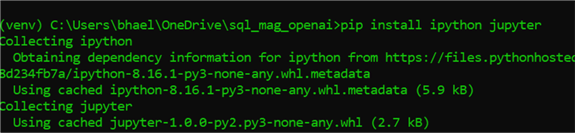
Step 3: Install iPython and Jupyter Notebooks. To install both components, run the following command:
pip install ipython jupyter
Both ipython and Jupyter are installed in the virtual environment:
I have created a requirements.txt in the home directory. This file contains the complete list of libraries required for this series. You can run the file as follows:
pip install -r requirements.txt
This will install all required libraries, so you do not have to run “pip install” anywhere in our Jupyter notebooks.
Basic Interaction with ChatGPT
In this section, I will show how to start consuming both the OpenAI and Azure OpenAI models. You will create a notebook that invokes both the legacy Completions and Chat Completions endpoints through the openai library.
Interacting with the API
The specification of the OpenAI REST API can be found at OpenAPI Specification v3.1.0. You could interact with the API directly by creating your own GET and POST requests (for example, using the popular Python requests library). However, since this level of interaction would be relatively low level, it would distract you from the real task at hand, which is LLM interaction.
Therefore, you probably want to use one of the client libraries. These client libraries supply clean class- and method abstractions for the OpenAI LLM functionalities. We will use the official OpenAI Python library since it works great with our Jupyter Notebook environment. Another popular library is the JavaScript OpenAI library, which is typically used in environments like Node.js.
Many other libraries exist for other programming languages (Ruby, Go, Java, C#, and Rust).
Set Up Jupyter Notebook
Follow the steps below to get started:
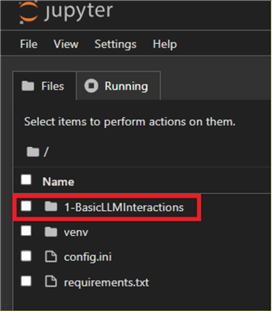
Step 1: Create a new directory named 1-BasicLLMInteractions from the home directory.
Step 2: From the home directory, type jupyter notebook to start Jupyter.
Step 3: In the Jupyter UI, select the 1-BasicLLMInteractions folder:
Step 4: Click the New button on the right and select Notebook to create a new notebook.
Step 5:Click on File | Save to save the notebook. Use the name OpenAIapi.ipynb.
Step 6: Import both the os and the openai libraries:
import os
import openai
Step 7: Use the API Key to authenticate the client. One of the common ways to handle an API key in this environment is to read it from a .ini file. Create a config.ini file in the home directory, and add a [DEFAULT] section with an openai_api_key as follows:

You will need to store additional keys later, so having a config.ini file will make that easy.
Important note: In a cloud environment, you should use a more secure method, such as storing the key in an Azure Key Vault.
Step 8: The code for reading the API key is shown below. You will use the configparser class to read the config.ini file into a Python directory from which you can extract the key:
import configparser
# Initialize the parser
config = configparser.ConfigParser()

# Read the config file
config.read('..\config.ini')

# Retrieve the secret
openai.api_key = config['DEFAULT']['openai_api_key']
Using the APIs
At the time of writing, OpenAI offers two distinct APIs: Completions and Chat Completions.
The Completions API
- Endpoint: https://api.openai.com/v1/completions.
- This endpoint is used for generating completions to prompts. You supply a string as input, and the model returns a response object with the continuation of that string.
- This API is a legacy API; this endpoint will likely be deprecated over time and replaced by the Chat Completions API.
With this API, you only need to supply a model name and a prompt. A good model to use for completions is the gpt-3.5-turbo-instruct model:
# This is an example of how to invoke the
# legacy Completions API
response = openai.Completion.create(
    model='gpt-3.5-turbo-instruct',
    prompt="Who won the 2021 super bowl?",
    max_tokens=50
)
print(response)
I will discuss the max_tokens parameter in the ChatCompletion section. This completion prompt produces the following output:
{
  "id": "cmpl-8HyhCTUiN5fRFhIkOk6EUoj3gDA8v",
  "object": "text_completion",
  "created": 1699295582,
  "model": "gpt-3.5-turbo-instruct",
  "choices": [
    {
      "text": "\n\nThe Tampa Bay Buccaneers won the 2021 Super Bowl.",
      "index": 0,
      "logprobs": null,
      "finish_reason": "stop"
    }
  ],
  "usage": {
    "prompt_tokens": 9,
    "completion_tokens": 13,
    "total_tokens": 22
  }
}
The response object contains a choices array with one element. If you want to extract only the response text, you can use:
print(response.choices[0].text)
Which outputs:
- The Tampa Bay Buccaneers won the 2021 Super Bowl.
While this response is correct, the API has limitations, including specifying a single prompt and being unable to identify a role for the request. While this response is correct, the API has limitations, including specifying a single prompt and being unable to identify a role for the request.
The Chat Completions API
- Endpoint: https://api.openai.com/v1/chat/completions.
- This endpoint is designed for a more interactive and conversational format.
Instead of a single string, you provide a messages parameter, which is an array of message objects. Each object should have a role (“system“, “user“, or “assistant“) and content. The roles are defined as follows:
- system: The system role typically provides high-level instructions or context-setting messages. It helps guide the behavior of the assistant throughout the conversation. For example, a system message could be, “You are an NFL reporter.”
- user: The user role represents the messages or queries from the user or end-user interacting with the model. These messages contain the user’s input or questions. For instance, a user message could be, “Who won the Superbowl in 2021?”
- assistant: The assistant role represents the responses generated by the ChatGPT model. It includes the model’s generated replies or information provided to the user based on their queries. For example, an assistant message could be, “The Tampa Bay Buccaneers won the 2021 Super Bowl.”
Conversations can vary in length and usually start with a system message to guide the assistant’s behavior. This is followed by alternating user and assistant messages.
While the system message is optional, it can define the assistant’s persona or give specific instructions, so I recommend always including it.
Below is a simple ChatCompletion interaction from the notebook. A common model used for chat completions is the gpt-3.5-turbo model.
# This is a very simple example of a Chat Completion request
response = openai.ChatCompletion.create(
    model='gpt-3.5-turbo',
    messages=[
        {'role': 'system', 'content': 'You are an NFL reporter'},
        {'role': 'user', 'content': 'Who won the superbowl in 2021?'}
    ]
)
print(response['choices'][0].message.content)
The response from GPT 3.5:
- The Tampa Bay Buccaneers won Super Bowl LV in 2021.
If you make the following request in the next cell:
response = openai.ChatCompletion.create(
    model='gpt-3.5-turbo',
    messages=[
        {'role': 'user', 'content': 'Who was the MVP of that game?' }
    ]
)

print(response['choices'][0].message.content)
Then you get the following (unexpected) answer:
- I’m sorry, but as an AI I do not have information on specific games. It would be best to consult a reliable source or provide more specific details about the game in question..
This illustrates that ChatGPT is stateless! By itself, it keeps no state around; every request to the LLM is like the very first request. You can get around this by providing more context, as is shown in the next cell:
response = openai.ChatCompletion.create(
    model='gpt-3.5-turbo',
    messages=[
        {'role': 'system', 'content': 'You are an NFL reporter'},
        {'role': 'user', 'content': 'Who won the superbowl in 2021?'},
        {'role': 'assistant', 'content': 'The Tampa Bay Buccaneers won Super Bowl LV in 2021.'},
        {'role': 'user', 'content': 'Who was the MVP of that game?'},
    ]
)

print(response['choices'][0].message.content)
Above, you included our system messages so that ChatGPT knows how to behave, and you provided it with the previous user and assistant messages (i.e., the full message history). As a result, the model now has the context it needs to provide a correct answer:
- The MVP of Super Bowl LV was quarterback Tom Brady of the Tampa Bay Buccaneers.
In article four, you will leverage the LangChainIn Memory classes to implement state for your application.
The Temperature Parameter
The temperature parameter influences the randomness of the generated responses. Temperature is a value between 0 and 1. A higher value, such as 0.85, makes the answers more diverse, while a lower value, like 0.15, makes the responses more focused and deterministic.
In the following example, you first ask a question with a temperature set to 0:
response = openai.ChatCompletion.create(
    model='gpt-3.5-turbo',
    messages=[
        {'role': 'system', 'content': 'You are an NFL reporter'},
        {'role': 'user', 'content': 'Who won the superbowl in 2021?'},
        {'role': 'assistant', 'content': 'The Tampa Bay Buccaneers won Super Bowl LV in 2021.'},
        {'role': 'user', 'content': 'Can you provide a two-line summary of the game?'}
    ],
    temperature=0,
    max_tokens=75
)

print(response['choices'][0].message.content)
You get the following response:
- In a dominant performance, the Tampa Bay Buccaneers defeated the Kansas City Chiefs 31-9 in Super Bowl LV. Led by quarterback Tom Brady, the Buccaneers’ defense stifled the Chiefs high-powered offense, securing their second Super Bowl victory in franchise history.
No matter how often you run this cell, you always get the same answer since a temperature value of zero eliminates randomness.
However, if you run the same cell with a temperature parameter of 0.8, you get different responses. While each one is still correct, it is differently worded:
- Response 1: In Super Bowl LV, the Tampa Bay Buccaneers dominated the Kansas City Chiefs, winning 31-9. Led by quarterback Tom Brady, the Buccaneers’ defense stifled the Chiefs’ high-powered offense, securing their second Super Bowl title in franchise history.
- Response 2: In a dominant performance, the Tampa Bay Buccaneers defeated the Kansas City Chiefs 31-9 to win Super Bowl LV. Tom Brady led the way, throwing for three touchdowns and earning his seventh Super Bowl ring.
The Max Tokens Parameter: Limiting the Response Length
In natural language processing, a ‘token’ is a set of text that the model interprets. Depending on the language and the model in play, a token might span from a single character to an entire word. Typically, tokens represent recurring character patterns in the text. You can use the Tokenizer example from OpenAI to see how text translates to tokens.
For English text, think of 1 token as roughly equivalent to 4 characters or about 0.75 words. The max_tokens ChatCompletion parameter lets you cap the number of tokens in the model’s output. By tweaking this value, you can tailor the response’s length to match your content needs.
Each OpenAI model has a model maximum context length, expressed in max tokens. For example, the gpt-3.5-turbo model you have been using has a max token size of 4,097, while the gpt-3.5-turbo-16k model has a max token size of 16,385. More information can be found at https://platform.openai.com/docs/models/gpt-3-5.
The token count of your prompt plus the max_tokens parameter cannot exceed the maximum model context length. This is not a problem in most cases, but there are use cases like summarizing text, where your input prompt can contain a long document excerpt that bumps up to the model context length limit.
So, with the max_tokens parameter, you specify the response length in tokens. Note: The LLM will NOT try to generate a shorter response when it bumps up to this limit; instead, it will cut off the response, as shown below. The following request:
response = openai.ChatCompletion.create(
    model='gpt-3.5-turbo',
    messages=[
        {'role': 'system', 'content': 'You are an NFL reporter'},
        {'role': 'user', 'content': 'Who won the superbowl in 1997?'},
        {'role': 'assistant', 'content': 'The Super Bowl in 1997 was won by the Green Bay Packers'},
        {'role': 'user', 'content': 'Can you provide a two-line summary of the game?'}
    ],
    temperature=0.8,
    max_tokens = 40
)

print(response['choices'][0].message.content)
Generates this response:
- In the Super Bowl XXXI, played on January 26, 1997, the Green Bay Packers defeated the New England Patriots by a score of 35-21. The Packers quarterback Brett Fav
As you can see, the response content is simply cut off by the model.
Azure Open AI
So far, you have examined the OpenAI capabilities, got an Open AI API key, and invoked both the Completions and the ChatCompletions API. Since you can do all this with OpenAI, one might ask why I need another platform.
Azure OpenAI Service brings the OpenAI Generative AI models to the Azure platform, allowing you to use the same APIs to develop solutions and enabling you to create enterprise-grade applications that leverage the power of OpenAI, together with the ability to leverage the security, scalability, and integration capabilities of the Azure could platform. In addition, Azure OpenAI offers the OpenAI Studio interface, a central portal for all Azure OpenAI services – model management, deployment, experimentation, customization, and learning resources.
In this section, you will use the OpenAI Studio, deploy a language model, and invoke the different APIs.
Deploying a Model in Azure Open AI
First, create an Azure OpenAI instance as shown in the portal:

Open Azure OpenAI Studio. Click Explore:

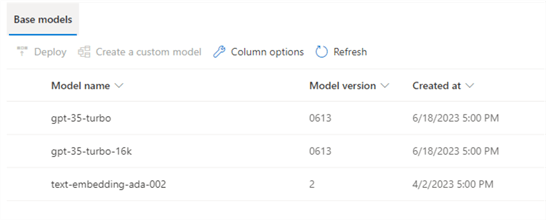
To start working with Azure OpenAI, choose a base model and deploy it. In the left navigation, click on Models for a list:
First, deploy a model by clicking on the Deployments link in the left navigation, then click + Create new deployment to deploy a model:

In the Deploy Model dialog box, select the model, give your deployment a name, and click Create. In our case, select the gpt-35-turbo-16kmodel and name it GPT35, as is shown below:

Click Create to create the model.
The model is now listed under your deployments:

Testing the Model in OpenAI Studio
To test the model using ChatCompletions, you can click on Chat in the left navigation bar to start the Chat Playground:

You immediately recognize the system (on the left), the user (the prompt on the bottom right), and the assistant (central right) role areas on the screen. Below is a screenshot with our NFL content. Chat Playground is a chatbot and will maintain the state:

The experience is nearly identical since you are leveraging the same LLM. On the left side is the Configuration area with the Parameters tab, where you can set the ChatCompletion parameters, such as temperature and Max Response (or max_tokens).
Azure OpenAI Service – Calling the API
The following data is needed before calling the Azure Open AI Service:
- Service Endpoint – Value in the Keys and Endpoint section on the OpenAI resource page in the Azure portal. For LLM interactions, use the Language APIs endpoint.
- API Key – Value in the Keys and Endpoint section of the portal. Keep in mind that the portal contains two keys, and either one can be used.
- Deployment Name – Custom name entered when deploying the model. In our example, gpt-3.5-turbo-16k was named GPT35.
The Keys and Endpoint page from my OpenAI resource is shown below:

How to Make Azure OpenAI API Calls
Let’s first start using the Azure OpenAI API by adding both the Endpoint and our API Key to our config.ini file.

Next, follow these steps:
Step 1: Create a new notebook in the same 1-BasicLLMInteractions folder. I called mine AzureOpenAIapi.ipynb.
Step 2: Add the code below to read our config.ini file and then configure the openai library:
import openai
import configparser
# Initialize the parser
config = configparser.ConfigParser()

# Read the config file
config.read('..\config.ini')

# Configure the openai library
openai.api_key     = config['DEFAULT']['azure_openai_key']
openai.api_base    = config['DEFAULT']['azure_endpoint']
openai.api_type    = 'azure'
openai.api_version = '2023-05-15'
Notice the api_type and api_version settings.
Step 2: Copy our ChatCompletion code from the OpenAI api notebook. You only must add an engine argument, which is set to your deployment name:
# Define the deployment name, you need
# to pass this as the engine argument for
# the ChatCompletion call
deployment_name = 'GPT35'

# This is a very simple example of a Chat Completion request
# note the additional engine argument, which needs to be set to
# the deployment name
response = openai.ChatCompletion.create(
    engine=deployment_name,
    model='gpt-3.5-turbo',
    messages=[
        {'role': 'system', 'content': 'You are an NFL reporter'},
        {'role': 'user', 'content': 'Who won the superbowl in 2021?'}
    ]
)
print(response.choices[0].message.content)
Step 3: If you now run the above cells, you get a very similar answer as you did with the OpenAI API:
- The Tampa Bay Buccaneers won Super Bowl LV in 2021.
As you can see, both platforms use the same openai Python library. You must add a few extra steps to deploy a model in Azure OpenAI, but otherwise, it is easy to port our code between the two platforms. In the next article, I will introduce the LangChain library, which provides an extra abstraction layer on top of both platforms. LangChain also provides access to powerful classes, such as PromptTemplates, Memory, Chains and Actions, which you will explore throughout this series.
Next Steps
This article provided fundamental knowledge to start with the OpenAI and Azure OpenAI APIs. I encourage you to create an account, get a key, and try some scenarios. The next article will focus on the LangChain and start re-using prompts through the LangChain PromptTemplate class.
Check out this related article: Creating Applications with ChatGPT, LLMs and Generative AI – Overview

Senior Analytics Architect | Author | Patent Holder
Bennie Haelen, a Senior Analytics Architect with 30+ years of experience, is recognized for his expertise in data warehousing, data lakehouses, machine learning, and generative AI. He holds two patents, showcasing his innovative spirit, and has made substantial contributions to the IT industry in both the USA and Europe. He has a particular interest in exploring the integration of enterprise data and Large Language Models, aiming to develop practical solutions that leverage the power of language and data for valuable insights.
Bennie is a co-author on the book “Delta Lake Up and Running,” published by O’Reilly, and various articles on Spark with a focus on real-time streaming. He holds various Microsoft Azure and Databricks certifications and is completing his Databricks Champion certification path.