Overview
In the previous part we built a pipeline manually, along with the needed datasets and linked services. But what if you need to load 20 Excel files? Or 100 tables from a source database? Are you going to create 100 datasets? And 100 different pipelines? That would be too much (repetitive) work! Luckily, we can have flexible and dynamic pipelines where we just need two datasets (one for the source, one for the sink) and one pipeline. Everything else is done through metadata and some parameters.
Explanation
Prerequisites
Previously, we uploaded an Excel file from Azure Blob Storage to a table in Azure SQL Database. A new requirement came in, and now we must upload another Excel file to a different table. Instead of creating a new dataset and a new pipeline (or add another Copy Data activity to the existing pipeline), we’re going to reuse our existing resources.
The new Excel file contains product data, and it has the following structure:

As you can see from the screenshot, the worksheet name is the default “Sheet1”. You can download the sample workbook here. Upload the Excel workbook to the blob container we used earlier in the tutorial.
Since we want to store the data in our database, we need to create a new staging table:
CREATE TABLE dbo.Tutorial_StagingProduct
(
     [Name]             NVARCHAR(50)
    ,[ProductNumber]    NVARCHAR(25)
    ,[Color]            NVARCHAR(15)
    ,[StandardCost]     NUMERIC(10,2)
    ,[ListPrice]        NUMERIC(10,2)
    ,[Size]             NVARCHAR(5)
    ,[Weight]           NUMERIC(8,2)
);
Implement Parameters
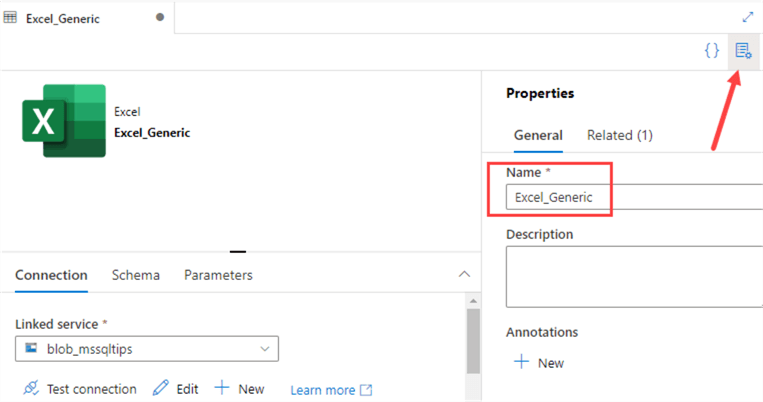
Instead of creating two new datasets and another Copy Data activity, we’re going to use parameters in the existing ones. This will allow us to use one single dataset for both our Excel files. Open the Excel_Customers dataset, go to properties and rename it to Excel_Generic.
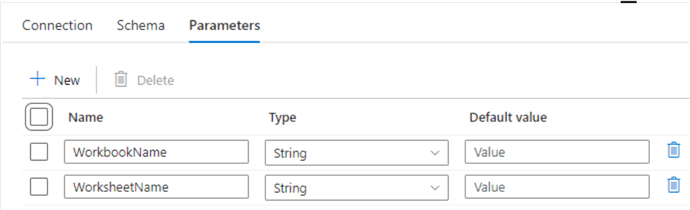
Then go to the Parameters tab, and create the following two parameters:
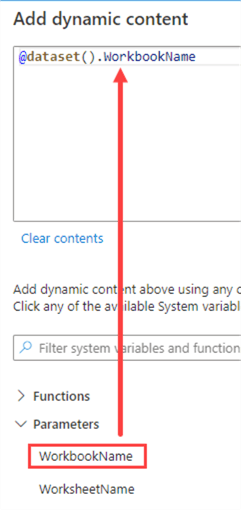
Back in the Connection tab, click on Customers.xlsx and then on “Add dynamic content”.

This will take us to the expression builder of ADF. Choose the parameter WorkbookName from the list below.
The file path should now look like this:

Repeat the same process for the sheet name:
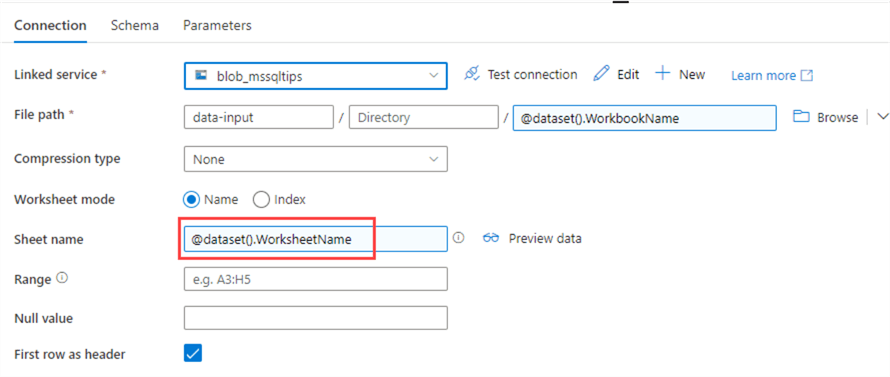
Both Excel files have the first row as a header, so the checkbox can remain checked, but this is something that can be parameterized as well. Finally, go to the Schema tab and click the Clear button to remove all metadata information from the dataset:
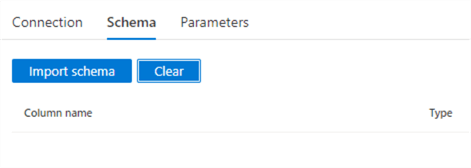
The schema is different for each Excel file, so we cannot have any column information here. It will be fetched on the fly when the Copy Data activity runs.
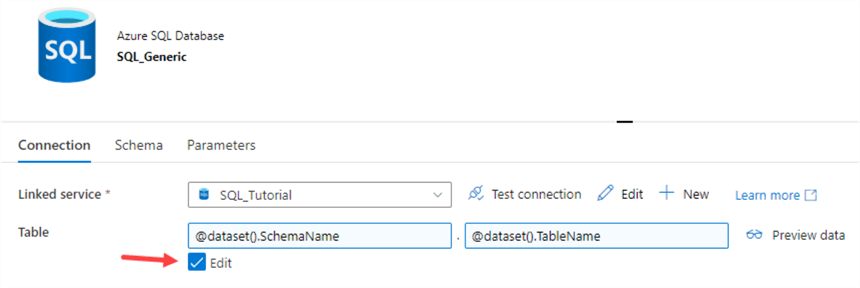
We’re going to do the exact same process for our SQL dataset. First, we rename it to SQL_Generic and then we add two parameters: SchemaName and TableName. We’re going to map these in the connection tab. If you enable the “Edit” checkbox, two text fields appear (one for the schema and one for the table) which you can parameterize:
Don’t forget to clear the schema! Go to the StageExcelCustomers pipeline and rename it to “StageExcel”. If we open the Copy Data activity, we can see ADF asks us now to provide values for the parameters we just added.
You can enter them manually, but that would defeat the purpose of our metadata-driven pipeline.
Creating and Mapping Metadata
We’re going to store the metadata we need for our parameters in a table. We’re going to read this metadata and use it to drive a ForEach loop. For each iteration of the loop, we’re going to copy the data from one Excel file to a table in Azure SQL DB. Create the metadata table with the following script:
CREATE TABLE etl.ExcelMetadata(
     ID             INT IDENTITY(1,1) NOT NULL
    ,ExcelFileName  VARCHAR(100) NOT NULL
    ,ExcelSheetName VARCHAR(100) NOT NULL
    ,SchemaName     VARCHAR(100) NOT NULL
    ,TableName      VARCHAR(100) NOT NULL
);
Insert the following two rows of data:
INSERT INTO etl.ExcelMetadata
(
    ExcelFileName,
    ExcelSheetName,
    SchemaName,
    TableName
)
VALUES  ('Customers.xlsx','Customers','dbo','Tutorial_Excel_Customer')
       ,('Products.xlsx' ,'Sheet1'   ,'dbo','Tutorial_StagingProduct');
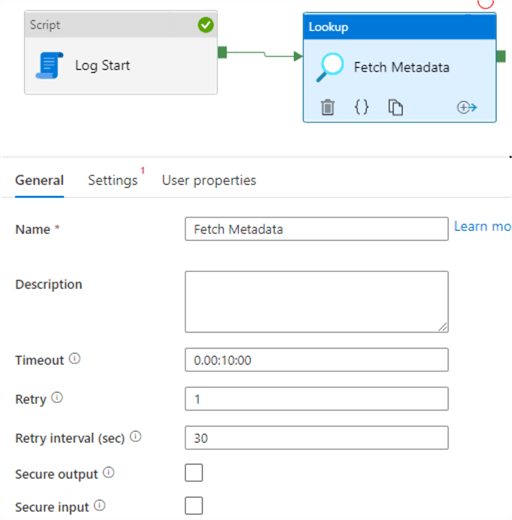
In the pipeline, add a Lookup activity to the canvas after the first Script activity. Give the activity a decent name, set the timeout to 10 minutes and set the retry to 1.
In the Settings, choose the generic SQL dataset. Disable the checkbox for “First row only” and choose the Query type. Enter the following query:
SELECT
     ExcelFileName
    ,ExcelSheetName
    ,SchemaName
    ,TableName
FROM etl.ExcelMetadata;
Since we’re specifying a query, we don’t actually need to provide (real) values for the dataset parameters; we’re just using the dataset for its connection to the Azure SQL database.

Preview the data to make sure everything has been configured correctly.

Next, we’re going to add a ForEach to the canvas. Add it after the Lookup and before the second Script activity.
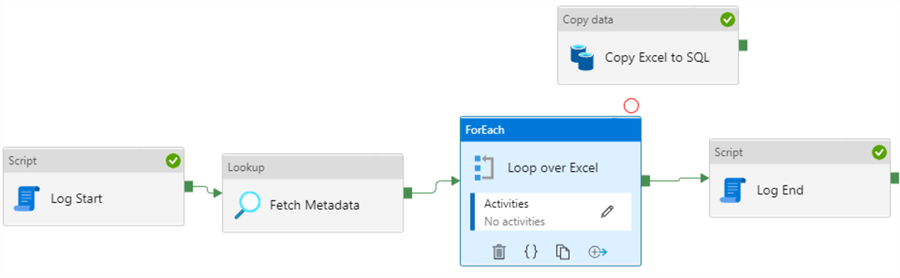
Select the Copy Data activity, cut it (using ctrl-x), click the pencil icon inside the ForEach activity. This will open a pipeline canvas inside the ForEach loop. Paste the Copy Data activity there. At the top left corner of the canvas, you can see that we’re inside the loop, which is in the StageExcel pipeline. It seems like there’s a “mini pipeline” inside the ForEach. However, functionality is limited. You can’t for example put another ForEach loop inside the existing ForEach. If you need to nest loops, you’ll need to put the second ForEach in a separate pipeline and call this pipeline from the first ForEach using the Execute Pipeline activity. Go back to the pipeline by clicking on its name.

Go to the Settings pane of the ForEach. Here we need to configure over which items we’re going to iterate. This can be an array variable, or a result set such as the one from our Lookup activity.
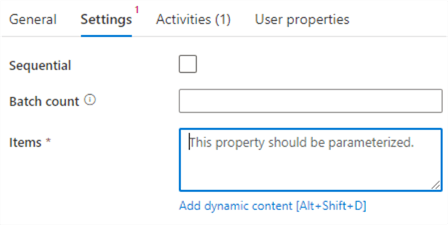
Click on “Add dynamic content” for the Items. In the “Activity outputs” node, click on the Lookup activity.
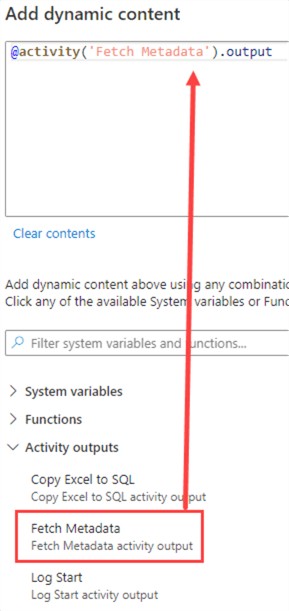
This will add the following expression:
@activity('Get Metadata').output
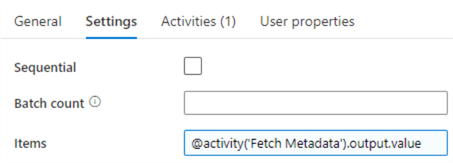
However, to make this actually work, we need to add value at the end:
@activity('Get Metadata').output.value
In the settings, we can also choose if the ForEach executes in parallel, or if it will read the Excel files sequentially. If you don’t want parallelism, you need to select the Sequential checkbox.
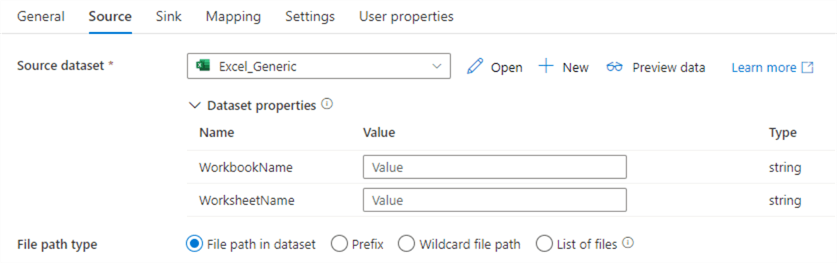
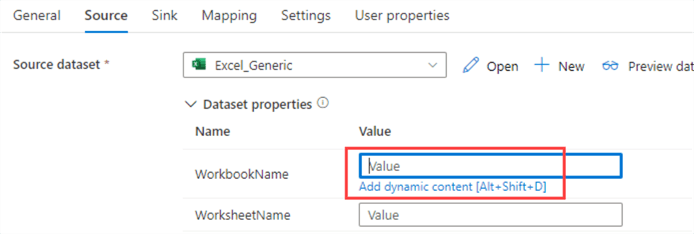
Now go back into the ForEach loop canvas and into the Copy Data activity. Now we can map the metadata we retrieve from the Lookup to the dataset parameters. In the Source pane, click on the text box for the WorkbookName parameter and go to the dynamic content.
We can access the values of the current item of the ForEach loop by using the item() function.
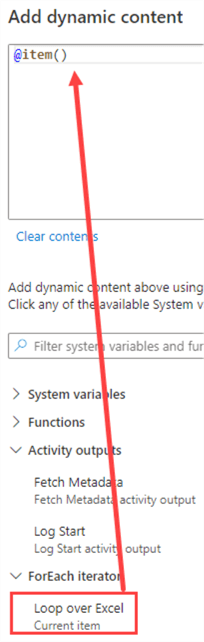
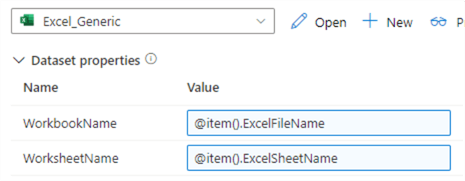
We just need to specify which column we exactly want:

We can repeat the same process for the sheet name:
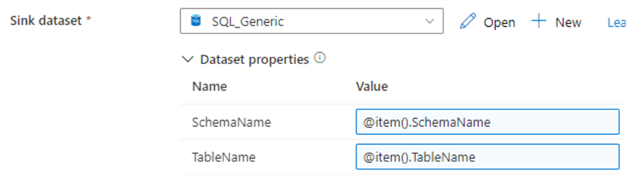
And of course, we do the same for the SQL dataset in the Sink tab:
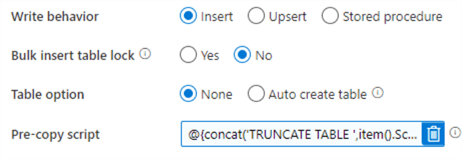
We also need to change the Pre-copy script, to make sure we’re truncating the correct table. Like most properties, we can do this through an expression as well. We’re going to use the @concat() function to create a SQL statement along with the values for the schema and table name.
@concat('TRUNCATE TABLE ',item().SchemaName,'.',item().TableName,';')
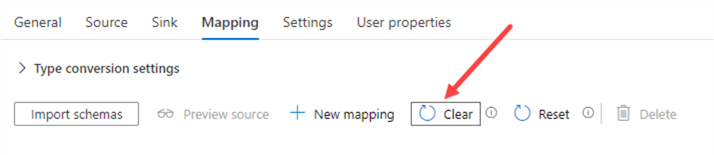
Finally, we need to remove the schema mapping in the Mapping pane. Since both the source and the sink are dynamic, we can’t specify any mapping here unless it is the same for all Excel files (which isn’t the case). If the mapping is empty, the Copy Data activity will do it for us on-the-fly. For this to work, the columns names in the Excel file and the corresponding table need to match!
The pipeline is now ready to run.
Debugging the Pipeline
Start debugging of the pipeline. In the output pane, you’ll see the Copy Data activity has been run twice, in parallel.
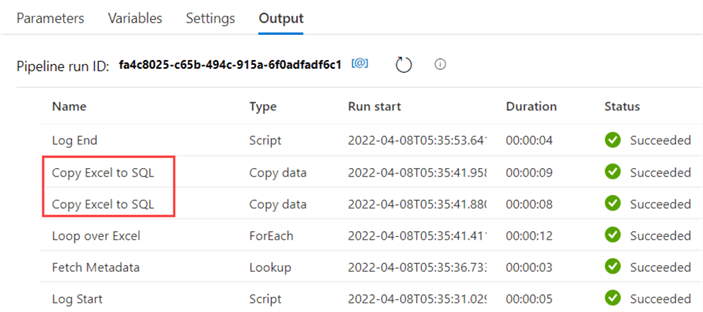
We’ve now successfully loaded two Excel files to an Azure SQL database by using one single pipeline driven by metadata. This is an important pattern for ADF, as it greatly reduces the amount of work you need to do for repetitive tasks. Keep in mind though, that each iteration of the ForEach loop results in at least one minute of billing. Even though our debugging pipeline was running for a mere 24 seconds, we’re being billed for 5 minutes (2 Script activities + 1 Lookup + 2 iterations of the loop).

Additional Information
- The tips How to Load Multiple Files in Parallel in Azure Data Factory – Part 1 and Part 2 give an example of the same pattern, this time with CSV files with different delimiters.
- You can find another looping example in the tip Azure Data Factory ForEach Activity Example or in the blog post Dynamic Datasets in Azure Data Factory.
- ADF can define mappings automatically, but for some sources like a JSON file it might be a bit too complicated for an automated mapping. It’s possible to make the mapping dynamic as well by specifying it as dynamic content as well. The blog post Dynamically Map JSON to SQL in Azure Data Factory explains how you can do this.

Koen Verbeeck is a seasoned business intelligence consultant with over a decade of experience with the Microsoft Data Platform. He holds several certifications, including Azure Data Engineer. He’s a prolific writer, with over 375 articles on technologies such as Microsoft Fabric, SSIS, ADF, SSAS, SSRS, MDS, Power BI, Snowflake and Azure services. He has spoken at various events such as PASS, SQLBits, dataMinds Connect and many others. He frequently delivers educational webinars on MSSQLTips.com. For his efforts, Koen has been awarded the Microsoft MVP data platform award for many years.
- MSSQLTips Awards:
- Leadership Award (200+ Tips) – 2021
- Author of the Year – 2014/2020/2022
- Author Contender – 2024/2025