Overview
If you want to follow along with the examples in this tutorial, you’ll need to install ADF in your Azure tenant. Either make sure you have the appropriate permissions to do so, or you can opt for a free trial. We cover how to setup Azure Data Factory, a Storage Account, and Azure SQL Database.
Explanation
Setup Azure Data Factory
When logged in the Azure Portal, click on “Create a resource” at the top of your screen.

Search for “data factory” in the marketplace and choose the result from Microsoft.

On the next page, you’ll get an overview of the product. Click on create to get started with configuring your ADF environment. You need to select a subscription. You can either create a new resource group (which is a logical container for your resources) or select an existing one. You need to select a region (take one close by your location to minimize latency) and choose a name. Finally, you need to select a version. It’s highly recommended you choose V2. Version 1 of ADF is almost never used and practically all documentation you’ll find online is about V2.

Click on Review + create at the bottom. It’s possible you might get a validation error about the Git configuration. Integration with Git and Azure Devops is out of scope for this tutorial.

If you get the error, go to the Git configuration tab and select Configure Git later.

When the validation passes, click on Create to have Azure create the ADF environment for you. This might take a couple of minutes. When the resource is deployed, you can check it out in the portal.

Typically, you don’t spend a lot of time here. You can configure access control to give people permission to develop in ADF, or you can set up monitoring and alerting. The actual development itself is done in Azure Data Factory Studio, which is a separate environment. Click on the Studio icon to go to the development environment, which should open in a new browser tab.

Setup Storage Account
Before we can start creating pipelines in ADF, we need to set up our source and destination (called sink in ADF). We begin by creating a storage account in the Azure Portal. Search for the “storage account” resource in the marketplace and click on Create.
In the Basics tab, choose your subscription and the same resource group as the ADF environment. Specify a name for the storage account and choose the same region as your ADF.

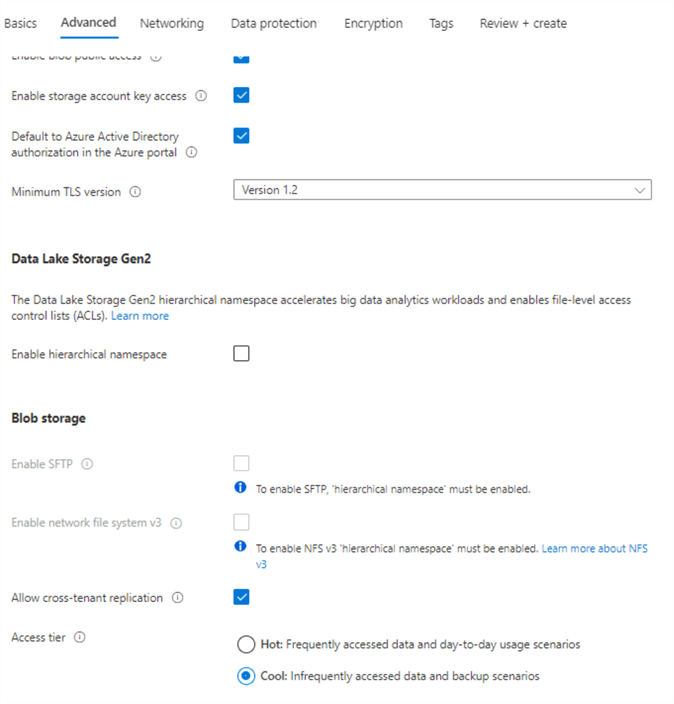
For the redundancy, choose “Locally-redundant storage (LRS)”, which is the cheapest option. Go to the Advanced tab and switch the access tier to Cool. This is a cheaper option than the default Hot access tier.
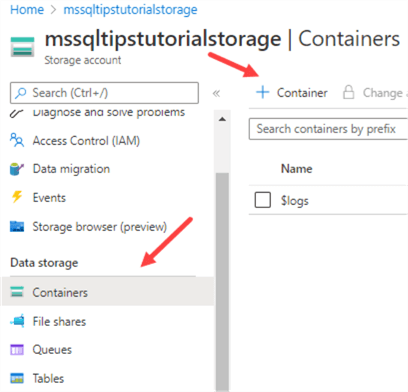
Click on Review + Create and then Create to provision your storage account. When it has been deployed, go to the resource and then to Containers in the Data Storage section.
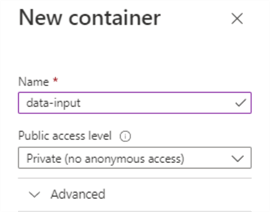
Specify “data-input” as the new container name and then click on Create.
Setup Azure SQL Database
Next, we need our destination, which is going to be an Azure SQL database. Search for “SQL database” in the marketplace and click on Create.
In the Basics tab, choose your subscription and the same resource group as before. Give the database the name “tutorial”.

Before we can create the database however, we need to assign it to a “SQL Server”. This is not an actual SQL Server, but rather a logical container for our databases. Some configurations are applied to the server level. Since we do not have a server yet, we need to create it first. Click on Create new to create one.
Specify a name for the server. This will be the server name you’ll enter in a database tool like SQL Server Management Studio or Azure Data Studio to connect to your database. I choose “adf-tutorial-sql”, but if you want to add other databases later on that have nothing to do with this tutorial, you might want to choose another name.
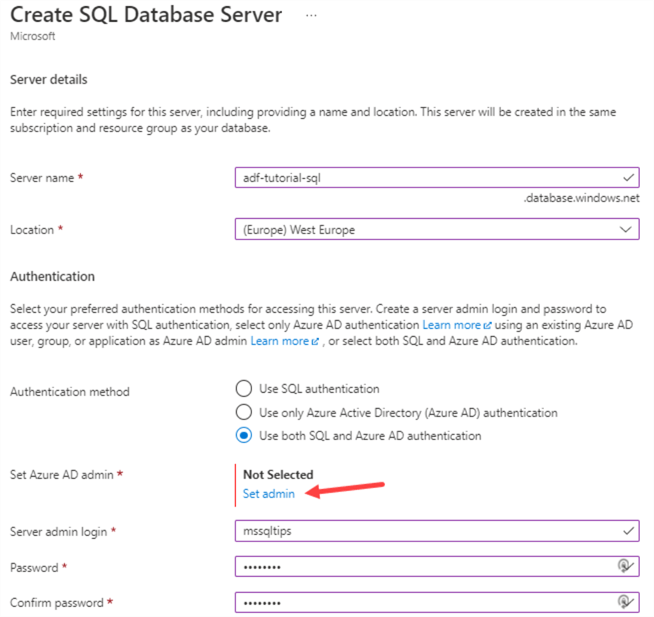
If you choose SQL authentication, you need to specify a login name for the server admin and a strong password. If you choose Azure Active Directory authentication, you’ll need to specify an Azure AD admin. You can choose either one of the authentication methods, or both. If you use Azure AD, click on Set admin. Search for an AD user you want to grant admin rights.
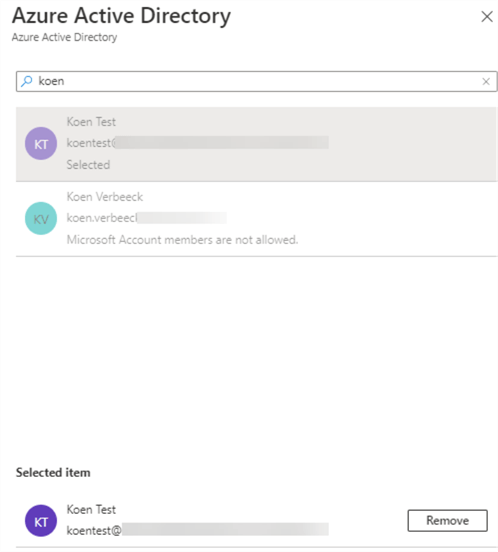
Once you have selected your admin, click on OK at the bottom to finish the configuration of the server. Back in the configuration of the database, set the redundancy to “locally-redundant backup storage”.

The default configuration of the database is a bit too pricy for our tutorial, so let’s set this to a cheaper option. Click on Configure database to see the various options.
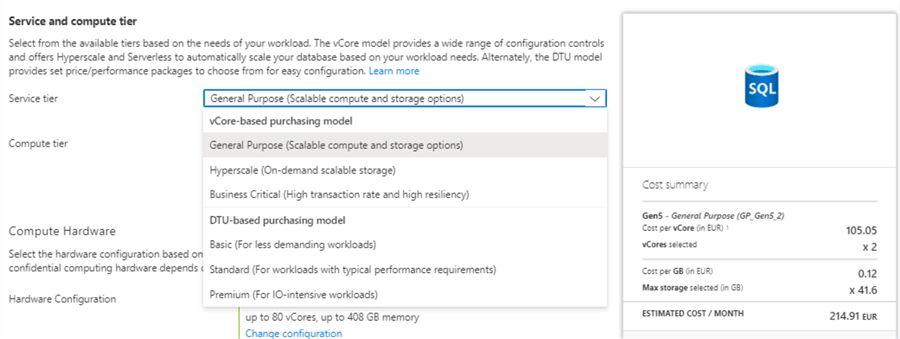
Switch to DTU-based purchasing and choose the Basic workload. You can see the price has considerably dropped!
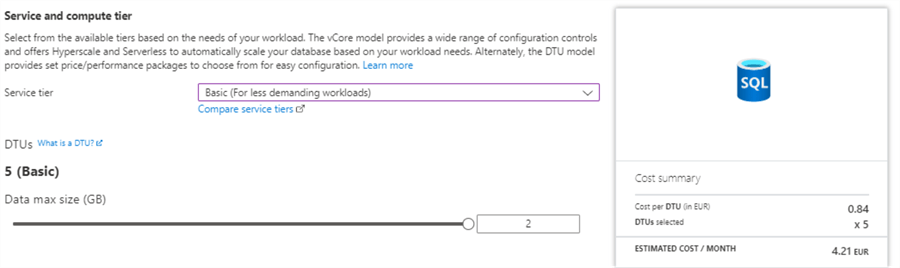
The downside is we can have only 2GB for our database, but that should be plenty for this tutorial. Just one more setting before we can create our database. In the Additional settings tab, choose Sample as the data source. This will install the AdventureWorksLT sample database.

Click on Review + create and then on create to create the SQL Server and the Azure SQL database. This might take a couple of minutes. Once the deployment is done, go the SQL Server and then to Firewalls and virtual networks, which can be found in the Security section.
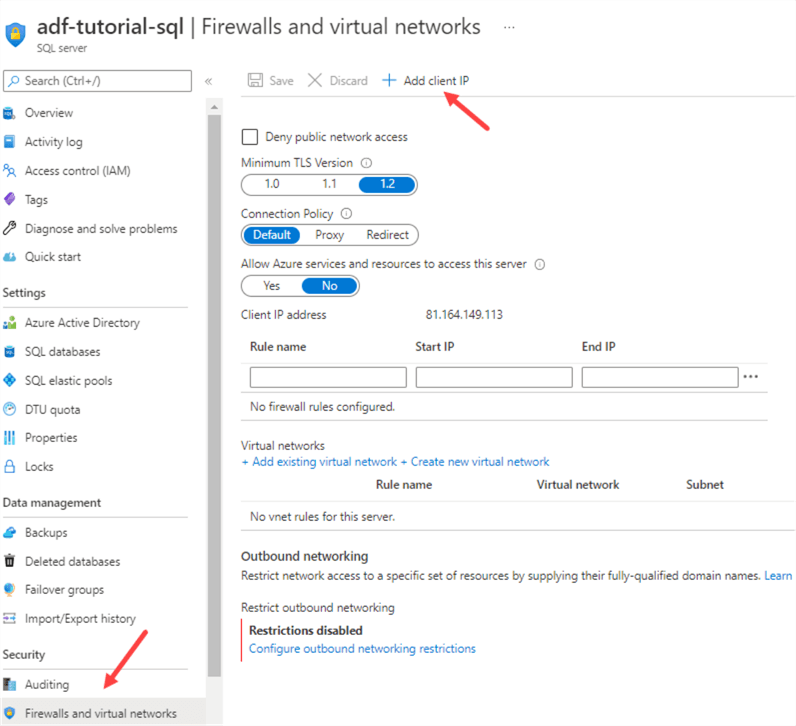
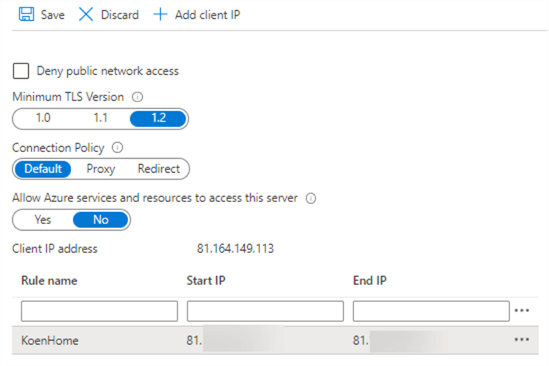
To make sure we can access our database from our machine, we need to add our current IP address to the firewall. At the top, click on Add client IP. This will add a new rule to the firewall. Don’t forget to click Save at the top!
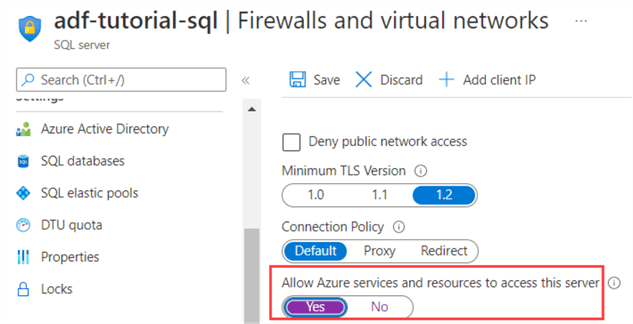
While we’re in the firewall config, let’s set the property “Allow Azure services and resources to access this server” to Yes. This will make our lives a lot easier when we try to connect to the server from ADF.
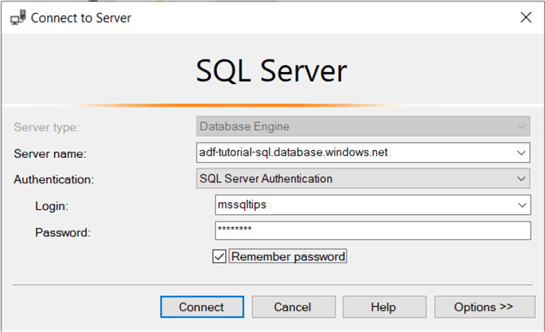
In the Overview pane, you can find the name of the server. Hover over it with your mouse and click the copy icon to copy the name to your clipboard. Start SQL Server Management Studio (SSMS) or Azure Data Studio to connect to the server. For the remainder of the tutorial, SSMS is used. In SSMS, create a new connection. Paste the server name and choose the authentication method you configured earlier. If you’re using Azure AD, don’t choose Windows Authentication but rather one of the Azure AD authentication methods listed: Universal with MFA, Password or Integrated. The correct one depends on your environment.
Don’t click on Connect just yet! First, go to options and enter the database name in the upper text box.
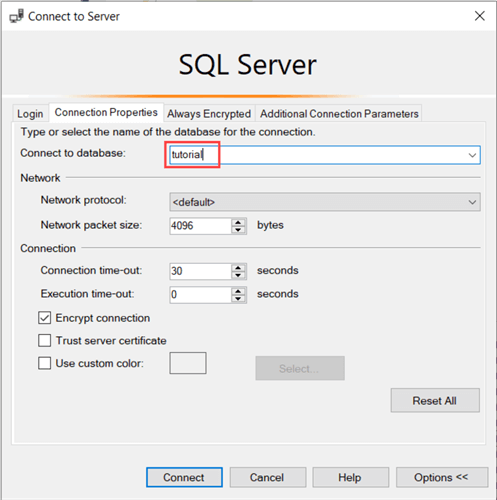
If you don’t do this, SSMS will automatically try to connect to the master database, which might or might not work, depending on your permissions. You can now click on Connect. Once you’re connected, you can view the tables that were automatically created for us because we chose the sample database:

Additional Information
- Creating an ADF environment incurs almost no costs. The actual costs come from running pipelines. If you don’t run anything, you’re not spending money.
- If you’re interested in the integration with Git and Azure Devops, you can check out the following tips:
- A good tool for browsing your storage account is Azure Storage Explorer, which is free to download. You can find an introduction to the tool in the tip Azure Storage Explorer Overview.
- For more info on Azure SQL DB, check out these tips:

Koen Verbeeck is a seasoned business intelligence consultant with over a decade of experience with the Microsoft Data Platform. He holds several certifications, including Azure Data Engineer. He’s a prolific writer, with over 375 articles on technologies such as Microsoft Fabric, SSIS, ADF, SSAS, SSRS, MDS, Power BI, Snowflake and Azure services. He has spoken at various events such as PASS, SQLBits, dataMinds Connect and many others. He frequently delivers educational webinars on MSSQLTips.com. For his efforts, Koen has been awarded the Microsoft MVP data platform award for many years.
- MSSQLTips Awards:
- Leadership Award (200+ Tips) – 2021
- Author of the Year – 2014/2020/2022
- Author Contender – 2024/2025

Thanks for providing azure knowledge, please share all concepts related to adf.thanks in advance.