Problem
In my previous article, Using Azure DevOps CI CD to Deploy Azure Data Factory Environments, I demonstrated how to deploy a dev Azure Data Factory environment to a different Azure Data Factory environment. This demo utilized GitHub for the source repo along with the preview ‘Deploy Azure Data Factory’ CICD release pipeline task. While this task has the capability of including start/stop ADF triggers without having the use PowerShell Scripts, along with creating and deploying a new data factory environment, I ran into issues when changing ADF configuration and connection properties from DEV to QA, probably since this task is still in preview. That said, what alternative methods and options do I have for deploying an Azure Data Factory to other environments while accounting for start/stop triggers and changing connection properties from DEV to QA during the CI/CD deployment process?
Solution
The critical need to deploy an Azure Data Factory from one environment to another using the best practices of the Azure DevOps CICD process presents a number of complexities to completing the deployment process successfully. In this article, we will cover how to utilize PowerShell scripts along with the Azure Resource Group Deployment task to start/stop ADF triggers and change ADF environment connection configuration properties through an end to end deployment of Azure Data Factory CI/CD changes with Azure DevOps.
Pre-Requisites
This demonstration assumes that a few pre-requisites have been completed. Below is the list of pre-requisites that must be completed prior to competing the end to end process. Additionally, read and complete the steps outlined in my previous article Using Azure DevOps CI CD to Deploy Azure Data Factory Environments.
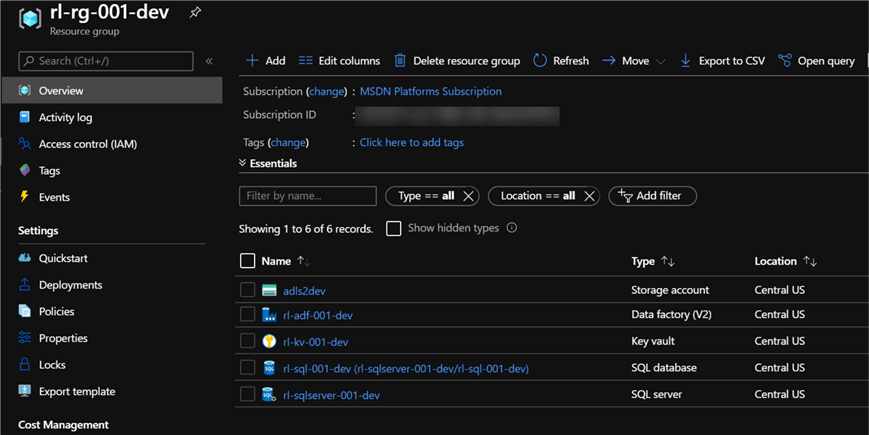
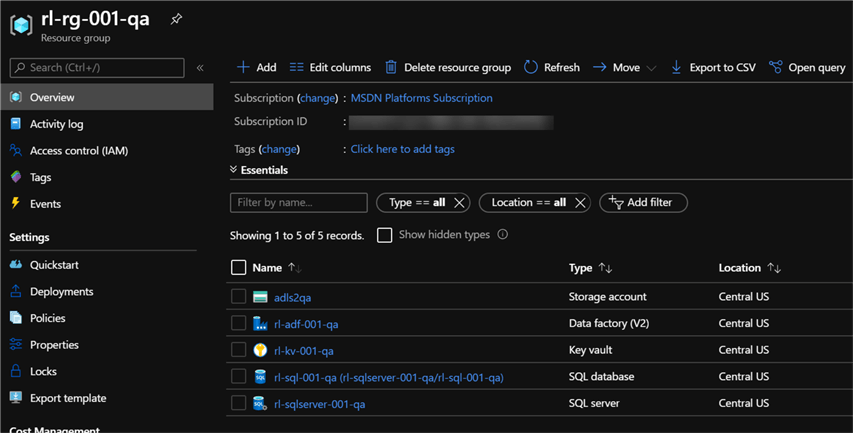
1) Create the following resources in both a DEV and QA Resource Group (Note that the Data Factory for QA will need to be created as a prerequisite, which is a slightly different approach from my previous article where the ‘Publish ADF Task’ creates the Data Factory as well. For the purposes of this demo we will be manually creating the QA Data Factory. Explore blending the ‘Publish ADF Task’ with this process):
DEV Resource Group
QA Resource Group
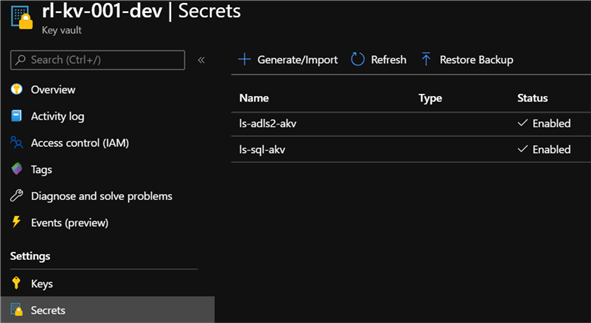
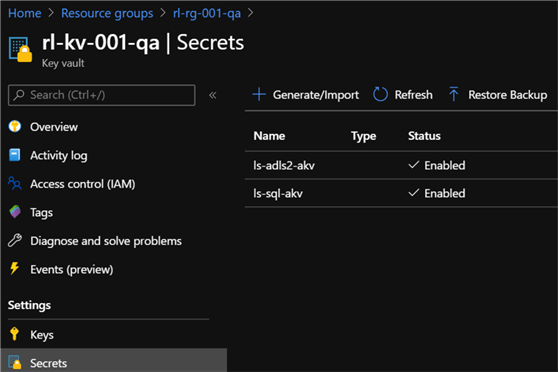
2) Create the following Secrets in both the DEV and QA Key Vault Accounts (Note that the secret names in both DEV and QA accounts are the same for deployment purposes, however the actual secrets are unique between DEV and QA):
a) ls-adls2-akv: This will contain the Access Key for both the DEV and QA ADLS2 Accounts, which can be found in the Access Keys section of the respective DEV and QA Data Lake Storage Accounts.
b) ls-sql-akv: This will contain the Admin Password of the DEV and QA Azure SQL Servers and Databases for authentication purposes.
DEV Key Vault Secrets
QA Key Vault Secrets
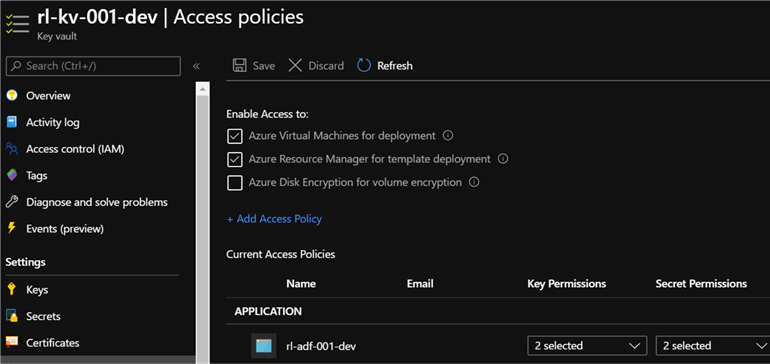
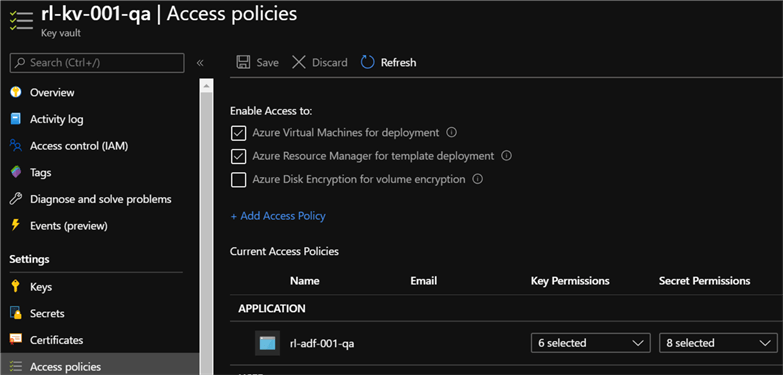
3) Remember to grant both the DEV and QA Data Factories access to both the DEV and QA Key Vaults by adding Key Vault Access policies.
DEV Key Vault Access Policies
QA Key Vault Access Policies
4) Create the following Linked Services in the DEV Data Factory for testing purposes:
DEV Data Factory Linked Services
Below is the json script for the Azure Data Lake Storage Linked Service connection:
{
    "name": "LS_AzureDataLakeStorage",
    "properties": {
        "annotations": [],
        "type": "AzureBlobFS",
        "typeProperties": {
            "url": "https://adls2dev.dfs.core.windows.net",
            "accountKey": {
                "type": "AzureKeyVaultSecret",
                "store": {
                    "referenceName": "LS_AzureKeyVault",
                    "type": "LinkedServiceReference"
                },
                "secretName": "ls-adls2-akv",
                "secretVersion": ""
            }
        }
    }
}
Below is the json script for the Azure Key Vault Linked Service connection:
{
    "name": "LS_AzureKeyVault",
    "properties": {
        "annotations": [],
        "type": "AzureKeyVault",
        "typeProperties": {
            "baseUrl": "https://rl-kv-001-dev.vault.azure.net/"
        }
    }
}
Below is the json script for the Azure SQL Database Linked Service connection:
{
    "name": "LS_AzureSqlDatabase",
    "type": "Microsoft.DataFactory/factories/linkedservices",
    "properties": {
        "annotations": [],
        "type": "AzureSqlDatabase",
        "typeProperties": {
            "connectionString": "Integrated Security=False;Encrypt=True;Connection Timeout=30;Data Source=rl-sqlserver-001-dev.database.windows.net;Initial Catalog=rl-sql-001-dev;User ID=devadmin",
            "password": {
                "type": "AzureKeyVaultSecret",
                "store": {
                    "referenceName": "LS_AzureKeyVault",
                    "type": "LinkedServiceReference"
                },
                "secretName": "ls-sql-akv"
            }
        }
    }
}
5) Create a trigger in the DEV Data Factory for testing purposes.
6) Publish the DEV Data Factory to commit the changes to the adf_publish branch and to prepare for the DevOps CICD process. (Note that in this method, we will be using the adf_publish branch rather than the master branch for the CICD deployment process. For more on creating a CICD deployment from the master branch instead, see the ‘Publish ADF Task’.
7) Verify that the Data Factory additions and changes have been published to the adf_publish branch in the GitHub Repo.
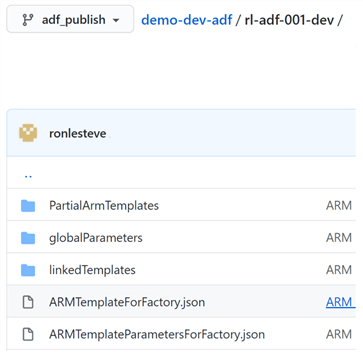
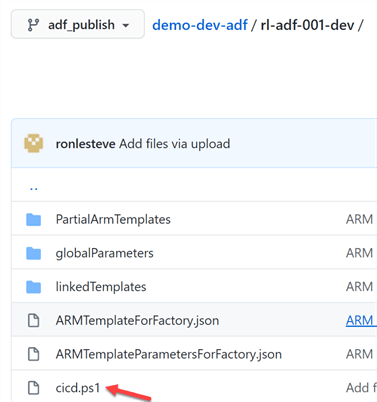
8) Finally, add the following Sample pre- and post-deployment script from Microsoft’s article: Continuous integration and delivery in Azure Data Factory. Note that the script can be found toward the bottom of the page. Add the file within the same folder as the dev ADF resources and name it cicd.ps1
Create the CI DevOps Build Pipeline
Now that we have created all of the necessary pre-requisites, we are ready to begin creating the Azure DevOps continuous integration build pipelines in Azure DevOps.
Let’s begin by creating a new Build Pipeline.

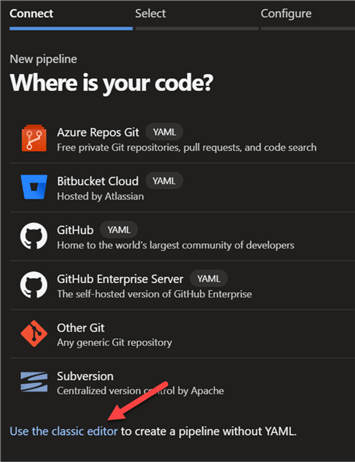
Next, select ‘Use the classic editor’ link to prevent having to create the pipeline with YAML code.
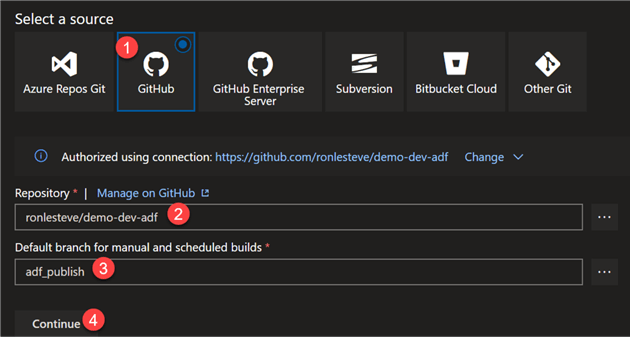
Next, select GitHub since that is where the code repo is saved. Also select, the repo name along with the adf_publish branch.
Next, start with an Empty job template.

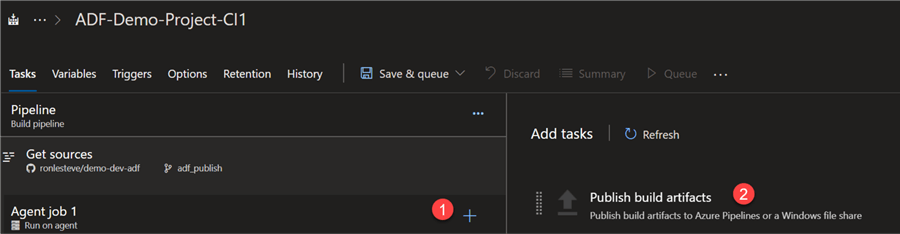
Click the + icon on the Agent job to add a new task. Add the Publish build artifacts task.
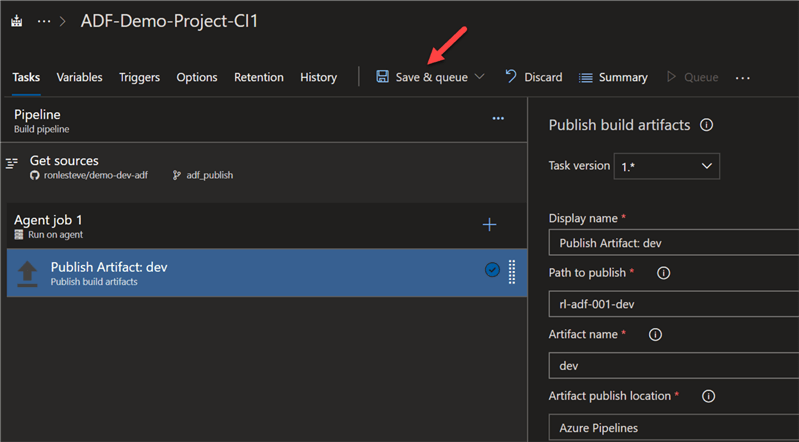
Configure the Publish Artifact task; click save and queue.
Verify the Run pipeline details and click Run.

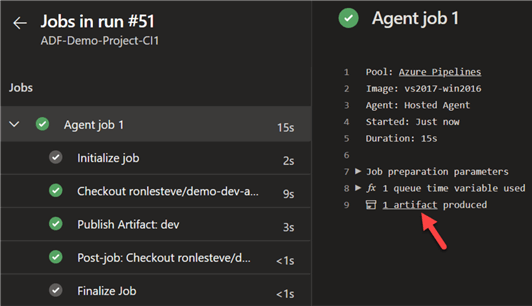
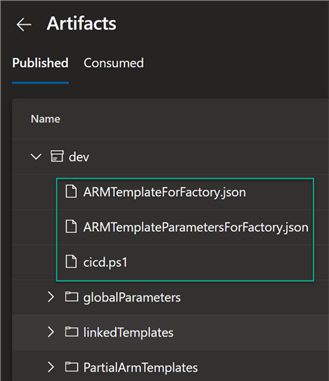
Once the job completes running successfully, verify that the artifacts have been published.
As expected, the folder appears to contain all the artifact that will be needed in the release pipeline.
Create the CD DevOps Release Pipeline
Now that the CI Build pipeline has been successfully completed and verified, its time to create a new CD release pipeline.
Click New release pipeline.

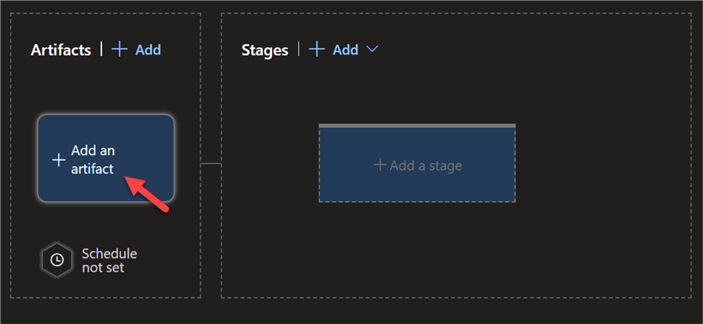
Click add an artifact.
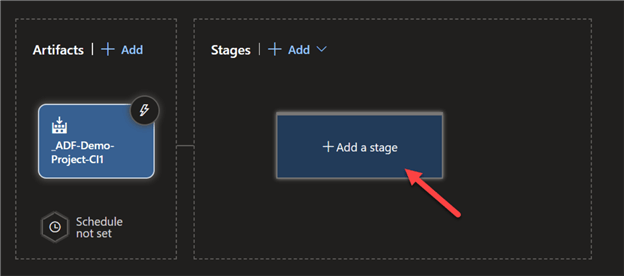
Select Build as the source type, select the build pipeline and complete the required details and click Add.

Next, add a stage.
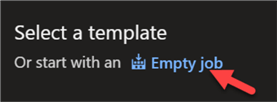
Start with an Empty job template.
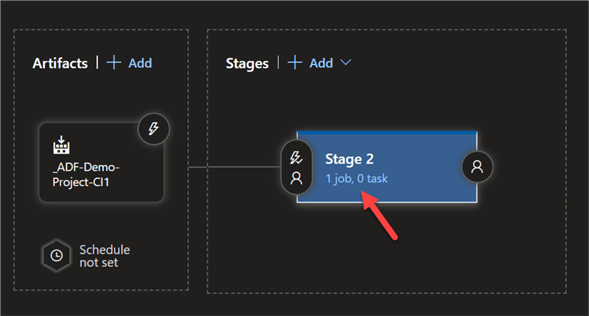
Next click the link to add a task.
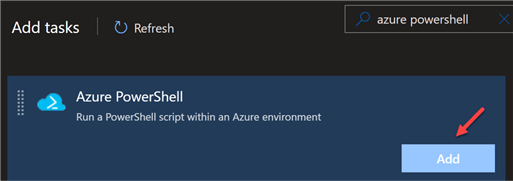
Begin by adding an Azure PowerShell script task. This will be used to stop the Data Factory triggers.
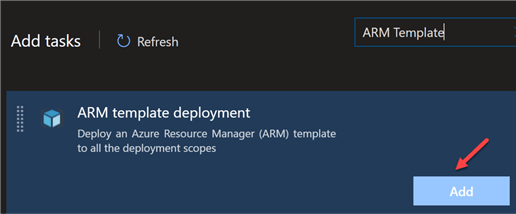
Also add an ARM template deployment task. This will be used to deploy the Data Factory artifacts and parameters to the desired environment.
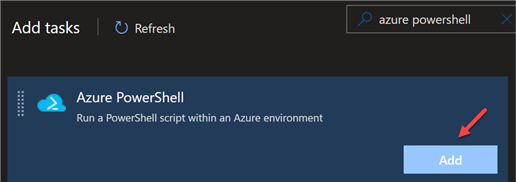
Finally, also add another Azure PowerShell task. This will be used to re-start the Data Factory triggers.
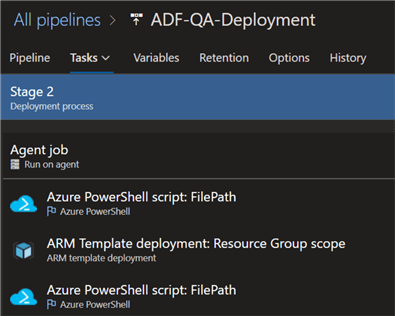
Ensure that all three tasks are organized in the following order prior to configuring them.
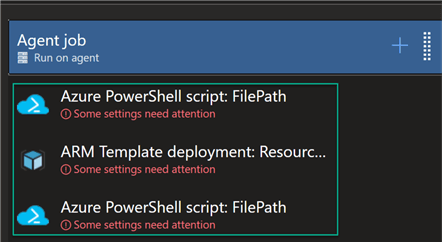
Azure PowerShell: Stop Triggers
Begin configuring the Azure PowerShell script to stop the Data Factory triggers in the QA environment.
Ensure that the script path is pointing to the cicd.ps1 file that we added to the GitHub Repo in the pre-requisite step.
Select Task Version 4* and select the latest installed version of Azure PowerShell.
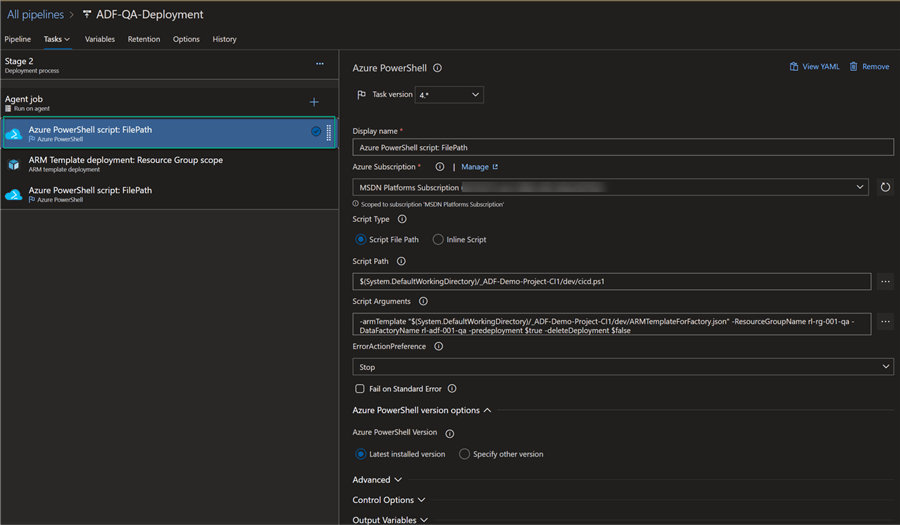
Also, add the following pre-deployment script to the script arguments of the task.
Pre-deployment script
-armTemplate "$(System.DefaultWorkingDirectory)/_ADF-Demo-Project-CI1/dev/ARMTemplateForFactory.json" -ResourceGroupName rl-rg-001-dev -DataFactoryName rl-adf-001-dev -predeployment $true -deleteDeployment $false
ARM Template Deployment
This release pipeline task will incrementally update the QA resource group with the template and template parameters of the DEV Data Factory that was published to the DevOps Artifacts from the build pipeline. These artifacts were published in the DEV Data Factory and committed to the adf_publish branch GitHub Repo.
Ensure the select the appropriate ARMTemplateForFactory.json and ARMTemplateParametersForFactory.json files.
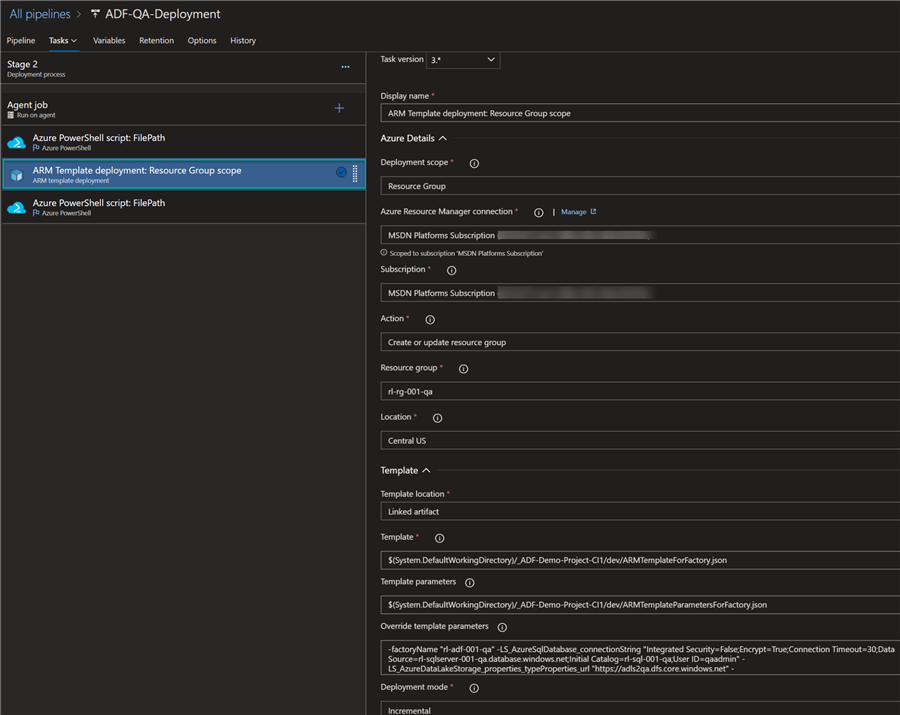
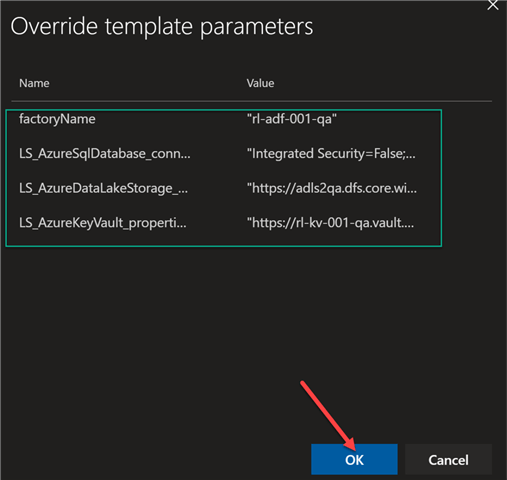
Once all the other Azure details fields are completed, choose the Override template parameters by clicking the … icon.

Change the override template parameters to the QA resources and connection properties and click OK.
Azure PowerShell: Start Triggers
Finally, let’s configure the Azure PowerShell script to start the Data Factory triggers in the QA environment.
Ensure that the script path is pointing to the cicd.ps1 file that we added to the GitHub Repo in the pre-requisite step.
Select Task Version 4* and select the latest installed version of Azure PowerShell.
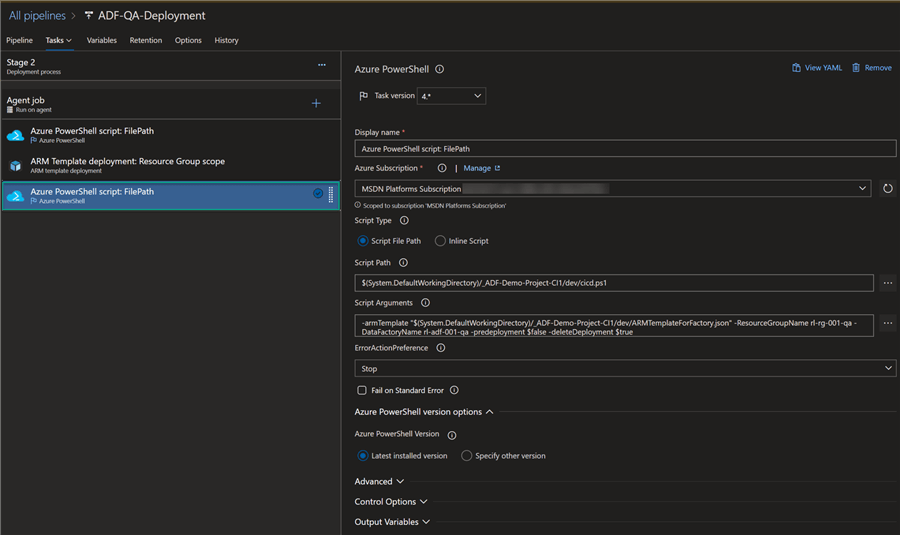
Also, add the following post-deployment script to the script arguments of the task.
Post deployment script
-armTemplate "$(System.DefaultWorkingDirectory)/_ADF-Demo-Project-CI1/dev/ARMTemplateForFactory.json" -ResourceGroupName rl-rg-001-dev -DataFactoryName rl-adf-001-dev -predeployment $false -deleteDeployment $true
Run the Release Pipeline
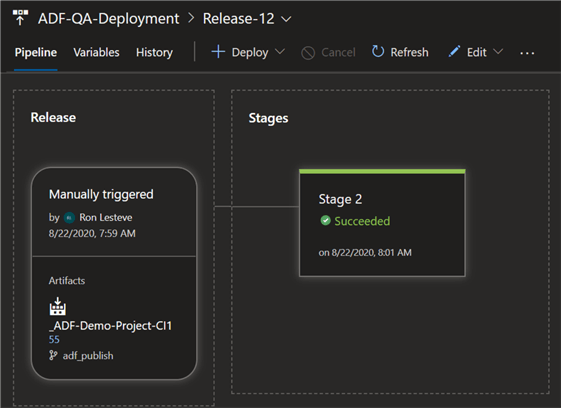
Now that we have added and configured the CD release pipeline tasks, its time to run the release pipeline.
As expected, the release has succeeded.
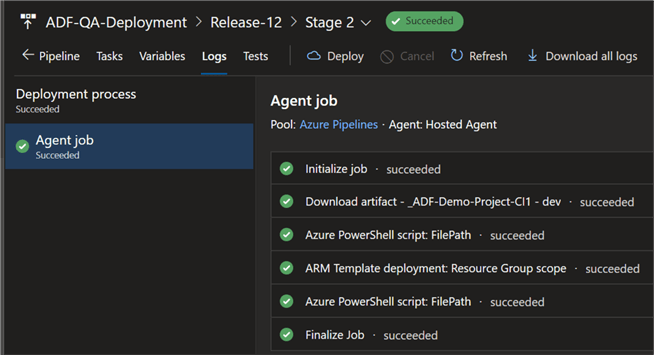
Upon navigating to the logs, we can verify that all steps in the release pipeline have successfully completed.
Verify the Deployed Data Factory Resources
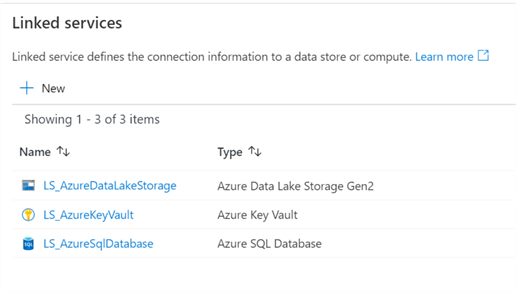
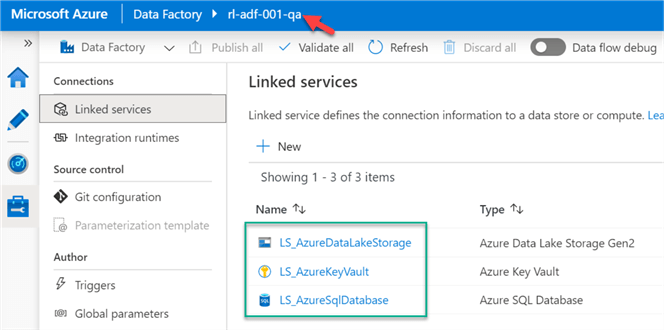
As a final check to ensure that the QA Data Factory changes have deployed correctly, let’s navigate to the QA Data Factory and check the Linked Services connections.
As expected, we can see the three linked services connections.
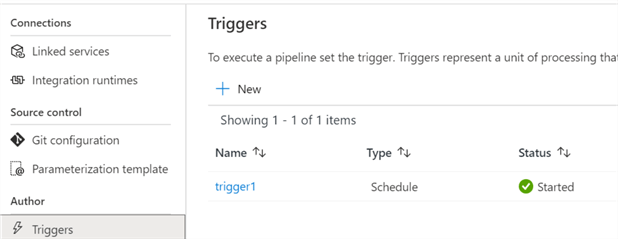
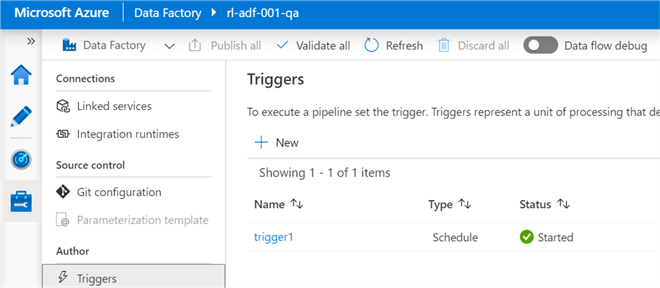
Additionally, there is one trigger that was added and started. This is the trigger that will be stopped and re-started during the incremental CICD DevOps process.
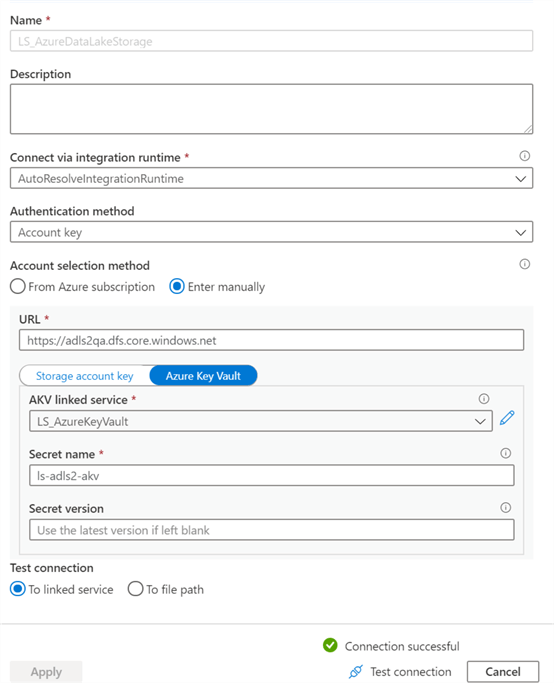
Upon drilling in further, we can see that the connection strings for the Data Lake has been changed and the connection was successfully tested.
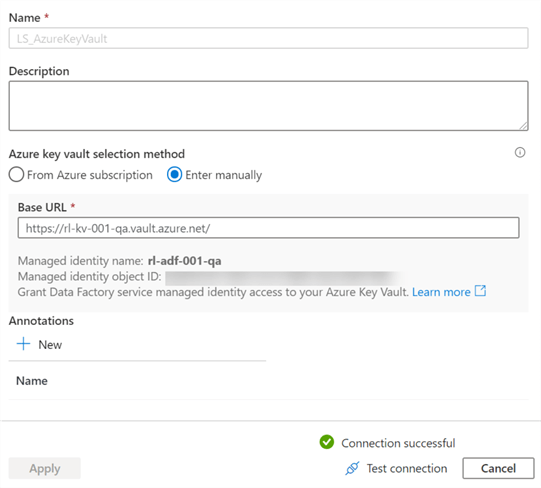
The Key Vault connection was also changed to QA and successfully tested.
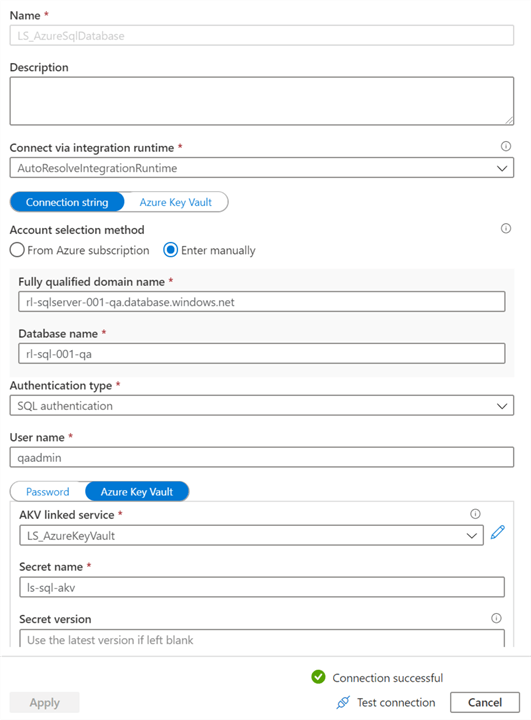
Lastly, the SQL Server and Database connections were also changed to QA and successfully tested.
Next Steps
- For more information on the Azure PowerShell task within Azure DevOps CICD pipelines, read Azure PowerShell Task.
- For more detail related to the adf_publish branch within Azure Data Factory, read Azure Data Factory – All about publish branch adf_publish.
- For more information on this Azure DevOps CICD process, read Microsoft’s article Continuous integration and delivery in Azure Data Factory.
- Read this article for more information on expanding this demo to add triggers and variable groups for various environments, Continuous integration and delivery (CI/CD) in Azure Data Factory using DevOps and GitHub.
- For more information on Azure Data Lake Storage Gen2 Access Keys, read: Manage storage account access keys.
- For more information on PowerShell versions, see: Introducing the new Azure PowerShell Az module.

Ron C. L’Esteve is a Data and AI Leader and professional Author residing in Chicago, IL, USA. He is well-known for his impactful books and article publications on Azure Data & AI Architecture, Engineering, and Leadership. Ron holds a Master of Business Administration (M.B.A.) and Master of Science in Corporate Finance (M.S.F.) from Loyola University Chicago. Ron possesses deep technical skills and experience in designing, implementing, leading, and delivering modern Azure Data & AI projects for numerous clients around the world. He is a Motorola Certified Six Sigma Green Belt, a Microsoft Global Challenger, and also holds numerous additional Microsoft, Snowflake, and Databricks professional certifications in Big Data Engineering, Artificial Intelligence, Apache Spark and Data Platform Architecture.
- MSSQLTips Awards: Champion (100+ tips) – 2023 | Author of the Year – 2020-2021 | Rookie of the Year – 2019

Hi,
ARM deployment expects all triggers to be disabled, which we are handing in Pre-deployment step. Is there any option to stop only trigger which is dependent on pipeline which has code change?
Stopping all the triggers then post deployment starting all the trigger may impact the scheduled pipeline. That’s why I want to know from you guys if you have any idea around it.