Problem
We are working on an Integration Services project with multiple developers. Some team members work remotely, so it’s not always easy to see which package someone is working on. We’d like to use a git repository as a source control repository. This way we can also manage the code using branches. Is it possible to use git in Visual Studio?
Solution
Git is free and open-source distributed version control system which has become very popular in the last years (one of the reasons is Github, a free online repository which was acquired by Microsoft). Git is distributed in the sense that every developer has a local copy of the repository on his machine. When a developer makes changes, he/she first commits those against the local repository, then pushes the changes to the remote repository (on the server). If you’re new to the world of Git, these tips might help you get started:
- Getting Started with GitHub for SQL Server Developers
- Continuous SQL Server Database Integration with Visual Studio and Azure DevOps
Visual Studio supports git for quite some time now. To follow along with this tip, you need Visual Studio (you can use the free community edition if needed) and the SSIS extension. The screenshots in this tip are taken with Visual Studio 2019 and version 3.5 of the extension. In the past, Microsoft offered online source control through Team Foundation Services, which was renamed to Visual Studio Online, which is now renamed to Azure Devops (the on-premises Team Foundation Services is now rebranded as Azure Devops Server). Azure Devops not only provides version control, but also CI/CD pipelines, agile boards and test plans.
In this tip, we’ll focus on using Azure Devops to manage an Integration Services (SSIS) project. Azure Devops is free for the first 5 users. You can find more information about pricing here. To use Azure Devops, you need a Microsoft account.
Azure Devops and SSIS
Creating an Organization and Repository
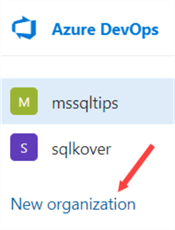
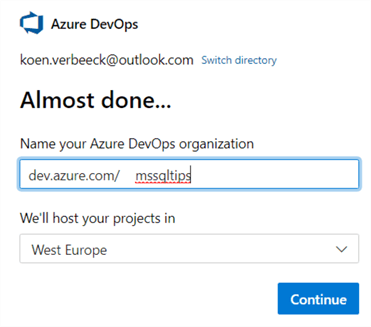
The first step in Azure Devops is to create an organization, which acts as a container for all your different projects. I already had an organization, but you can easily create a new one:
You have to specify a name and the location for the organization:
Once the organization is created, you’ll be asked to create a new project.

This will result in a project without any code repositories:

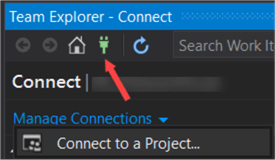
Let’s switch to Visual Studio and see if we can connect to this new project. In the Team Explorer window, click on the green plug to manage your connections. There you can choose to connect to a project.
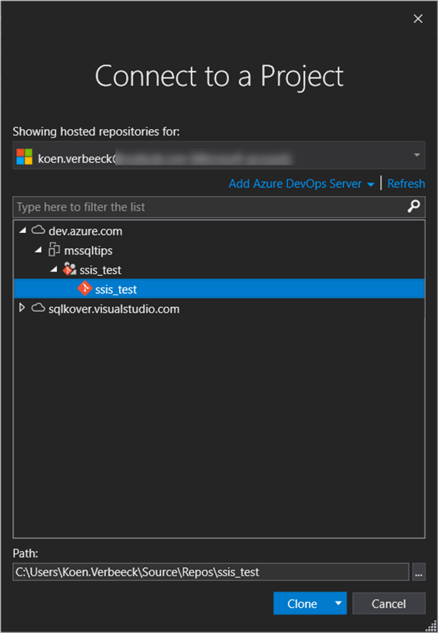
A new window will pop-up, where you can select the repositories linked to your account. At the top, you can switch between accounts. At the bottom, you can configure the location on your hard drive where you want to sync the files to. Choose the repo we just created and click on Clone.
When clicking clone, you can choose between the following options:
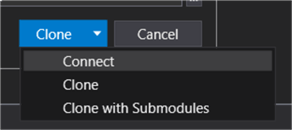
Simply click Connect to finish the set-up. The repo is then copied to your local machine:

It’s possible you’ll get the following message when cloning or syncing the project:

Visual Studio uses the Git command line behind the scenes, which means of course Git needs to be installed on your machine. Click on the Install link. This will give you the following explanation:

Click on the Install button to proceed. This will take you to the Git website where you can download the necessary components:

The installation is your typical "next-next-finish" set-up. When Git is installed, restart Visual Studio. When trying to clone or sync, you might have to enter your credentials into the Git credential manager:
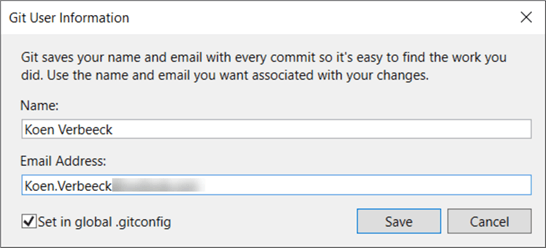
The value you enter in the Name box will be used when you commit changes.
Add a New SSIS Project to the Repository
Once the project is cloned into Visual Studio, we can start by adding a new Integration Services project to it. Create a new project and make sure the location is inside the repository folder where you cloned the project to.

This means you need to change the default location into the following one:

When the project is created, you can see all the git commands at the bottom-right of your screen, along with the different statuses. Creating the project resulted in 7 changes to the repository:
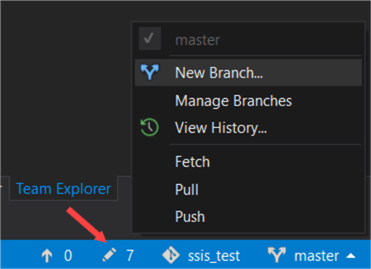
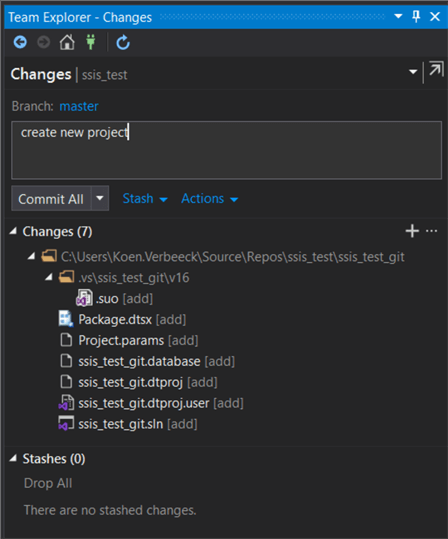
In the team explorer window, you can see those changes in the Changes submenu. You can also commit those changes along with a commit message. By clicking Commit All, the 7 changes will be committed locally against the master branch, which is the default branch for a new project.
After the changes have been committed, you’ll get a message you need to sync the commit to the server (or push the changes in git jargon).
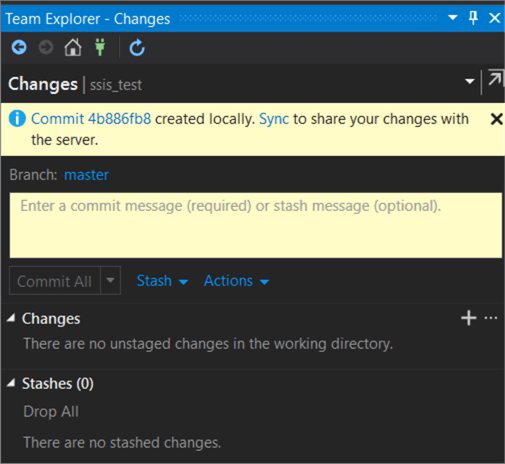
In the bottom-right corner, you can see one commit is waiting to be pushed to the server:
You can click on the arrow to go to the sync window and push the commit to the server.

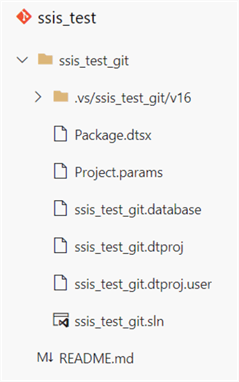
In the local folder, you can see Visual Studio added the folder for the SSIS project:

The same folder can now be found on the Azure Devops site:
You can now continue to work on the SSIS project, add packages and commit those to the remote server.
Add an Existing Project to Azure Devops
Not all projects are brand new. Sometimes you will need to add existing SSIS projects to your new Azure Devops infrastructure. The easiest option would be to just copy the project/solution files to the folder (…\source\repos\ssis_test) in your local repository. However, it would be cleaner to create a new repository for your existing project. Let’s open an existing project in Visual Studio. Right-click on the solution and choose Add Solution to Source Control…

Go to the changes menu to sync (or click on the upwards arrow in the bottom-right corner). You will be prompted with the following options:
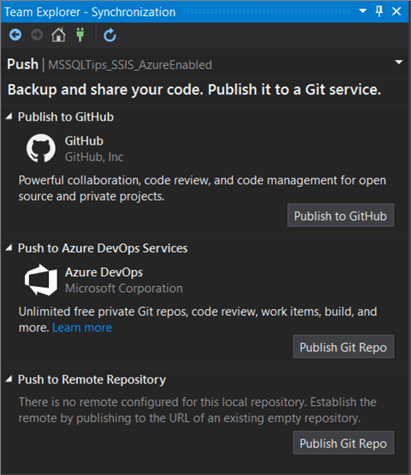
Choose Publish Git Repo. In the following menu, choose the organization and specify a name for the repository:

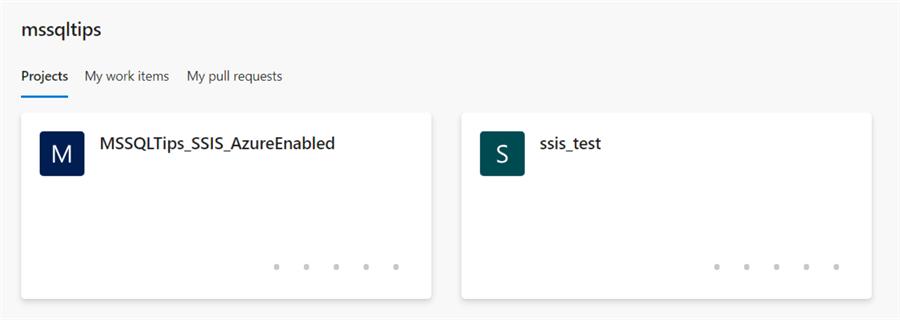
After syncing, you can see a new project was added to Azure Devops:
There’s also a new repo, along with the files of your SSIS project:

Next Steps
- To learn more about Azure Devops, check out these tips:
- To learn more about SSIS, check out this tutorial. More SSIS tips can be found in this overview.
- You can find all Azure-related tips here.

Koen Verbeeck is a seasoned business intelligence consultant with over a decade of experience with the Microsoft Data Platform. He holds several certifications, including Azure Data Engineer. He’s a prolific writer, with over 375 articles on technologies such as Microsoft Fabric, SSIS, ADF, SSAS, SSRS, MDS, Power BI, Snowflake and Azure services. He has spoken at various events such as PASS, SQLBits, dataMinds Connect and many others. He frequently delivers educational webinars on MSSQLTips.com. For his efforts, Koen has been awarded the Microsoft MVP data platform award for many years.
- MSSQLTips Awards:
- Leadership Award (200+ Tips) – 2021
- Author of the Year – 2014/2020/2022
- Author Contender – 2024/2025
