Problem
Software developers are beginning to use NoSQL in transactional applications rather than conventional relational tables offered by SQL Server, PostgreSQL, and MySQL. In this tip, we are going to breakdown how to create an event-driven solution with a NoSQL database.
Solution
Let’s create an event-driven serverless solution using Azure Cosmos DB and Azure Functions to capture failed transactions and alert necessary parties for a quick response and adjustment when needed.
Project Components
Cosmos DB Event-Driven Solution with Azure Functions
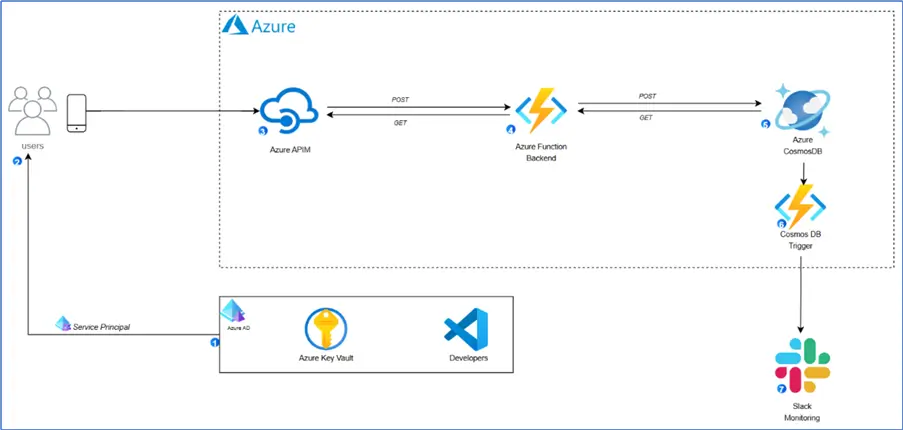
Below is the architecture of what we will build for the event-driven solution.
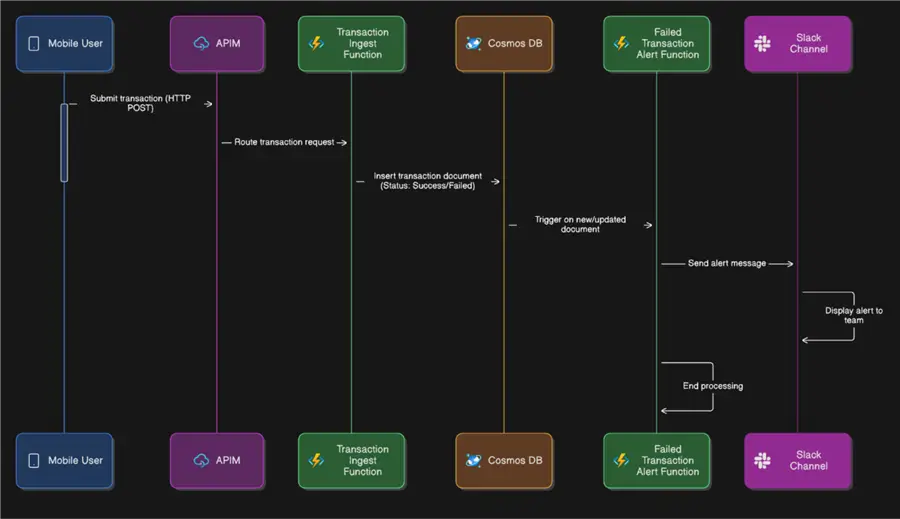
Here is the architecture flow of the processes for each component.
Provision Azure API Management Using Terraform
This is a continuation from our previous article on Azure Functions provisioning to multiple environments using Terraform.
Step 1: Create the New Module Directory
The Terraform File will be made available as part of the attachment.
First initialize the environment:
>>terraform init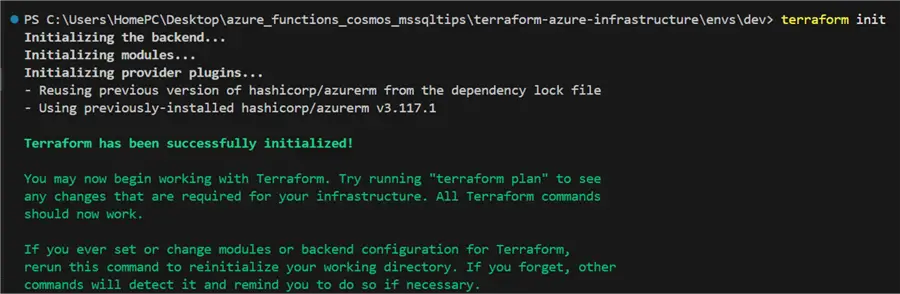
Validate the configuration:
>>terraform validate 
Review any required changes:
>>terraform plan 
Next apply the build resources:
>>terraform apply 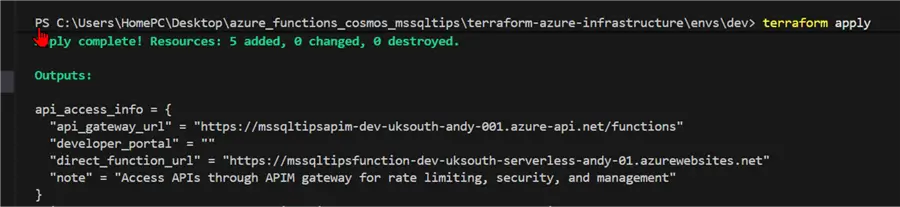
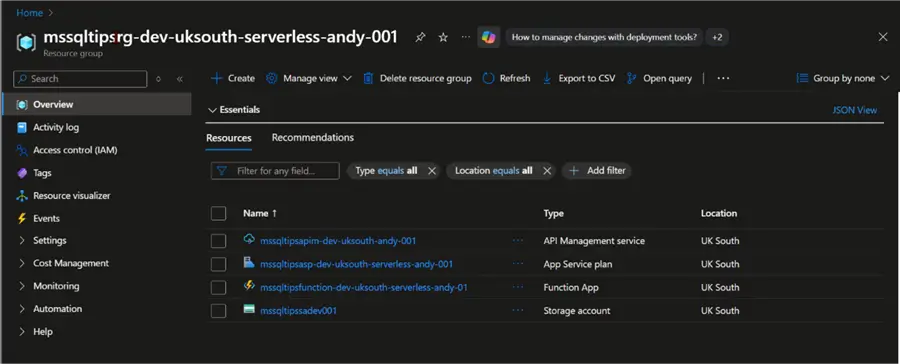
Validate Resource Creation
We can the look at the resources to validate they were created.
Provision Azure Cosmos DB using Terraform
Azure Cosmos DB is a powerful, fully managed, globally distributed, multi-model database service offered by Microsoft Azure.
The Azure Cosmos DB is made up of 3 major components.
- Database (Organizational Unit): In Azure Cosmos DB, a database serves as an organizational and administrative unit. It is the top-level resource where you may control rights, users, and, if shared throughput is being used, the shared throughput (also known as Request Units per second, or RUs) for each container.
- Container (Unit of Scale and Storage): A container is the basic unit of scale for both throughput and storage, and is where your data (items/documents) are actually kept.
- It is comparable to a graph in Gremlin, a collection in MongoDB, or a table in relational databases.
- Containers reside within a Database.
- A Partition Key must be defined when a container is created.
- A container offers unlimited storage and throughput because it scales horizontally using partitions.
- Partition (Data Distribution Mechanism): Partitioning is how Azure Cosmos DB scales horizontally to meet the performance and storage needs of your container.
Follow these steps to create an Azure Cosmos DB with Terraform.
Step 1: Create the New Module Directory
>> cd modules
>> mkdir cosmos-db
Step 2: Provision Resources in the Terminal
The Terraform File will be made available as part of the attachment.
Follow the provisioning of the resources.
>> terraform init
>> terraform validate
>> terraform plan
>> terraform apply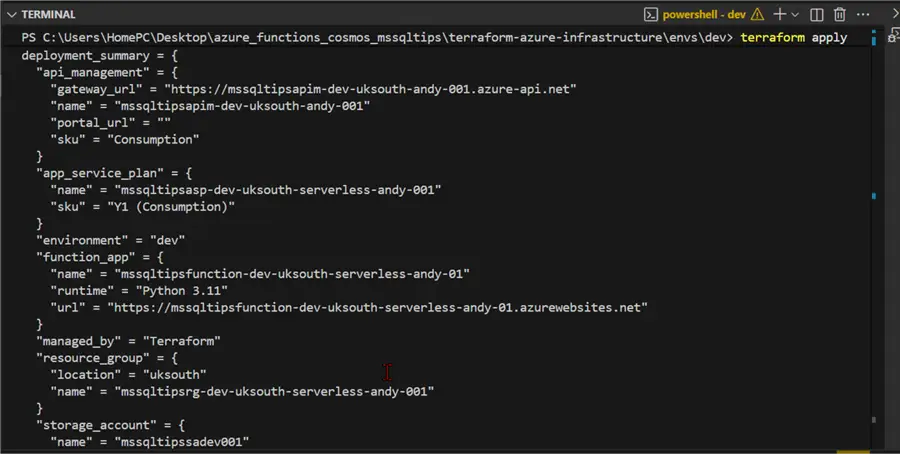
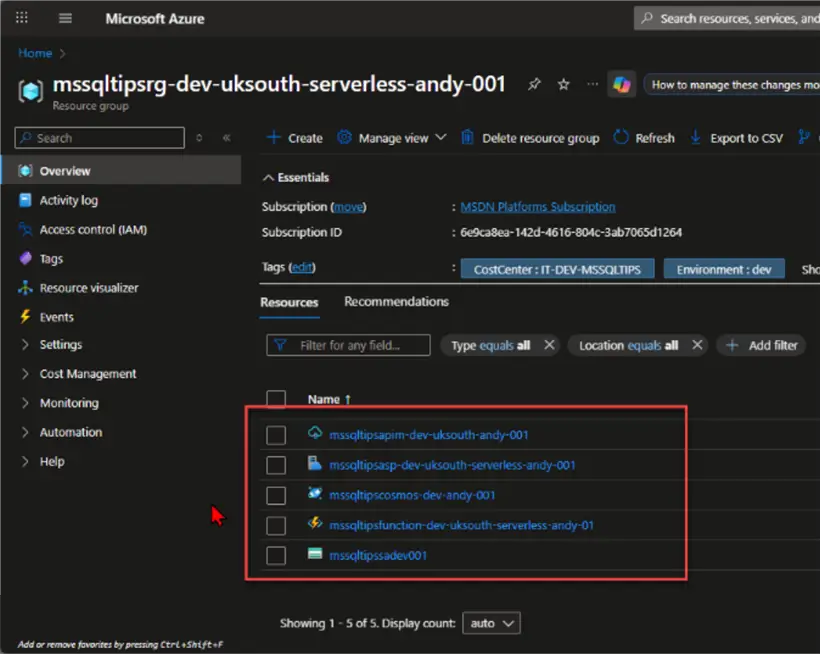
Step 3: Confirm Resource Provision
We can confirm that all the resources needed for the project are up and running.
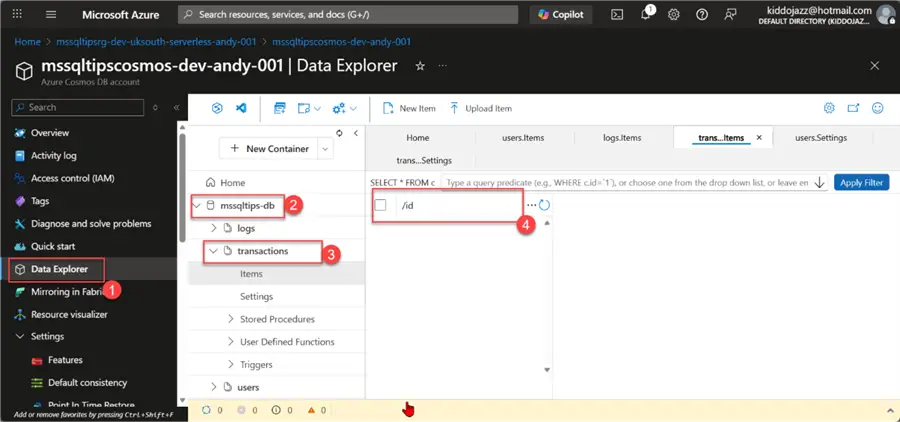
Select the Azure Cosmos DB resource created and check if the containers listed in Terraform are created as expected.
Connect Azure Functions to Azure APIM
In this section, we are going to have a step-by-step process of setting up an Azure Function as a backend to APIM.
In our VS Code, we need to create an HTTP Trigger function, which we will later deploy to our Azure Function App that we created earlier.
Step 1: Create a Function Trigger in VSCode
You can check our previous article (http triggers in Azure Function) on how to set up the trigger in VSCode.
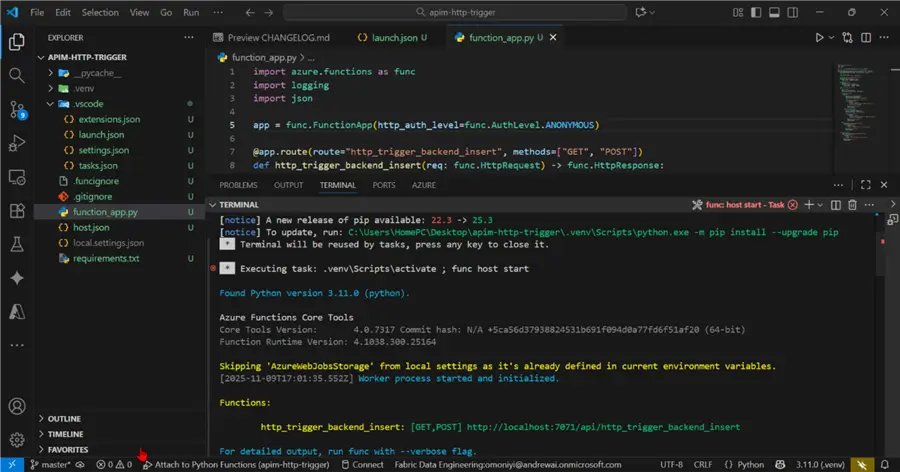
With the local URL generated, we can test in our browser.
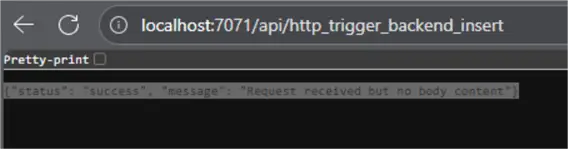
NOTE: For production purposes, you must update the URL so it works properly when deployed to the Azure portal.
https://<APP_NAME>.azurewebsites.net/api/<FUNCTION_NAME>Step 2: Deploy to Azure Portal
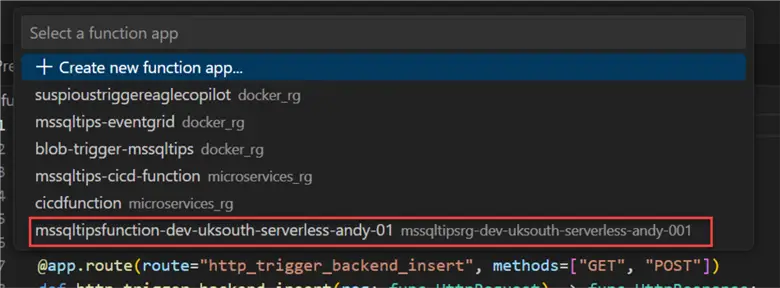
In your VSCode, click on the Deploy Azure Functions to Portal, then select the Function App you want to deploy.
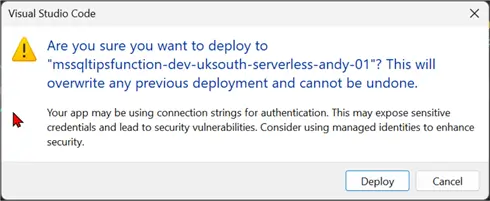
You will be prompted to confirm your confirmation.
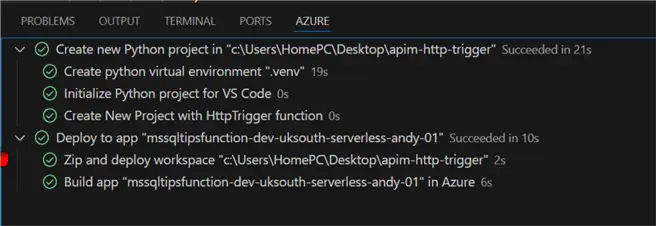
Connect Azure Functions to Azure APIM Backend
To connect the deployed Azure Function to Azure APIM, we need to follow the steps below.
Step 1: Create API Function
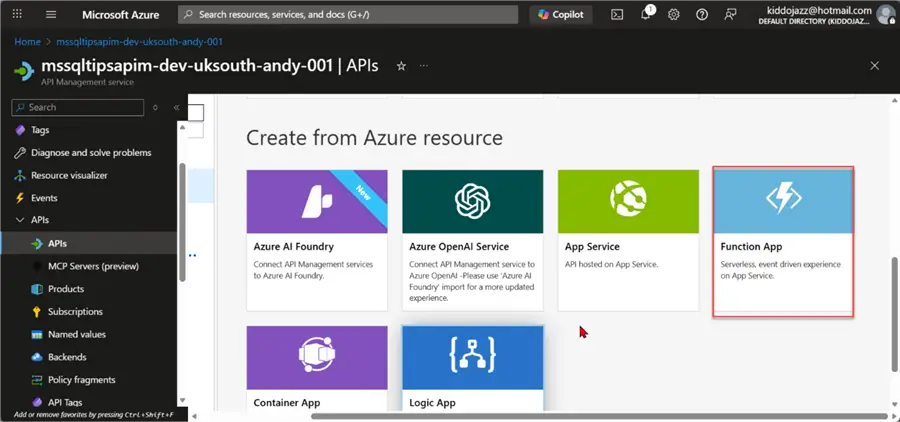
From the Azure Portal, navigate to the Azure APIM resource we created and select the APIs tab. In the Create from Azure Resource, select Azure Function App.
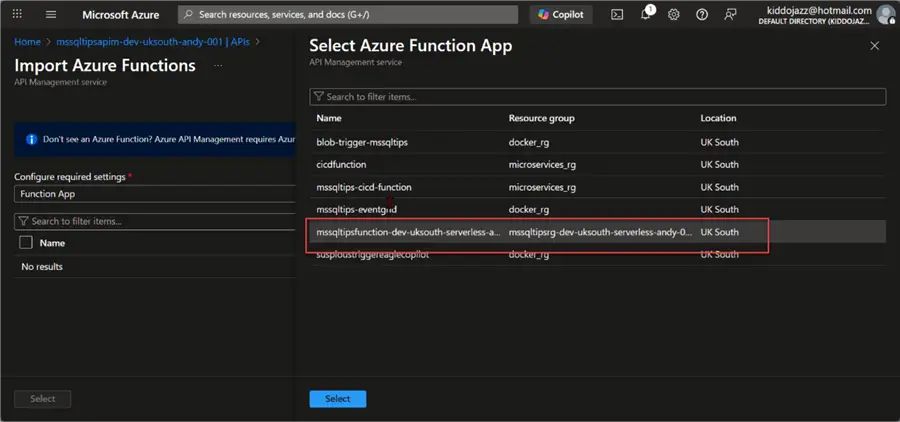
In the new window, select the Azure Function App we deployed in our previous section.
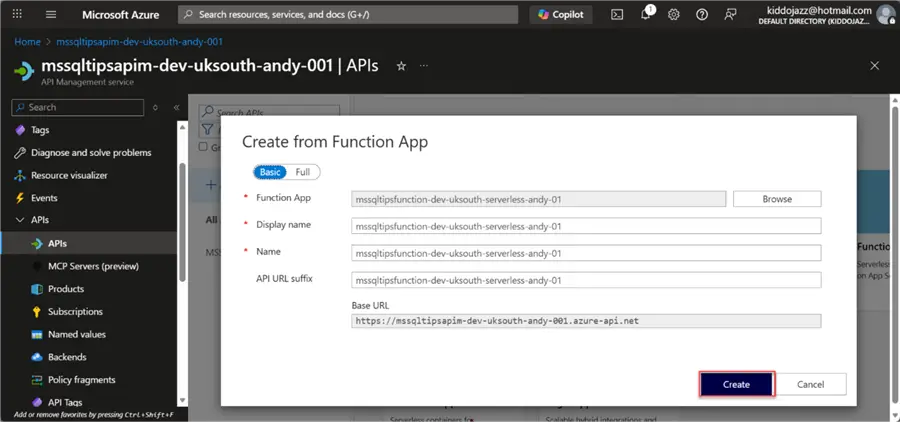
Step 2: Basic Configuration
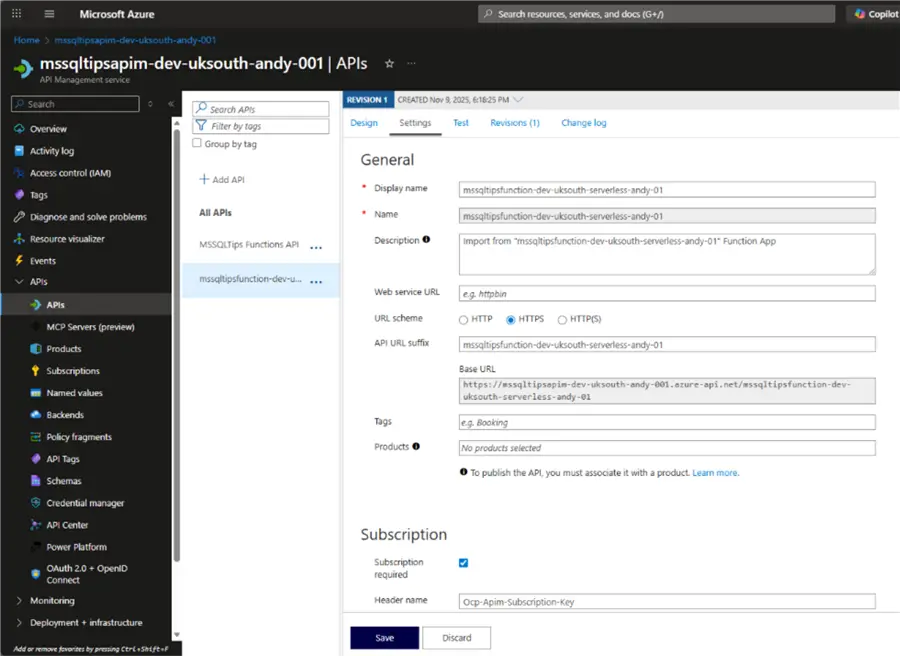
With the Azure Function being selected we will be using the Basic settings for this article. Copy the Base URL and fill in all other information.
Step 3: Test APIM
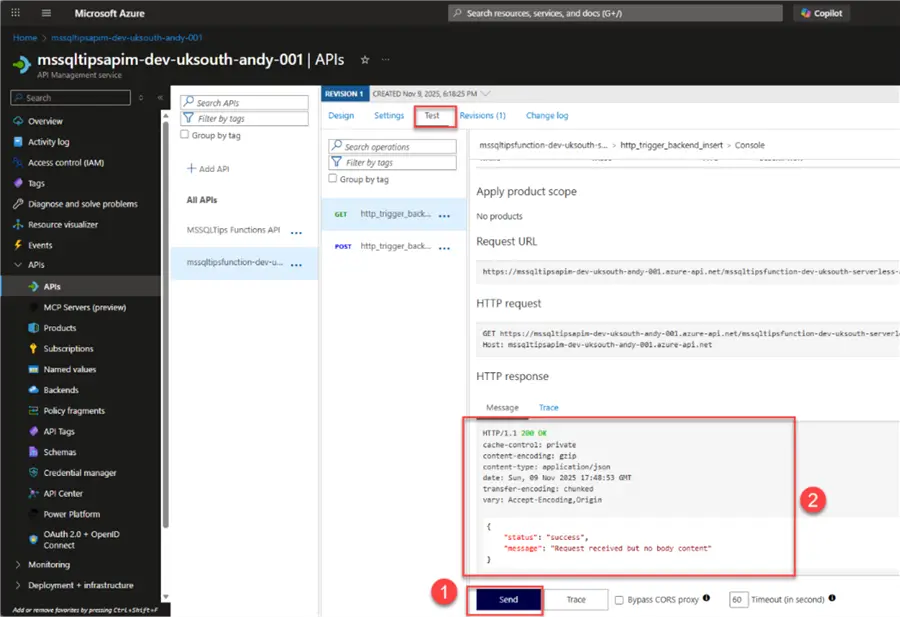
You can test the APIM to confirm if it is working. You should get the message: “Request received but no body message”.
Build Solution
From our project definition, we have a user who sends data to Azure APIM, which is then received by Azure Functions and inserted into Cosmos DB.
Azure Key Vault
The Microsoft Azure Key vault is Microsoft Azure service for storing and managing sensitive information used by applications either for cloud or on-premises.
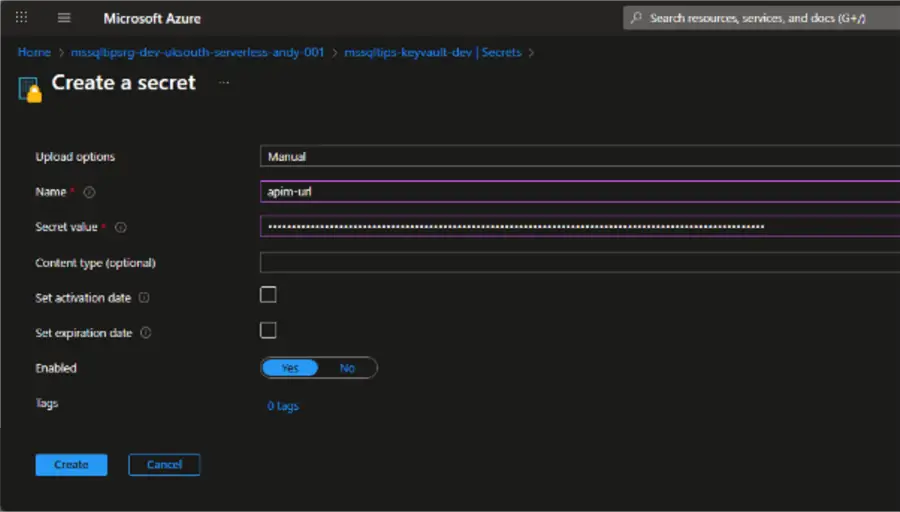
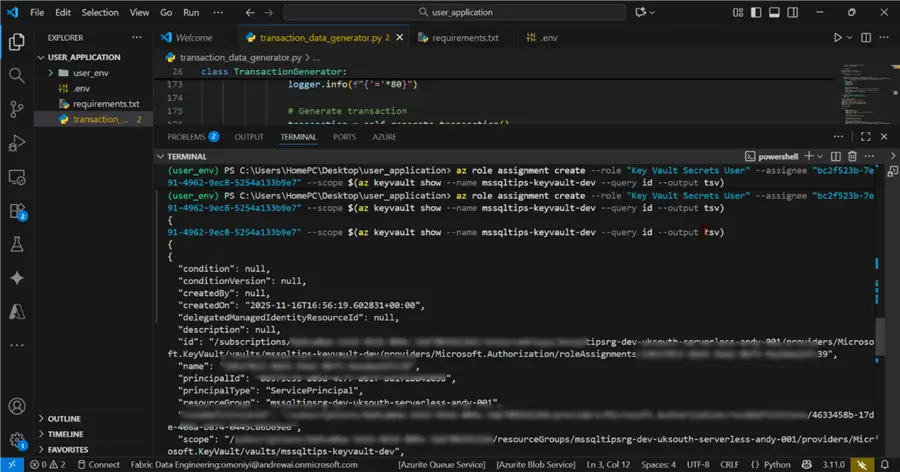
To make our application more secure, all credentials will be stored in Azure Key Vault for security purpose and we will use .env files.
For the user Application all credentials will be stored in Azure Key Vault.
User Transaction Micro-Service Application
For our transaction micro-service, we will be simulating a real-world mobile application where users interact with the front-end, and data is sent to the Azure APIM and gets collected by the Azure Functions (backend).
Filename: transaction_data_generator.py
Backend Azure Functions
From our previous section, we showed how we connected Azure Functions to Azure APIM as the backend.
The Azure Function is meant to capture the Payload from the user Application and insert to the Azure Cosmos DB container.
Update Azure Function Credentials
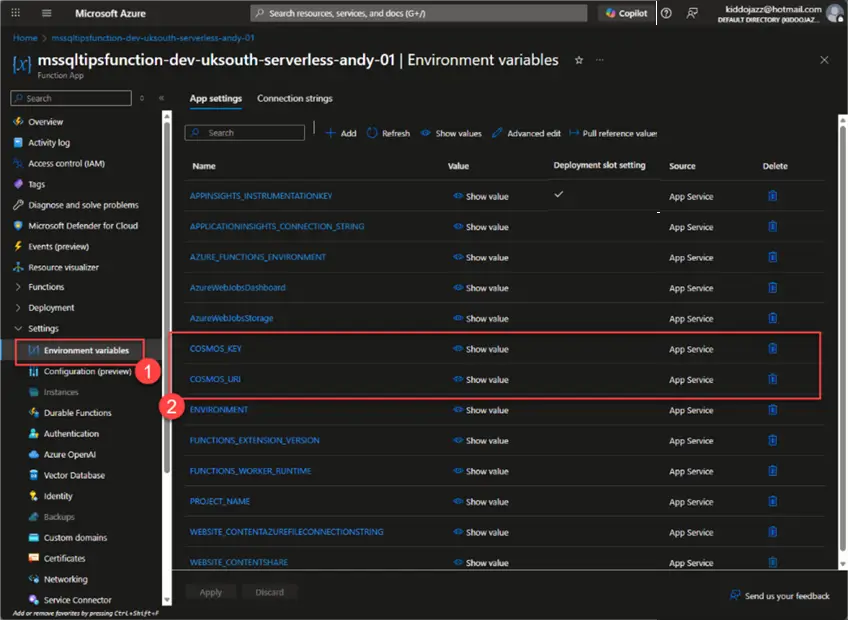
In the Azure Function Portal add the following variables as they will be needed to connect to Azure Cosmos DB for the creation of records.
In Azure Function Logs, you will notice the records that are being collected from the frontend application.

Confirm Data Insertion in Cosmos DB
In Azure Cosmos DB, click on the Data Explorer and select the database and container name. You will see all collections with their unique ID for the different transactions.

For further analysis, you can write a SELECT statement to view the data.

Here is the query output to get a count.

Here is query output for specific status values.

Cosmos DB Trigger Notification
For the final part of the project, we need to set up a notification system for Azure Cosmos DB to send out notifications to a dedicated Slack channel based on the following translation statuses = [‘pending’, ‘failed’, ‘cancelled’].
File: Cosmostrigger
From the image below, we can test the Cosmos DB trigger based of the transaction container.

This is the Azure Functions Logs after deployment.
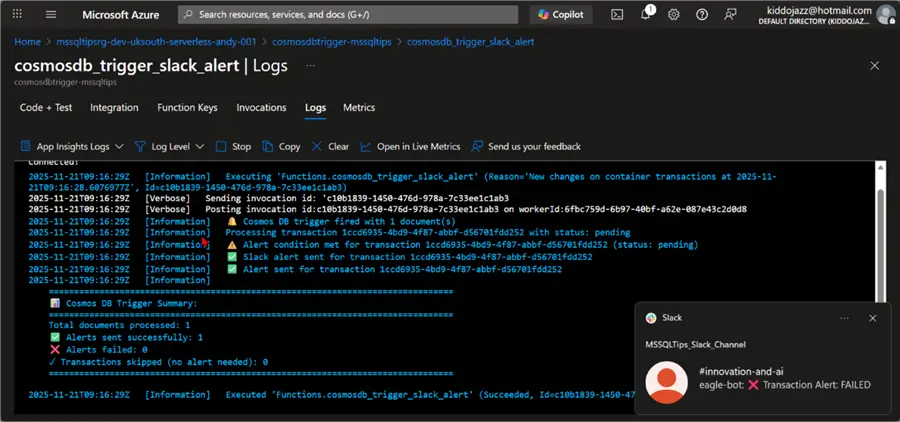
We can also confirm the Slack notification to the dedicated channel.

Key Takeaways
- Developers utilize NoSQL databases like Cosmos DB for transactional applications using an event-driven approach.
- This guide outlines creating a cosmos db event trigger with Azure Functions and Terraform to manage failed transactions.
- Key steps include provisioning resources, configuring Azure API Manager, and connecting Azure Functions to APIM.
- The project involves setting up notifications for specific transaction statuses to alert teams via Slack.
- After implementing the trigger, users can verify successful data insertion and notifications in Cosmos DB.
Conclusion
In the article we gave a detailed breakdown of provisioning Azure Resources using Terraform for Azure Cosmos DB Trigger. We had an application that sends data to Azure APIM endpoint which was later received at the backend by Azure Function and inserted to Azure Cosmos DB Transactional container.
A Cosmos DB trigger was set to capture issues with the transaction statuses = [‘pending’, ‘failed’, ‘cancelled’]this the sends notification to a dedicated Slack channel for immediate response.
Next Steps
- Download the code for this article:
- Azure Function Event Grid Trigger Example and HTTP Post Request
- Microsoft Azure Functions: The Serverless Powerhouse
- Understanding Azure Functions for Microservice Architecture

Temidayo Omoniyi is a Microsoft Certified Data Analyst, Microsoft Certified Trainer, Power Platform Developer, Azure Data Engineer, Content Creator, and Technical writer with over three years of experience.
Currently, he works as a data and business intelligence analyst for a training and consulting company in Lagos, Nigeria.
Temidayo enjoys creating educative content on YouTube, LinkedIn, Twitter, and other online platforms. He loves sharing his knowledge and writing about systems, applications, tools, and processes.
Apart from training, writing, and coding, you will find him watching and reading Anime. He is a big fan of DC Comics.
- MSSQLTips Awards: Trendsetter (25+ tips) – 2025 | Author of the Year – 2023, 2024


