By: Hesham Saad | Comments | Related: > Sharepoint Design
Problem
Many SharePoint portals require extending SharePoint OOB (Out Of The Box) Web Parts. This can lead to the development of custom coded Web Parts. This can be achieved by customizing and converting SharePoint Custom List View Web Parts into XSLT Data View Web Parts.
Solution
This solution uses an XSLT DataView.
XSLT "Extensible Stylesheet Language Transformations" is a language for transforming XML documents into other types of documents , such as HTML or XML. It is designed for use as part of XSL which is a style sheet language for XML and also designed to be used independently of XSL.
A DataView is a live, customizable view of a data source that leverages Microsoft's ASP.NET technology that presents views of data that can you filter, sort, or group. You can also change the layout, apply styles or apply conditional formatting in a WYSIWYG environment. A DataView can display data from a wide variety of sources and be modified by using Office SharePoint Designer. These include:
- Databases queries.
- XML documents.
- Web services.
- SharePoint list & libraries.
- SeServer - side scripts.
So, a combination between XSLT and a DataView is a great way to modify the look and feel of displayed data in a SharePoint site in order to match your requirements. This will save time and help many non-SharePoint developers users to enhance the look and feel of their Web Parts without writing a single line of code.
Part (1) covered how to prepare for "Converting a SharePoint Custom List View WebPart into an XSLT Data View WebPart" by creating the custom list and displaying a page.
In this article (Part - 2), you will see how to create a simple XSLT DataView for a SharePoint custom list by following the steps below:
Customizing & Converting the "MSSharePointTips News" ListView WebPart into "XSLT DataView" WebPart :
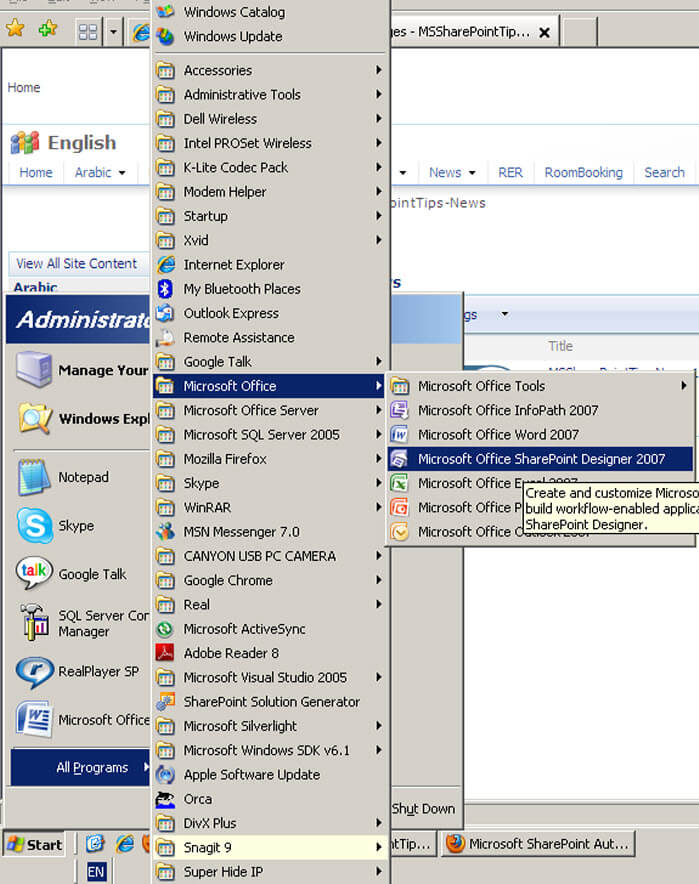
Click on the "Start" button, then Select "All Programs", "Microsoft Office", then "Microsoft Office SharePoint Designer 2007":
- Click on "File", "Open Site".
- Then type your site URL
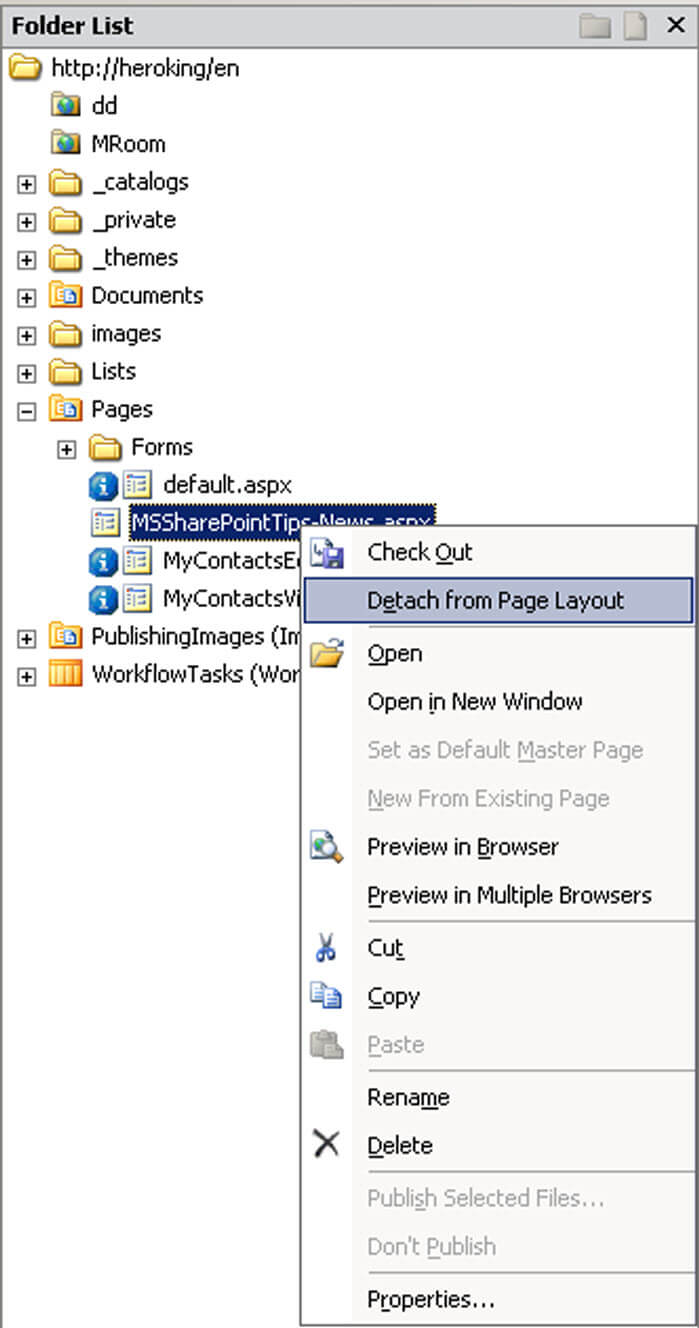
- Then expand the "Pages" directory and right click on the "MSSharePointTips-New" page and select "Detach from Page Layout"
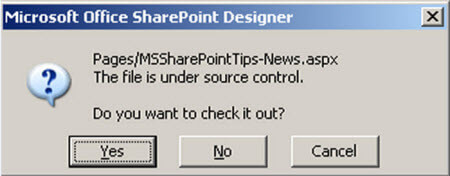
- Then click the "Yes" button for confirmation, then "Yes" again for check out your page
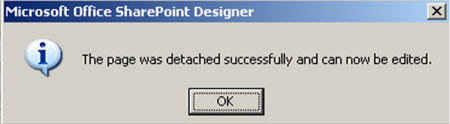
- Wait until receiving a confirmation message that the page was detached successfully and can now be edited :

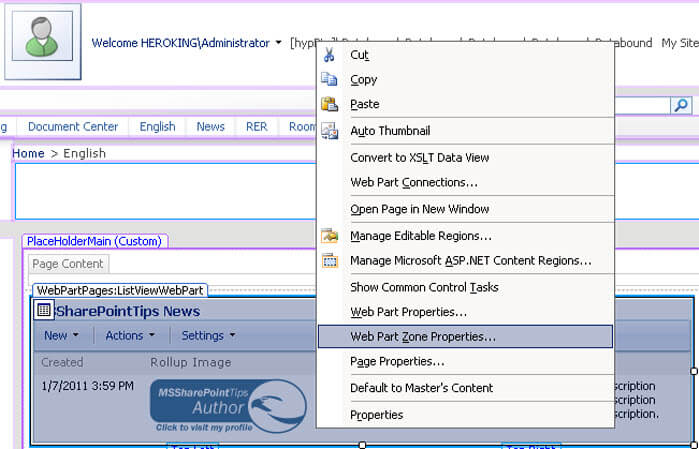
After displaying the detached "MSSharePointTips-News" page , Right click on the "MSSharePointTips News" ListView Web Part then select "Web Part Zone Properties" :
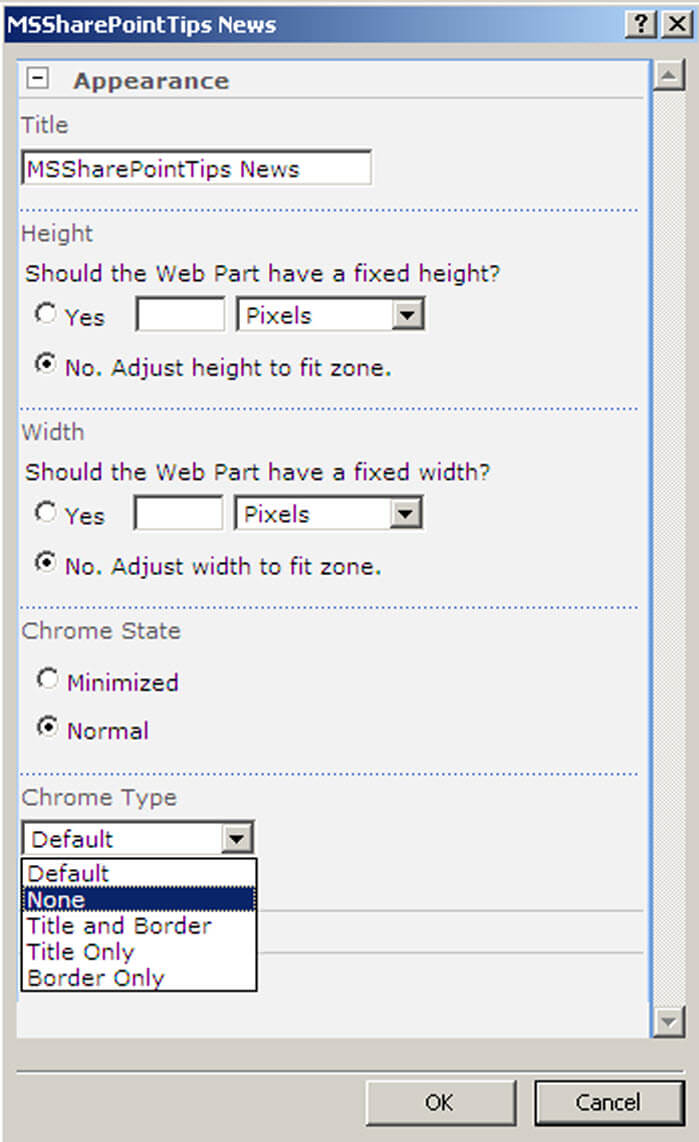
Select "None" for "Chrome Type" under the "Appearance" section in order to remove/hide the "MSSharePointTips News" title from the ListView Web Part:
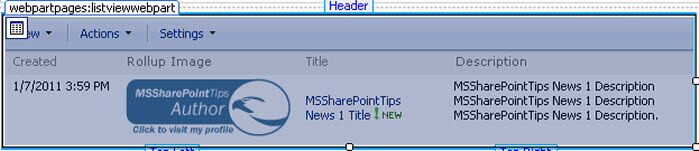
Viewing the "MSSharePointTips News" ListView WebPart after removing/hiding the "Title" :
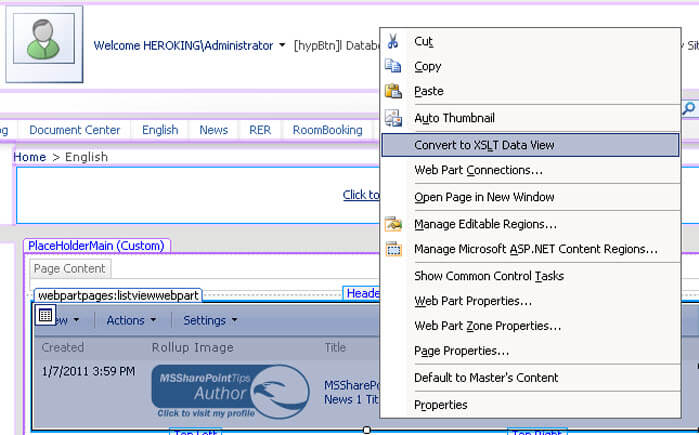
Right click on the "MSSharePointTips News" ListView WebPart, then select "Convert to XSLT Data View":
Viewing the converted "MSSharePointTips News" ListView WebPart into an "XSLT DataView WebPart" :

(Note: The list toolbar "Menu" rendered incorrectly holds "Error Creating Control" in the design view. So if you need to remove the toolbar and also the paging in order to display all list items):
Right click on the converted "DataFormWebPart" then select "Show Common Control Tasks ('Common Data View Tasks') ":
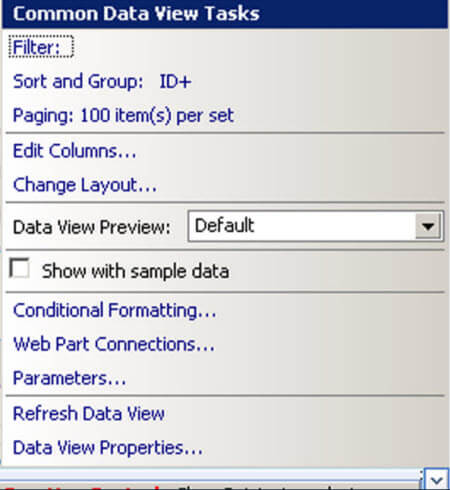
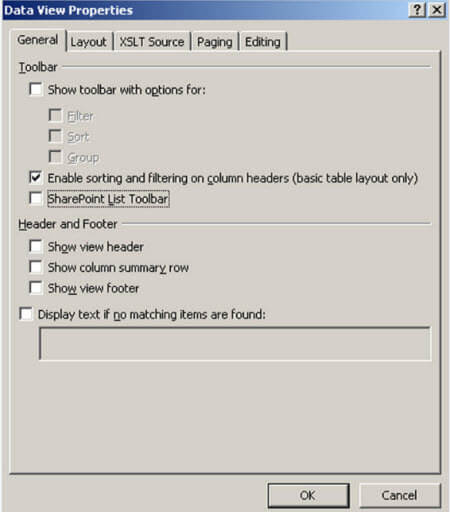
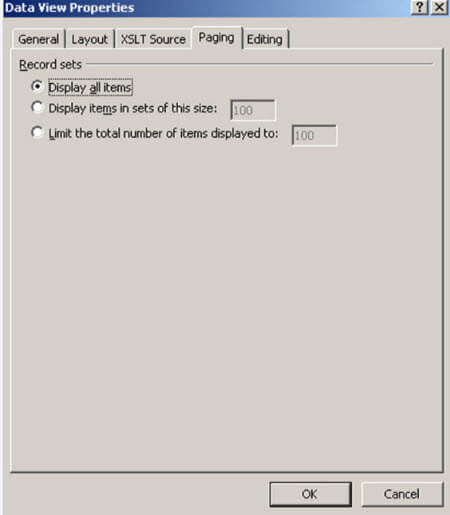
Uncheck "SharePoint List Toolbar" under "General" tab and Select "Display all items" under "Paging" tab:
Viewing the converted "DataFormWebPart" after removing the toolbar & paging:

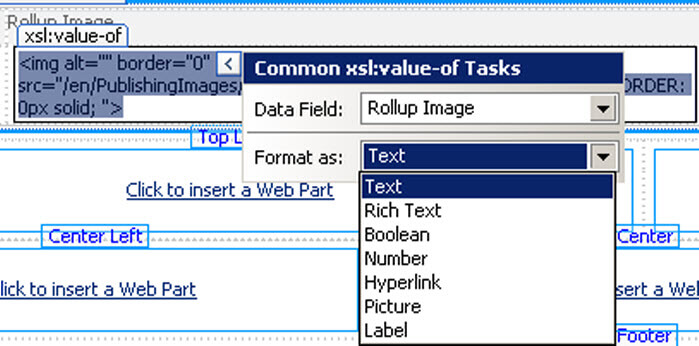
(Note : The "Rollup Image" field displayed as HTML tags "for example: Text in the runtime". Although it should be displayed as an image, in order to fix this, you have two options:
Either, just click on the drilled (Context) down menu for the generated HTML Rollup Image tag and format as : "Label" or "Rich Text" ):
Or, select the Rollup Image field to highlight it, then switch to the code view, then add " disable-output-escaping="Yes" "tag to the XSL".
Here is the result after formatting the Rollup Image field :

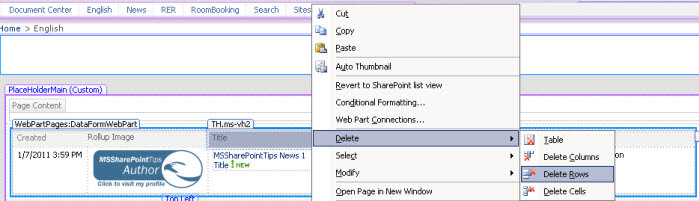
Let's remove the columns headers for enhancing the look and feel by right clicking on and column header cell then select "Delete", then "Delete Rows" :
Viewing the converted "DataFormWebPart" after removing the columns headers row:

You can apply some enhancements on the look and feel and layout by drag & drop, merging, adding and deleting cells, ... etc then save the page :

Here's the result after enhancing the look and feel for the converted "DataFormWebPart" in the page:

Next Steps
- Converting SharePoint Custom List View WebPart into XSLT Data View WebPart - Part 1.
- Customizing List Views with XSLT Transformations in SharePoint Designer 2007.


About the author
 Hesham Saad
This author pledges the content of this article is based on professional experience and not AI generated.
View all my tips
