By: Koen Verbeeck | Comments (4) | Related: > Encryption
Problem
I'd like to write data to a table using SQL Server Integration Services where some of the columns are encrypted with the new Always Encrypted feature of SQL Server 2016. However, I constantly get errors. How can I solve this issue?
Solution
SQL Server 2016 preview
At the time of writing, SQL Server 2016 is still in preview (currently CTP 3.2 has been released). This means functionality or features of the Always Encrypted or Integration Services might change, disappear or be added in the final release.
Test Set-up
For an introduction to Always Encrypted, check out the tip SQL Server 2016 Always Encrypted by Aaron Bertrand. Also, this tip uses the same test set-up as the tip Reading Always Encrypted Data with Integration Services 2016. I recommend you read that tip first, as it outlines the various steps needed to interact with data encrypted by Always Encrypted. To summarize, you need:
- A connection to be made with the additional connection property column encryption setting=enabled
- The column master key, which was created in the database, to be imported into the local certificate store
We will use the same table, Sales.CustomerPII, of the AdventureWorks2016CTP3 sample database, which can be downloaded on Codeplex. This time we will of course try to insert data into that table. The sample scripts used in this tip also use the AdventureworksDW2016CTP3 database. Also, don't forget to download the sample scripts as well, as they contain the private key file needed to interact with the Always Encrypted data.
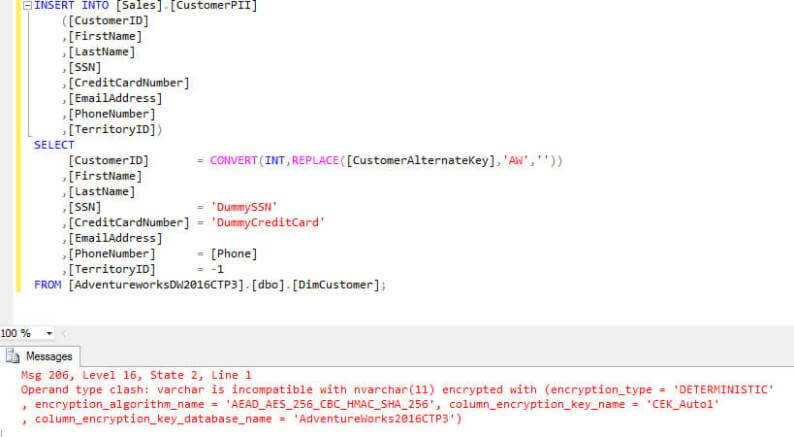
Trying to insert data using SQL Server Management Studio (SSMS) without the additional connection property will give the following error:
Even using correctly typed parameters will lead to an error, but a different one in this case:
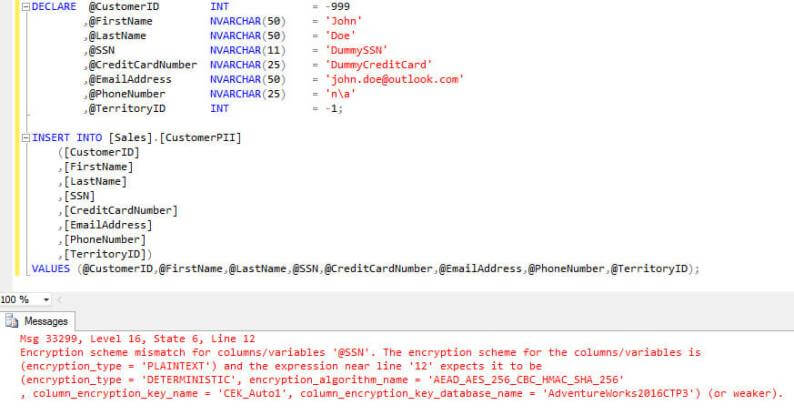
The error explains the data passed in the variables is in plain text, but SQL Server expects the data to be already encrypted. Luckily for us, Integration Services will handle that part for us.
Writing data to an encrypted table with SSIS
Using a Data Flow
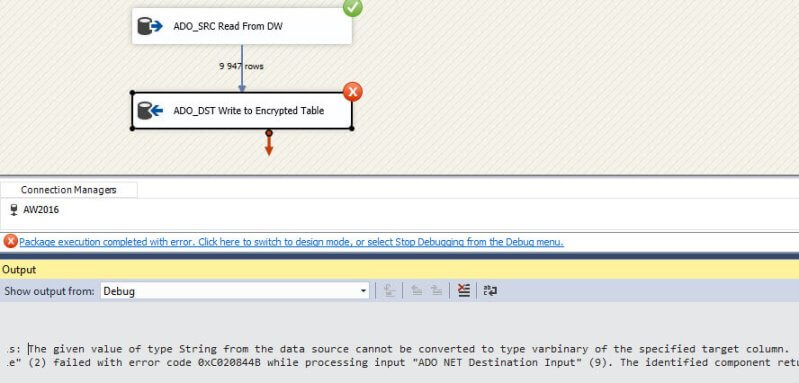
As mentioned in the tip Reading Always Encrypted Data with Integration Services 2016, only ADO.NET connection managers support the additional connection property. When it isn't specified, writing data to an encrypted table will lead to an error:
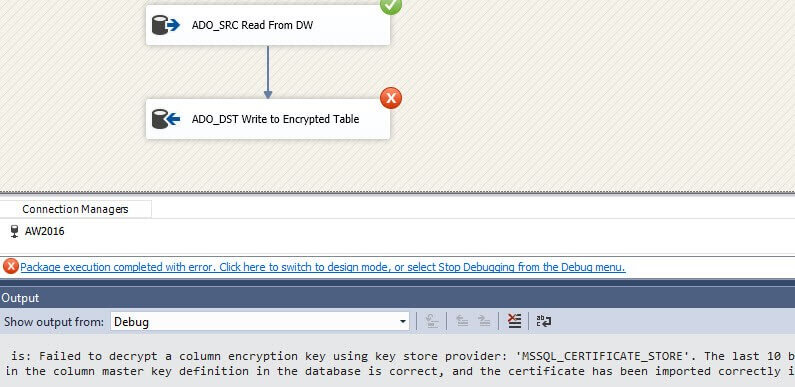
If you set the connection property Column Encryption Setting to enabled, but haven't installed the certificate, you'll get the following error:
If everything is configured correctly, we can start writing data to the table. We will use the following query to fetch the source data:
SELECT
	 [CustomerID]		= CONVERT(INT,REPLACE([CustomerAlternateKey],'AW',''))
	,[FirstName]
	,[LastName]
	,[SSN]			= N'DummySSN'
	,[CreditCardNumber]	= N'DummyCreditCard'
	,[EmailAddress]
	,[PhoneNumber]		= [Phone]
	,[TerritoryID]		= -1
FROM [AdventureworksDW2016CTP3].[dbo].[DimCustomer];
Writing data to the table is now just the same as in any other data flow. You just have to remember to use ADO.NET components instead of OLE DB.
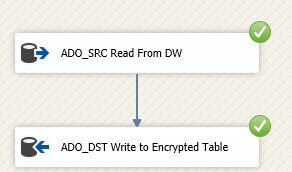

Let's verify if the rows actually made it correctly into the table. You cannot filter on the encrypted columns themselves.

When we filter on another column, we can see the rows made it to the destination table.
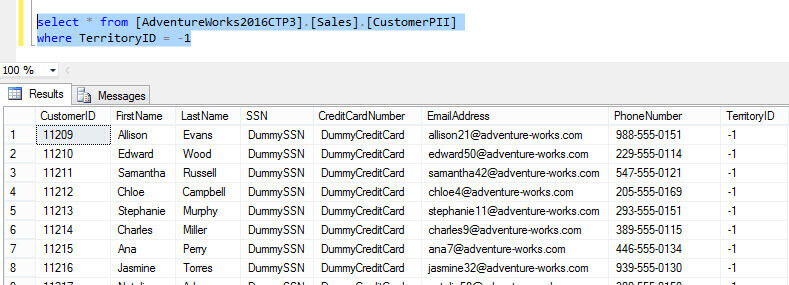
To clean-up the destination table, you can use the following SQL statement:
DELETE FROM [AdventureWorks2016CTP3].[Sales].[CustomerPII]
WHERE TerritoryID = -1;
Using an Execute SQL Task
In this section we will write data to the Always Encrypted table using an Execute SQL Task. However, we cannot use a regular SQL statement, as this will fail as demonstrated at the start of this tip. We will need a SQL statement where the values are passed in as parameters. The statement looks like this:
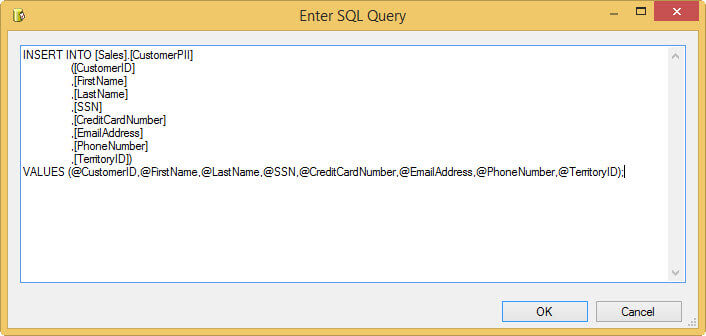
Since we're using an ADO.NET connection, we can use named parameters in the SQL script instead of question marks like in OLE DB. First we need to create variables that will hold the different values.
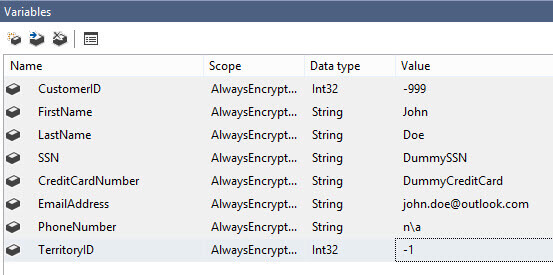
Next, map those variables against the parameters in the parameter mapping pane of the Execute SQL Task:

Let's take a look in Profiler to find out what SSIS is sending to SQL Server when the package is running. Two statements are sent to SQL Server. The first one uses an extended system stored procedure to find out if parameters are encrypted.

The second one sends the actual insert statement to SQL Server. Although the encrypted columns are small Unicode text columns, the parameters for the encrypted columns are passed as varbinary. This means the values are encrypted before they even reach SQL Server.

In SSIS, we can see that the Execute SQL Task has executed successfully. However, we can only insert one row at a time. For performance reasons, the data flow will be a better choice to insert multiple rows into a table with encrypted columns.

Conclusion
Writing data to a table with encrypted columns are straight forward: you have to import the certificate and you need to specify a connection property in the ADO.NET connection manager, just like when you want to read data. Insert data through an Execute SQL Task is a bit more complicated, as parameters must be used. This means you can only insert one record at a time.
Next Steps
- For more information on Always Encrypted, check out the tip SQL Server 2016 Always Encrypted. Also read the tip Reading Always Encrypted Data with Integration Services 2016, as it contains more specific into on how to prepare a client machine.
- You can also find extra information in the official documentation.
- Don't forget to download the sample databases and the sample scripts from Microsoft to get you started.
- For more SQL Server 2016 tips, you can use this overview.
About the author
 Koen Verbeeck is a seasoned business intelligence consultant at AE. He has over a decade of experience with the Microsoft Data Platform in numerous industries. He holds several certifications and is a prolific writer contributing content about SSIS, ADF, SSAS, SSRS, MDS, Power BI, Snowflake and Azure services. He has spoken at PASS, SQLBits, dataMinds Connect and delivers webinars on MSSQLTips.com. Koen has been awarded the Microsoft MVP data platform award for many years.
This author pledges the content of this article is based on professional experience and not AI generated.
View all my tips


