Problem
In the last tip, Step by Step Installation of SQL Server 2014 on a New Failover Cluster, we installed SQL Server 2014 on a new failover cluster. In this tip I will explain how to add SQL Server nodes to the cluster environment.
Solution
We have a two node cluster based on Windows Server 2012 R2 operating systems where we will be installing SQL Server 2014. The name of the nodes are SQL-NODE1 and SQL-NODE2. We have used MSSQLCLUSTER as the Network Name and virtual IP of 10.2XX.XX2.X5 (note: X represents a numeric value, I put X because I do not want to disclose my IP address due to security reasons). So let’s install SQL Server 2014 on node SQL-NODE2.
SQL Server 2014 Cluster Node Addition
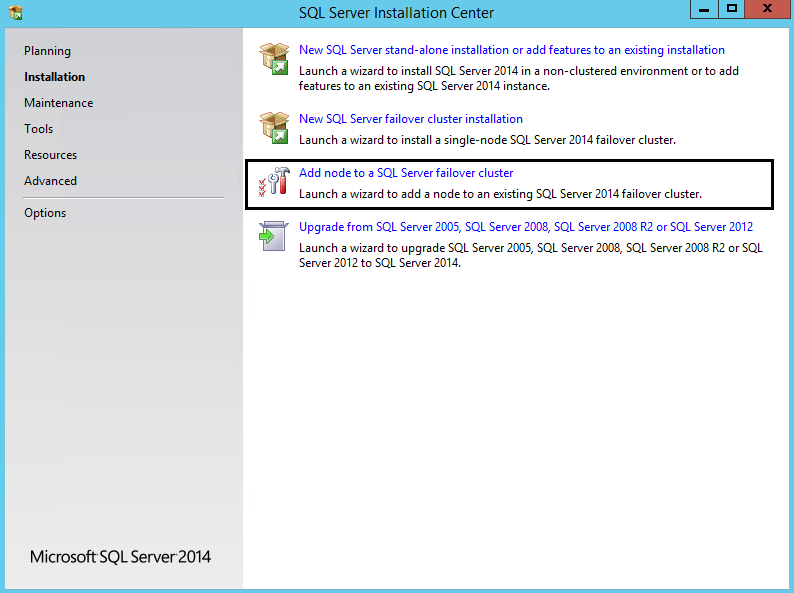
Step 1: On the new node where you want to install SQL Server, go to the SQL Server setup file location and right click on setup.exe and choose “Run as administrator”. SQL Server Installation Center will appear on your screen as shown in the below screenshot. Select the “Installation” tab on the left side and click on the third option “Add node to a SQL Server failover cluster” from the right side.
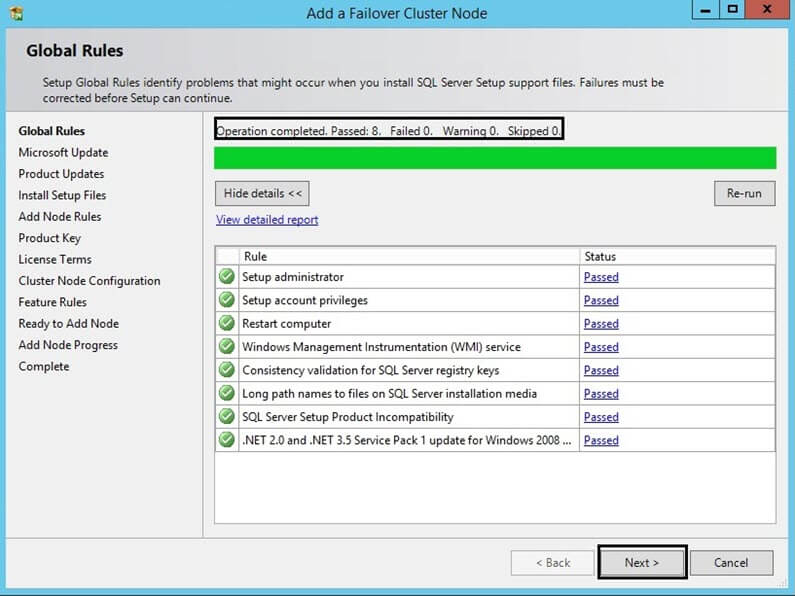
Step 2: Once you click on “Add node to a SQL Server failover cluster”, the “Add a Failover Cluster Node” window will appear as shown below. We then need to go through several screens like this when we install SQL Server 2014 on the first node. We need to click the Next button through each of these screens: Microsoft Update, Product Updates, Install Setup Files, Add Node Rules, Product Key and License Terms.
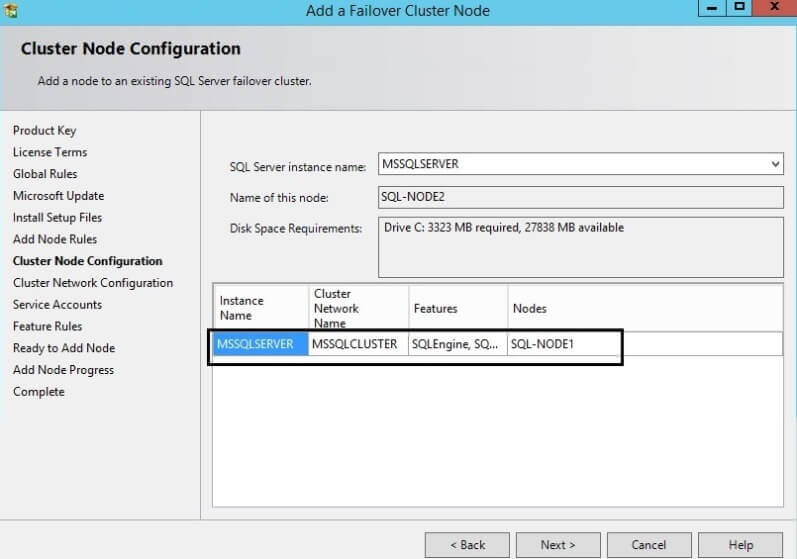
Step 3: Now SQL Server will ask you to configure the node to be added to the SQL Server failover cluster. The details about the SQL Server cluster instance which we have installed in our last tip will appear on the right. You can see the SQL Server cluster network name along with the SQL Server instance name. You can also see the features that have been installed on SQL-NODE1.
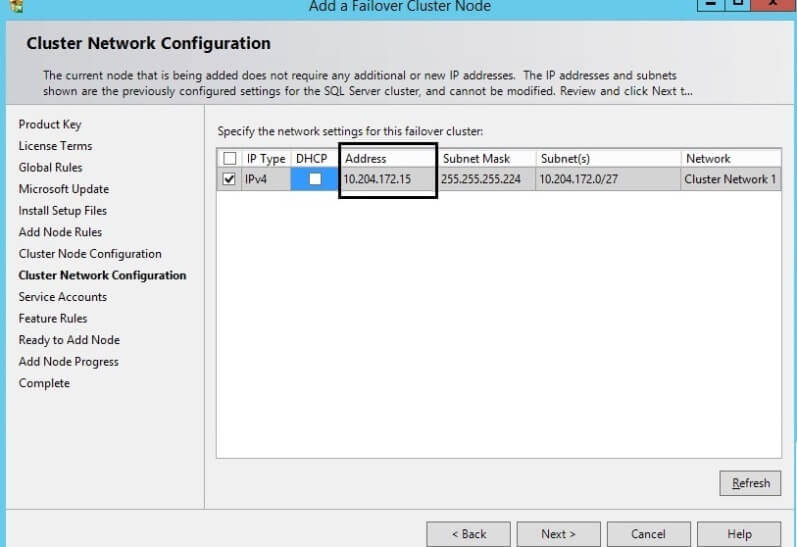
Step 4: Now click on the Next button to proceed with the installation. The next window will ask you to verify the cluster network configuration. You do not need to enter anything here, but you just need to validate the details like the SQL Server virtual IP which we used to install the SQL Server cluster. It will be same as we entered during the SQL Server cluster installation. Click on the Next button to go on to the next window.
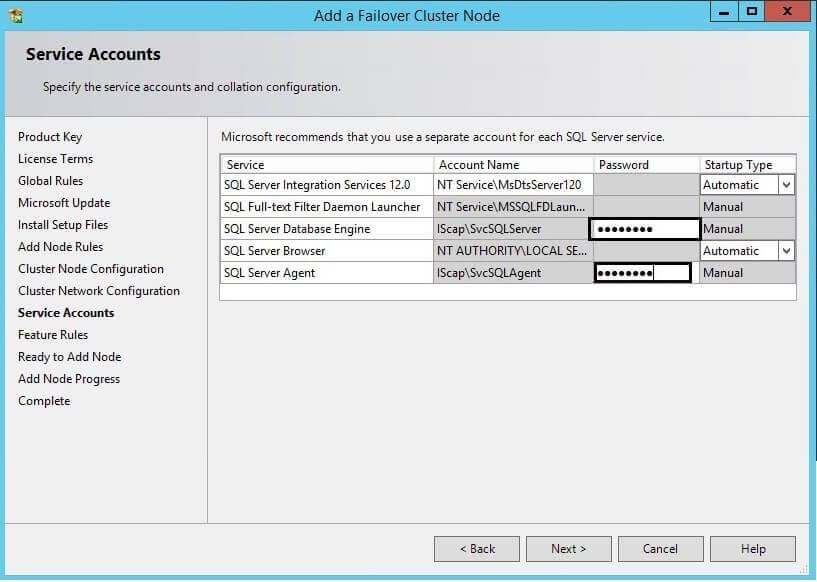
Step 5: The next window will ask you to configure the SQL Server service accounts. Enter the password of the service accounts and click on the Next button.
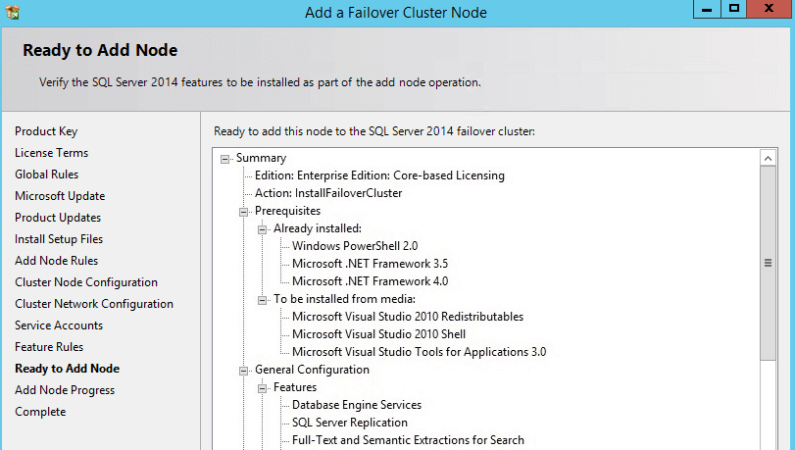
Step 6: The next window is the “Ready to Add Node” page to verify all the details as shown in the below screenshot
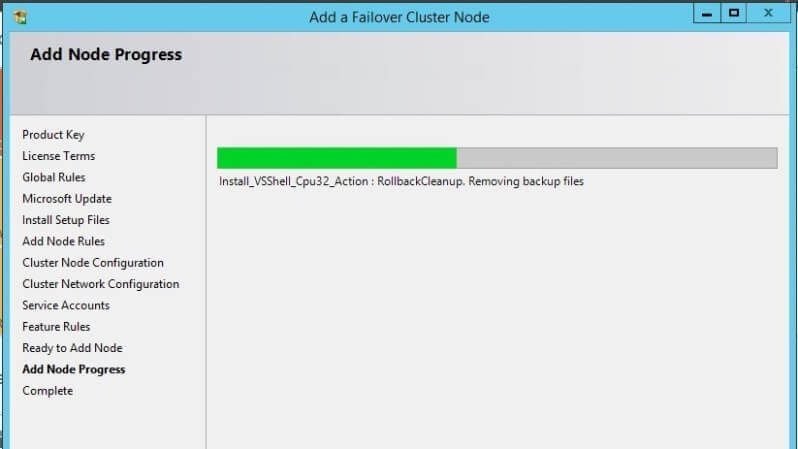
You can see the add node progress in the below screenshot.
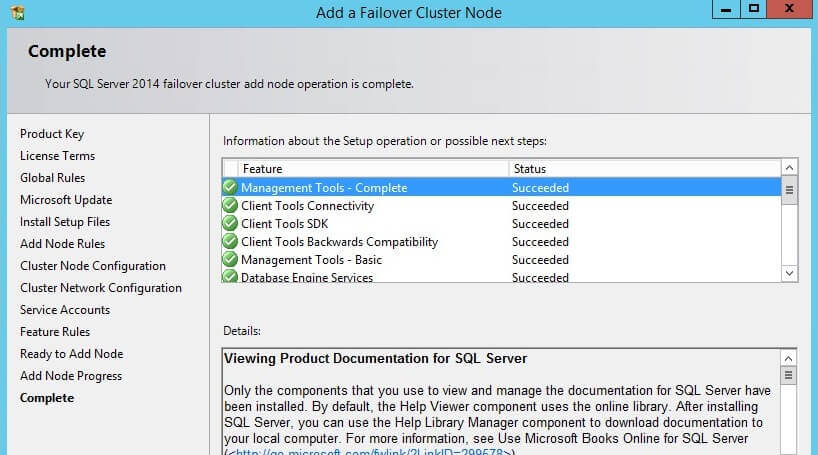
Once installation successfully completes, you will get the below screen with confirmation that all the features you have selected during the SQL Server cluster installation are successful.
Validate the SQL Server Node Addition
Now that we have added this node to the SQL Server failover cluster, we want to validate the installation by querying a DMV.
You can see the below screenshot which was taken after we installed SQL Server 2014 on SQL-NODE1. You can see there is only one entry, because this was taken before the addition of SQL-NODE2 to the cluster.
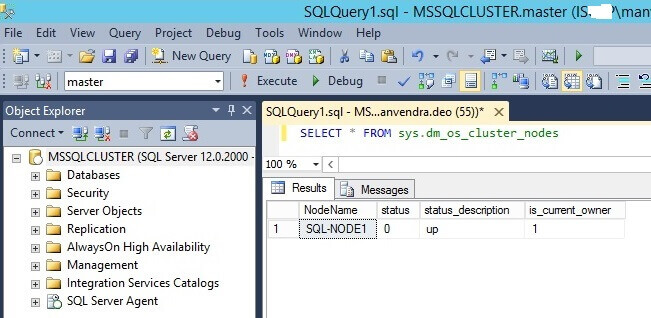
Now if we run the same query again, both nodes with their ownership show in the below screenshot.

SQL Server Failover Testing
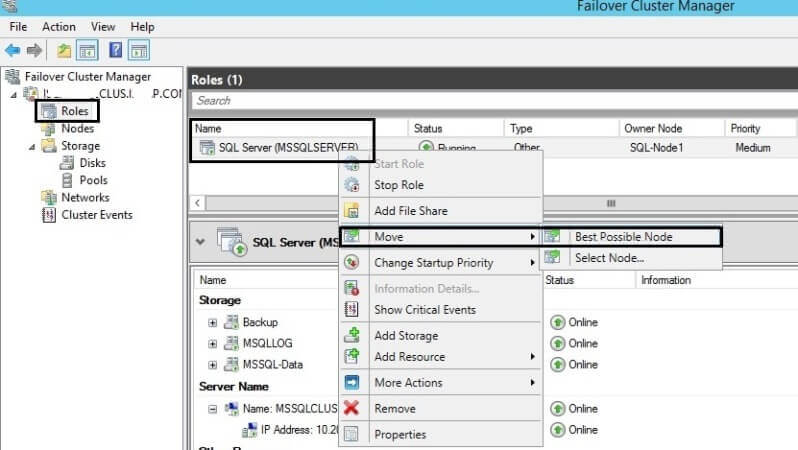
Now we will test the failover configuration to see whether the cluster is working. Before going ahead, you can see the owner node is SQL-NODE1 in the above screenshot. After failover it should be SQL-NODE2.
Launch “Failover Cluster Manager”, click on Roles from the left side pane. You can see the SQL Server instance on the right side pane with status, type, owner node and priority. Right click on the SQL Server role, click the “Move” option and choose “Best Possible Node” as shown below.
There are two options to check the owner node. One is by querying the SQL Server DMV which we did in last section or to use the Failover Cluster Manager. Let’s check both places.
You can see the owner node is shows SQL-NODE2 in the below screenshot.

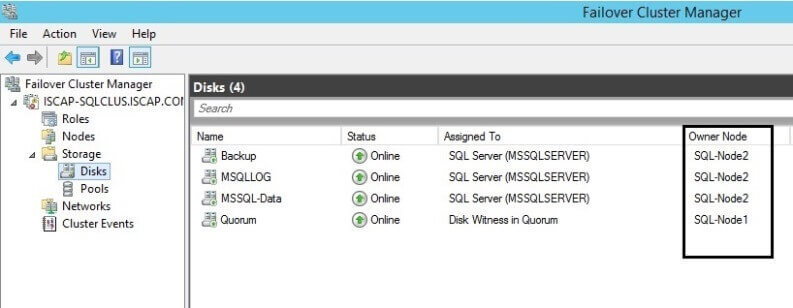
You can also see in the Failover Cluster Manager as shown below, that all SQL Server shared disks are now online for SQL-NODE2.
Next Steps
Now we have successfully installed SQL Server 2014 on two node cluster. Follow this process if you need to install SQL Server 2014 on cluster environment.
Check out the first two tips in this series:
- Validating a Windows Cluster Prior to Installing SQL Server 2014
- Step by Step Installation of SQL Server 2014 on a New Failover Cluster
Read more SQL Server Clustering tips here

Manvendra is a passionate database lover currently working as a Technical Architect at one of the top MNCs. He has extensive experience on all versions of SQL Server since 2000 and has built Big Data skills. He has lead projects on the following database features: Database Mirroring, Always ON, Replication, Log Shipping, Geo-Clustering and Performance Tuning and delivered many SQL Server projects on consolidation, upgrades, heterogeneous replication, HA / DR solutions, automation and major performance tuning projects. You can also follow Manvendra on his blog, Twitter, LinkedIn and Facebook.
- MSSQLTips Awards: Champion (100+ tips) – 2018 | Author Contender – 2015-2018, 2021-2022