By: John Miner | Comments (6) | Related: > Azure Backup and Restore
Problem
Many small and mid-size companies are performing backups of SQL Server databases using T-SQL and saving these backups to network attached storage (NAS). Due to limited disk space on-premises, a select number of days are kept available online for point in time restores. For instance, a company might keep 60 days of full and transaction log backups. As days pass, a sliding window is used to remove old backups and add new backups.
How can we keep a longer rotation of SQL Server backups in the cloud without major changes to our current processes?
Solution
Microsoft introduced Azure Cool Blob Storage in April 2016. See this article for details. The cost of this storage is pennies per gigabyte per month and this can allow us to store SQL Server backups in the cloud.
Along with the Azure blob storage, Microsoft provides the IT professional with the AzCopy command line utility. This utility can be used to copy files from on-premises folders to in-cloud blob storage. We can leverage this tool to schedule periodic uploads of backup files to Azure Cool Blob Storage.
Business Problem
Our boss has asked us to investigate the steps involved to leverage Azure Blob Storage for extending the number of days that backups can be retained. We are going to implement the following proof of concept (solution).
- Create an Azure Virtual Machine running SQL Server 2016 Developer edition.
- Deploy the [MATH] database which can be used to discover prime numbers.
- Search blocks of increasing prime numbers on a job schedule.
- Automate disk backups using Ola Hallengren scripts.
- Create both a Cool and a Hot Azure Blob Storage account.
- Use the AzCopy utility to copy on-premises backup files to Azure Cool Blob Storage.
- Use the AzCopy utility to copy files between different storage accounts.
Azure Virtual Machine
This tip will be building upon the foundation that was laid out with other tips I wrote.
I assume you have an active Azure Subscription with money to spend and you know how to create a Azure Virtual Machine loaded with the SQL Server 2016 Developer image. If you do not know how to do this task, please see my prior tip on setting up a test machine in Azure. It is always important to setup email alerts when running SQL Server Agent Jobs. Otherwise, how do you know when a job fails? This tips expects you to know how to setup the SendGrid email service from the Azure Market Place. See this prior tip for full details.
The image below shows the two Azure objects pinned to the dashboard. You should have similar objects in your environment.

We should log into our new server so that we can create a user defined database.
User defined database
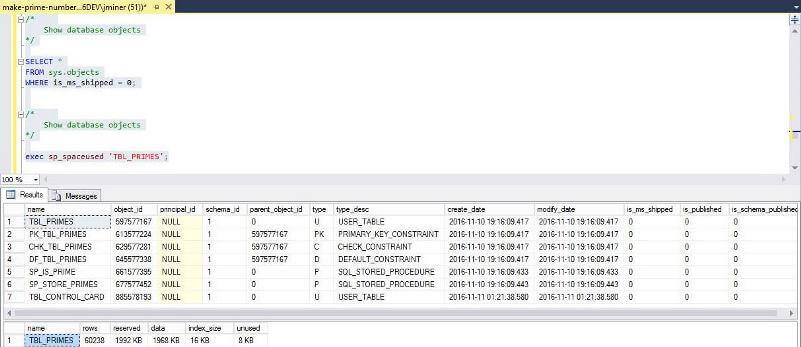
The MATH database contains the prime numbers from 2 to N. The value of N is constantly increasing each time the scheduled job is executed. The TBL_CONTROL_CARD table contains the last number checked for being prime. The SP_IS_PRIME stored procedure uses a brute force division algorithm to determine if a number is prime. Any positive results are stored in the TBL_PRIMES table. Last but not least, the SP_STORE_PRIMES stored procedure checks numbers X to Y as being prime.
The image below shows the objects that make up the MATH database. Use the following T-SQL script to create your own version of this database on your test server.
I am assuming that a Standard_DS2 image was chosen from the azure gallery when crafting the azure virtual machine. This is a best practice for small production servers. As a default, this image has a F:\ drive for user defined databases. If your image is different, just modify the CREATE DATABASE statement to use a valid OS drive and directory.
User Defined SQL Server Agent Job
The purpose of this user defined job is to add data to the MATH database. This database should be in FULL recovery mode. If it is not, please change it before executing this job. In short, adding data to the TBL_PRIMES table will produce new transaction log entries and increase the overall full backup size.
The job calculates prime numbers in batches of 250,000 numbers at a time. Please schedule the job to run every 15 minutes. The T-SQL code below is the only step in the job.
/*
 Sql Job -- Math Fun: Calculate Primer Numbers
*/

-- Calculate prime numbers
DECLARE @THE_LOW_VALUE [BIGINT];
DECLARE @THE_HIGH_VALUE [BIGINT];

-- Low & High water marks
SELECT @THE_LOW_VALUE = [MY_VALUE] FROM [DBO].[TBL_CONTROL_CARD];
SELECT @THE_HIGH_VALUE = @THE_LOW_VALUE + 250000 - 1;

-- Start the process
BEGIN TRANSACTION

-- Run the calculation
EXEC SP_STORE_PRIMES @THE_LOW_VALUE, @THE_HIGH_VALUE;

UPDATE [DBO].[TBL_CONTROL_CARD]
SET  [MY_VALUE]  =  @THE_HIGH_VALUE + 1;

-- End the process
COMMIT TRANSACTION;
Scheduled SQL Server Backups
I am a big fan of the Ola Hallengren maintenance scripts. A fellow data platform MVP created three T-SQL routines to perform backups, check integrity and optimize indexes. Please check out his website for full details.
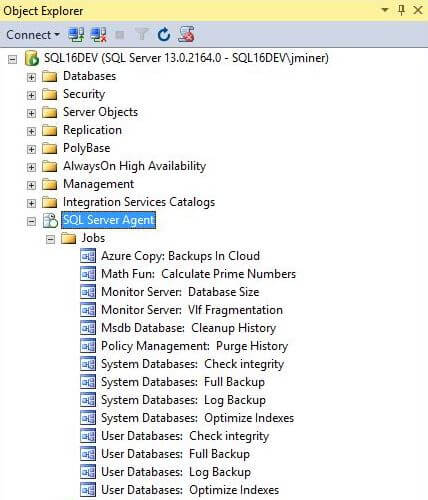
The cool thing about this solution is that I can backup all the user defined databases with a single T-SQL call. The same can be said with system databases. I usually split system database jobs away from user defined database jobs since they differ widely in size and usage. The image below shows that each database type has a daily full backup, hourly transaction backup, weekly integrity check and weekly index optimization job.
At this point, you should have the "Math Fun: Calculate Primer Numbers" job executing every 15 minutes. Manually execute a FULL backup for the user defined and system databases to start the restore chain. Make sure the LOG backups are executing every hour. As a final result, we will want a "Azure Copy: Backups In Cloud" job to copy our files to Azure Cool Blob Storage for a longer retention period. Stay tuned for more details below on how to make that happen.
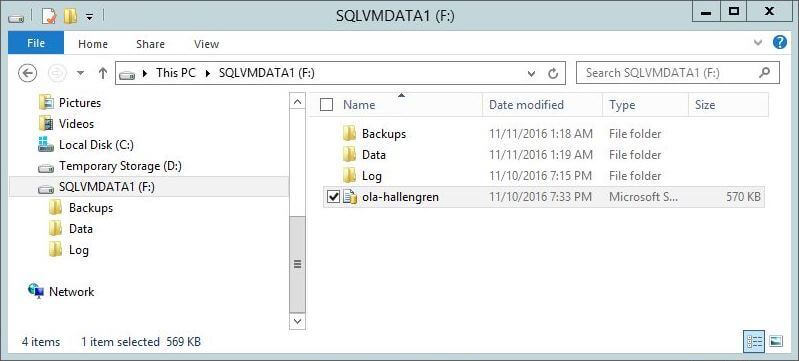
To recap, our current solution provides us with a changing database which results in new full and log backups every day and every hour respectively. Check out the F:\backups directory for these newly created files.
Azure Blob Storage
I assume you know how to create resource groups, storage accounts and storage containers in Microsoft Azure using PowerShell. For a refresher on these techniques, please see my prior article on this subject. If you are an expert with this topic, just execute the following script to create the storage objects.
For this solution, please create a resource group named rg4backups in the East US 2 region using your chosen subscription.

We continue to define a storage account using the New-AzureRmStorageAccount cmdlet. However, two key parameters need to be specified to leverage this new blob storage type.
By default, the -Kind parameter is set to standard "Storage". This means containers, tables, queues and shares can be defined inside this space. To use the new low cost storage type, pass "BlobStorage" as the parameter. Only containers can be defined inside this space. Next, the -AccessTier parameter specifies if the storage is HOT or COOL in nature.
The PowerShell script below creates a cool storage account named sa4coolback that is using Standard Geo-Redundant Storage (GRS). The Azure storage service automatically choose the secondary location since it was not specified.
# Create new (cool) storage account
New-AzureRmStorageAccount –StorageAccountName "sa4coolback" `
  -ResourceGroupName "rg4backups"  -Location "East US 2" `
  -Type "Standard_GRS" -Kind "BlobStorage" -AccessTier "Cool"
The output below shows the storage account with a primary location in East US 2 and a secondary location in Central US.
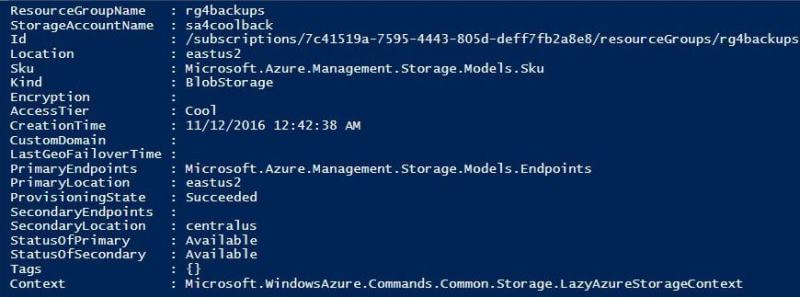
To store files in the cloud, we need a container to hold our information. Please create a storage container named sc4coolback with in the sa4coolback storage account.

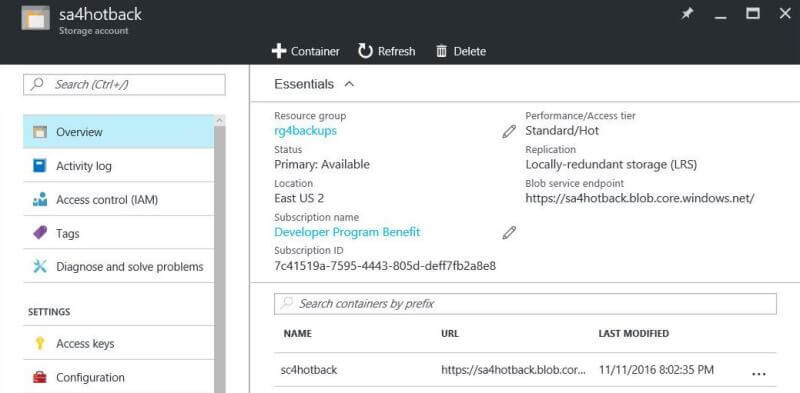
Let's complete this test by creating a hot storage account named sc4hotback. This account will be using Standard Local Redundant Storage (LRS). See the PowerShell code below that accomplishes this task.
# Create new storage account (hot storage)
New-AzureRmStorageAccount –StorageAccountName "sa4hotback" `
  -ResourceGroupName "rg4backups"  -Location "East US 2" `
  -Type "Standard_LRS" -Kind "BlobStorage" -AccessTier "Hot"
The output below shows the storage account named sc4hotback with a primary location in East US 2 region.

Again, we need a container to hold our information in Azure. Please create a storage container named sc4hotback with in the sa4hotback storage account.

Let us play back what just happened. We created one resource group to hold two storage accounts. One account is using cool GRS storage and the other account is using hot LRS storage. Both accounts have uniquely named containers in which we can now save our backup files to.
Azure Storage Account Keys
The two storage accounts that we defined have containers that are restricted. They can be used only by the owner. This means, you have to be logged into Azure to use the container. How can we access the containers with full control without logging into azure?
Do not fret! Let's take a look at the cool storage account via the Azure Portal. There is a section called access keys under settings.
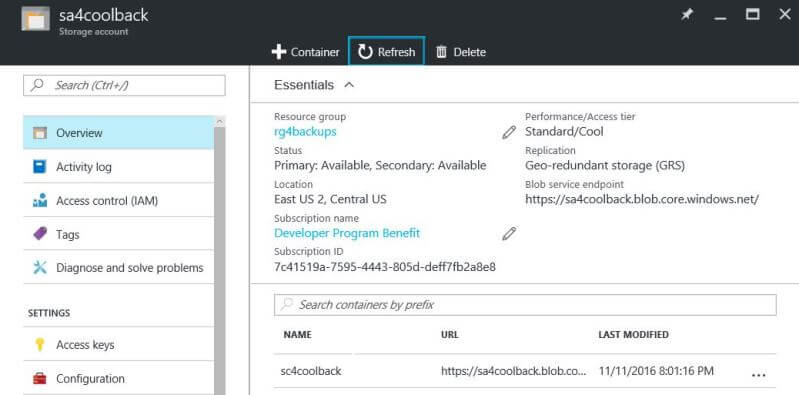
Key based authentication can be used with applications to access Azure Storage. Two keys are provided just in case one key needs to be regenerated. Copy this key1 value to new scratch pad. We will need this information when we start using the AzCopy utility.
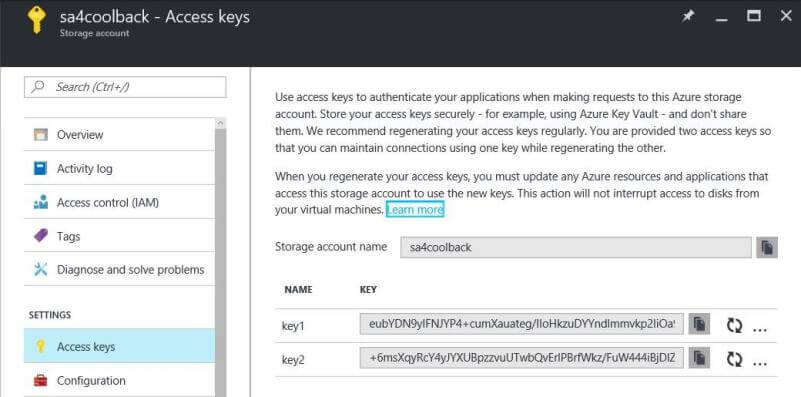
Do not forget there is another storage account. Examine the hot storage account properties and access keys via the Azure Portal. Make a copy of this key1 value for later usage.
AzCopy Utility
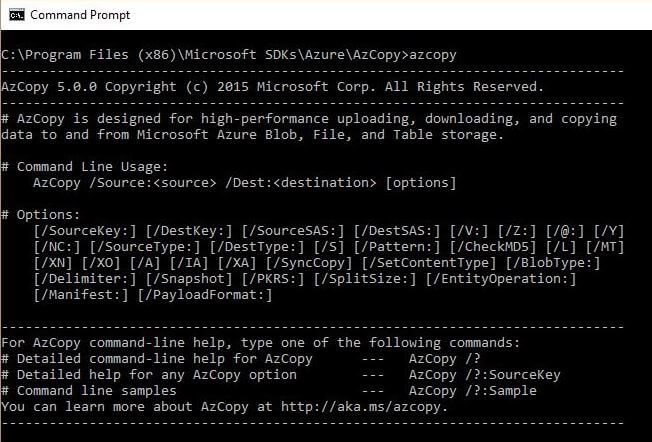
There is excellent azure documentation on this utility. Make sure you remote desktop protocol (RDP) into our Azure Virtual machine named SQL16DEV. Please download the utility from this link and execute the install program. The resulting utility should reside under the Microsoft SDKs Azure directory. Open a command window and change the directory to the location of the utility. Type "azcopy" and hit return. The following screen should be displayed showing a basic manual page.
Copy Local Files to Cloud Storage
Before we create a batch file to copy our backups from the F:\ drive to our cool storage container, we should take a peek at the contents of the container. It is not surprising to see our container is empty.
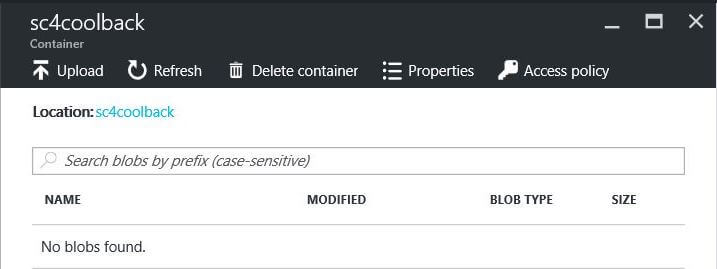
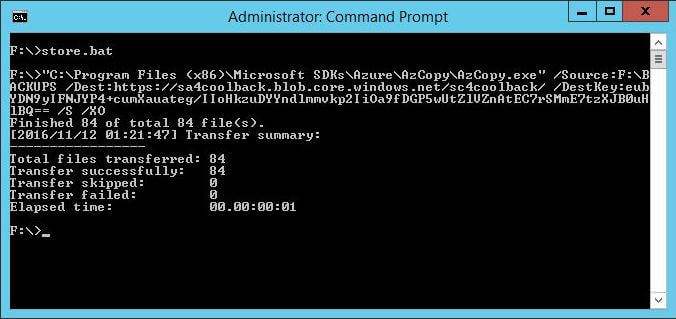
Open windows notepad and create a batch file named store.bat in the root directory of the F: drive. Copy the following code into the batch file. The caret symbol is used as a line continuation character. The code below calls the AzCopy utility to copy files from our on-premises (local) backup directory to our in-cloud (remote) storage container. Notice, we are using the key to access the storage. The most important part of this invocation is the /XO switch which tells the program to only copy only new files to the destination.
REM
REM Copy from on-premises to-cloud
REM

"C:\Program Files (x86)\Microsoft SDKs\Azure\AzCopy\AzCopy.exe" ^
/Source:F:\BACKUPS /Dest:https://sa4coolback.blob.core.windows.net/sc4coolback/ ^
/DestKey:eubYDN9yIFNJYP4+cumXauateg/IIoHkzuDYYndlmmvkp2IiOa9fDGP5wUtZl== /S /XO
After executing the store.bat batch file, we see that 84 files are copied to our cool storage container.
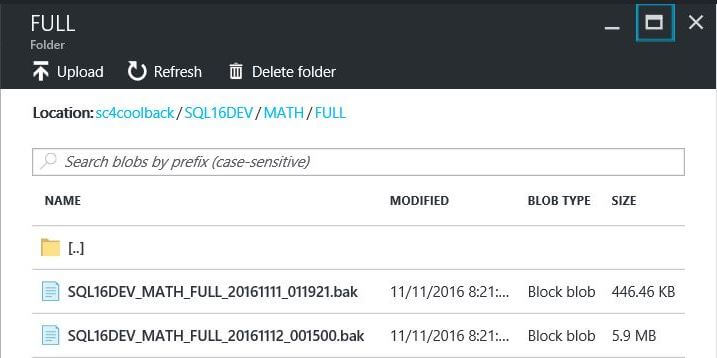
If we navigate the ola hallengren backup directory structure via the Azure Portal, we can see that the MATH database has two complete backups in the container.
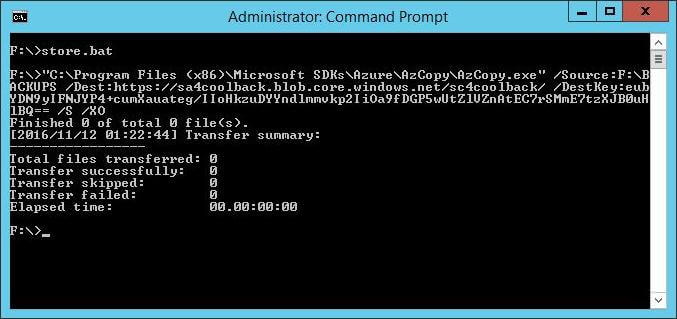
Since no FULL or LOG backups have happened during our exploration, re-running the store.bat batch file should result in zero files being copied over to cloud storage.
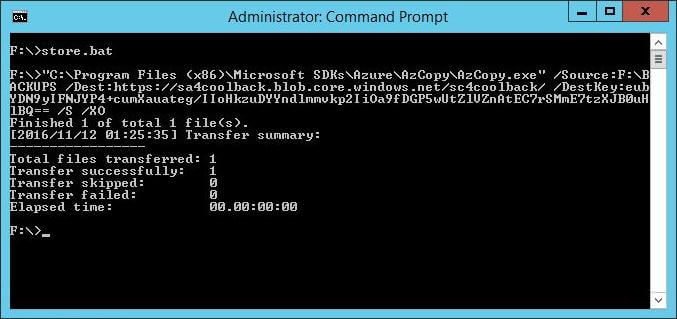
Please execute the "User Databases: Full Backup" SQL Agent job to create a new file in the F:\BACKUPS directory on our Azure Virtual Machine. Again, execute the store.bat batch file. One new file should be copied to cloud storage.
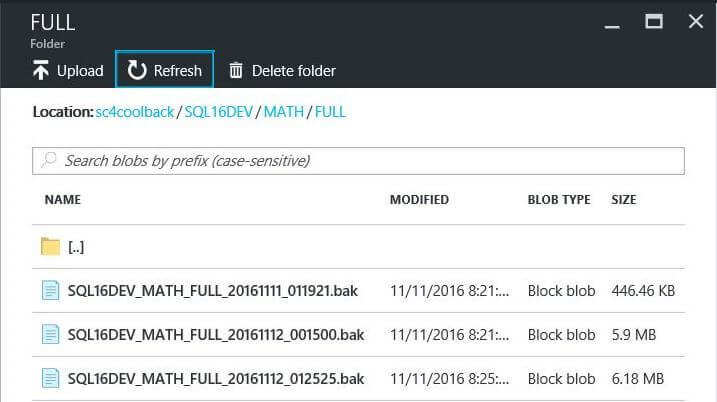
If we take a closer look at the FULL backup directory for the MATH database inside the sc4coolback container, we will now see three backup files.
In summary, the AzCopy utility can be used to make copies of local files and directories to remote cloud storage. Cool blob storage can be used for archive data that is written once and seldom accessed. Use hot blob storage for data that is accessed on a regular basis.
Copy Files Between Cloud Storage Accounts
Yet again, open windows notepad and create a batch file named copy.bat in the root directory of the F:\ drive. Copy the following code into the batch file. The code below calls the AzCopy utility to copy files from our COOL to HOT storage container. We will need the URL address for both storage accounts as well as the access keys.
REM
REM Copy from cool to hot container
REM

"C:\Program Files (x86)\Microsoft SDKs\Azure\AzCopy\AzCopy.exe" ^
/Source:https://sa4coolback.blob.core.windows.net/sc4coolback/ ^
/Dest:https://sa4hotback.blob.core.windows.net/sc4hotback/ ^
/SourceKey:eubYDN9yIFNJYP4+cumXauateg/IIoHkzuDYYndlmmvkp2IiOa9fDGP5wUtZl== ^
/DestKey:kwrOhifOPzglEOszdticZ2Ub6g7neDYR7TB0vNnNyGCYWOaAh9i7nDMlhbp/4cs== /S /XO
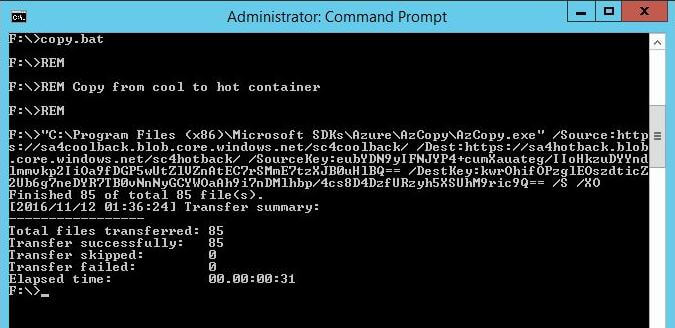
Upon executing the copy.bat batch file, we see that 85 files are copied between storage accounts. This is a complete copy of all the files from the COOL to HOT storage container.
Use the Azure Portal to examine the directory structure inside the HOT storage container. It should match the local directory structure on our SQL Server Azure Virtual Machine.
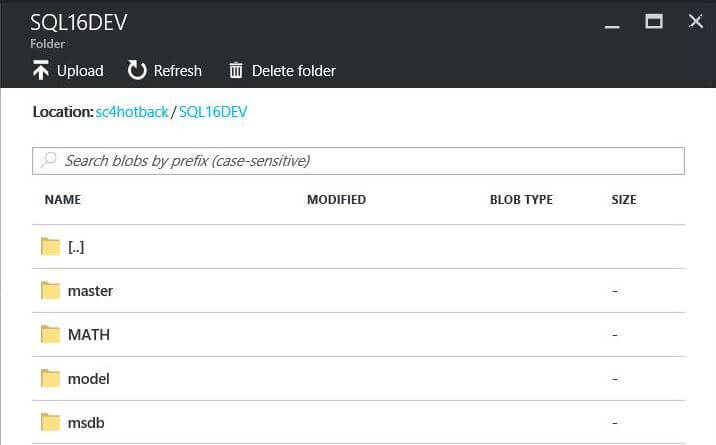
In a nutshell, the AzCopy command can be placed inside a batch file for ad-hoc execution. In our case, we want to execute this job on a scheduled basis. This can be accomplished by creating a "Azure Copy: Backups In Cloud" job. The first step in the job is to call the code in our store.bat batch file. Please schedule this job to execute on a time frame of your choosing.
Azure Pricing Calculator
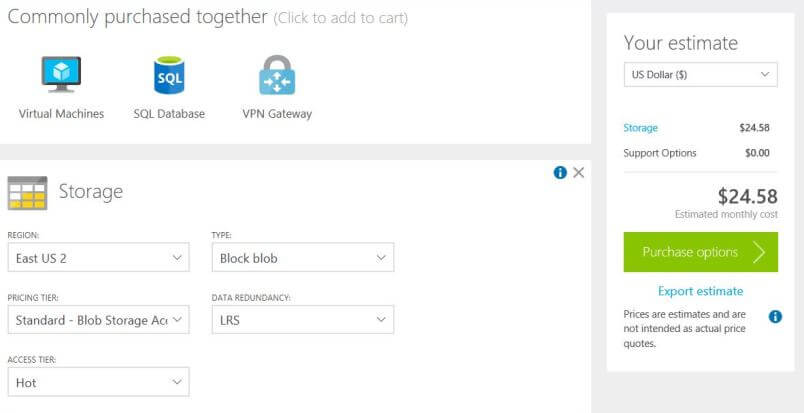
Most managers will want to know how much it will cost them to store files in Azure Blob Storage. That is where the Azure Price Calculator for the United States comes in handy. Please see you country specific calculator for estimates. Many small and mid-size companies can count their total storage consumption in terms of terabytes. Please talk to you Microsoft Sales Representative since their might be special offers or discounts depending upon your enterprise agreement.
The image below shows the monthly cost of 1 terabyte of HOT LRS Azure Blob Storage as $24.58. That is around $300 per year.
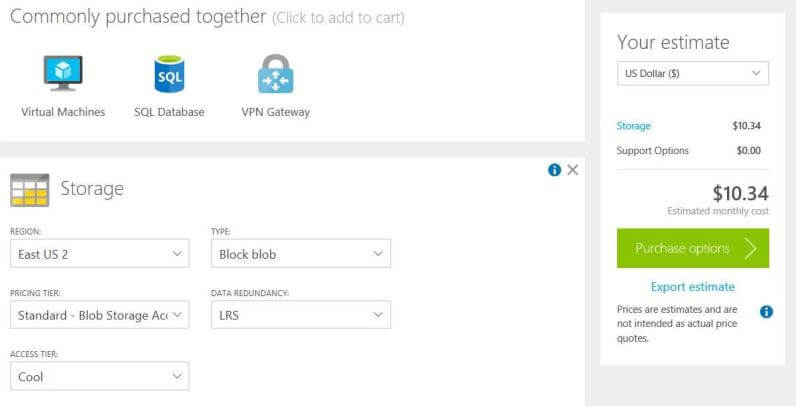
The image below shows the monthly cost of 1 terabyte of COOL LRS Azure Blob Storage as $10.34. That is around $125 per year. You pay 2.4 times more for HOT storage. Therefore, use COOL storage if you can.
Summary
Today, we designed and deployed an Azure Virtual Machine containing the MATH user defined database. This solution provide us with a changing database which results in new full and log backups every day and every hour respectively. We discovered two new parameters that can be used with our PowerShell cmdlet to define either HOT or COOL blob storage. There is a real cost savings for archived backup files that are seldom used. Last but not least, we used the AzCopy command line utility to copy files from on-premises to the azure cloud as well as between azure storage accounts.
This utility has many options and we only scratched the surface of what it can do. If you want to learn more, check out the Azure Documentation on this subject.
Next Steps
- Check out these other Azure tips
About the author
 John Miner is a Data Architect at Insight Digital Innovation helping corporations solve their business needs with various data platform solutions.
This author pledges the content of this article is based on professional experience and not AI generated.
View all my tips


