By: Nat Sundar | Comments | Related: 1 | 2 | 3 | > Integration Services Administration
Problem
How do I deploy SSIS Projects (ISPAC Files) to a target server?
Solution
In this tip, I will demonstrate a method to automate SQL Server Integration Services (SSIS) Deployments using a C# console application (i.e. executable application).
Classical Deployment Method
The “Integration Services Deployment Wizard’ is a tool provided by Visual Studio to deploy SSIS packages to a target server. This tool can also be used from the command line. However this tool does requires a full installation of Visual Studio on the build and deploy server. This is a critical limitation, as an organization may like to leverage the Continuous Integration (CI) server to deploy SSIS packages to a target server. In such cases, it is not allowed to install any application (such as Visual Studio) on the build server. Hence there is a need for an alternative automated deployment method for SSIS Packages.
Benefits of Deployment Automation
- Deployment can be performed very frequently and scheduled
- Human errors can be eliminated completely
- The same artifacts can be deployed to multiple target servers at the same time
SSIS Deployment using C# Windows Application
In this tip, I will walk through a method to develop a windows command line application (exe) written in C#. By using this application, you will be able to deploy the ISPAC file to the target server.
Prerequisites
It is assumed that the SSIS project has already been built and the ISPAC file for the project is already available to deploy. Building the SSIS project is a separate task and it is outside the scope of this deployment tip.
Developing a Windows Console Application
In this step, our aim is to develop a C# based Windows console application. You need visual studio to develop this application. Visual Studio can be downloaded from here (https://www.visualstudio.com/).
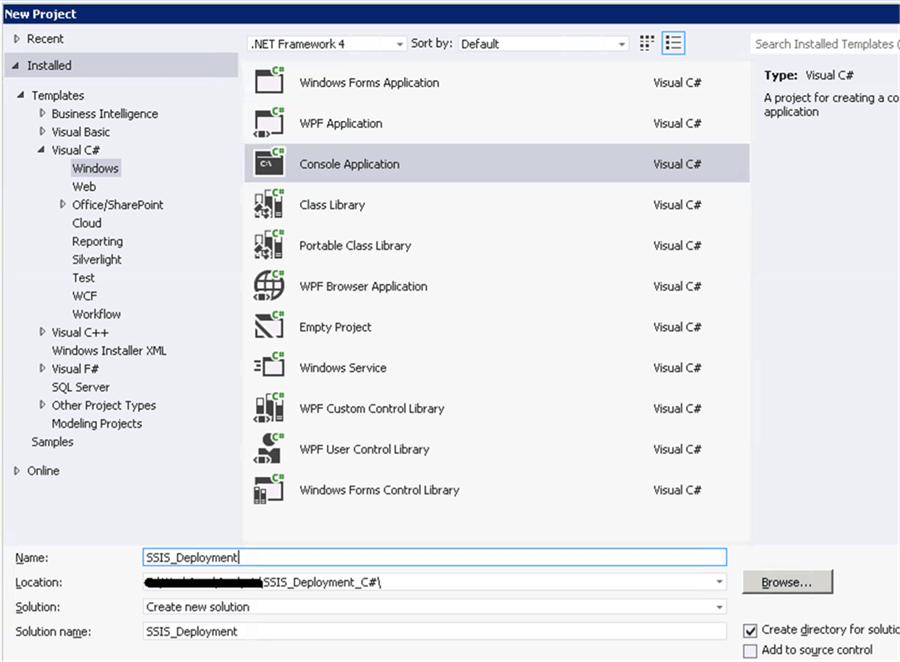
Once installed, let’s create a new project and select the windows / console application template, as shown in the picture below. It is recommended to select a suitable folder to create the solution and provide a suitable solution name. I have named the solution "SSIS_Deployment".
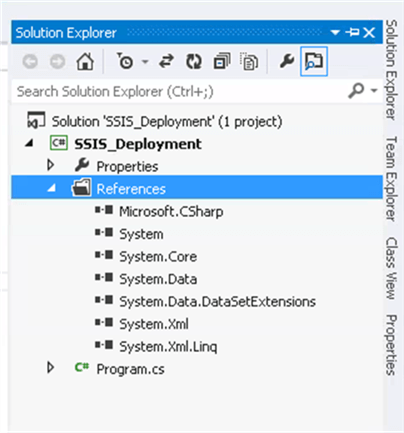
The below picture represents the solution and the project for the Windows application.
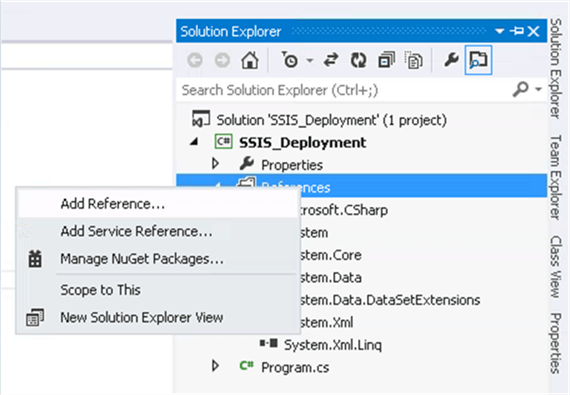
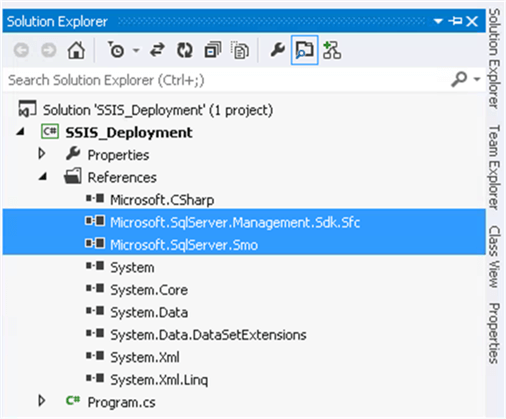
As we are going to access the SSIS service from C#, it is mandatory to add relevant assemblies as references. You need to select the "References" folder and click add reference menu. This will open a dialog box and click externals and search for these assemblies and add as mentioned in the below image. The following assemblies need to be added:
- Microsoft.SqlServer.Management.Sdk.Sfc
- Microsoft.SqlServer.Smo
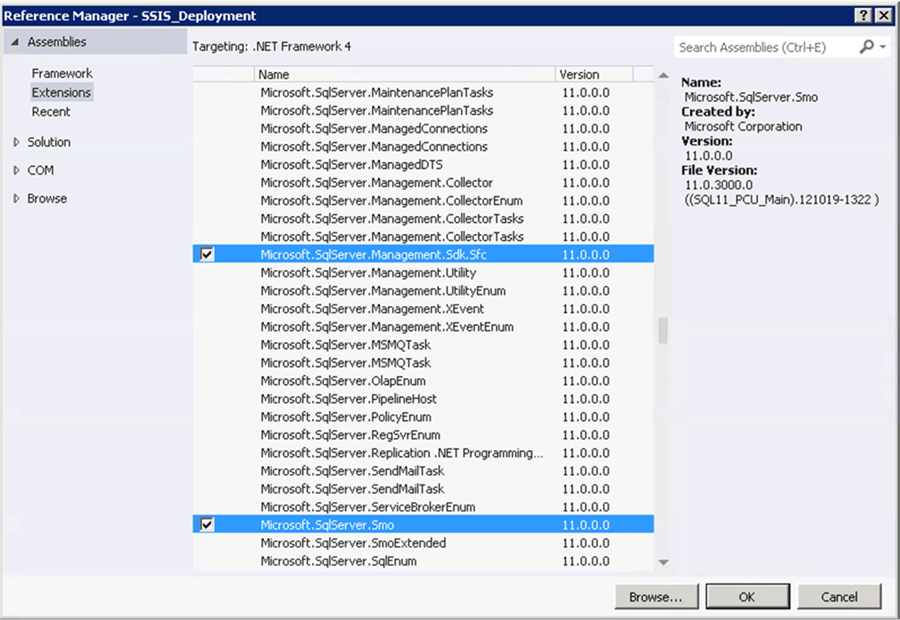
Once the references have been added they will be listed in the References folder, as shown in the below image.
Now we need to add the assembly Microsoft.SqlServer.Management.IntegrationServices as a reference. As this assembly is not added into Visual Studio, you have to browse thru the folder to add as a reference. This assembly is available in the following folder: C:\Windows\assembly\GAC_MSIL\ Microsoft.SqlServer.Management.IntegrationServices\ 14.0.0.0__89845dcd8080cc91.
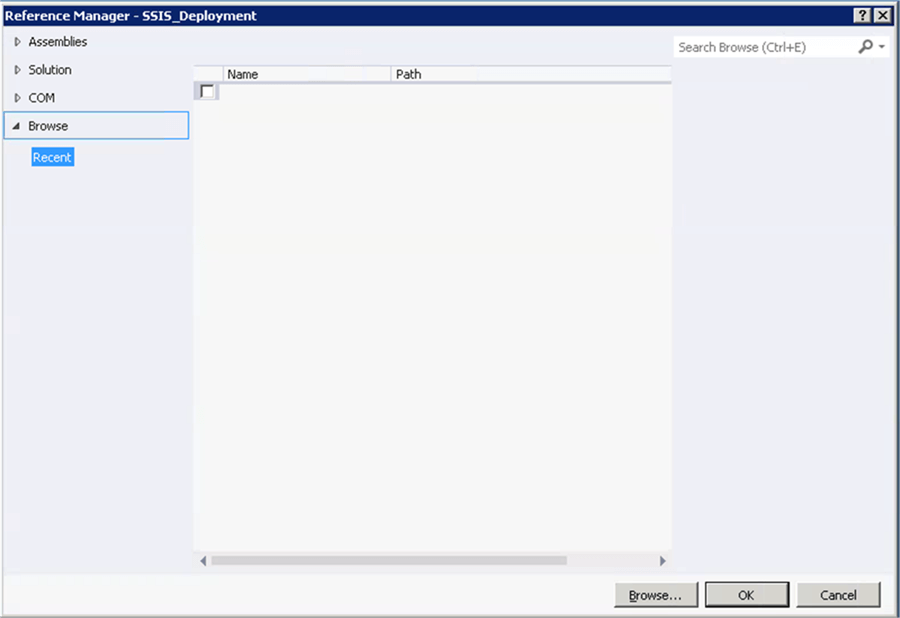
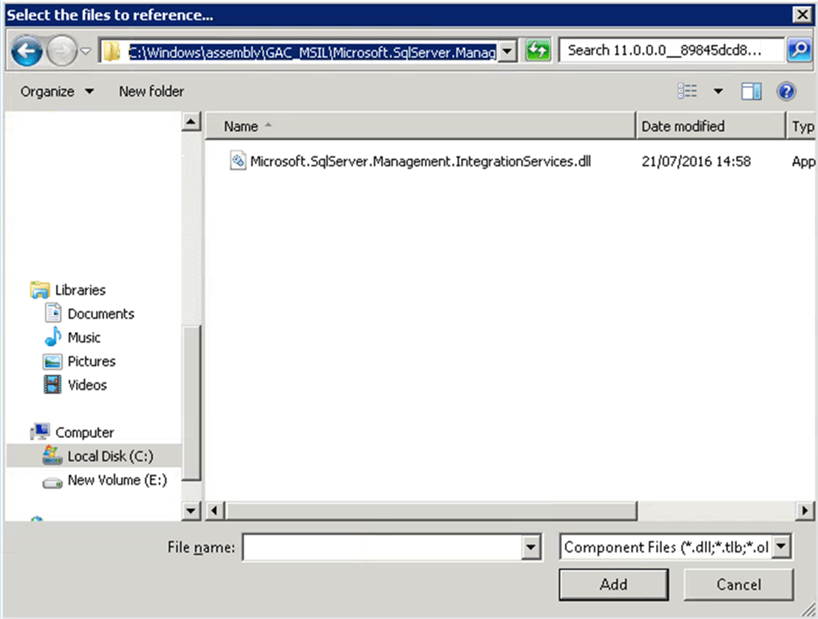
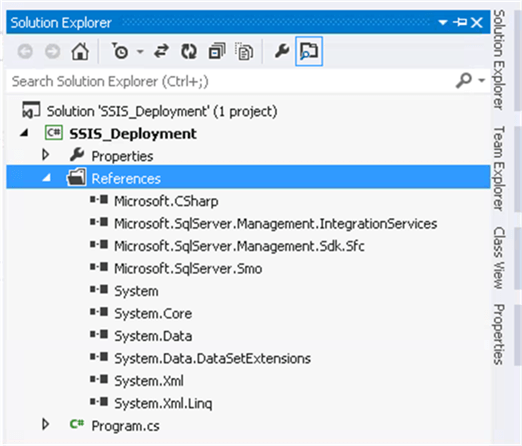
Once this assembly has been added, you will see all the references as shown in the picture below.
SSIS Project
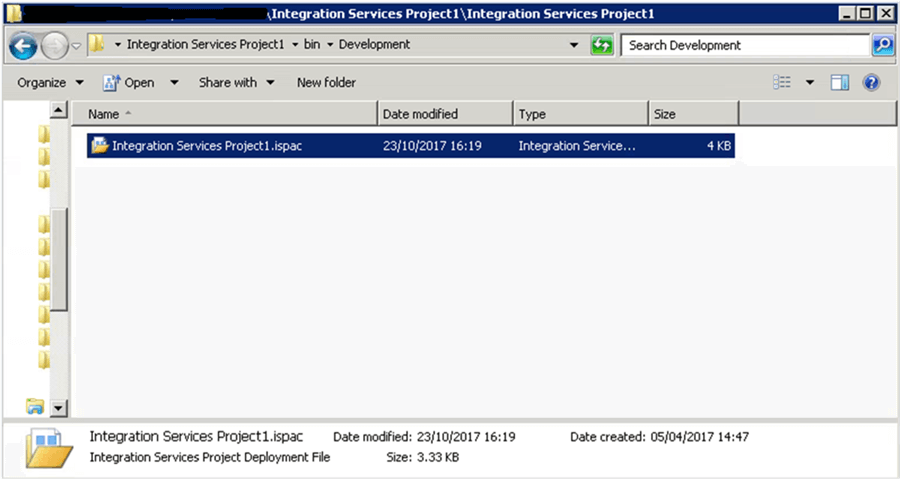
For the purpose of demonstration, I have created a simple SSIS project. This project has been built and the ISPAC file has been created in a folder, as shown in the picture below.
SSIS Catalog
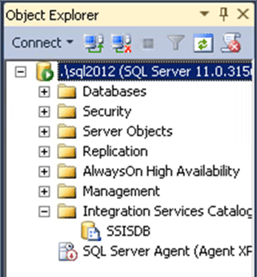
In the target server, I have created the SSIS catalog and it doesn't have any projects.
Accessing the SSIS server using C#
Now let’s see how to access the SSIS server using C#. With this sample code, you will be able to access the SSIS server and will be able to create a folder in the SSIS catalog.
// Declare and assign values to Variables
string SSISServerName = ".\\SQL2012";

// Creating a connection
string sqlConnectionString = "Data Source=" + SSISServerName + ";Initial Catalog=master;Integrated Security=SSPI;";
SqlConnection sqlConnection = new SqlConnection(sqlConnectionString);

// Creating a SSIS object
IntegrationServices integrationServices = new IntegrationServices(sqlConnection);

// Creating a SSIS catalog
Catalog catalog = integrationServices.Catalogs["SSISDB"];

Console.WriteLine("SSIS Catalog Name:" + catalog.Name);
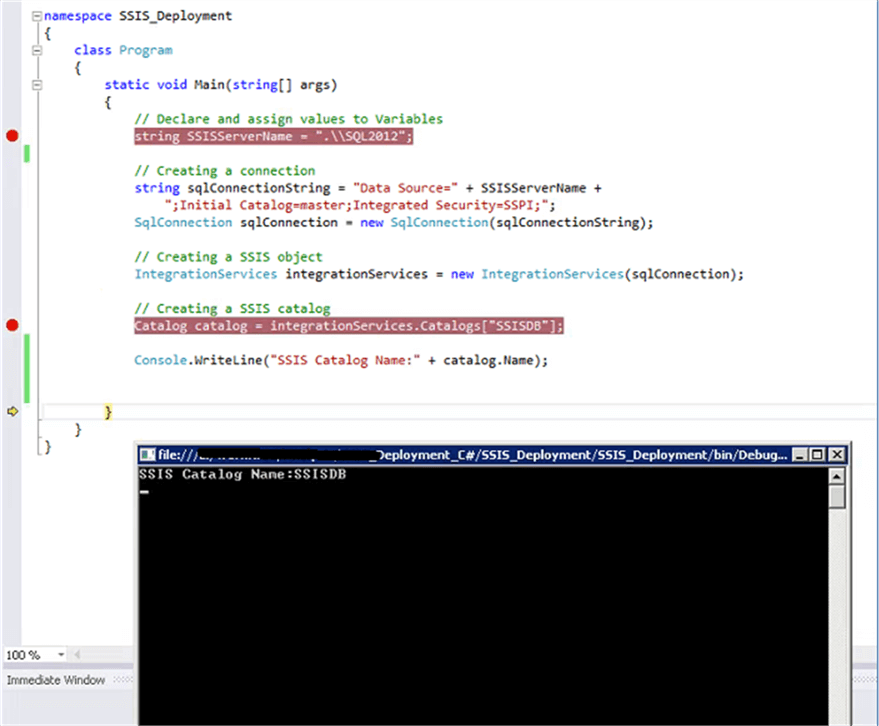
In this sample code, I have defined a variable to hold the name of the server. In addition I have created another variable to store the connection string details. Now an integration services object can be created by passing the connection string details. Once the integration service object has been created, the SSIS catalog object can be created by passing the name of the SSISCatalog (SSISDB) to the Catalogs function and this will return a reference to the SSIS catalog. With the SSIS catalog object you can access the Catalog and its properties (Projects, Packages & Environments).
The below sample code will show the name of the SSIS catalog.
Creating a Folder to deploy SSIS project
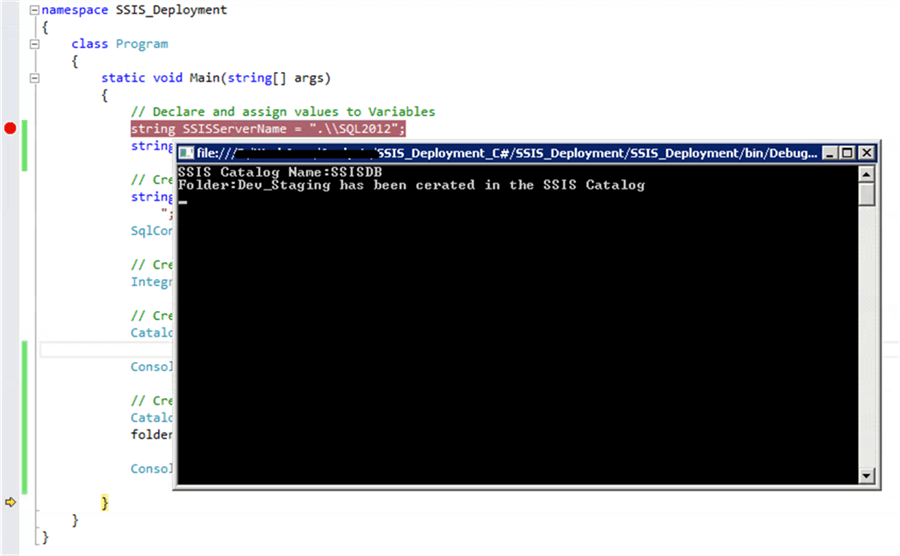
As we have learned how to access the SSIS catalog, now we will be able to create a folder in the SSIS catalog. In this sample code, I have added another variable to store the name of the SSIS folder. Once we created an object for Catalog, an object for the folder can be created by passing a few parameters to the constructor “CatalogFolder”. The Catalog Folder constructor will accept the parameters "Catalog object reference", "SSIS Folder Name" and "Folder description". The below sample code will create a folder in the SSIS catalog.
// Declare and assign values to Variables
string SSISServerName = ".\\SQL2012";
string SSISFolderName = "Dev_Staging";

// Creating a connection
string sqlConnectionString = "Data Source=" + SSISServerName +
";Initial Catalog=master;Integrated Security=SSPI;";
SqlConnection sqlConnection = new SqlConnection(sqlConnectionString);

// Creating a SSIS object
IntegrationServices integrationServices = new IntegrationServices(sqlConnection);

// Creating a SSIS catalog
Catalog catalog = integrationServices.Catalogs["SSISDB"];

Console.WriteLine("SSIS Catalog Name:" + catalog.Name);

// Creating a object for SSIS folder
CatalogFolder folder = new CatalogFolder(catalog, SSISFolderName, "Folder description");
folder.Create();

Console.WriteLine("Folder:" + SSISFolderName + " has been created in the SSIS Catalog");
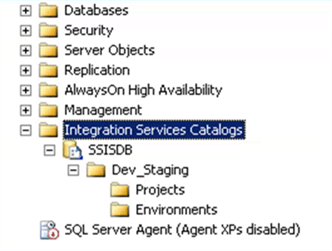
Deploying ISPAC File to Server
As we have created a folder on the SSIS server, we will be able to deploy the ISPAC file to the server. Once the catalog object has been created, then we can read the ISPAC file into a byte array using the “File.ReadAllBytes” function. Now the ISPAC file can be deployed using the DeployProject function by passing the ProjectName and the ISPAC file as parameters. The below sample code will help you to deploy the given ISPAC file to the server.
// Declare and assign values to Variables
string SSISServerName = ".\\SQL2012";
string SSISFolderName = "Dev_Staging";
string SSISProjectName = "Integration Services Project1";
string SSISProjectFilePath = @"E:\WorkArea\Analysis\Pre Constraint\Integration Services Project1\Integration Services Project1\bin\Development\Integration Services Project1.ispac";

// Creating a connection
string sqlConnectionString = "Data Source=" + SSISServerName +
";Initial Catalog=master;Integrated Security=SSPI;";
SqlConnection sqlConnection = new SqlConnection(sqlConnectionString);

// Creating a SSIS object
IntegrationServices integrationServices = new IntegrationServices(sqlConnection);

// Creating a SSIS catalog
Catalog catalog = integrationServices.Catalogs["SSISDB"];

Console.WriteLine("SSIS Catalog Name:" + catalog.Name);

// Creating a object for SSIS folder
CatalogFolder folder = new CatalogFolder(catalog, SSISFolderName, "Folder description");
folder.Create();

Console.WriteLine("Folder:" + SSISFolderName + " has been created in the SSIS Catalog");

Console.WriteLine("Deploying " + SSISProjectName + " project.");

byte[] projectFile = File.ReadAllBytes(SSISProjectFilePath);
folder.DeployProject(SSISProjectName, projectFile);
Console.WriteLine("SSIS Project has been successfully deployed !");
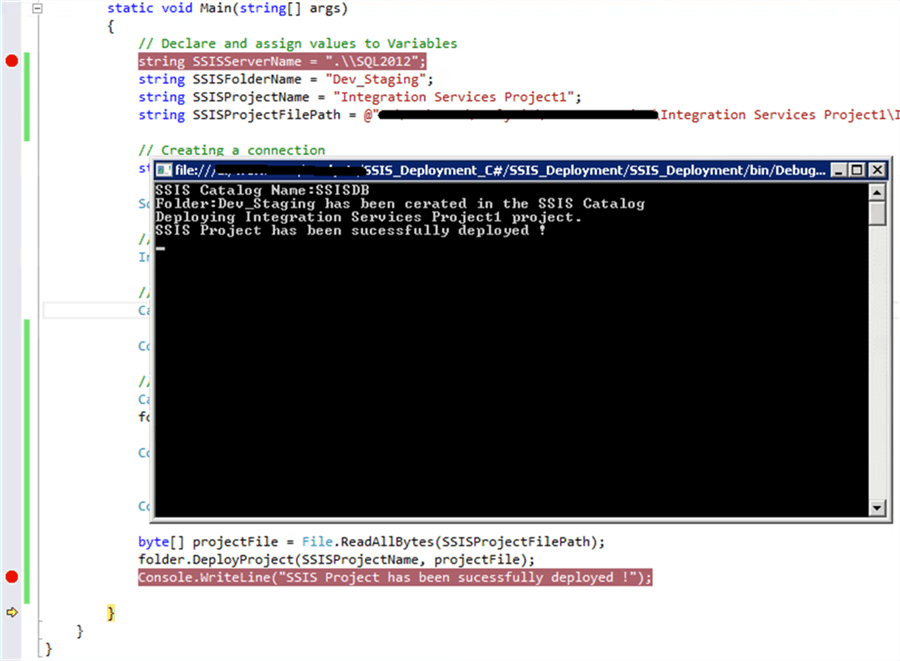
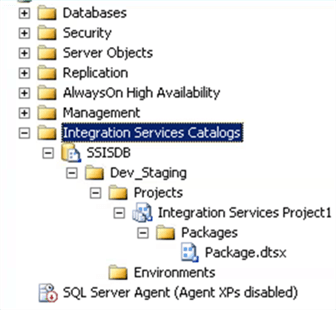
Summary
In this tip we have learned how to develop a simple Windows application to deploy a SSIS project. This solution is suitable, if you are following the SSIS project deployment model. As this is the Windows application, we don’t need Visual Studio to deploy the SSIS project to the target server.
Next Steps
- Stay tuned for my next tip on how to deploy multiple SSIS projects using C#.
- Read other SSIS Tips here.
- Read about SSIS Project Deployment Basics here.
- Download the C# solution that accompanies this tip.
About the author
 Nat Sundar is working as an independent SQL BI consultant in the UK with a Bachelors Degree in Engineering.
This author pledges the content of this article is based on professional experience and not AI generated.
View all my tips


