By: John Miner | Comments (4) | Related: > Azure SQL Database
Problem
The process of classifying a company into an industry segment has been around since the 1950s. Wikipedia has listed several popular taxonomies that are in current use. Some industries are more regulated and have stricter compliance regulations than others. As a database administrator, how can we provide an audit trail to a compliance officer when a security issue has occurred?
Solution
Azure SQL database now supports audit logs stored in a blob storage container. If your company is very innovative, you might have been notified that table storage for audit logs was deprecated in April 2017. In fact, there is no support for this logging type in the Azure Portal.
Business Problem
The medical industry has to comply with the Health Insurance Portability and Accountability Act of 1996 (HIPAA). If you are interested, detailed information can be found on the Department of Health and Human Services website. I am going to create a very simple database schema for a fictitious urgent care center called The Last Stop. Our boss has asked us to create a proof of concept showcasing auditing in Azure using blob storage.
How can we solve this business problem?
Basic Azure Objects
We are going to use a combination of techniques that we learned in prior articles to accomplish the following tasks.
| Task | Description |
|---|---|
| 1 | Use PowerShell to sign into Azure. |
| 2 | Create a resource group. |
| 3 | Create a logical Azure SQL Server. |
| 4 | Create an Azure SQL database. |
| 5 | Create a firewall rule for access. |
| 6 | Create a storage account |
The first five steps were covered in my tip named Deploying Azure SQL Database Using Resource Manager PowerShell cmdlets. I suggest that you try building these scripts on your own so that you learn the cmdlets. However, I will be supplying a complete set of working scripts at the end of the article.
I have chosen to create a resource group named rg4tips17 in the East US region. This group will contain all the other objects we create in Azure. The logical Azure SQL server is called mssqltips17 and the Azure SQL database is aptly named hippa. Last but not least, you can go to any search engine and type my ip to figure out the public facing ip address of your computer. Enter this address into our cmdlet to create a firewall rule named fr4laptop.
At this time, we should be able to access the database using our favorite tool.
The last step is to create a storage account, which is covered in my tip called Using Azure to store and process large amounts of SQL data.
Defining the Azure SQL Database
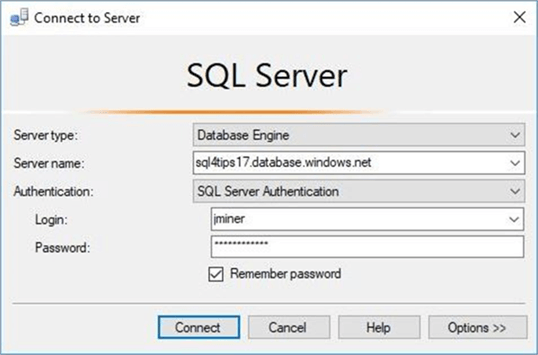
I am going to use SQL Server Management Studio to manage my new Azure SQL server. We need to connect to the server to create the database schema. Choose the database engine as the server type. Enter the fully qualified name of the Azure SQL Server. Pick SQL Server authentication as the security option and supply the login/password of the server administrator. The image below shows a typical connect to server login window.
Right now, there is one custom user defined database. By default, you should be in the master database. Open a new query window and switch the database context using the drop down to the hippa database. Execute the script sample-hippa-database.sql.
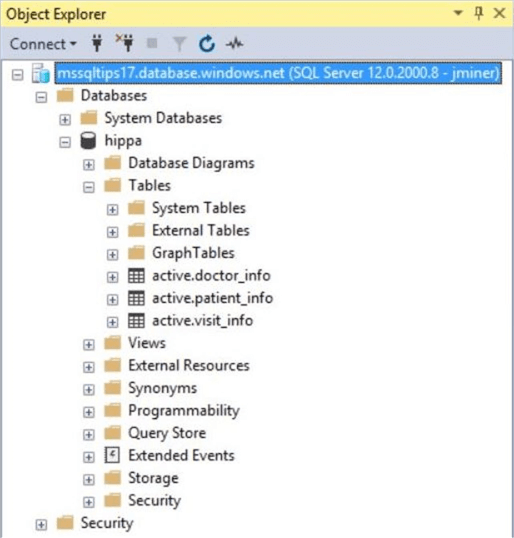
The end result of the execution is three tables in the active schema. Please see image below.
The patient_info table contains patients that visit the clinic and the doctor_info table contains doctors that saw the patient. The visit_info table has the overall medical readings taken during the visit as well as a medical diagnosis.
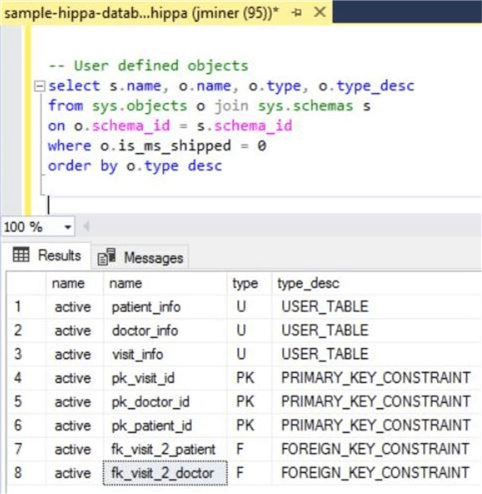
If we take a closer look at the system objects, we can see that each of the three tables have a surrogate primary key. The visit_info table is used to join all tables together with foreign key relationships.
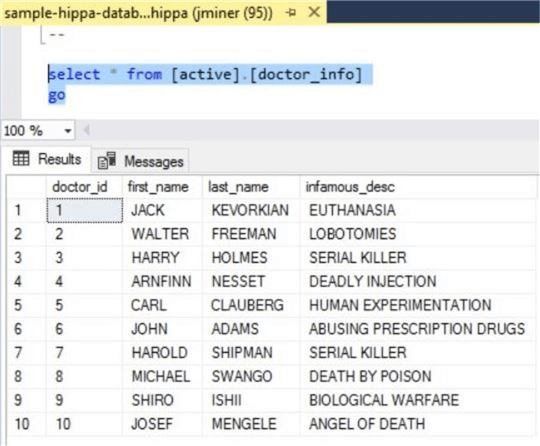
I forgot to mention that the Human Resources department at this center is very bad at recruiting qualified doctors. We have the top ten most evil doctors of all time on our payroll. Now you know why the center is nick named The Last Stop.
Now that we had a little fun, it is time to restate the obvious. We are working with just a sample database with sample data contained within sample tables.
However, I did use staging tables with various real data sets to randomly create patient and visit information. These tables were removed at the end of the script as a cleanup task. In fact, a variable inside the script can be used to determine the number of records created for each table. For this tip, I created only 20 records and showed 10 records in each of the screen shots below.
The screen shot below shows some of the records from the patient_info table.
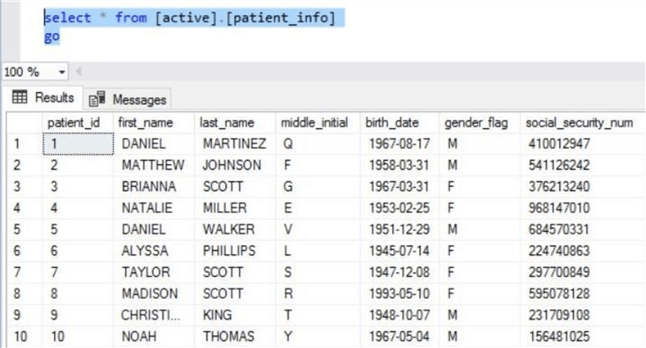
To round out our data exploration, the visit_info table joins doctors to patients. These foreign keys are at the end of the table and not shown in the screen shot below.

To recap, the hippa database is a great candidate for auditing using blob storage.
Using the Azure Portal or PowerShell cmdlets
What is the best way to deploy my solution? There is no wrong answer for this question. It all depends on how repeatable you want the deployment to be. I am going to use a combination of both in this tip.
By default, server level and database level auditing are turned off. Please see the image below taken from the Azure portal. If you turn both on for a particular database, you will have entries in both audit files. There are some scenarios in which you might want to have both.
However, today we are going to focus on database level auditing.
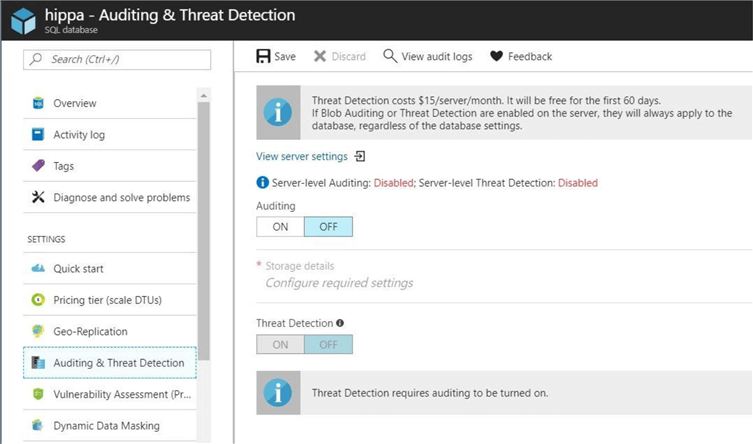
Microsoft provides the script developer with a PowerShell cmdlet to view database auditing.
The Get-AzureRmSqlDatabaseAuditing cmdlet returns the auditing settings of a given Azure SQL database. I am passing the resource group, server name and database name as parameters to the call.
#
# View current database auditing
#

# Show database auditing
Get-AzureRmSqlDatabaseAuditing `
  -ServerName "mssqltips17" `
  -DatabaseName "hippa" `
  -ResourceGroupName "rg4tips17"
The output from the PowerShell Integrated Scripting Environment (ISE) shows auditing on this database as disabled.

Again, Microsoft provides the script developer with a PowerShell cmdlet to enable or disable database auditing.
The Set-AzureRmSqlDatabaseAuditing cmdlet changes the auditing settings of a given Azure SQL database. I am passing the resource group, server name, database name, storage account, and state indicator as parameters to the call.
#
# Enable database auditing
#

# Enable auditing (has to be Generic storage)
Set-AzureRmSqlDatabaseAuditing `
    -State Enabled `
    -ResourceGroupName "rg4tips17" `
    -ServerName "mssqltips17" `
    -StorageAccountName "sa4tips17" `
    -DatabaseName "hippa"
The output from the PowerShell Integrated Scripting Environment (ISE) shows auditing on this database as enabled. By default, three action groups are chosen for us. This default setting audits successful and failed logins as well as any completed transaction SQL batches.

If we take a look at the auditing settings for the Azure SQL database named hippa, we can see that auditing files will be generated and saved in our blob storage account.
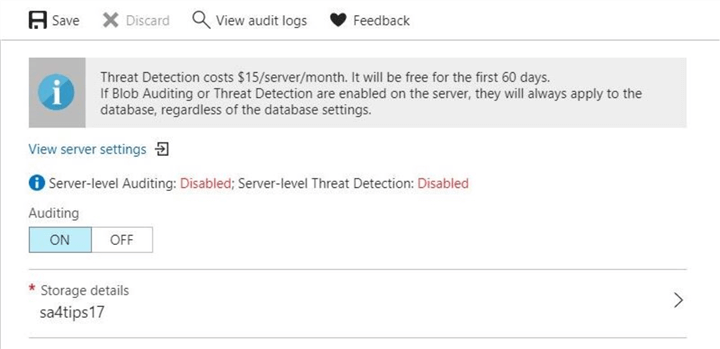
In summary, auditing can be enabled, disabled or viewed from both the Azure Portal and Azure Resource Manager PowerShell cmdlets. Now that we have auditing enabled, lets setup tests for the three different audit action groups.
Audit records for DML Statements
The purpose of auditing is to have a record of each action that was performed on the database. The previous screen shot shows the details of the Audit & Threat Detection blade. Once auditing is enabled, the view audit logs menu option appears.
Again, there are two different possible audit types. Please choose the database audit as the source. The image below shows the portal view of the audit records. Since we have not performed any actions since enabling logging, the window shows zero audit records.
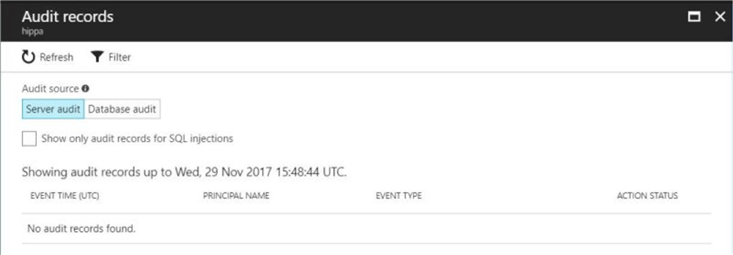
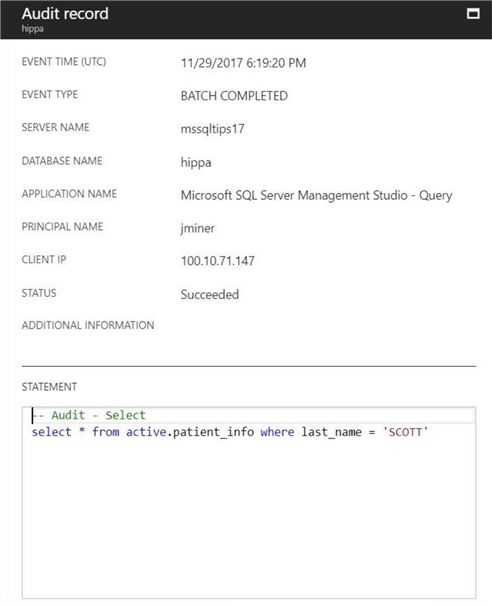
I am going to start testing how each of the four Data Manipulation Language (DML) statements gets logged. My first test choice is the SELECT statement. The T-SQL snippet below is a general search for all patients with the last name of SCOTT.
-- Audit - Select
select * from active.patient_info where last_name = 'SCOTT'
go
The output in the results window of SSMS show three matching patients.

If we take a look at the audit record, we see a bunch of information that identifies the user. We can see that jminer is accessing the database using SSMS from a client that has an IP of 100.10.71.147. We also see the actual statement that was executed against the database engine. However, the data returned by the engine to the client is not captured.
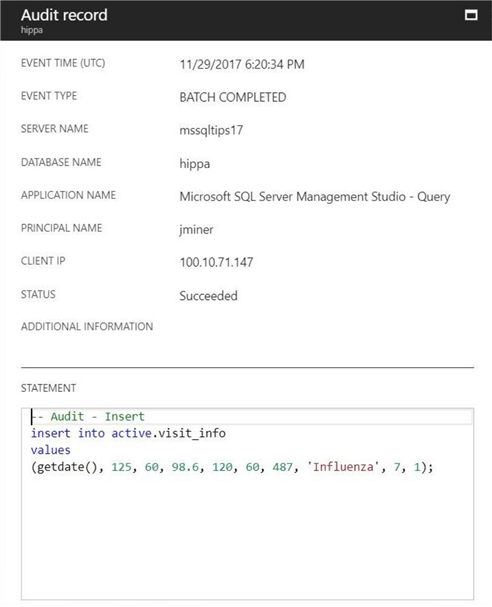
My second test choice is the INSERT statement. The T-SQL snippet adds a new visit record for the patient named TAYLOR SCOTT.
-- Audit - Insert
insert into active.visit_info
values
(getdate(), 125, 60, 98.6, 120, 60, 487, 'Influenza', 7, 1);
go
Similar information is captured as an audit record for the INSERT action. We are able to capture the patient data added to the table since it was part of the tabular data stream sent to the algebraic parser.
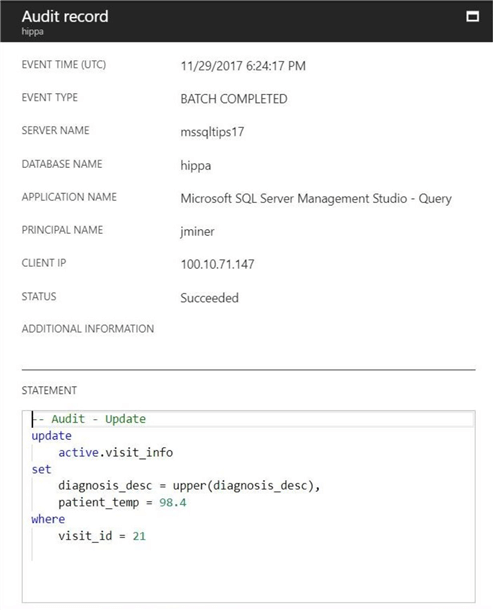
My test third choice is the UPDATE statement. The T-SQL snippet changes the newly added visit record for the patient named TAYLOR SCOTT. It modifies both the diagnosis description and recorded temperature.
-- Audit - Update
update
    active.visit_info
set
    diagnosis_desc = upper(diagnosis_desc),
    patient_temp = 98.4
where
    visit_id = 21
go
Typical information is captured within the audit record for the UPDATE action. Only partial patient data might be seen in the T-SQL statement that was executed by the database.
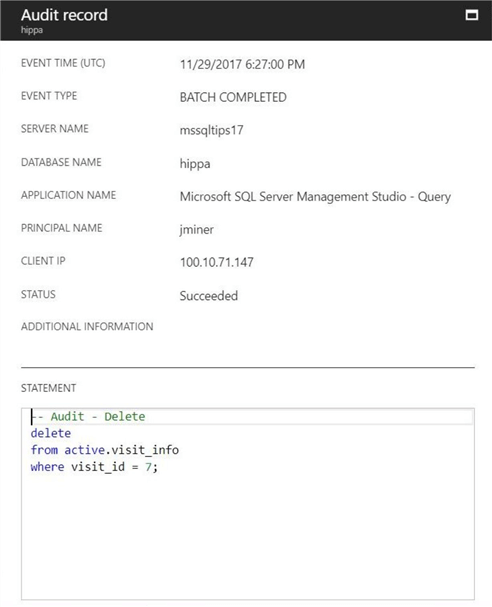
My fourth test choice is the DELETE statement. The T-SQL snippet removes the oldest record for the patient named TAYLOR SCOTT.
-- Audit - Delete
delete
from active.visit_info
where visit_id = 7;
go
The information captured in the audit record for the DELETE action is representative of what we have seen so far. We might see identifying patient data in the WHERE clause of the T-SQL statement.
In a nutshell, we have seen how the four statements of the Data Manipulation Language (DML) are captured in the audit log. Information that identifies the system user and the actual Transaction SQL statement is saved for later review. If your compliance objectives require the actual data that was seen or changed by the user to be logged also, this auditing will not do.
Audit records for minimally logged statements
There are two well know statements that are considered minimally logged. This means there are less log records written to the transaction log for a particular recovery model. While we do not have the ability to change the recovery model for this Platform As A Service (PAAS) offering in the cloud, we can definitely look at the audit records stored by these actions.
The TRUNCATE TABLE statement is considered a minimally logged action. The T-SQL snippet below removes all the visit records from the database.
-- Audit - Truncate
truncate table [active].[visit_info]
go
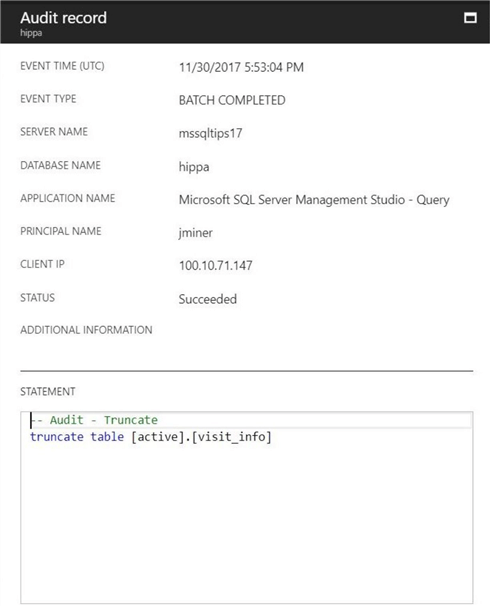
The audit information captured by this record is shown below. We can see that no patient information is seen.
The BULK INSERT statement is considered a minimally logged action. My previous tip named Bulk Insert Data into a Azure SQL Database with PowerShell demonstrates how to use this statement with files stored in Azure Blob storage.
However, I am deciding to use the BCP utility that uses the same technology when executed from a client machine. Read the on-line documentation for more details. The four files in the table below execute a simple data load process.
| Task | Description | File |
|---|---|---|
| 1 | Patient input file in csv format. | patient-info.txt |
| 2 | BCP format input file. | patient-info.fmt |
| 3 | BCP error output file. | patient-info.err |
| 4 | Batch file calls BCP utility. | patient-info.cmd |
I am assuming that your machine has the client tools for SQL Server installed. These tools come with the SSMS installation.
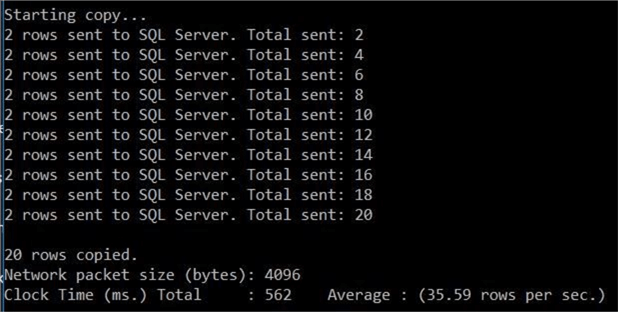
Place all of the above files in the C:\TEMP\ directory. Execute the batch command file to load the 20 new patient records into the hippa database. You can see that the batch size for the bulk copy is set to 2 records.
The second shot below shows audit information captured by this record. We can see that no patient information is given. Ten audit entries exist since the batch size was two records.
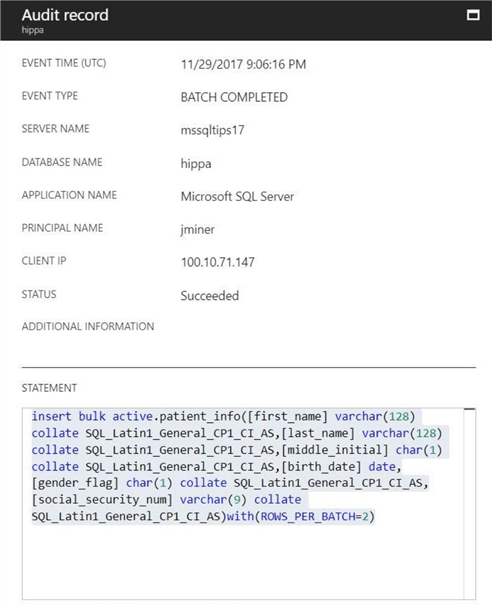
The long and short of it is that no patient information is stored in the audit records for minimally logged statements. To complete our investigation of the default audit action groups, we are now going to talk about database logins.
Audit records for database logins
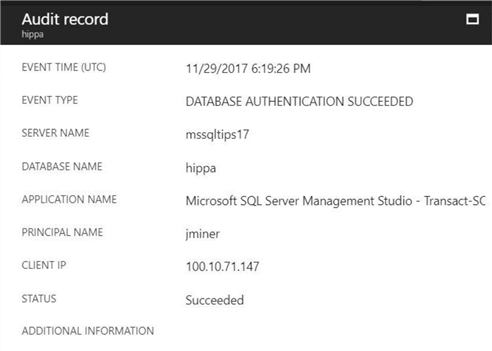
If we connect to Azure SQL database using Management Studio (SSMS), you will see the following record in the audit log. There will be other log record entries in the audit since SSMS is quite a chatty application.
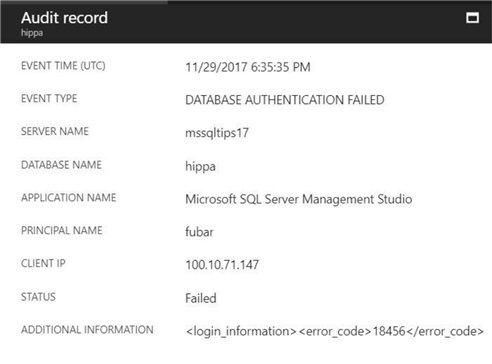
If we try to connect to Azure SQL database using an invalid login and password combination, you will see the following error number, 18456. Make sure you are connecting directly to the hippa database, not the master (default) database. The default database setting can be changed under options. Otherwise, the error will be recorded by any active server level audits.
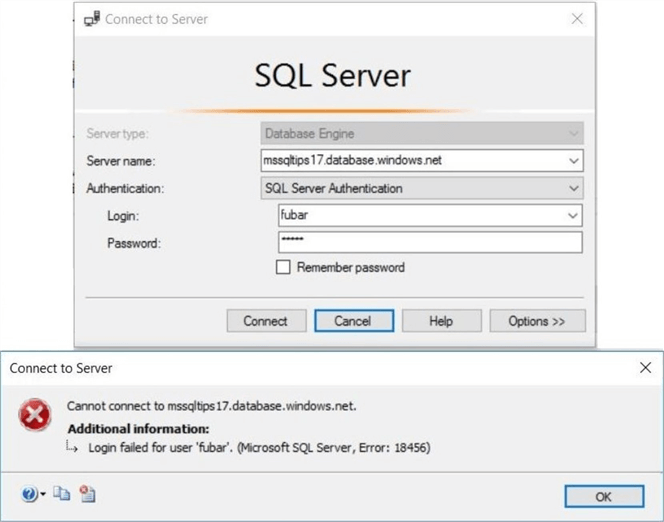
The audit record below shows that the user named fubar had a failed attempt at logging in. The audit records for successful and failed logins are what we expected.
Summary
Today, we talked about enabling server level and/or database level auditing in Azure SQL. Both types of auditing store log entries in files located in Azure Blob Storage. I focused on database level auditing since different applicants and/or databases might have varying compliance needs.
Auditing can be enabled, configured and disabled using both the Azure Portal or Azure Resource Manager PowerShell cmdlets. Both options work equally fine. Viewing the audit records is made easy with the portal. In a future tip, I will explain the format of the audit file and how to load it into a SQL Server table.
The default audit action groups log actions for both batch completion and database logins. Details on who executed the action and what the actual Transact SQL statement are logged in the audit. However, the actual data that was viewed and/or manipulated is not stored. If your compliance needs require this data, standard database auditing will not meet your needs.
In short, Azure server level and/or database level auditing will satisfy basic requirements for auditing.
Code Base
As promised, the table below has all the scripts to successfully execute this proof of concept.
| Id | Description | File |
|---|---|---|
| 1 | Patient input file in csv format. | patient-info.txt |
| 2 | BCP format input file. | patient-info.fmt |
| 3 | BCP error output file. | patient-info.err |
| 4 | Batch file calls BCP utility. | patient-info.cmd |
| 5 | Make Azure server and database. | make-server-n-database.ps1 |
| 6 | Create storage and enable audit. | make-storage-n-audit.ps1 |
| 7 | Create simple medical database | sample-hippa-database.sql |
Next Steps
- Exploring the available audit action groups.
- Using triggers and a centralized table for capturing of data changes in application tables.
- Using custom stored procedures to track actual data that was viewed and/or manipulated by a user.
About the author
 John Miner is a Data Architect at Insight Digital Innovation helping corporations solve their business needs with various data platform solutions.
This author pledges the content of this article is based on professional experience and not AI generated.
View all my tips


