Problem
Microsoft introduced SQL Server 2017 on Linux and many of us would like to see and use SQL Server 2017 on Linux in the cloud (AWS/Azure). SQL Server 2017 on Linux is not introduced as part of the managed services in AWS or Azure, hence we can install SQL Server 2017 on Linux in EC2 machines and run on a cloud server. In this tip, I will show how to install and configure Red Hat Enterprise Linux 7.4 in an EC2 instance server.
Solution
We will discuss the prerequisites to install and configure the SQL Server 2017 on Linux in cloud using Red Hat Enterprise Linux 7.4 in EC2 instance server in Amazon Web services Elastic Compute Cloud (EC2) environment. The goal is to setup SQL Server 2017 on Linux in the cloud as SQL Server 2017 on Linux is not introduced as part of managed services in AWS or Azure.
Hardware and software requirements
Cloud computing requirements are equal to on-premises, but before you begin to create the Red Hat Enterprise Linux 7.4 EC2 instance in AWS you need to create a virtual environment in the could – virtual private could (VPC), subnets, etc. For an on-premises data center we are responsible to get all required hardware, software, storage, and licenses etc., and in cloud computing basically you are renting the hardware, software, storage and licensing (however, if you have your own license then you can use your own), Amazon AWS provides a wide range of Elastic Compute Cloud (EC2) instance selections as per the business requirements.
Planning Red Hat Enterprise Linux 7.4 in EC2
The first step to build our Red Hat Enterprise Linux 7.4 in Elastic Compute Cloud (EC2) Instance is that we need to create a virtual private could (VPC) with availability zones (subnets) and all other requirements in Amazon AWS. I explained in detail how to build an Enterprise Environment in AWS in this tip. After you all the requirements in place, follow the below steps to install Red Hat Enterprise Linux 7.4 in Elastic Compute Cloud (EC2) Instance.
Step # 1 – Create EC2 Instance in AWS Management Console
Amazon Elastic Compute Cloud (EC2) also called an EC2 Instance is a cloud-based server. In cloud-based servers, you can build a Red Hat Enterprise Linux 7.4 server. In EC2 you can create a Red Hat Enterprise Linux 7.4 using the free tier or you can pay as you go on an hourly basis. To calculate your hourly charges click here.
You can build your server with a few clicks as per your requirements. Amazon offers a wide range of selections for instance types to best fit your needs. You can compare various types of instance combinations of memory, storage, networking and CPU capacity. For more info you can visit Amazon AWS site here.
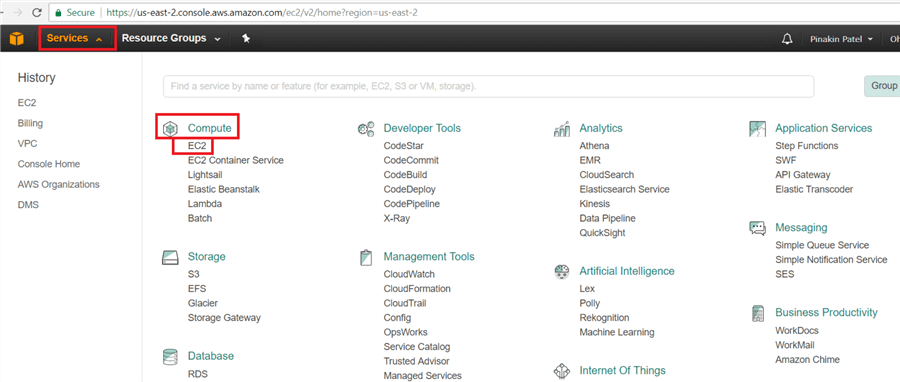
To create the Red Hat Enterprise Linux 7.4 server EC2 Instance click on services (top left side), and under Compute select EC2.
On the Resource Groups, click on Launch Instance.
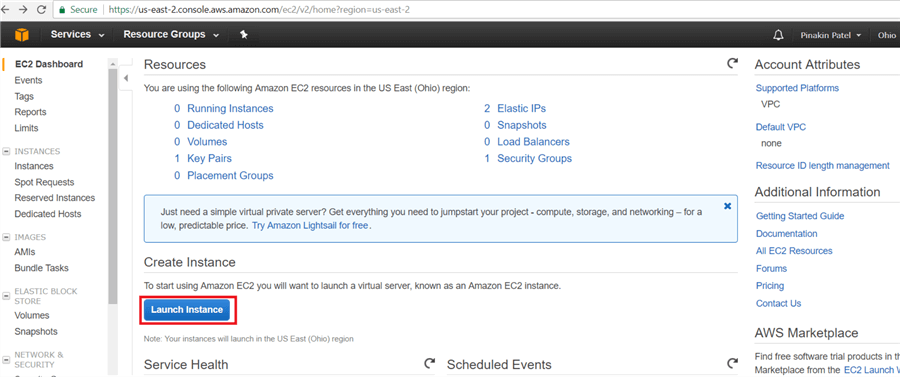
Or click on Services (top left side) and under the Compute select EC2 and then on the left side under EC2 Dashboard click on Instances then click on down arrow on Launch Instance.

Select appropriate Amazon Machine Image (AMI) as shown below. Here I am selecting Red Hat Enterprise Linux 7.4 (HVM), SSD Volume Type – ami-0b1e356e.

On Choose Instance Type page, select the instance type and hit Next: Configure Instance Details. (For more information click here).

On the Configure Instance Details page enter number of instances needed to be created then select Network VPCs, select Subnet, IAM role, Shutdown behavior and click on Next: Add Storage.


On the Configure Instance Details page, the Tenancy option by default will run on a shared hardware instance. You can also choose to run your instance on dedicated servers. For more information on dedicated click here and more for more information on dedicated instances click here. Then click Next: Add Storage.

On the Add Storage page, click on Add new Volume (in free tier there will be 30 GBs of storage available) and select Volume Type and click Next: Add Tags.
Note: you can additional storage by clicking on Add New Volume.

On the Add Tags page, click on Add another tag to add tags for this server. Then click Next: Configure Security Group.

On Configure Security Group page, select Create a new security group to add a new one or Select an existing security group to use an existing security group and the click on Review and Launch.

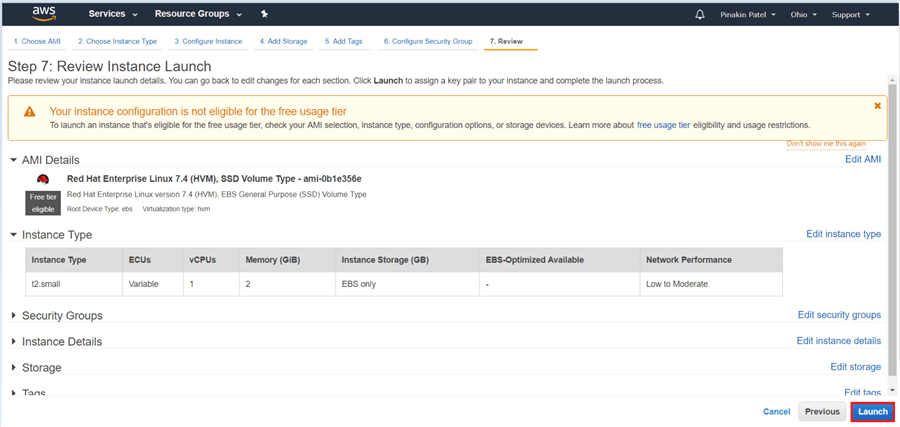
On the Review Instance Launch page, review all configuration settings and hit Launch.
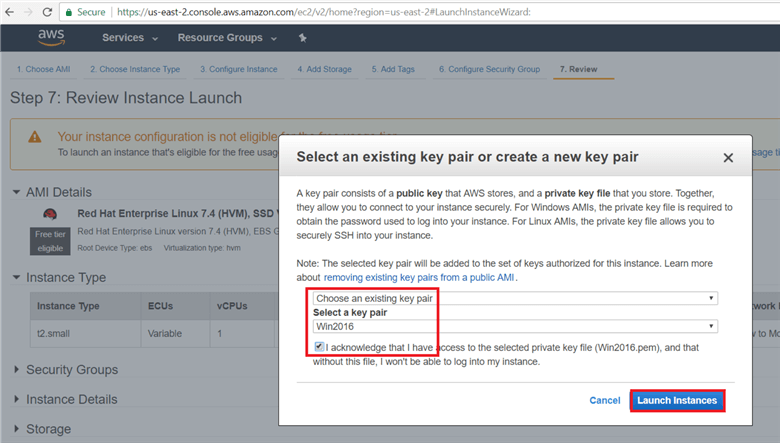
On the Select an existing key pair or create a new key pair dialog box, select Create a new key pair or Choose an existing key pair and give the key pair a name and click on download to download the Key Pair. Here I have already downloaded the Key Pair and I am acknowledging that I have access to the selected private key files. (save the key pair in a secure location). Hit Launch Instances.
On the Instances page the instance are shown and the instance state shows what is running.

Step # 2 – How to connect Red Hat EC2 Instance via Puttygen
To connect Red Hat Enterprise Linux 7.4 EC2 instance using a Putty Session you need to convert the Pem file to PPK files using PuttyGen. To convert the Pem files to PPK files follow the below steps.
Window users need to install the PuTTy software on your machine or on the server to connect the Linux session from the Window machine or on the server.
The PuTTy software can be downloaded from www.putty.org website. You can download the entire package or just the puttygen and Putty utility.

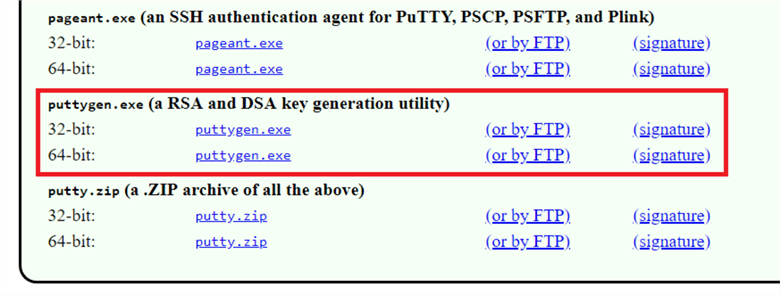
Here I have downloaded the PuTTY and PuTTYGen and installed in my machine.
Step # 3 – How to convert Pem file to PPK file format
PuTTy doesn’t support the PEM format which AWS uses, so you need to convert the PEM file to PPK file (PPK stands for PuTTY Private Key). To convert the PEM files to PPK files follow the below steps.
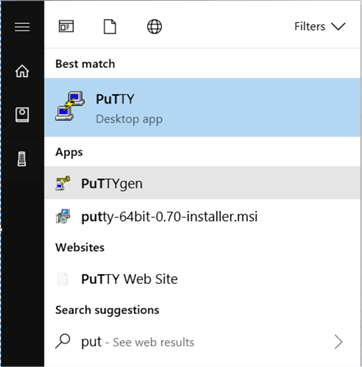
To start PuttyGen utility type PuttyGen in the Windows start dialog box, once PuttyGen appears then open PuttyGen.
On the PuTTYgen dialog box, click on Load to locate the file and select the .pem files which you download from AWS when you built the EC2 instance. I had a Win2016.pem to load and convert to (Dot) PPK file.
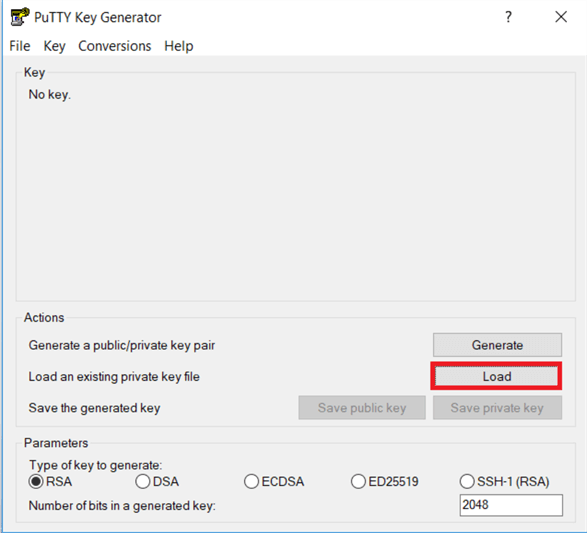
Note: You may be not able to see the pem file, if so select all files in drop down list to find the pem file and hit Open.

On the PuTTYgen dialog box, the Pem file has successfully loaded; as the message indicates. Click Ok to save the file.
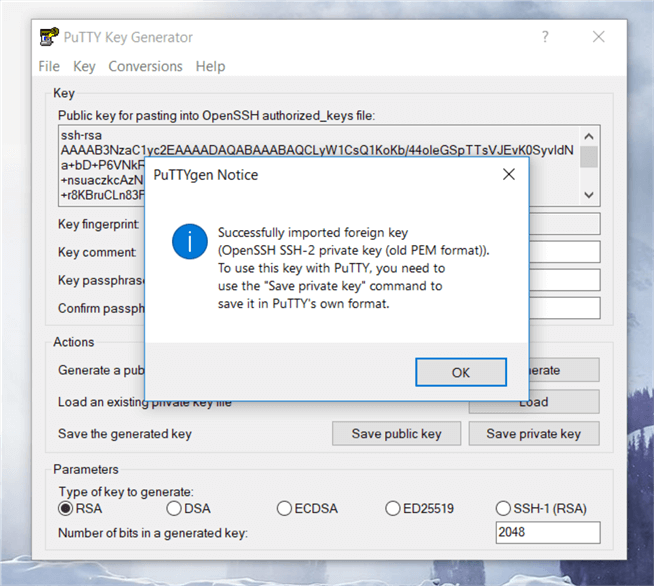
On the PuTTYgen dialog box, click on Save private key to save file with a PPK format.

You will get a warning messages as below, whether you want to save the key without a passphrase or not, select Yes and give a key name for your PPK file and click Save private key.
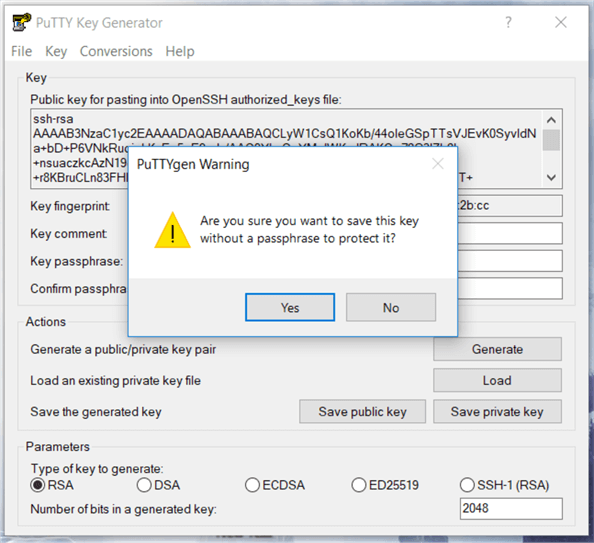
On the PuTTYgen dialog box, I have saved the file with the same file name as the original file name by changing the file format.

Step # 4 – How to launch PuTTy terminal session
As we have converted the pem file to a ppk file, now you can connect the PuTTY terminal session. To connect Red Hat Enterprise Linux 7.4 EC2 instance using PuTTy terminal sessions follow the below steps.
In the Windows start dialog box, type in putty to start the terminal session.
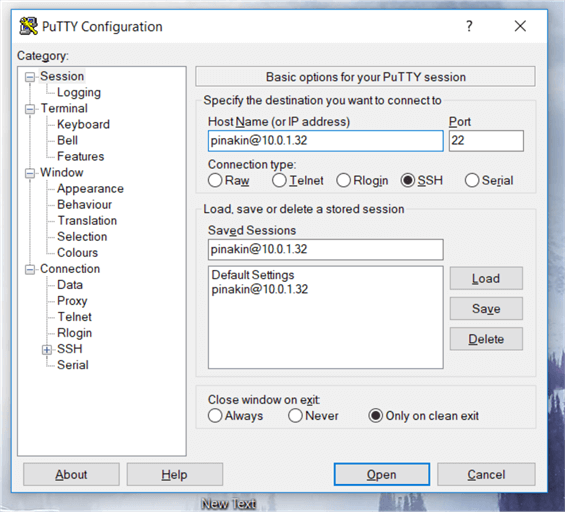
How to enter host name
Frist you need to enter your host name into host Name (or IP address) field. Amazon provided the format to connect to any Linux EC2 instance server. The format will be your user name followed by the IP address (user_name@privite IP). To specify the appropriate user name for your Amazon instance (AMI) see the below or for more information click here.
These all user name formats are provided by Amazon AWS
Get the default user name for the AMI that you used to launch your instance.
- For an Amazon Linux AMI, the user name is ec2-user.
- For a Centos AMI, the user name is centos.
- For a Debian AMI, the user name is admin or root.
- For a Fedora AMI, the user name is ec2-user or fedora.
- For a RHEL AMI, the user name is ec2-user or root.
- For a SUSE AMI, the user name is ec2-user or root.
- For an Ubuntu AMI, the user name is ubuntu or root.
- Otherwise, if ec2-user and root don't work, check with the AMI provider.
Here I am connecting to a Red Hat Enterprise Linux 7.4 EC2 instance in AWS with non-default user name.

Now click on plus sign (+) next to SSH in the PuTTy terminal session to expand this section. Then click on Auth (to authenticate the session using private key file), select your private key file (Example: ppk file) under the Private Key file for authentication (click on browse to search your directory where you stored the PPK authentication file).

On the PuTTY dialog box, we can see that the PPK file has been loaded for authenticating the session using the private key files.

Step # 5 – How to login to Red Hat Enterprise Linux 7.4 on EC2
Finally, click on Open to start your SSH session.
If you are logging on for the first time to Red Hat Enterprise Linux 7.4 on EC2 thru a PuTTy terminal session, you will receive the following alert shown in the image below. Click on Yes to continue.
Note: If you face any issues while you try to connect with a SSH terminal session, it’s due to needed rules not enable in your security group (for simplicity I have allowed all traffic, but in a real environment you should open only the appropriate ports attached to the instance).

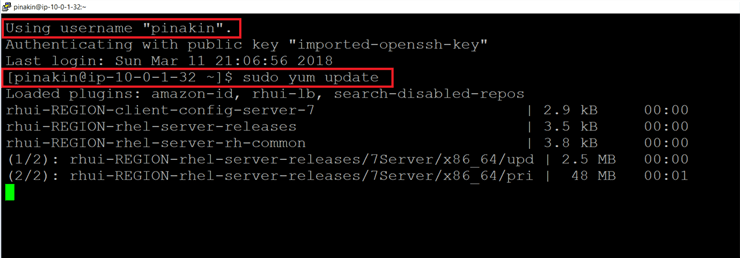
If you have done all configurations appropriately, then a new window will appear as shown below displaying your command line SSH terminal session.
Here I have run below command to update the server.
/* to update the server */
sudo yum update

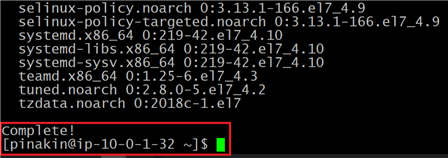
Once the system update check is complete it will ask to download and install the update, hit the “y” to download and install all the packages.

After all downloads and update is complete the message Complete! will be displayed.
Conclusion
In this article we discussed how to build a Red Hat Enterprise Linux 7.4 in Elastic Compute Cloud (EC2), convert pem files into ppk format and connect to a Red Hat server using a Putty terminal window. In Part 2 of this series, we will walk thru how to install SQL Server 2017 on Linux and connect SQL Server 2017 in Linux using SQLCMD and SSMS.
Next Steps

Pinakin Patel is a SQL Server Admin / AWS Solutions Architect with experience in SQL Server 2000 to 2016. His expertise is implementing SQL Server high availability and disaster recovery solutions including backup and recovery plans, database mirroring, log shipping, replication, clustering and SQL Server Always On Availability Groups across multiple availability zones. Over his career he has been involved with installing, upgrading and configuring SQL Server, designing security plans, performance tuning and monitoring and SQL Server maintenance. As an AWS Solutions Architect he has configured an AWS cloud environment, launched EC2 instances in AWS and SQL Server in AWS. Further he has worked with SQL Server Azure Virtual Machines. Pinakin can be reached at pinakinaws108@gmail.com.