By: John Miner | Comments (1) | Related: > Power BI
Problem
The Power BI desktop designer is a great tool; however, the hardest part of any Business Intelligence project is gathering and formatting the data into reportable datasets.
How can we get a better understanding of the internal workings of Power BI?
Solution
The data section of the Power BI designer is where you import and manipulate data. Just like SQL Server Management Studio which obscures the T-SQL generated by menu selections and actions, the Power BI designer is based upon the Power Query formula language informally known as "M".
Having a deeper understanding of the M language will help a BI developer in cases where the menus can’t solve the problem.
Business Problem
I am a big fan of the TV show Grimm. Each week, a Seattle police detective named Nick Burkhardt hunts down supernatural creatures that were described in fairy tales. In real life, a collection of fairy tales was first published in 1812 by the Grimm brothers, Jacob and Wilhelm. The collection is commonly known in English as Grimm’s Fairy Tales. During their time as authors, more stories were added to the collection. The seventh version of the book published in 1857 contained 211 fairy tales.
Your boss has asked you to explore the text extraction functions using the GRIMM sample database which is deployed on an Azure SQL Server. Please see my prior tip on the details on how to setup this test database.
Desktop Designer
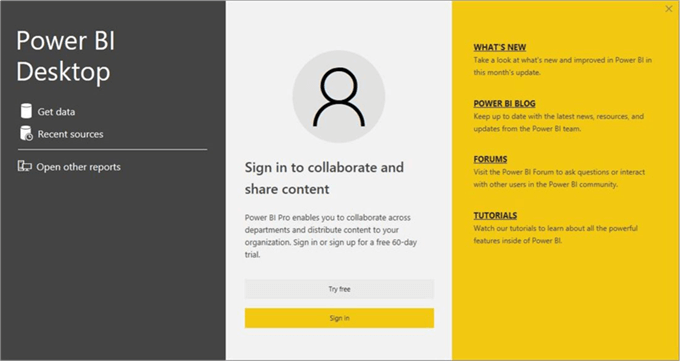
We will be using the desktop designer to explore the M language functions. The very first step is to launch the Power BI application.
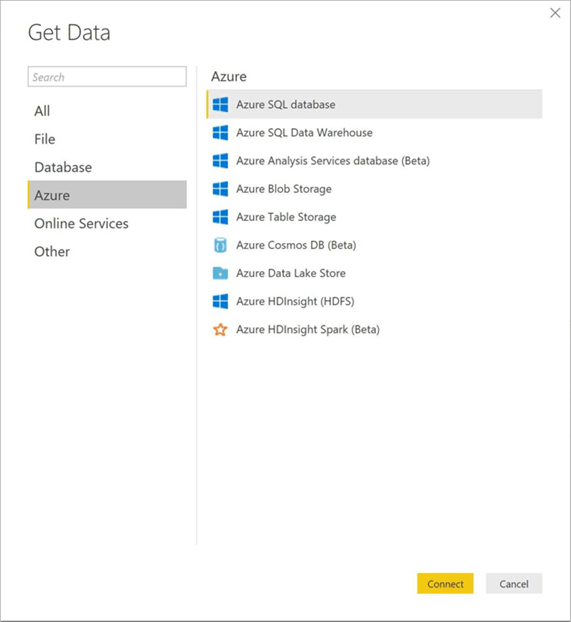
To start the import process, select the get data option from the toolbar. Choose the Azure SQL database as the desired connection. Click the Connect button to continue.
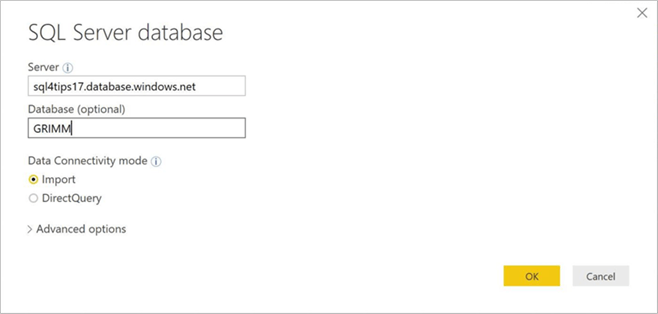
Since the data inside the table (fairy tales) is not changing, we are going to import the data into the Power BI internal data store (xVelocity in-memory Analytical Engine). Please enter the fully qualified name of the Azure SQL server. The database name is GRIMM. Press the OK button to continue.
SQL Server in general supports two types of security: windows and standard. I am going to use the admin account that was setup with our test server. If this was a real production build out, I would create a contained user account with read only access for reporting. Choose the Connect button to continue.

The navigator dialog box allows you to select database objects such as views and tables that you have access to. I am going to select the TBL_FAIRY_TALES table in the STORIES schema.

The nice thing about this dialog box is the sample preview of the table data on the right side. If we wanted to manipulate the data before importing, we could press the edit button now. Since the table data is in the correct format, just click the Load button.
Currently, the query is not saved and not named. Make sure you save the query and rename it as the FAIRY_TALES data set.
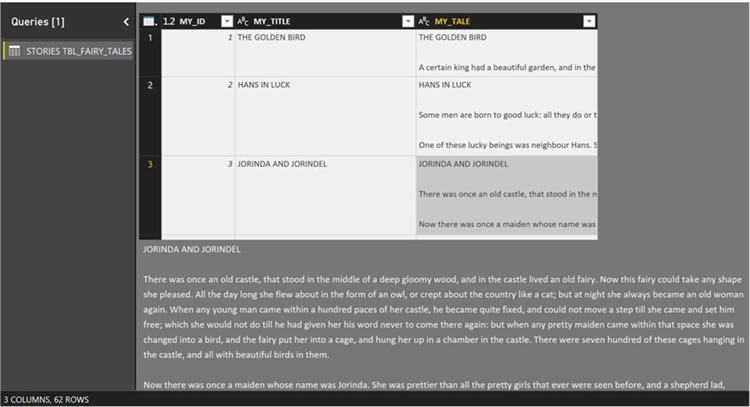
The screen shot below shows the results of our tasks. We have imported the FAIRY_TALES dataset with three columns: MY_ID, MY_TALE and MY_TITLE.
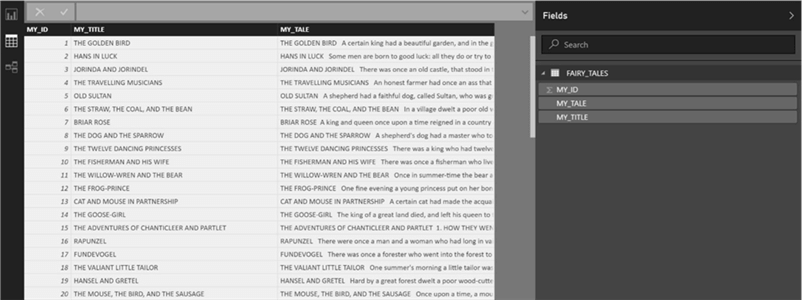
Now that we have our test data, we can talk about information and extraction text functions that are supported by the M language.
Advanced Editor
The quickest way to bring up this editor is to choose the following menus in order: get data, blank query, and advanced editor. Initially, our source will be equal to the empty string. If we want to base a query off an existing data set, we just change the empty string to the name of that data set.
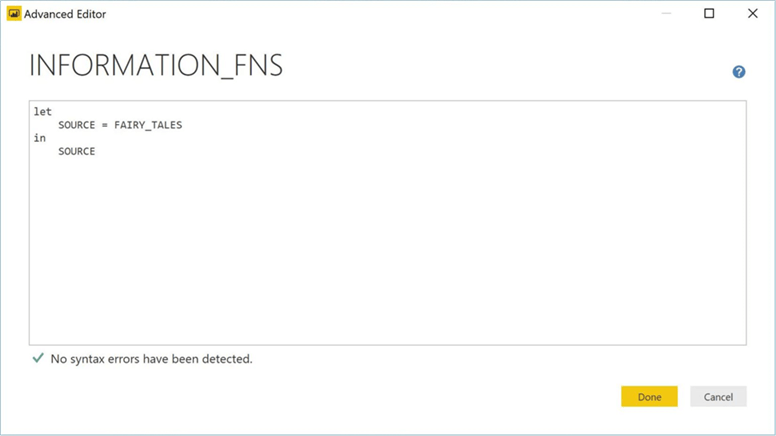
This technique is very handy when we want to work with a data set multiple times and want to store the data only once. For this tip, we are going to create two more datasets to reflect the types of functions we will be experimenting with.
The INFORMATION_FN dataset will be used for describing the string and the EXTRACTION_FN dataset will be used to extract a smaller string from a larger one.
Informational Functions
There is only one text function in the M language that is considered informational.
The Text.Length function returns the length of a given string.
This function is handy when you want to find the longest FAIRY TALE in the GRIMM database.
To use this function, we are going to add a custom column to the INFORMATION_FN dataset. The quickest way to bring up this editor is to choose following menus in order: data sets, choose the correct set, edit queries, add column and custom column editor.
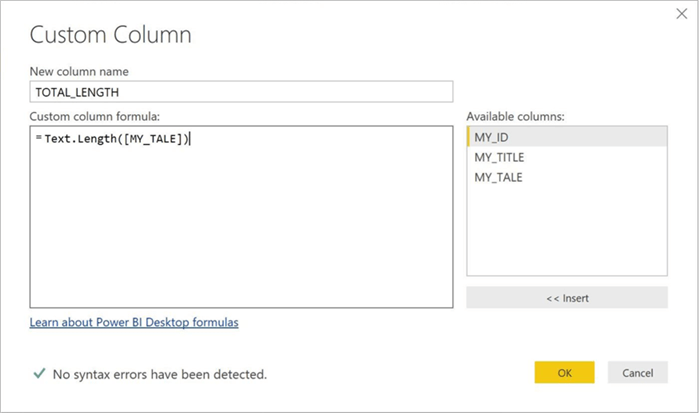
The above image shows the syntax for the new column named TOTAL_LENGTH. We can optionally format this number as a large integer and sort in descending order all the records.
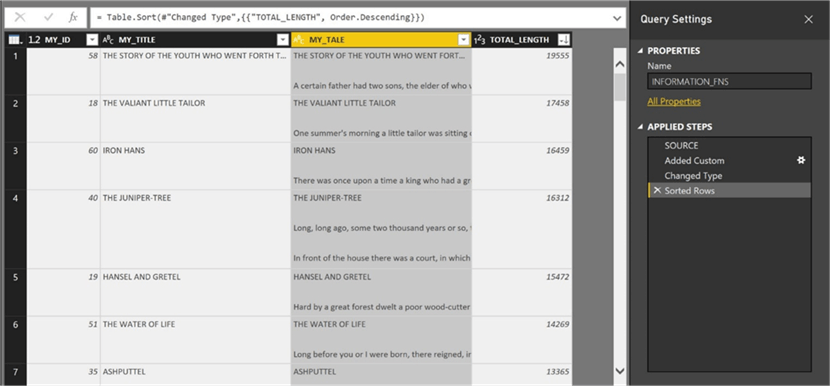
The above screen shot show that the “THE STORY OF THE YOUTH WHO WENT FORTH TO LEARN WHAT FEAR WAS” contains the most text.
Extraction Functions
The following table contains functions that I consider to be used to extract text. For some reason, the last three functions are under the transformations in the online documentation.
The Power BI team releases updates on a monthly basis. The framework of
this article has been on my desk for a while. Since then, the Text.Middle
function has been added and I included it for completeness.
| Function | Description |
|---|---|
| Text.At | Returns a character starting at a zero-based offset. |
| Text.Middle | Returns the substring up to a specific length. |
| Text.Range | Returns a number of characters from a text value starting at a zero-based offset and for count number of characters. |
| Text.Start | Returns the count of characters from the start of a text value. |
| Text.End | Returns the number of characters from the end of a text value. |
| Text.AfterDelimiter | Returns the portion of text after the specified delimiter. |
| Text.BeforeDelimiter | Returns the portion of text before the specified delimiter. |
| Text.BetweenDelimiters | Returns the portion of text between the specified start and end delimiter. |
I will be creating custom columns to demonstrate the use of each function.
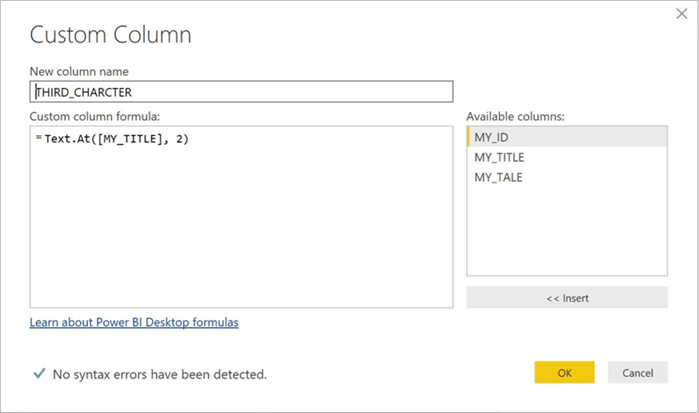
The Text.At function returns a single character given a position
in the string. Text (strings) in Power BI are zero based. A value of
2 is passed to the function to extract the third character from the MY_TITLE column.
This new custom column is named THIRD_CHARACTER.
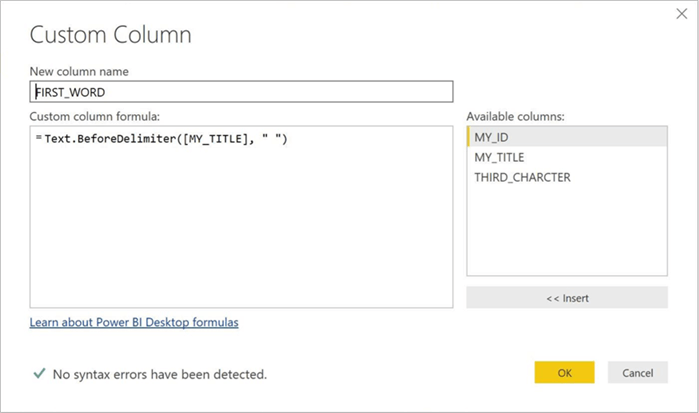
There are three functions that deal with delimiters.
The Text.BeforeDelimiter function returns the part of the string
before the first delimiter. In our case, we want the custom column named FIRST_WORD
to contain the first word in the MY_TITLE column. Since words are delimited
by a space, we pass “ “ as the parameter to the function.
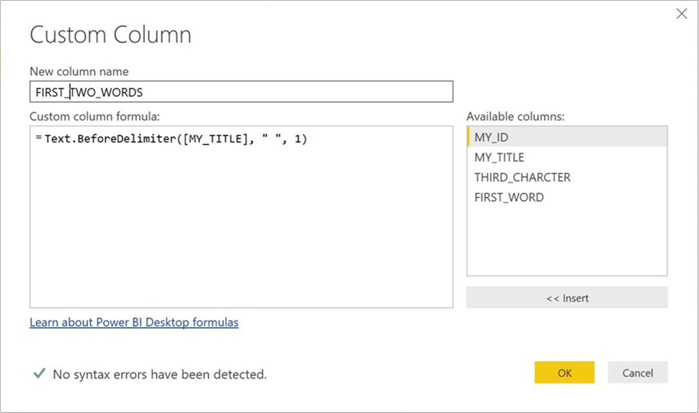
There is an optional third parameter for this function called index. Again, this variable is zero based. If we want to extract the first two words, we pass a parameter of 1. The custom column is named FIRST_TWO_WORDS to aptly describe the data.
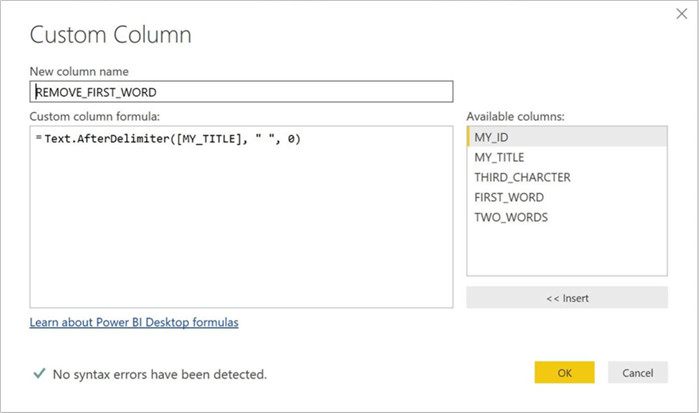
The Text.AfterDelimiter function returns the part of the string
after the first delimiter. The above example removes the first word from MY_TITLE
column and saves the result as a column named REMOVE_FIRST_WORD. Again, a
space (“ “) is passed as the argument. While the index is optional,
I passed a zero index to tell the function to remove up to the first delimiter.

The Text.Range function is used to return a range of characters.
The parameters to the function are the following: name of the column, zero
based index to start extract, and the number of characters to return. The
above example extracts the 5th and 6th characters from the
title and saves the column as CHARS_5_AND_6.
The only difference between the Text.Range and Text.Middle function
is that later function is one based. I will leave exploration of this function
up to you. The following M language code snippet returns the last word.
/* Return the word ‘World’ */
Text.Middle("Hello World", 6, 5)
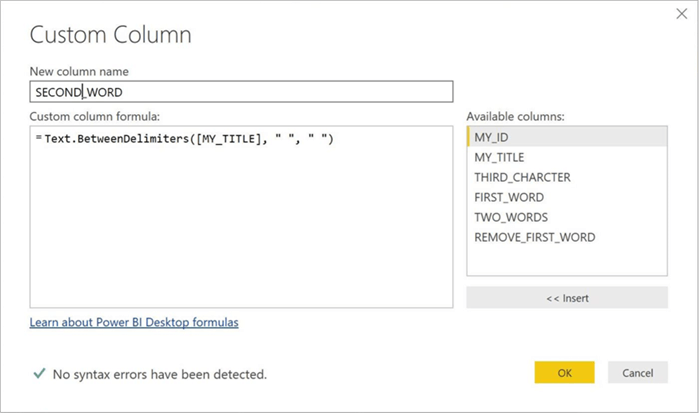
The Text.BetweenDelimiters function allows for a variety of uses.
To pick out the second sentence is a string, we could pass a space as the first
delimiter and a period as the second delimiter. This assumes a correctly formatted
sentence.
In our simple test, we are going to pass a space for each delimiter. The result is a column named SECOND_WORD that is extracted from the MY_TITLE column.
The last two extraction functions return characters from the front or end of
the string. If we want the first 3 characters of the title, we can use the
Text.Start function with a length of 3.
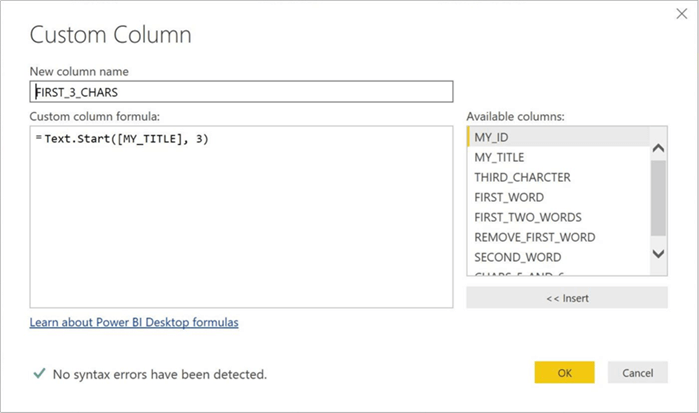
If we want the last 3 characters of the title, we can use the Text.End
function with a length of 3.
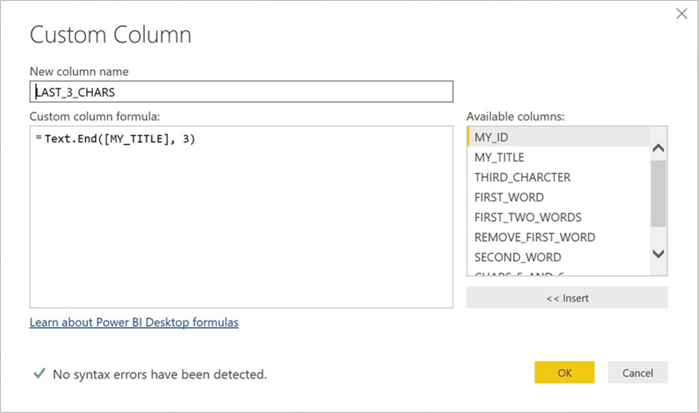
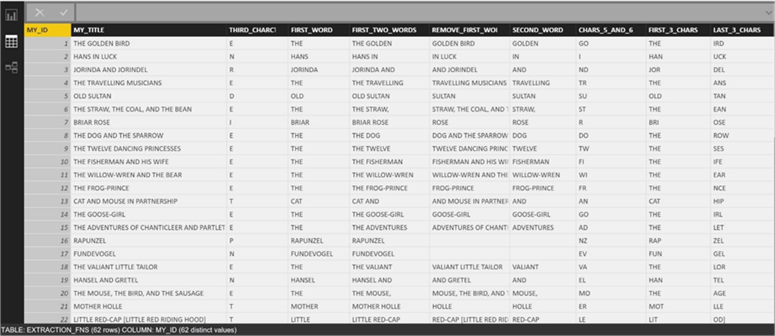
Again, the two custom columns are appropriately named FIRST_3_CHARS and LAST_3_CHARS. The screen shot below shows all the new custom columns that were created during the test.
Summary
Today, we used an existing Azure SQL Database that contained Grimm’s Fairy Tales as the basis for testing the M language text functions. The informational and extraction text functions of the M language were used to create custom columns. While the exploration of the functions was fun, it was not earth shattering.
One key design pattern is the fact that an existing query can be used as the basis of another query. This technique is very handy when we want to work with a data set multiple times but want to store the data only once. I hope you use this pattern in your future work.
Last but not least, Microsoft Power BI has been at the top of the Gartner magic quadrant for the last two years. Please see this article below. As a consultant, this means more work will be available to you in the future with this tool. Having a full understanding of the M language will only make you a better dashboard designer.
Next Steps
- Take a look at these other Power BI tips.
Learn more about Power BI in this 3 hour training course.
About the author
 John Miner is a Data Architect at Insight Digital Innovation helping corporations solve their business needs with various data platform solutions.
This author pledges the content of this article is based on professional experience and not AI generated.
View all my tips


