By: Simon Liew | Comments | Related: > Azure Data Studio
Problem
I have a table with many columns in Teradata. I wanted to copy data from this Teradata table quickly to SQL Server to do some data reconciliation. Manually defining a destination table in SQL Server with the column names and its equivalent data type would be very time consuming. Do the SQL Server Data Tools (SSDT) have any features to create a table in SQL Server with all the columns and its equivalent data type as well as bringing the data across easily?
Solution
There is a way in SSDT to generate a CREATE TABLE script which will contain the column names from the source table and its equivalent data type in SQL Server. This process can be used to map the source columns to SQL Server and copy the data across from the source into SQL Server.
In this tip, we will run through the step-by-step process using SSDT to create an equivalent table in SQL Server and copy the data across. Pay attention to Step 6 in this tip. Step 6 is where we will generate the CREATE TABLE script and define the column mapping between the source Teradata table and destination SQL Server table.
In this tip we are using Teradata as the source and this tip assumes the OLEDB driver for Teradata is already installed.
Step 1 - Launch an Integration Services Project in SSDT
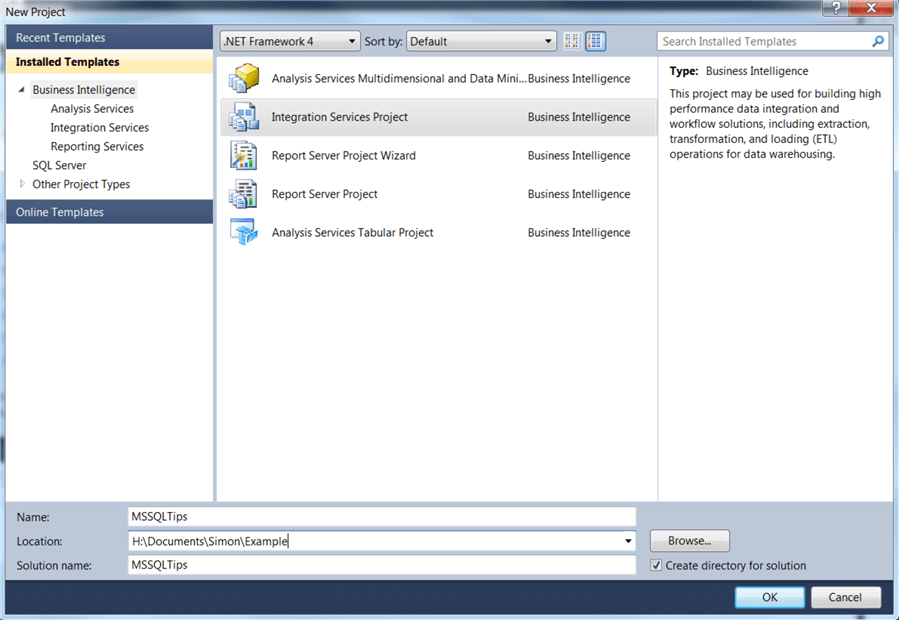
Launch SSDT to create a new Integration Service Project.
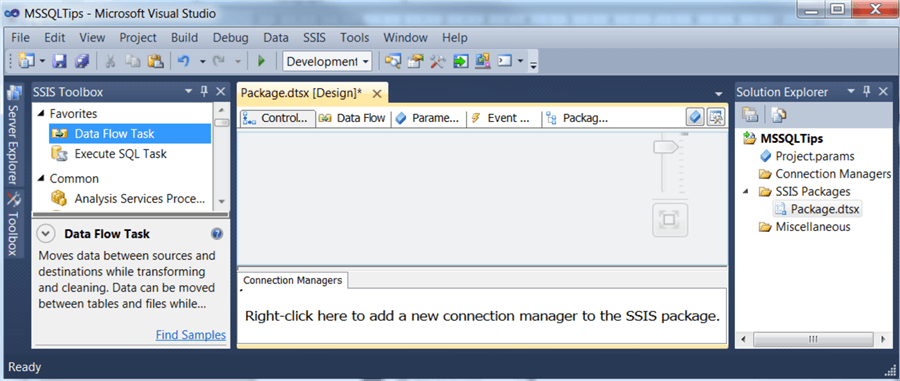
By default, a blank SSIS package will be created with the name Package.dtsx.
Step 2 - Integration Services Data Flow Tasks for Teradata and SQL Server
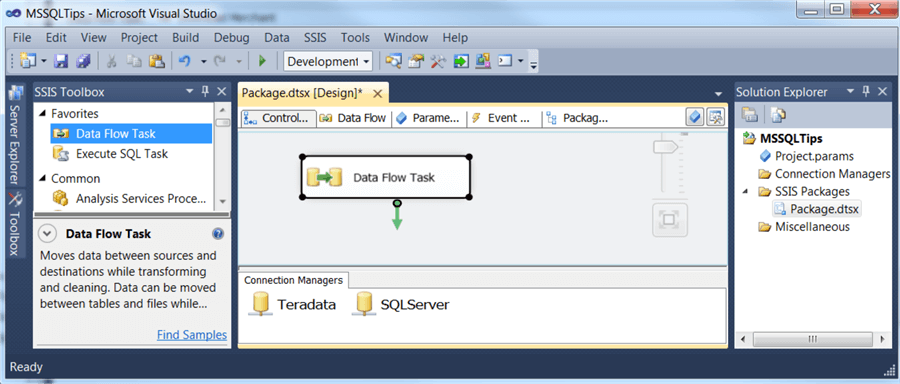
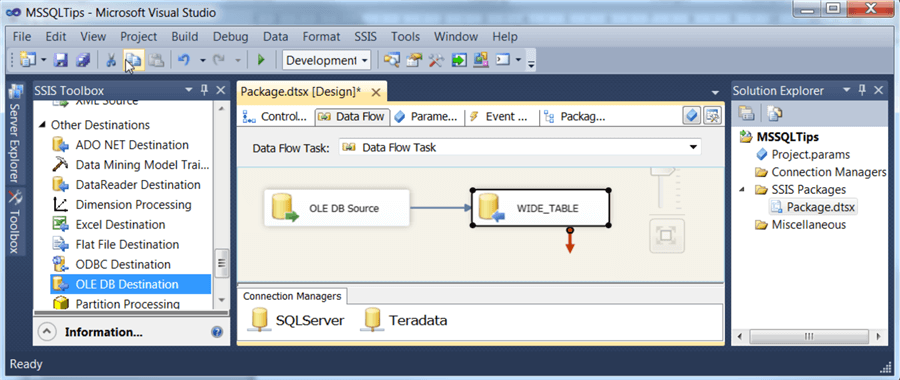
In SSDT, drag and drop a Data Flow Task into the package. Create 2 OLE DB Connection Managers, one for the source database to Teradata, and another one for the destination database in the SQL Server.
Step 3 - Integration Services OLE DB Source and Destination
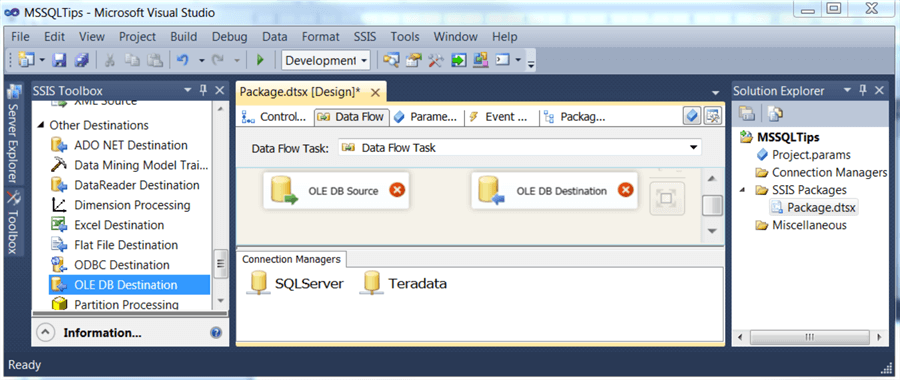
Inside the Data Flow Task, drag and drop an OLE DB Source and an OLE DB Destination to map to the source and destination connection manager.
Step 4 - Teradata Extract Query
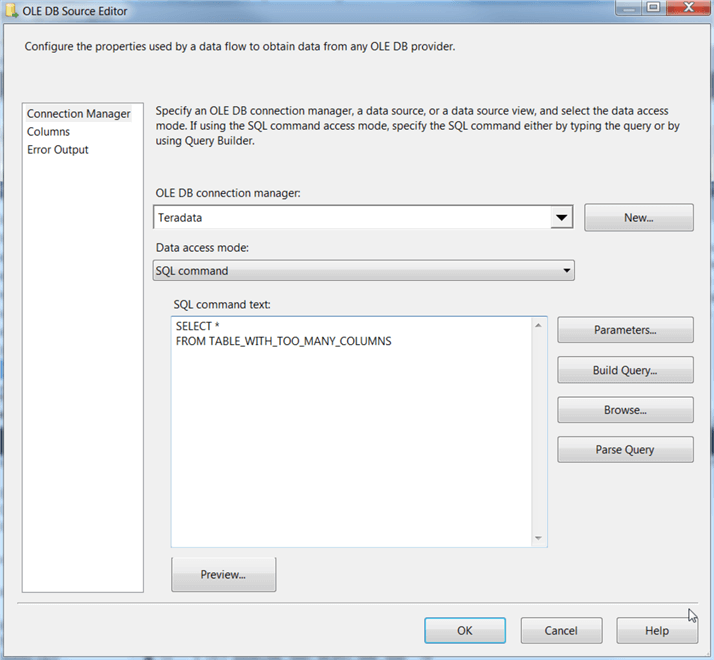
Type the extract query into the SQL command text of source Teradata.
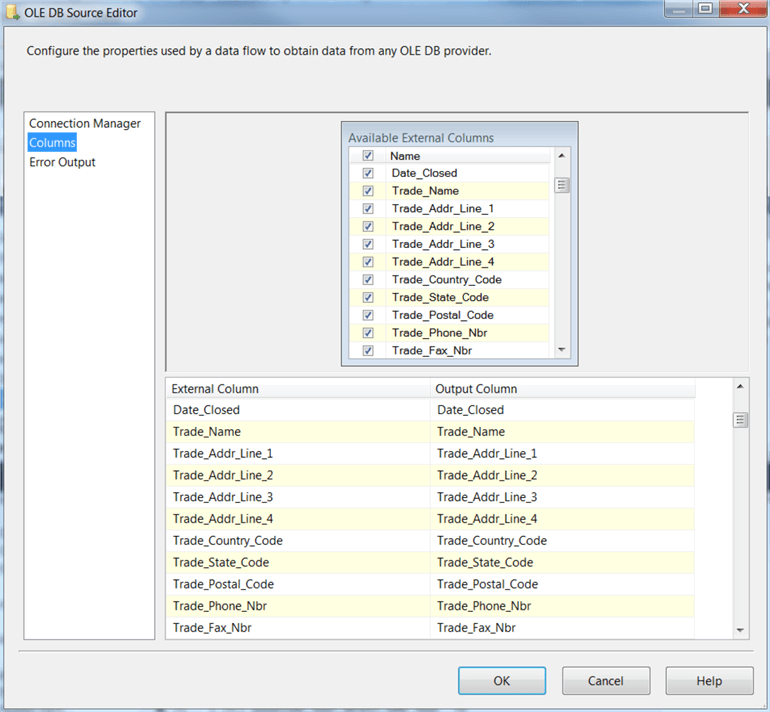
Then click on the Columns page. This will automatically populate the Available External Columns of the source table in Teradata. As you can see, the table in this tip contains many columns as outlined in the problem description.
Step 5 - Connect the Data Flow Tasks in Integration Services
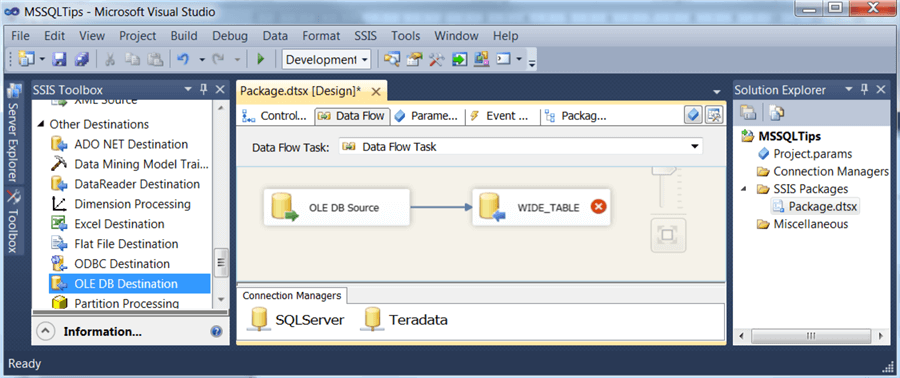
Connect the data flow path precedence of the OLE DB Source to the OLE DB Destination. Note that the destination OLE DB task name is renamed to WIDE_TABLE.
Step 6 - Modify the OLE DB Destination in Integration Services
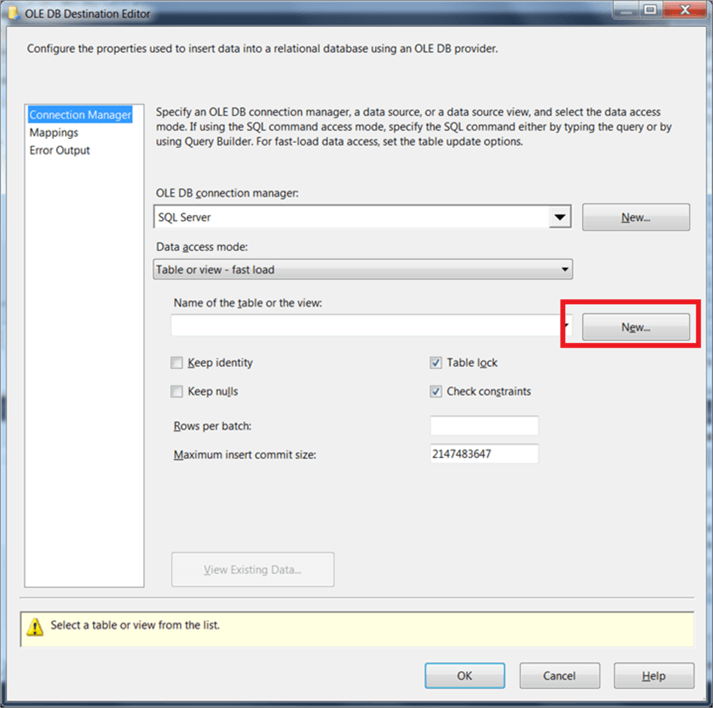
Double-click the destination OLE DB task, then you will see the OLE DB Destination Editor. This form editor allows the CREATE TABLE script to be generated with the column name and data type of the source Teradata table.
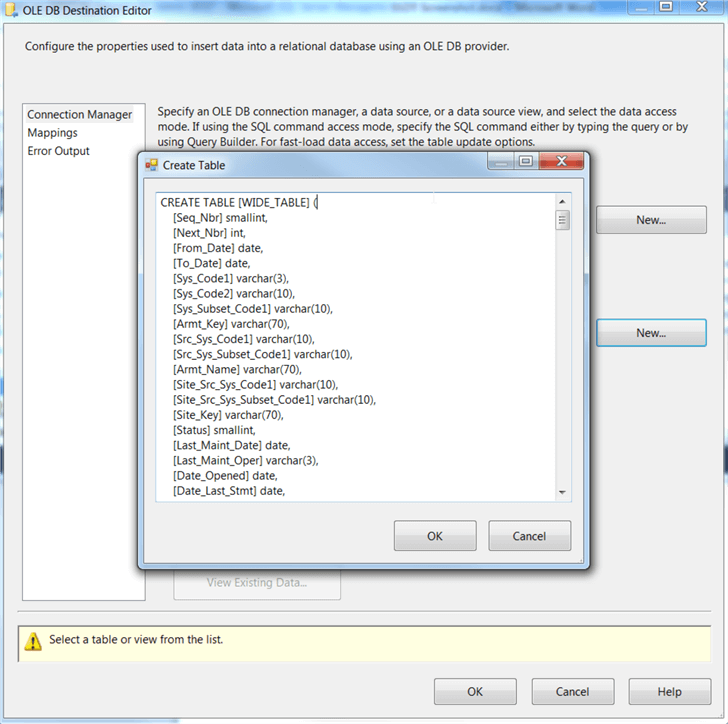
Click on the New button as highlighted in the red box.
The form that pops up will generate the CREATE TABLE data definition script populated with all the column names and the data type of the source Teradata table. Note that the table name in the generated script here will be the name of the OLE DB Destination task name.
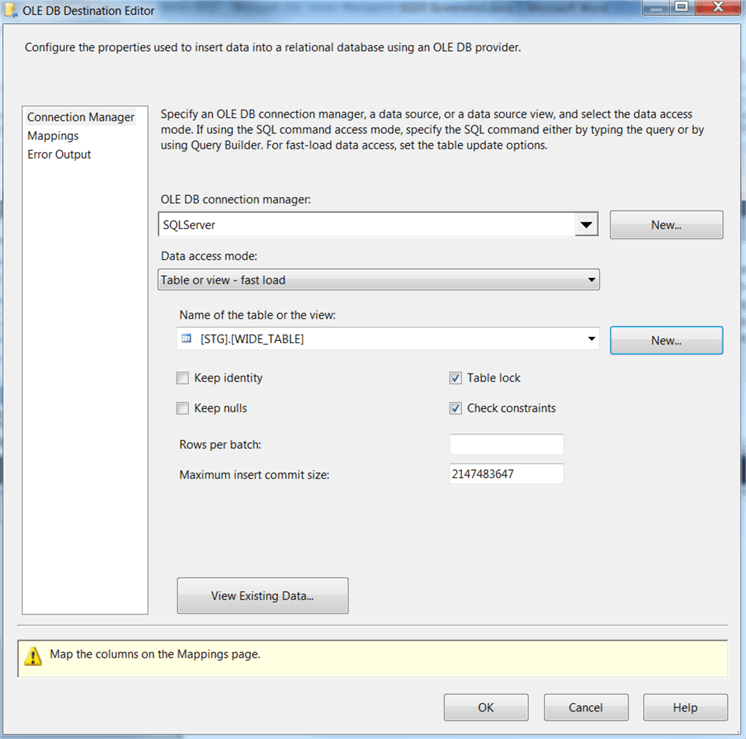
Click OK would create the WIDE_TABLE table in the destination SQL Server database as configured in the Destination Connection manager.
After clicking the OK button and the table is created, the form will go back to the OLE DB Destination Editor. There is a Warning sign at the bottom of the form to map the columns on the Mapping page.
Step 7 - Correct Column Mappings in Integration Services
Click on the Mappings page and this will automatically map the source to destination columns based on the same column name created.
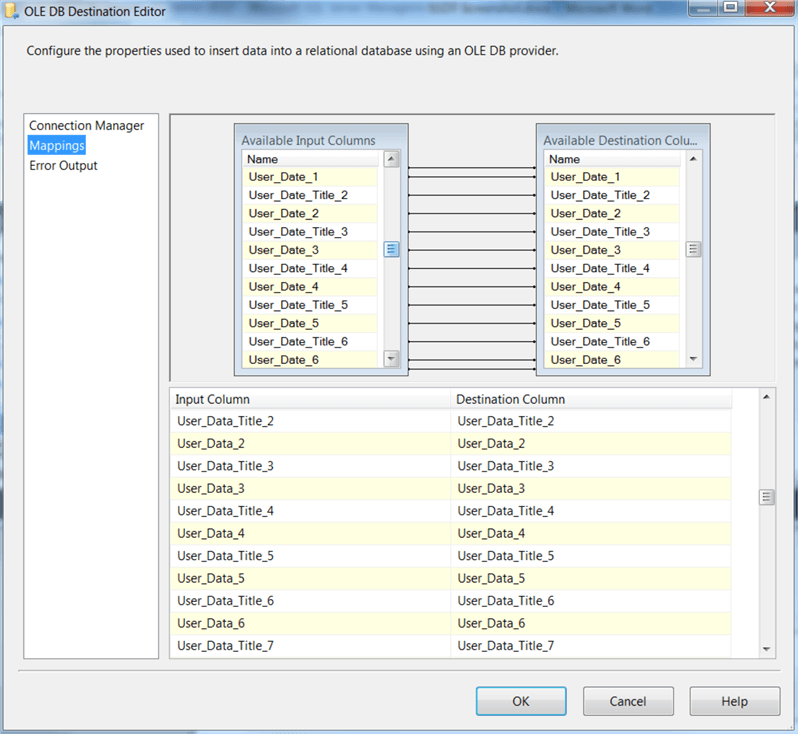
Now the Data Flow Task is complete and all the previous errors and warnings are gone.
Step 8 - Execute Integration Services Package
Right-click on the SSIS package and choose “Execute Package” to kick off the package execution.
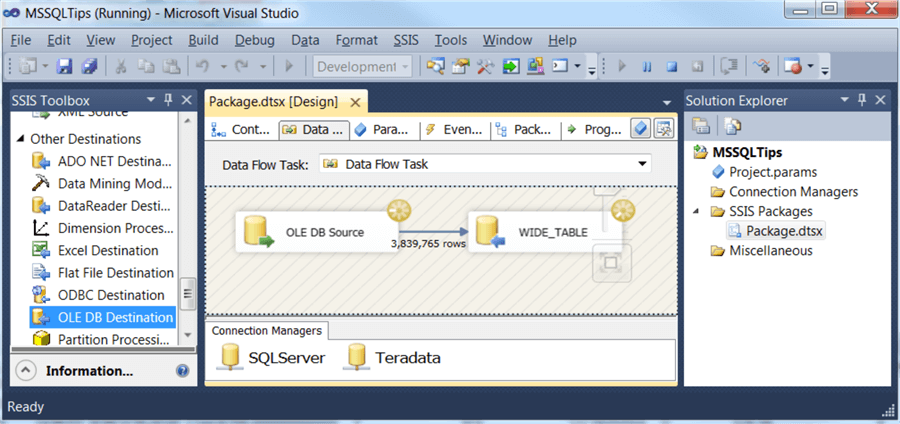
Step 9 - Verify the Data Export from Teradata to SQL Server
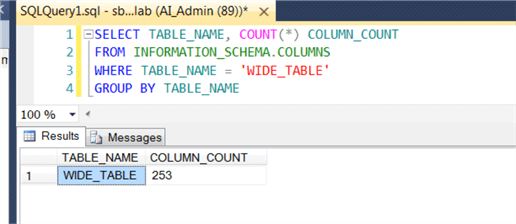
In SSMS, you can verify that the new WIDE_TABLE table has been created and contains all the columns of the source Teradata table.
Next Steps
Try this out next time you need to import data into SQL Server.
Also, check out these other articles:
- SQL Server Data Tools
- Task 4: Creating an SSIS Project using SQL Server Data Tools
- Installing Teradata Client Tools to use with SQL Server Integration Services
- Integration Services (SSIS) Connections
- Check out all of the Integration Services tips
About the author
 Simon Liew is an independent SQL Server Consultant in Sydney, Australia. He is a Microsoft Certified Master for SQL Server 2008 and holds a Masterís Degree in Distributed Computing.
This author pledges the content of this article is based on professional experience and not AI generated.
View all my tips


