By: Mohammed Moinudheen | Comments | Related: > Azure Backup and Restore
Problem
I have a number of files stored on Azure file shares which I use in my SQL Server environment. Is there any way I can safely backup these files as part of a backup policy? What are the steps I need to perform to accomplish this task?
Solution
This tip assumes that you already have resources in your Azure environment and you are familiar with using the Azure portal. If you are new to Azure, you can subscribe to a trial account here, which will give you access to Azure services for a year and a credit of USD $200. Steps to create file shares in Azure is quick and easy. You can refer this link where there is a section to create a file share in Azure step by step. You can refer this link where you can see detailed step by step instructions to set up a Recovery Services Vault.
In this tip, we will be using the Azure Recovery Services Vault to back up the Azure file shares. This tip assumes that you already have Azure file shares and Azure Recovery Services vault configured.
Backup Azure file share using Recovery Services Vault
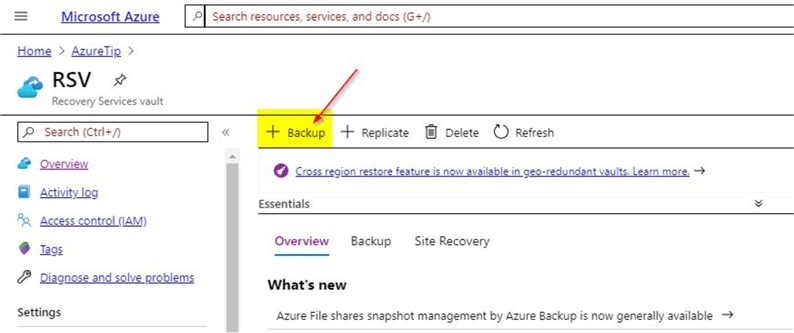
As a first step, on the Recovery Services Vault, click on the 'Backup' option as shown.
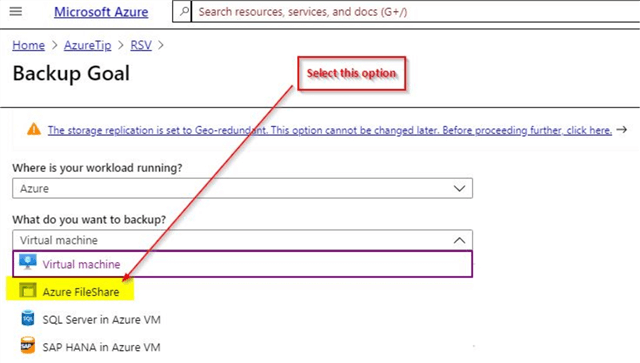
Once you click on the 'Backup' option, you get to select what you want to backup. Here, select the 'Azure FileShare' option and configure backup.
Select storage account
When you select the 'Configure Backup' option, in the next step, the storage account needs to be selected.
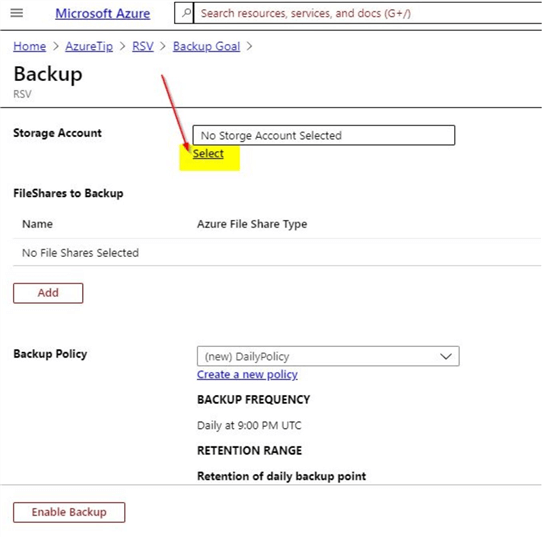
Once you click on the 'Select' option as shown, you get to see the storage accounts that are available in your subscription.
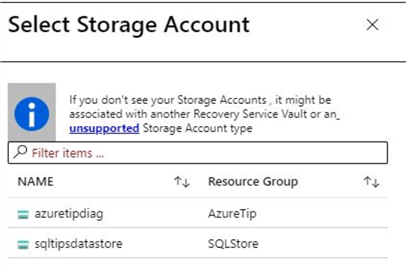
Select the storage account that you want to backup. Once done, the validation process will start as shown.

The validation process is quite quick and completes in a few minutes.
Add File Shares to backup
Once the storage account validation completes, you can add the file share to backup.
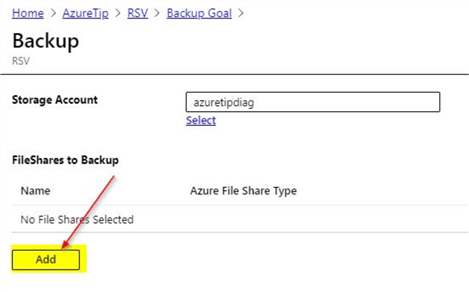
When you click on the 'Add' option, on the right-hand side you will see the list of file shares that are available to be backed up. Select the file share that needs to be backed up and select 'Ok'.
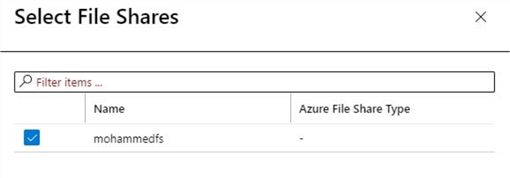
Once done, the file share will appear in the 'FileShares to backup' list and you can select the option to 'Enable Backup'.
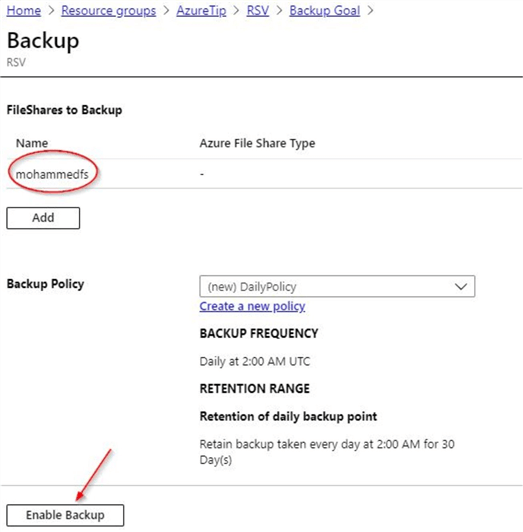
Enable Backup
Select the option to 'Enable Backup' after selecting the file shares to be backed up. Once done, you will see this deployment message in notifications.

The deployment process completes in a few minutes and you will see this notification when deployment succeeds.

Checking the backup items on Recovery Services Vault
When you navigate to the Recovery Services Vault, on the left-hand pane, you can select 'Backup Items' as shown.
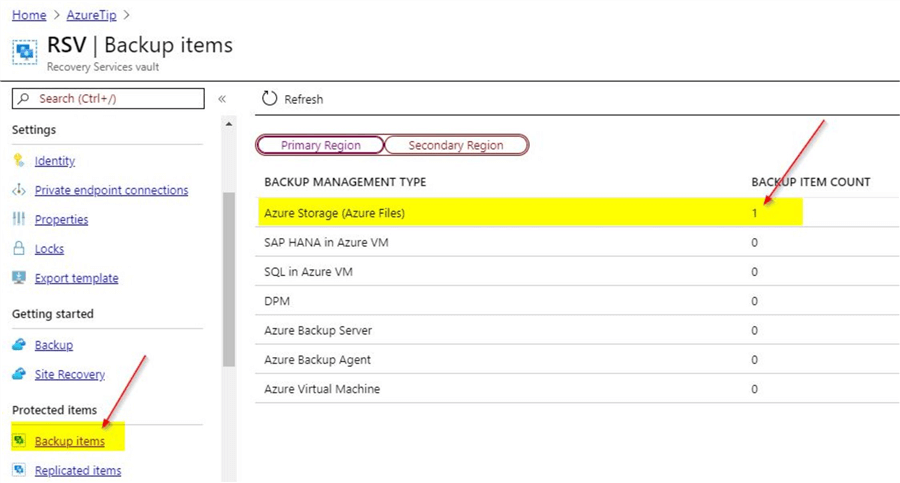
Here, you can see that there is a backup item in the Azure files. When you click on the 'Backup Item' as shown above, you get further details of the backup status.

In the backup item, you can see that there is a warning regarding a pending initial backup. As the backup will be based on a backup policy, the file share will be backed up only on a specific time and at this point, it is not yet backed up in the Recovery Services Vault. In order to perform an on-demand backup, just click on the ellipsis as shown.
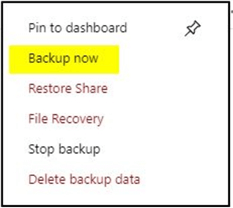
Once done, you can see the 'Backup now' option which you can select to perform an on-demand backup. When you click on the 'Backup now' option, you will get this screen where you can decide on the retention period.

Based on your requirement, review and confirm. Once done, the backup job gets triggered and you will get a confirmation on the notifications section.

Review backup job status
You can review the status of the on-demand backup job by checking the 'Backup jobs' pane on the Recovery Services Vault. On the left-hand pane, you can view the option to select the 'Backup jobs.
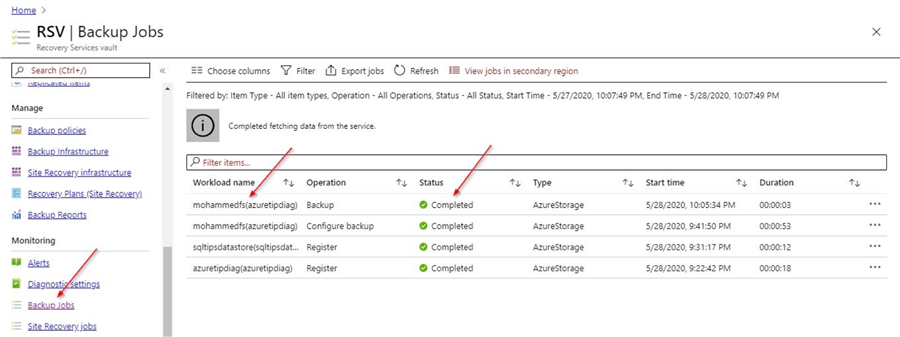
From the screen above, you can see that the on-demand backup job for the Azure file share completed in around 3 seconds.
Checking Backup Policy
In this demo, the default policy was used to schedule backups for the Azure file shares. You can check further on the backup policy by clicking on the 'Backup policies' option on the left-hand pane of the Recovery Services Vault.
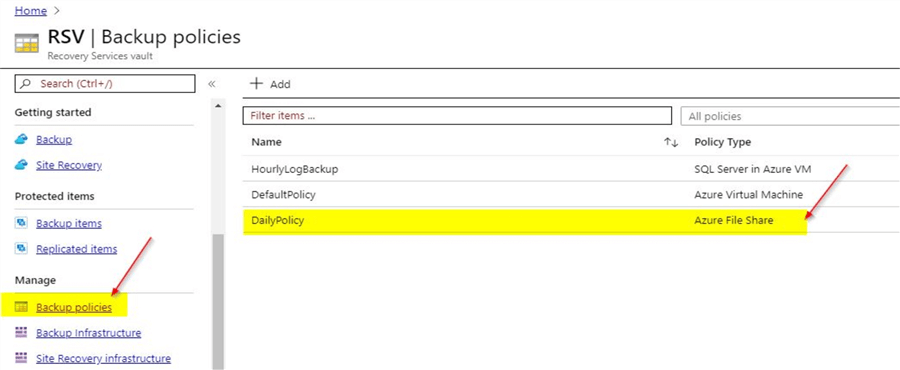
Here, you can see a 'Daily Policy' available for Azure file shares. Just click on the option to check further details of the policy.
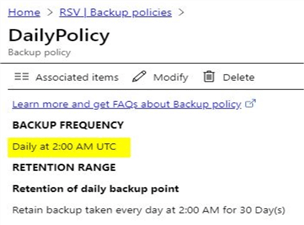
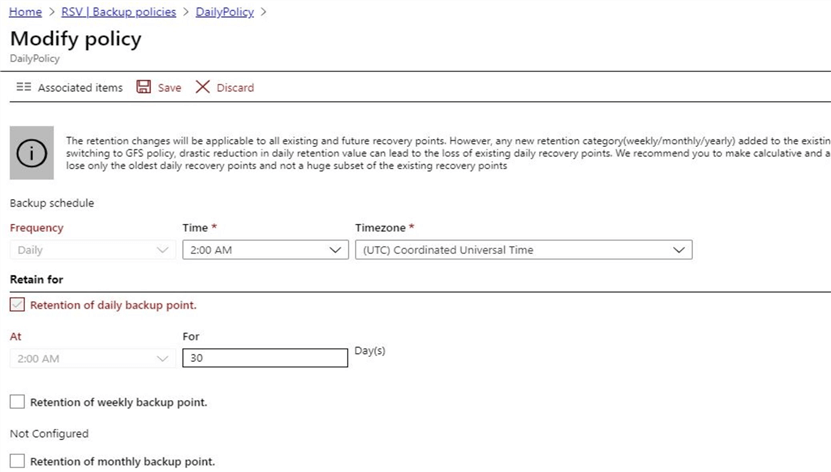
The daily policy is a nightly backup of the Azure file shares as shown. You can modify the policy as per your requirement. When you click on the 'Modify' option, you will see additional options that can be enabled as per your requirement.
Next Steps
- In this tip, you saw a reference to a tip to create Azure file shares step by step
- In the tip, you saw a reference to a tip on creating Azure Recovery Services Vault step by step
- In the demo, you learnt how easily Azure file shares can be backed up using Recovery Services Vault
- In the demo, you saw how file shares can be added to backup policy
- In the demo, you saw how we can view the status of the jobs that are running under the 'Backup Item' section of the Recovery Services Vault
- In the demo, you saw how an on-demand backup can be performed for the Azure file share on the Recovery Services vault
- In the demo, you also saw details of the default backup policies that are available in the Recovery Services Vault and how we can modify it as per our requirement
- Try out this demo on your own Azure environment
- Refer other articles available on MSSQLTips related to Azure
About the author
 Mohammed Moinudheen is a SQL Server DBA with over 6 years experience managing production databases for a few Fortune 500 companies.
This author pledges the content of this article is based on professional experience and not AI generated.
View all my tips


