Problem
Microsoft Power BI has again topped the charts in 2020 as a leader in the Gartner Magic quadrant. This report rates Business Intelligence tools in terms of the ability to execute and the clearness of vision. The Power BI desktop designer is still where all the action happens when it comes to data modeling, adding measures and drawing visuals. The Power BI service allows the designer to share their artifacts in a public workspace or in an app. This means that the administrator will be managing more objects in the service.
How can we manage Power BI workspaces using a scripting language?
Solution
Microsoft has provided the administrator PowerShell cmdlets to manage objects in the Power BI service including workspaces, datasets and reports. The cmdlets are just a nice wrapper for REST API. If you cannot find a PowerShell cmdlet to perform the required action, you can just call the web service directly. Today, we are going to review cmdlets that manage workspaces in the cloud.
Business Problem
Our boss has asked us to investigate the use of PowerShell scripts to manage workspaces for users of the cloud service. Since we are a big fan of Scott Adam’s comic strip, a few characters of the Dilbert’s comic strip will show up as users and/or in the reports. Most windows operating systems come with the Power Shell ISE preinstalled. Please make sure you have at version 5.1.
Enabling Power BI APIs
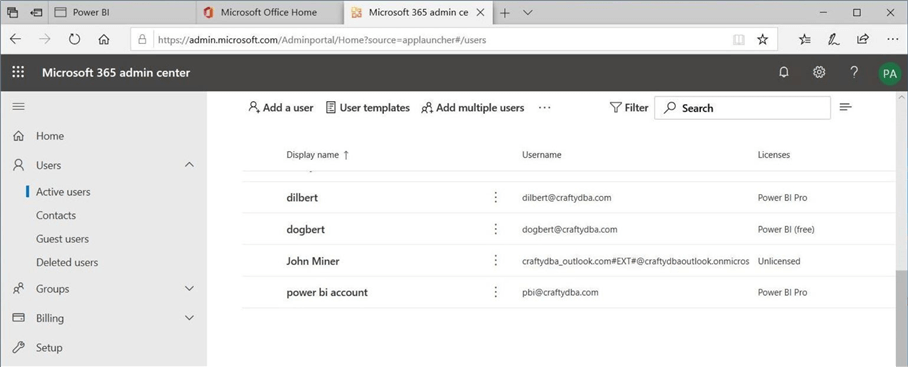
The global administrator should have access to both the Office 365 and Power BI Admin portals to setup the correct access for the PBI – REST API service. The active user’s menu lists the office 365 users and shows which users are assigned licenses. We can see that Dilbert is a pro user while Dogbert is a free user.
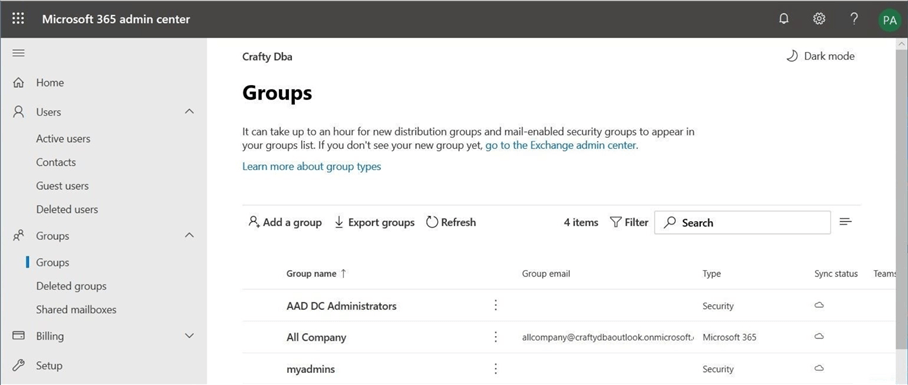
Typically, the settings for the Power BI tenant allows for three types of values. Do not allow users to access, allow all users access and provide access to a defined office 365 group. We want to use the last setting since it allows admins to do their job. The image below shows the myadmins group and the pbi@craftydba.com account is part of this group.
The last task is to enable the Power BI APIs for the selected security group. You will have to scroll down the tenant settings window until you find the right property. The image below shows the correct access being applied to the tenant.

To recap, the user account that will be executing Power Shell scripts that talk to the PBI – REST API must be part of an Office 365 group. This group must be specified in the tenant settings window. Additionally, a service principle can be defined within Azure Active Directory and added to this same group.
Review Modules and Cmdlets
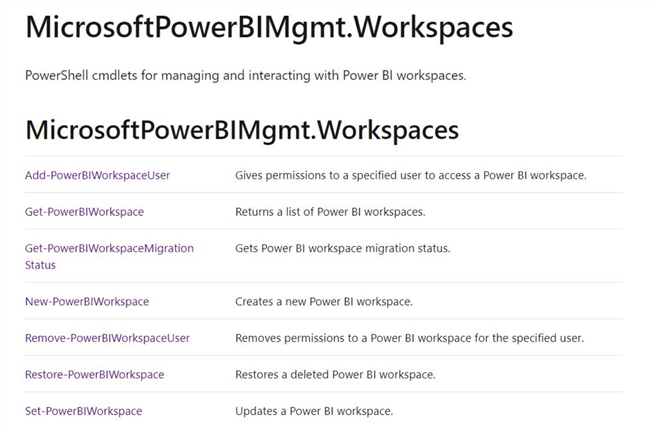
Microsoft has supplied the PBI administrator with a bunch of modules and cmdlets that can be used to manage the online service. Please see the online documentation for details.

Today, we are going to focus on the module and cmdlets that deal with workspaces. Any missing functionality can be overcome with calling the Swiss army cmdlet named Invoke-PowerBIRestMethod.
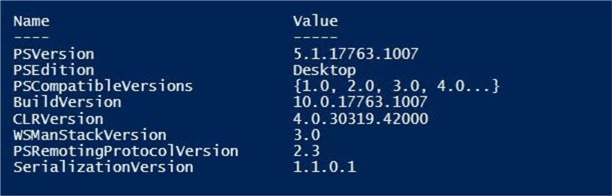
To install these cmdlets, you must have a PowerShell version of 5.1 or later. The following script validates the version, updates the nuget package, installs the Microsoft Power BI management cmdlets and lists cmdlets filtered by the workspaces module.
# What version of PowerShell
$PSVersionTable

# Update nuget
Install-PackageProvider -Name NuGet -Force

# Install power bi
Install-Module -Name MicrosoftPowerBIMgmt -Force

# Verify module
Get-Command -Module MicrosoftPowerBIMgmt

# List cmdlets
Get-Command | Where-Object { $_.Source -match 'MicrosoftPowerBIMgmt.Workspaces'}
The image below shows that my computer has the correct version of PS software.
The nuget package has been updated to the latest.

Last but not least, we can see there is an alias for each cmdlet for backwards compatibility.

We now have the cmdlets install and can start exploring how to manager workspaces.
List current workspaces
The Connect-PowerBIServiceAccount cmdlet logs the current user (credential) into the Power BI service. The Get-PowerBIWorkspace returns a list of all workspaces in the tenant. The PowerShell script below shows all active workspaces in the tenant.
# Connect with regular power bi admin
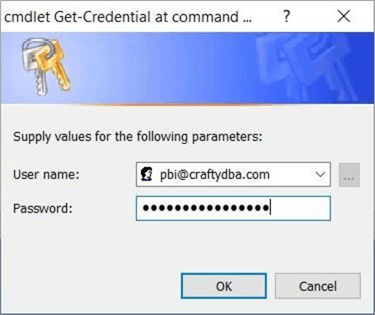
Connect-PowerBIServiceAccount -Credential (Get-Credential)
# Find all active workspaces
$workspaces = Get-PowerBIWorkspace -Scope Organization | Where-Object { $_.State -match 'Active' } | Select-Object Id, Name, Type
$workspaces
You must supply a user name and password to the Get-Credential cmdlet.
The connect cmdlets displays the current user who is logged into the Power BI service.

The image below shows that all three user accounts have a personal workspace. The pbi@craftydba.com account is an administrator and has access to the All Company workspace.

I usually like to check the results after executing my Power Shell cmdlets from the Power BI service graphical user interface. Shown below is the view from the pbi@craftydba.com account.

Creating a new workspace
One task that will be repeated many times is the creation of a new workspace. Many organizations turn off the ability for end users to create shared workspaces. That way, soft development life cycle (SDLC) tasks such as code reviews and/or addition of premium capacity assignment can be planned by the Information Technology (IT) team. Workspaces are containers that can hold reports, dashboards, datasets, workbooks and dataflows.
The script below satisfies a typical user request for a new workspace. Calling the New-PowerBIWorkspace cmdlet will create a new shared workspace called “Scott Adams – Comic Strips”.
# Create a new workspace, current user is admin
New-PowerBIWorkspace -Name "Scott Adams - Comic Strips"

# Grab pointer to object
$workspace1 = Get-PowerBIWorkspace -Scope Organization -Filter "name eq 'Scott Adams - Comic Strips'"
$workspace1

# Add Dilbert as a contributor
Add-PowerBIWorkspaceUser -Scope Organization -Id 20e6b0e4-e237-462f-8b25-caec664550da `
    -UserEmailAddress dilbert@craftydba.com -AccessRight Contributor
The output of the call to the second cmdlet is shown below.
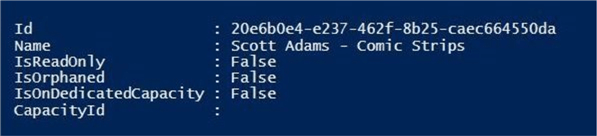
I was lazy and copied over the workspace id by hand to the third call in the script. But the above GUID can be replaced with the variable $workspace1.Id if you want. The last action of the script is to add dilbert@craftydba.com as a contributor to the shared workspace. This action can be completed with a call to the Add-PowerBIWorkspaceUser cmdlet.
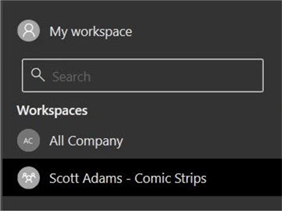
The image below shows the new workspace has been added to the pbi@craftydba.com account.
Now that we have a new workspace, we need to create and publish some content for Dilbert to review.
Publishing workspace content
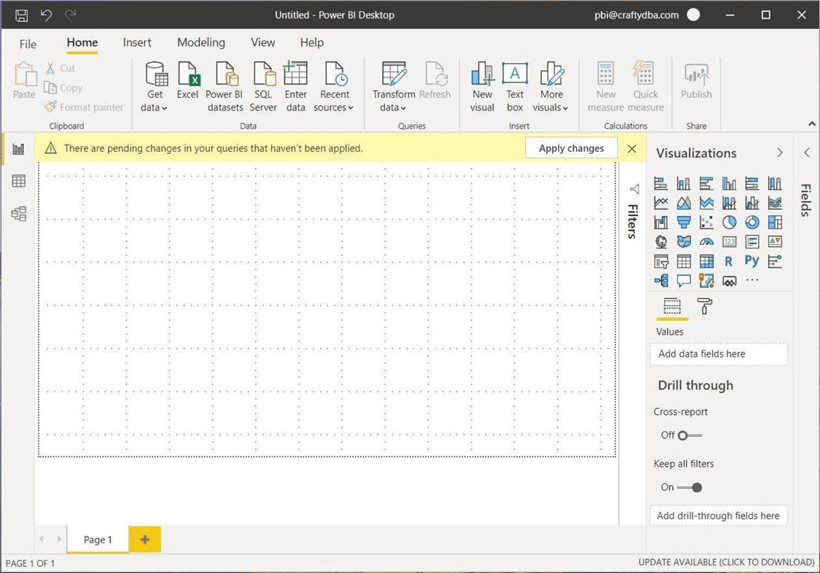
Make sure you have downloaded the latest version of the Power BI Desktop designer from here. The agile team at Microsoft publishes a new update each month. The easiest way to get ready for publishing content is to sign into the Power BI Service. The image below shows the pbi@craftydba.com user signed into the cloud service.
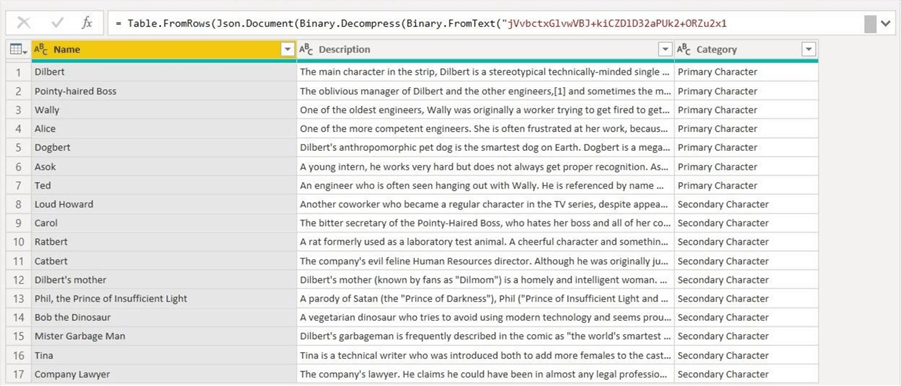
There have been many characters in the Dilbert Comic strip over the years. Check out the Wikipedia page for details on the primary and secondary characters. I choose to manually enter the data into a table. If you have not done this task before, check out MSDN for details. The image below shows 17 rows of data describing various characters.
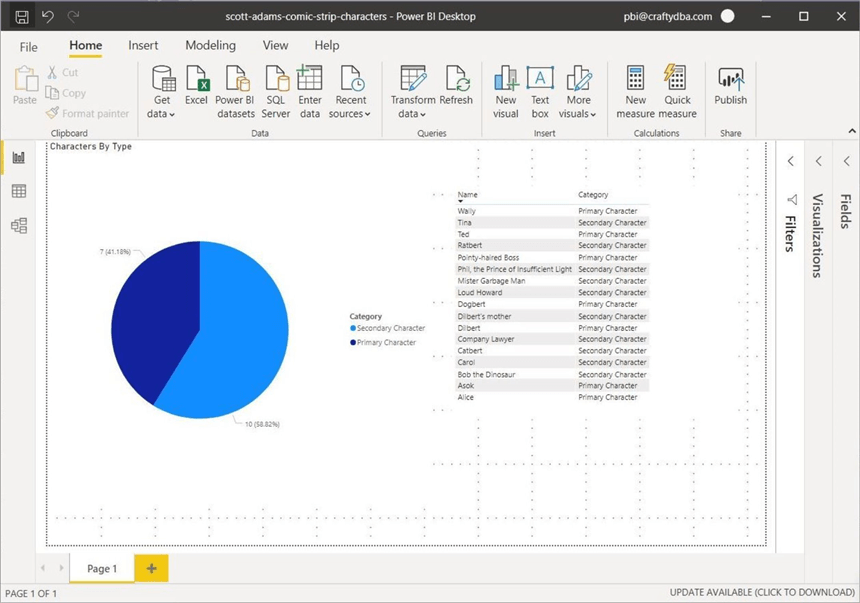
Having a raw table of data is not that interesting of a report. We have been asked to create a pie chart on how many characters are considered primary versus secondary. Of course, a simple data table will show the details behind the chart. The final report is shown below. Please save the file as “scott-adams-comic-strip-chracters.pbix”.
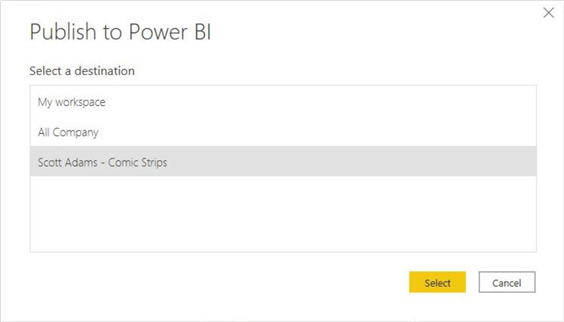
Click the publish button on the toolbar to move the report and dataset to the cloud. The end user has three workspaces to publish the report to. Please deploy the report to the last (newest) workspace.
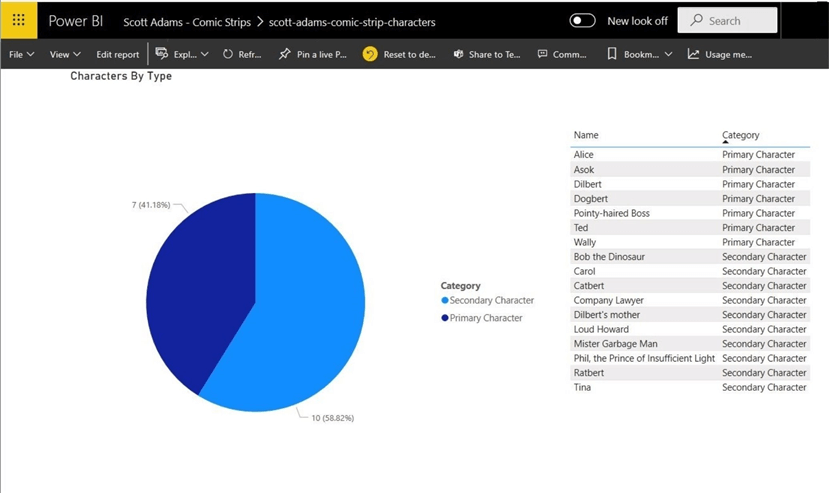
We can verify the publication of the report by looking at the “Scott Adams – Comic Strip” workspace under the pbi@craftydba.com workspace. Sure enough, the report can be seen in the cloud service.
Sharing workspace content
By default, the user named dilbert@craftydba.com does not have any personal report content. If he looks at the workspaces tab, he will find the shared workspace.

Let’s modify the workspace by creating a new dashboard named “Dilbert’s Dashboard”.
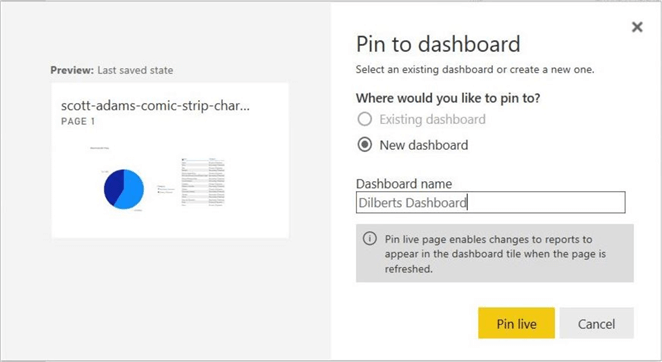
The image below shows an update to the workspace seen by the pbi@craftydba.com account. A new dashboard has been created. If we check the access of the workspace, we note that dilbert@craftydba.com can contribute to the workspace. If we did not want this, we could change the access level to reader to prevent future changes.
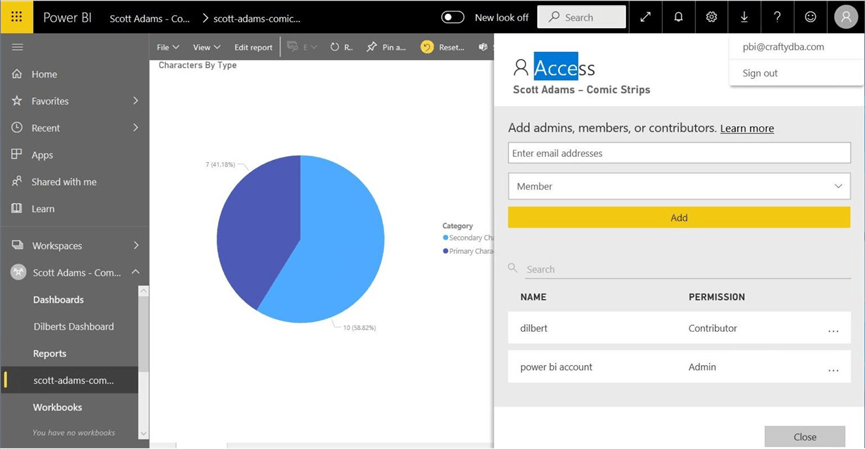
To summarize, users with Power BI Pro licenses can freely share and modify content if given the right access.
Renaming an existing workspace
The Set-PowerBIWorkspace is a very useful command. In its simplest form, we can change the name and description of an existing workspace. However, this cmdlet is very important if your organization has Premium Capacity. Once the CapacityId is obtained from the Get-PowerBICapacity cmdlet, the workspace can be moved to premium capacity. To move the workspace back to share capacity, pass a zero’s as the global unique identifier (GUID)
The first block of code in PowerShell script below renames the workspace, adds a description to the workspace and moves the workspace to share capacity. Since it was never on premium capacity, this action is just ignored.
# Set workspace properties
$workspace1.Name = "Dilbert Takes Over"
$workspace1.Description = "He is always causing trouble"
$workspace1.CapacityId = "00000000-0000-0000-0000-000000000000"
Set-PowerBIWorkspace -Scope Organization -Workspace $workspace1

# Grab pointer to object
$workspace1 = Get-PowerBIWorkspace -Scope Organization -Filter "name eq 'Dilbert Takes Over'"
$workspace1
The image below shows the renamed workspace.

If we use to Get-PowerBIWorkspace cmdlet, we can see that the description of the workspace has been changed.

In a nutshell, changing the properties of the workspace can easily be done. Please note that the workspace is still active.
Removing access
The Remove-PowerBIWorkspaceUser cmdlet can be used to remove a given user from a workspace. The script below removes dilbert@craftydba.com from the “Dilbert Takes Over” workspace. Again, I hard coded the GUID for the workspace.
# Remove user
Remove-PowerBIWorkspaceUser -Scope Organization -Id 20e6b0e4-e237-462f-8b25-caec664550da -UserEmailAddress dilbert@craftydba.com
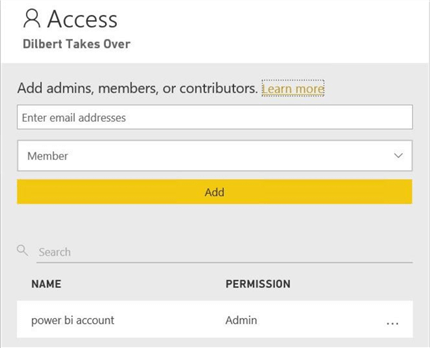
If you are dilbert, you no longer have access to the workspace. If you are pbi, you can verify that the access has been taken away. The screen shot below shows the updated access control list (ACL).
Deleting a workspace
Its actually kind of funny that the Power Shell module does not have a command for deleting a workspace. Do not fret, we will use the Invoke-PowerBIRestMethod to solve this problem. If you have not realized yet, all objects have some type of hierarchy in the portal. This is enforced by the URL pathing. Upon research of the API documentation, we just need to pass the id of the group prefixed by the groups keyword.
# Delete workspace
$SearchName = "Dilbert Takes Over"
(Get-PowerBIWorkspace -Name $SearchName) | foreach {
        $Id = $_.Id
        $Url = "groups/$Id"
        Invoke-PowerBIRestMethod -Url $Url -Method Delete
}

# Find delete workspace
$workspaces2 = Get-PowerBIWorkspace -Scope Organization | Where-Object { $_.State -match 'Deleted' -and $_.Name -eq 'Dilbert Takes Over' }
$workspaces2
The first block of code in the above script deletes the workspace. The second block of code displays the deleted workspace. Is the workspace really gone? The answer is no. In fact, if we use the portal to create a workspace called “multiples” and then delete the workspace. We have one copy of the workspace in a deleted state. If we repeat the process, we will have two workspaces named “multiples”. Each workspace has a different GUID.

The above image shows the workspace is in a deleted state. This workspace can no longer seen by the pbi@craftydba.com user. However, it will exist until the maximum retention period is Office 365 is reached. Then it is be purged from the system.

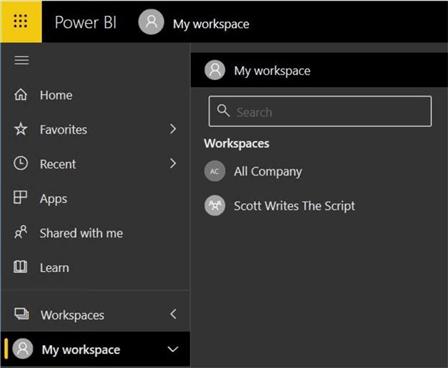
Scott was really mad that Dilbert changed the name of the workspace and then the administrator deleted it from the system. Let’s restore the workspace right now. The final name of the workspace will also be changed. The Restore-PowerBIWorkspace cmdlet will accomplish this task. It is always wise to logout of any system when you are done. Use the Disconnect-PowerBIServiceAccount cmdlet to perform this last action.
# restored delete workspace
Restore-PowerBIWorkspace -Id "20e6b0e4-e237-462f-8b25-caec664550da" -RestoredName "Scott Writes The Script" -AdminEmailAddress "pbi@craftydba.com"

# Stop the session
Disconnect-PowerBIServiceAccount
The image below shows the restored workspace with the new name.
Summary
Microsoft has definitely gained market share in the Business Intelligence reporting area since the release of Power BI in July of 2015. With more users creating and publishing reports daily, it has become a management nightmare for the Power BI administrator. PowerShell has been the de-facto scripting language for managing objects in the cloud. Today, we investigated how to manage workspaces. Workspaces are containers for reports, dashboards, workbooks, datasets and dataflows. They are the one key way to share data between pro licensed users. Next time, we will investigate how to manage datasets with the cmdlets.
Enclosed is the PowerShell script and Power BI report used in the proof of concepts.
Next Steps
- Investigate PBI cmdlets for datasets
- Investigate PBI cmdlets for reports

John Miner is a Senior Data Architect at Insight Digital Innovation helping corporations solve their business needs with various data platform solutions.
He has over thirty years of data processing experience, and his architecture expertise encompasses all phases of the software project life cycle, including design, development, implementation, and maintenance of systems.
His credentials include undergraduate and graduate degrees in Computer Science from the University of Rhode Island. Also, he has earned certificates from Microsoft for Database Administration (MCDBA), System Administration (MCSA), Data Management & Analytics (MCSE), Data Science (MPP), Databricks Certified, and Fabric Certified.
John has been recognized with the Microsoft MVP award nine times for his outstanding contributions to the Data Platform community.
When he is not busy talking to local user groups or writing blog entries on new technology, he spends time with his wife and daughter enjoying outdoor activities. Some of John’s hobbies include wood working projects, crafting a good beer and playing a game of chess.
- MSSQLTips Awards: Author of the Year – 2019, 2022, 2023 | Champion (100+tips) – 2023


Hello,
Just came across with your website as a fellow data colleague. I’ve read some articles of yours, this one is one of those that opens doors in terms of I did not even knew it existed. Keep up the good work!
Dear Reader,
The cmdlet documentation is included here – https://learn.microsoft.com/en-us/powershell/module/microsoftpowerbimgmt.workspaces/set-powerbiworkspace?view=powerbi-ps. Make sure you meet the requirements to modify a workspace.
Sincerely
John
Hi John – I ran your recommended method for removing capacity from a workspace. No errors but no effect on the workspace. I’m using the Power BI Admin id:
$workspace1 = Get-PowerBIWorkspace -Scope Organization -Filter “name eq ‘(workspace name)'”
$workspace1
# Set workspace properties
$workspace1.CapacityId = “00000000-0000-0000-0000-000000000000”
Set-PowerBIWorkspace -Scope Organization -Workspace $workspace1
$workspace1
Hi,
Great article. Is there a way to work with autoscaling the vcores in powerBI premium using powershell? I am looking to use aazure automation runbooks to automate autoscaling on a scheduled basis but cant seem to find anything around it. Just wondered if you had come accross anything that could assist? Thanks