Problem
Many organizations use SQL Server Reporting Services (SSRS) to create reports from data stored in corporate SQL Server databases. Organizations are also increasingly migrating their on-premises databases to the cloud. Can SSRS be used with AWS RDS SQL Server?
Solution
SQL Server Reporting Service is a platform for creating, deploying, distributing, and managing dynamic and paginated reports. Although it has been an integral part of the SQL Server suite for many years, AWS RDS SQL Server did not include SSRS until recently. Companies have been using other analytics and reporting tools like Power BI or Tableau to create analytical reports from RDS SQL Server data, but now they can also use SSRS, which comes with RDS SQL Server at no extra cost.
This article will show how to install and configure SSRS with an AWS RDS SQL Server 2017 instance. In a previous tip, we talked about installing and configuring SSIS with AWS RDS SQL Server 2017. Many of the steps we followed there also applies when configuring SSRS for RDS SQL Server, so we won’t elaborate them here.
Prerequisites
Since AWS RDS is a wholly managed database service, integrating SSRS with RDS is slightly different from an on-premises scenario. The prerequisites for this include the following:
- The Security Group of the database instance must allow incoming traffic on port 8443, which is the default port for SSRS.
- The database instance must have SSL enabled.
- The database instance should be joined to a Windows Active Directory and enabled for Windows authentication.
- The database instance must be running SQL Server 2016 or above.
- The database instance’s Option Group must have SSRS enabled.
The steps shown here can be performed either when creating a new RDS SQL Server instance or later. For the purpose of this article, we will create a new RDS SQL Server instance, and restore a copy of the AdventureWorks database there. We will then use SSRS to create an elementary report from that database.
Initial Setup
You can refer to this MSSQLTips article to complete most of the steps listed in this section:
Step 1: Create an RDS SQL Server 2017 database Instance, and ensure it’s using Windows authentication. The instance should be connected to an already-existing Windows Active Directory. The AWS documentation shows how to configure RDS SQL Server with Active Directory.
Step 2: Set up S3 integration for the instance. You can follow the steps described in this article to see how it’s done.
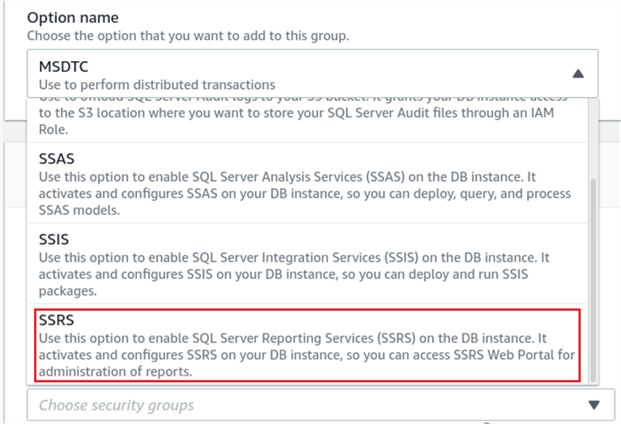
Step 3: Create a custom Option Group for the newly created RDS instance. In the option group, add “SSRS” as the new option. Also, add the “SQLSERVER_BACKUP_RESTORE”. In both cases, ensure the option is added immediately.
Step 4: Create a custom Parameter Group, and enable the “rds.force_ssl” parameter by setting its value to 1.

Step 5: Edit the RDS SQL Server instance’s property, and select the custom Option Group and the custom Parameter Group under “Additional configuration” section.

Step 6: You should now set up an SSL certificate in your Windows client machine to connect to the RDS instance. To see how you can do this, refer to this AWS documentation.
Step 7: Restore a copy of the AdventureWorks database on the newly created RDS instance. You can refer to this article to see where to download the backup file from, and how to restore it.
Step 8: Create a Windows-authenticated user in the RDS SQL Server instance and assign SSRS-related permissions to the user. This step needs to be performed by the RDS master user. The query block below shows how it’s done:
CREATE USER [mydomain\ssrs_user_name] FOR LOGIN [mydomain\ssrs_user_name]
exec msdb.dbo.rds_msbi_task
@task_type='SSRS_GRANT_PORTAL_PERMISSION',
@ssrs_group_or_username=N'[mydomain\ssrs_user_name]'
Check the SSRS Portal
You should now be able to browse to the SSRS web portal by using the following URL: https://<RDS_DB_Instance_Endpoint>:8443/Reports
Make sure the portal is accessible before going any further.
Creating and Deploying a Report in SSRS
SSRS projects are created in Visual Studio. To create an SSRS report, ensure you have Visual Studio 2019 with SQL Server Data Tools installed in your local workstation. In Visual Studio 2019, create an SSRS project using the “New Project” wizard. Make sure you select the project type as “Report Server Project”:

Once Visual Studio creates an empty project, right-click on the “Reports” folder in the Solutions Explorer, then select “Add” from the pop-up menu, and then “New Item…”:

Provide a name for the report and then click “Next”. This will generate a .rdl file in the “Reports” folder.
Next, in the “Report Data” pane, click “New”, and then select “Data Source…”:

In the configuration window, select the “Embedded connection” option and fill in the connection string details:

The connection string must contain the full database instance URL and the database name. An example is shown below:
Data Source=database-1.rds.amazonaws.com; Initial Catalog=AdventureWorks
After filling the connection string, click on the “Credentials” tab, and then select the Windows authentication method:

Click “OK”. You should now see the data source listed in the Report Data folder.
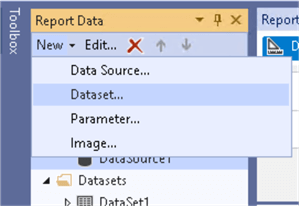
Next, you have to add a dataset to the data source. A dataset is a query, table, or stored procedure that provides the underlying data for the report. Again, in the “Report Data” pane, click “New”, and then select “Dataset…”:
Provide a name for the dataset, choose the option to embed the dataset in the report, and select the data source. Select the query type as text, and add a query. Here, we are using a simple SELECT statement:

Click “OK” to finalize the data source for the report. In the empty report designer pane, right-click, select “Insert” from the pop-up menu, and then select “Table” from the list of available components:

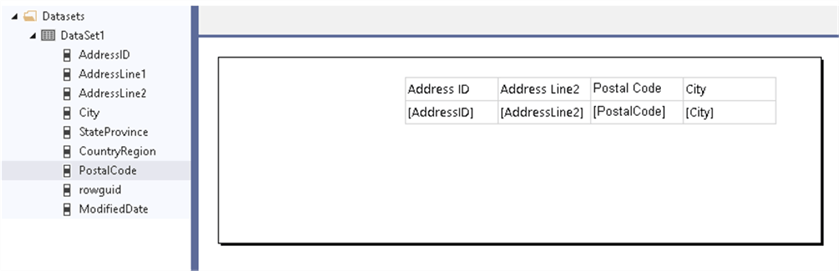
This action will insert an empty table in the report designer. You can add columns to this table by dragging and dropping fields from the data set:
Click the “Preview” button from the toolbar to see the report in preview mode. You can now save it as well.

To deploy the report in Report Server, right-clicking on the .rdl file in the Solution Explorer, and then select “Deploy” from the pop-up menu:

Once the deployment is successful, you can see the newly created report project in the SSRS web portal:

You can also see the deployed report in the portal:

This concludes the steps involved in setting up SSRS with AWS RDS SQL Server, creating a simple report, deploying, and viewing it.
Next Steps
The beauty of SSRS is its ability to create complex reports without using any code. The next logical step is to try creating complex datasets and dynamic reports based on those datasets. Readers are encouraged to explore how to:
- Create advanced features in reports (e.g., dynamically hiding items, filtering, etc.).
- Customize the SSRS web portal to reflect the enterprise logo, look and feel, and color theme.
- Secure and protect Reporting Service.

Sadequl Hussain lives in Sydney, Australia and holds a Bachelor’s degree in Electrical Engineering. His more than 15 years’ experience in IT has seen him in various roles including training, technical writing, web application development and database administration. Sadequl has been working with SQL Server since version 6.5 and his life as a DBA has seen him managing mission critical database systems for various large companies. He is also an Oracle DBA and an avid Linux administrator. Over the years Sadequl has achieved various certifications including those from Microsoft, CompTIA and ITIL. He is currently having fun preparing for other ones from Amazon and the Open Group. He regularly contributes to various SQL Server and Linux online publications. Apart from spending time with his wife and daughter, he loves his part-time career as a photographer and film-maker and also loves to travel.
- MSSQLTips Awards: Trendsetter (25+ tips) – 2017


