Problem
We have an OLTP database and would like to analyze the data in our dedicated SQL Pool in Azure Synapse Analytics. However, setting up data pipelines between these databases is time-consuming. Is there an easy way to get the data from the source database into Azure Synapse Analytics?
Solution
A new feature has been introduced to Azure Synapse Analytics: Azure Synapse Link. With this feature, you can replicate one or more tables from Azure SQL Database or SQL Server 2022 to a dedicated SQL Pool in your Azure Synapse Analytics workspace. This saves considerable effort in creating and maintaining ETL pipelines. When creating a link, a change feed will be set up between the databases. When changes occur in the source database, they’re automatically replicated to Azure Synapse.
This tip will explain how to set up such a link. We’re using an Azure SQL DB for the source but working with SQL Server 2022 is very similar. Note: Azure Synapse Link and SQL Server 2022 were still in preview when this tip was written.
How to Configure Azure Synapse Link
Prerequisites
Before we start, make sure you have the following:
- Azure subscription (free trial here).
- Azure SQL database, with one or more tables that contain data. For Azure Synapse Link, the database needs to have a minimum size.
- For DTU-based provisioning, you need at least 100 DTUs (which corresponds with the Standard S3 tier).
- For a database in an elastic pool, you need at least 100 eDTUs
- Or min 1 vCore otherwise
- An Azure Data Lake Storage Gen2 account
Let’s begin with configuring the Azure SQL DB. In the properties of the logical SQL Server, go to Identity and assign a system-managed identity (see image below).

Next, go to the Networking section and allow other Azure services/resources to access the SQL Server:

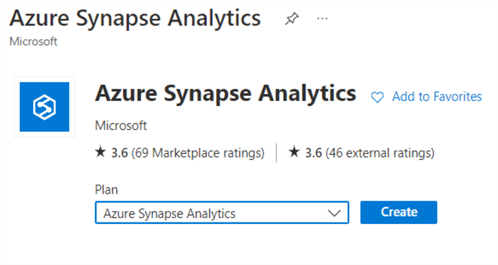
Now let’s create an Azure Synapse workspace. In the Azure Portal, create a new resource and search for Azure Synapse.
Choose a subscription, and either create a new resource group or choose an existing one. Synapse also needs its own managed resource group. Give your Synapse Analytics workspace a name, choose a region, and your Data Lake Storage account.

In the Security tab, configure the SQL Server admin login if you want to use SQL authentication.

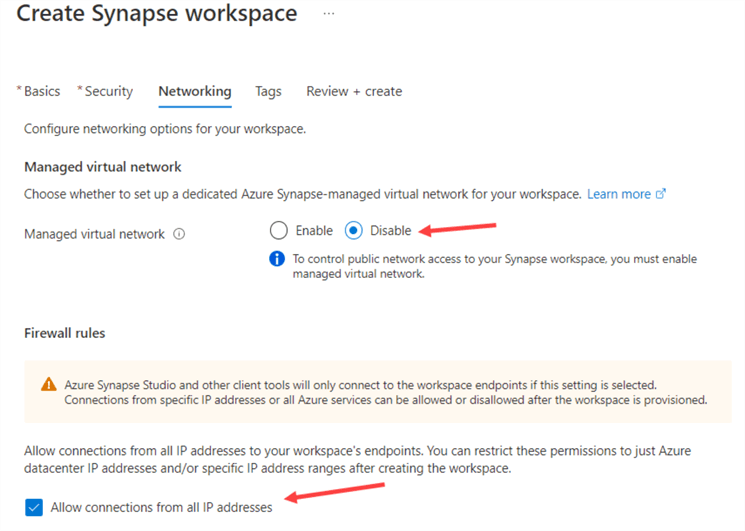
In the Networking tab, disable the managed virtual network (default setting), and allow connections from all IP addresses.
Review your settings and create the workspace. After a while, it will be ready. In the management portal, you will find a link to Azure Synapse Studio, as shown in the image below. Click on it to open a new tab in your browser.
Go to the Manage section in the Studio and create a new dedicated SQL pool.

Name the new pool and choose the minimum performance level (DW100c), which should be enough to test this new feature. All other settings can be left to the default.

Once the dedicated pool is created, remember to pause it if you don’t need it because it’s a costly resource.
If you want to use the system-assigned managed identity of Azure Synapse to connect to the source database, it needs to be added as a user to the database with the correct permissions. The following T-SQL scripts add the managed identity as a user and assign it to the db_owner role:
CREATE USER [mssqltips-synapse] FROM EXTERNAL PROVIDER;
ALTER ROLE [db_owner] ADD MEMBER [mssqltips-synapse];
The db_owner role is needed because a changefeed schema will be created with a couple of system objects. For testing purposes, you can create the following table with one record inserted:
CREATE TABLE dbo.LinkTest(
     ID INT IDENTITY(1,1) NOT NULL PRIMARY KEY
    ,MyText VARCHAR(250) NOT NULL
);

INSERT INTO dbo.LinkTest(Mytext) VALUES ('Hello World!');
Creating the Link
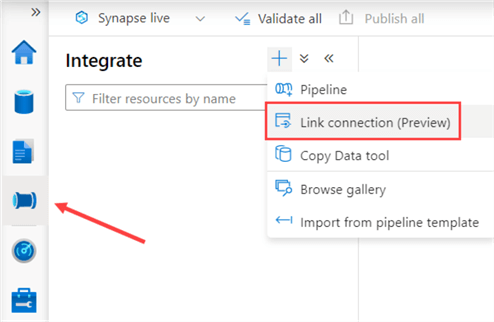
Go to the Integrate section and click Link connection:
In the dialog, select a linked service to either an Azure SQL DB or a SQL Server 2022 instance. If you haven’t created one, you can choose to configure one at this time.

If the database doesn’t have the correct sizing, the following error will be returned:
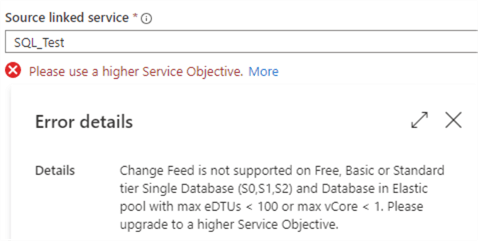
With a linked service selected, you can choose one or more tables to be replicated:

If a table is incompatible, an error will appear explaining the problem (see the above text in red). There are a couple of requisites, such as that a table should have a primary key. Certain data types are also not allowed. You can find a complete list in the documentation article, Known limitations and issues with Azure Synapse Link for SQL.
In the next screen, choose the destination (target) pool:

Finally, specify a name for the link, choose the size, and the replication mode.

Keep in mind that the size of the link drives the price, as you pay for each hour a core has been running. You can replicate continuously (the most expensive option) or on a schedule. The schedule is a number of minutes, with the minimum being 20 and the maximum being 60. Choosing 20 means the change feed will be checked every 20 minutes.

The link will be created but will not start yet. First, you must configure the destination tables in the dedicated pool.

Since we’re only replicating a very small table, I chose Replicated as the distribution type (which means the table is replicated over all 60 nodes of the dedicated SQL pool) and a normal Clustered index (instead of the default of a clustered columnstore index). Once every table is configured, the link can be started, which can take a couple of minutes (see the image below).

When the link is running, you’ll get a link to the monitoring section:

There, we can see the status of the link, how many rows were processed, and when the last processing time was:

In the dedicated pool, we can verify that the row from the Azure SQL DB has been replicated successfully:

Let’s insert a new row:
INSERT INTO dbo.LinkTest(Mytext) VALUES ('Hello MSSQLTips!');
After about 20 minutes, we can see it will be transferred as well:

Deleting the Link
The link can easily be stopped and deleted from Synapse Analytics. This will not destroy the data in the dedicated pool. However, the changefeed schema will still exist in the Azure SQL DB (or SQL Server 2022). You may have other links running as well.
If you want to scale the database down to a tier not supported by Azure Synapse Link (S1 for example), there will be an error. All changefeed objects need to be removed from the database first, which can be done with the following stored procedure:
EXEC sys.sp_change_feed_disable_db
After executing this sp, the database can be scaled down again.
Next Steps
- You can learn more about Azure Synapse Analytics in these tips:
- Learn more about Azure Synapse Link for SQL in the official documentation. This doc provides more detail for the Link for SQL Server 2022. Don’t forget to check out the known limitations and issues.

Koen Verbeeck is a seasoned business intelligence consultant with over a decade of experience with the Microsoft Data Platform. He holds several certifications, including Azure Data Engineer. He’s a prolific writer, with over 375 articles on technologies such as Microsoft Fabric, SSIS, ADF, SSAS, SSRS, MDS, Power BI, Snowflake and Azure services. He has spoken at various events such as PASS, SQLBits, dataMinds Connect and many others. He frequently delivers educational webinars on MSSQLTips.com. For his efforts, Koen has been awarded the Microsoft MVP data platform award for many years.
- MSSQLTips Awards:
- Leadership Award (200+ Tips) – 2021
- Author of the Year – 2014/2020/2022
- Author Contender – 2024/2025