Problem
We have data stored as documents in an Azure Cosmos DB container. We want to read the data from this container in near real-time. We have been considering using Azure Data Explorer to query the data but are unsure how. Is this even possible?
Solution
Azure Cosmos DB is a globally distributed, multi-model database service in Azure, typically used as a NoSQL document database. You can find an introduction to Azure Cosmos DB in the following tips:
- How to Install a Sample Database in Azure Cosmos DB
- Introduction to Azure Cosmos DB database and the SQL API
On the other hand, Azure Data Explorer (ADX) is a big data analytics platform intended to analyze high volumes of data in near real-time. In contrast with Azure Synapse Analytics (dedicated pools), ADX is used for interactive analytics, typically on log or event data. You might say ADX has more in common with Azure Synapse Analytics Serverless SQL Pools as a query engine than a regular database. In fact, ADX is also available as a query pool in Synapse Analytics but is, at the moment, still in preview and not available in every region.

The query language of ADX is the Kusto Query Language (KQL), which is also used in Azure Monitoring, for example. You can find more info on ADX in the official documentation.
The feature described in this tip (reading Cosmos DB data directly in ADX) is still in preview at the time of writing. It’s possible that functionality or appearances might change later. The same feature is sometimes called “Cosmos DB to Azure Data Explorer Synapse Link,” although it has nothing to do with Synapse Analytics at first glance. This is because ADX was released as a product before Azure Synapse Analytics. But the Kusto technology is part of Synapse Analytics (alongside SQL and Spark). Synapse Link is the name for connections between operational data stores and analytical systems.
How to Read Cosmos DB Data with Azure Data Explorer
Prerequisites
First, you need an Azure Cosmos DB account (using the NoSQL API) with a database and a container with documents in it. You can follow the steps in the tips, Analyze Azure Cosmos DB data with Synapse Serverless SQL Pools and How to Install a Sample Database in Azure Cosmos DB, to get your environment started.
Second, we need an ADX cluster and database (again, at the time of writing, we cannot use Data Explorer Pools in Synapse Analytics). In the Azure Portal, create a new resource.

This will take you to the marketplace, where you can search for “data explorer.”

Click on Create and again on Create on the next page.

In the next screen, you can configure your subscription, resource group, and cluster details.

For Workload, choose the “Dev/test” option, which will be the cheapest. Pricing is based on the time the cluster is running and the workload size. An ADX cluster will be paused automatically if it is inactive for five days (which cannot be changed). You can find more info about this behavior in the documentation.
In the next section, you can optionally configure the autoscale option. We will set this to Manual scale with an instance count of 1, the smallest option.

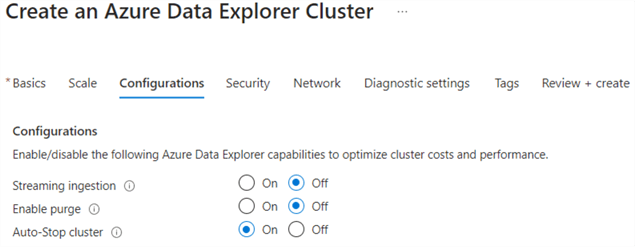
In the Configurations tab, you can adjust some extra settings. Make sure the auto-stop cluster option is set to On.
In the Security tab, verify that the cluster has a system-assigned managed identity. This will be important later when we want to connect with the Cosmos DB database.

Finally, ensure the cluster can be accessed from public endpoints in the Network sections.

Review your configuration and click Create once validation has finished.

Once the cluster has been created, you can create a new database on the overview page.

Give the database a name and choose a retention and cache period.

Once the database is created, you can find it in the Databases page under the data section. You can only see the list of available databases if the ADX cluster is running. It can take some time to resume a paused cluster.

Create the Connection to Azure Cosmos DB
Before we can create a connection to Cosmos DB, we need to create a table in ADX that will hold the data. We will also need to specify a mapping that will translate the hierarchical structure of the JSON documents to the relational structure of the table.
In the Databases overview, click on your database name to go to its overview page.

In the left menu, click Query to go to the query editor. There we can specify our create table statement (it looks a lot like SQL, but it’s a Kusto query. Don’t forget the dot before create).

.create table BeerCheckins(
     checkin_id:string
    ,created_at:string
    ,beer_name:string
    ,beer_type:string
    ,beer_ibu:string
    ,beer_abv:string
    ,flavors:string
    ,venue_name:string
    ,venue_city:string
    ,venue_state:string
    ,venue_country:string
    ,venue_lat:string
    ,venue_lng:string
    ,brewery_name:string
    ,brewery_city:string
    ,brewery_state:string
    ,brewery_country:string
    ,purchase_venue:string
    ,score:string
    ,global_score:string
    ,global_weighted_score:string
    ,serving_type:string
    ,total_toasts:string
    ,total_comments:string
    ,comment:string
    )
We’re using the same sample data as in the tip Analyze Azure Cosmos DB data with Synapse Serverless SQL Pools. Once the table is created, you can view its definition on the left:

Now we can specify the mapping that will detail how each JSON field will map to a corresponding column of the table. It’s possible that some JSON arrays are stored as JSON inside the ADX table.

The mapping is very similar to the WITH clause you specify when using the OPENROWSET command in Azure Synapse Serverless SQL Pools:

.create table BeerCheckins ingestion json mapping "DocumentMapping"
```
[
    {"column":"checkin_id","path":"$.checkin_id"},
    {"column":"created_at","path":"$.created_at"},
    {"column":"beer_name","path":"$.beer.beer_name"},
    {"column":"beer_type","path":"$.beer.beer_type"},
    {"column":"beer_ibu","path":"$.beer.beer_ibu"},
    {"column":"beer_abv","path":"$.beer.beer_abv"},
    {"column":"flavors","path":"$.flavor_profiles"},
    {"column":"venue_name","path":"$.venue.venue_name"},
    {"column":"venue_city","path":"$.venue.venue_city"},
    {"column":"venue_state","path":"$.venue.venue_state"},
    {"column":"venue_country","path":"$.venue.venue_country"},
    {"column":"venue_lat","path":"$.venue.venue_lat"},
    {"column":"venue_lng","path":"$.venue.venue_lng"},
    {"column":"brewery_name","path":"$.brewery.brewery_name"},
    {"column":"brewery_city","path":"$.brewery.brewery_city"},
    {"column":"brewery_state","path":"$.brewery.brewery_state"},
    {"column":"brewery_country","path":"$.brewery.brewery_country"},
    {"column":"purchase_venue","path":"$.purchase_venue"},
    {"column":"score","path":"$.rating_score"},
    {"column":"global_score","path":"$.global_rating_score"},
    {"column":"global_weighted_score","path":"$.global_weighted_rating_score"},
    {"column":"serving_type","path":"$.serving_type"},
    {"column":"total_toasts","path":"$.total_toasts"},
    {"column":"total_comments","path":"$.total_comments"},
    {"column":"comment","path":"$.comment"}
]
```
Once you have defined the table and the mapping, you can create a connection to the Cosmos DB container. In the overview page, click on Create data connection in the Data ingestion square, and choose Cosmos DB as the source.

In the configuration window, choose the database you just created, a name for the connection, and your Cosmos DB account, database, and container.

You will also need to specify the table and its mapping. Data from the container is fetched from the Azure Cosmos DB change feed. The setup wizard will take care of everything. It will connect using the managed identity you specify and give appropriate permissions so the identity can read the data from the container. If you want to retrieve all of the data from the container, you need to specify a date before the container was created to make sure ADX imports everything.
Once the connection is created, you might have to wait for ADX to import all the data. You can view the size of the database in the portal:

Query the Data
Once the data is imported, you can query it using the Kusto language. Entering the table name only will fetch all of the data:

With the following query, we can do a row count of the table:
BeerCheckins
| count

It’s even possible to render charts directly in the editor:

BeerCheckins
| summarize count() by bin(todatetime(created_at),30d)
| render timechart
Next Steps
- The following YouTube video details this feature: Azure Cosmos DB to Azure Data Explorer Synapse Link.
- You can find more info about Synapse ADX in the official documentation:
- You can find all Azure Cosmos DB tips in this overview.

Koen Verbeeck is a seasoned business intelligence consultant with over a decade of experience with the Microsoft Data Platform. He holds several certifications, including Azure Data Engineer. He’s a prolific writer, with over 375 articles on technologies such as Microsoft Fabric, SSIS, ADF, SSAS, SSRS, MDS, Power BI, Snowflake and Azure services. He has spoken at various events such as PASS, SQLBits, dataMinds Connect and many others. He frequently delivers educational webinars on MSSQLTips.com. For his efforts, Koen has been awarded the Microsoft MVP data platform award for many years.
- MSSQLTips Awards:
- Leadership Award (200+ Tips) – 2021
- Author of the Year – 2014/2020/2022
- Author Contender – 2024/2025