Problem
We have an Azure Cosmos DB which we use as a document database. We would like to run analytical queries against this database, but because the data is partitioned in a certain way and because of the volume, queries don’t perform that well. Is there a method to run big analytical queries against a Cosmos DB container?
Solution
Azure Cosmos DB is a cloud-based, globally-distributed, multi-model database. There are several APIs available, such as a graph API, a MongoDB API and a SQL API. You can use Cosmos DB for example to store many small JSON documents (like in a NoSQL database) and query those using SQL statements. These documents are stored in containers, and each container is partitioned according to a certain key. For an introduction to Cosmos DB and partitioning, check out the tips Introduction to Azure Cosmos DB database and the SQL API and Partition Key Best Practices in Cosmos DB.
But what if you want to run large analytical queries on top of your document store? And what if the partitioning key isn’t helpful for your queries? Suppose the container is partitioned on the unique document ID, but your query doesn’t even use the ID, but rather filters on a date attribute?
To solve these kinds of challenges, the feature Azure Synapse Link for Azure Cosmos DB was introduced. This solution consists of two parts:
- You enable the Analytical Store on one or more containers. This replicates the data in real-time from your Cosmos DB container into a columnar storage, which is optimized for analytical queries.
- In your Azure Synapse Analytics workspace, you link the workspace with your Azure Cosmos DB account. When this is done, you can query the analytical store using either Spark or SQL using the Serverless SQL Pool.
In this tip, we’ll guide you through the setup of Azure Synapse Link so you can query the data with the Synapse Serverless. If you’re interested in querying the data using the Spark Pools, check out the tips Explore Azure Cosmos Databases with Azure Synapse Analytics and Getting Started with Azure Synapse Link for Cosmos DB. In this Azure Cosmos DB, we’re going to store JSON documents for an app that keeps track of the beers an individual drinks. Every time someone makes a check-in in the app, the app tracks which beer was drank, where it was purchased and consumed, which rating was given, which flavors the user assigned to the beer et cetera.
Setting Up Azure Synapse Link for Azure Cosmos DB
Prerequisites
We first need an Azure Synapse Analytics workspace. You can follow the steps in the tip Azure Synapse Link for SQL to set up a new Synapse workspace. Next, we need an Azure Cosmos database. In the Azure Marketplace, search for Cosmos DB:

Select the first result (as seen in the screenshot) and choose to create a new instance:
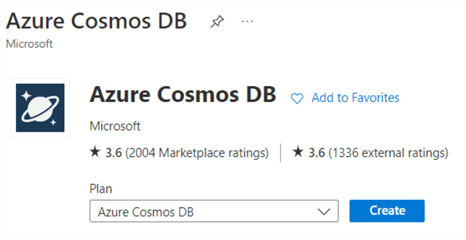
As mentioned earlier, Cosmos DB offers several APIs. Choose Azure Cosmos DB for NoSQL.

In the next screen, choose your subscription and resource group. Give a name for the Cosmos DB account and choose a region (preferably close to you). For the capacity mode, choose Serverless.

Review your settings, and create your new account.

Once the resource is created, you will be taken to a Quick Start page. You can create a sample container to store your To Do lists, but you can also create your own database and container.

Go to the Data Explorer page, and create a new Database.

Name the database Beers.

Also, create a new container:

If the Analytical Store has not yet been enabled for your account, the option to add the container to it will be grayed out. There will be an option though to enable it.

Another option is to click on the link in the header in the Data Explorer – after you’ve created the container – to enable the Analytical Store:

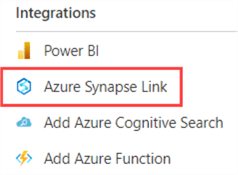
Yet another option is to go directly to the Azure Synapse Linkmenu and enable it from there:
First, you have to enable the account:

Then, you can choose which containers you want to enable the analytical store:

This might take a couple of minutes:

If Synapse Link has already been enabled, you can choose to add new containers to it from the creation dialog:

Make sure you have a container created with the name “CheckinContainer” and “/checkin_id” as the partitioning key. In the Data Explorer, you can manually add a new document to the new container:

You can use the following JSON to create the new document (don’t forget to click on Save in the header):
{
   "beer_name": "Orval",
   "brewery_name": "Brasserie d'Orval",
   "beer_type": "Pale Ale - Belgian",
   "beer_abv": "6.2",
   "beer_ibu": "36",
   "venue_name": "Lindner Hotel & City Lounge",
   "venue_city": "Antwerpen",
   "venue_state": "Antwerpen",
   "venue_country": "Belgium",
   "venue_lat": "51.2133",
   "venue_lng": "4.42253",
   "rating_score": "4",
   "created_at": "2018-05-23T19:11:38",
   "brewery_country": "Belgium",
   "brewery_city": "Villers-devant-Orval",
   "brewery_state": "Luxembourg",
   "flavor_profiles": [
      {
         "flavor": "fruity"
      }
   ],
   "serving_type": "Bottle",
   "checkin_id": "601849915",
   "bid": 851,
   "brewery_id": 169,
   "global_rating_score": "3.7",
   "global_weighted_rating_score": "3.7",
   "total_toasts": 1,
   "total_comments": 0
}
Now that we have an Azure Synapse Analytics workspace and an Azure Cosmos DB with some data in it, we can configure the Azure Synapse Link for Cosmos DB.
Configure Azure Synapse Link for Cosmos DB
In your Synapse workspace, go to the Data tab and click on the + icon:

From the menu, choose Connect to external data. In the following screen, pick Azure Cosmos DB (SQL API).

This will open a configuration screen for a new linked service.

If you want to use the Azure Synapse managed identity to connect to the Cosmos DB account, you’ll need to add it to a pre-defined role. However, at the moment this is not possible with the Azure Portal. This needs to be done through either the Azure CLI or Azure PowerShell. More info can be found in the documentation. An example PowerShell script:
New-AzCosmosDBSqlRoleAssignment -AccountName "mycosmosaccount" `
-ResourceGroupName "myResourceGroup" `
-RoleDefinitionID "00000000-0000-0000-0000-000000000001" `
-Scope "/" `
-PrincipalID "guid of managed identity"
The role definition ID “00000000-0000-0000-0000-000000000001” corresponds with the built-in role Cosmos DB Built-in Data Reader. Once you run the script, you can use a managed identity to connect to the Cosmos DB account.

Click on Create and a new linked service will be added to the workspace.

If you go back to the Data tab, you’ll see the Azure Cosmos DB has now been added to the list. You can find the Checkins container by expanding the list. When you right-click the container, you can choose to generate a SQL script that can be used to fetch the first 100 rows.

Before we can run an actual query though, we first need to create a credential containing the Azure Cosmos DB secret key. The generated script will provide you with a template.
CREATE CREDENTIAL [mssqltips-cosmoslink]
    WITH IDENTITY = 'SHAREDACCESSSIGNATURE', SECRET = 'mysecretkey'
Read-only keys can be found in the settings of the Azure Cosmos DB account:

Querying Data from the Azure Cosmos DB Analytical Store
Now we can finally run our query against the Cosmos DB container:
SELECT TOP 100 *
FROM OPENROWSET(PROVIDER = 'CosmosDB',
                CONNECTION = 'Account=mssqltips-cosmoslink;Database=Beers',
                OBJECT = 'Checkins',
                SERVER_CREDENTIAL = 'mssqltips-cosmoslink'
) AS [Checkins]
Make sure there’s data in the container, or an error will be returned:

If everything is configured correctly, the query will return data:

As you can see, the data is returned as columns, even though they were originally stored in a JSON document. However, nested arrays are still returned as JSON:

For more info about OPENROWSET, check out the documentation.
Next Steps
- For more Azure Synapse Analytics tips, check out this overview.
- Other tips about Azure Cosmos DB can be found here.

Koen Verbeeck is a seasoned business intelligence consultant with over a decade of experience with the Microsoft Data Platform. He holds several certifications, including Azure Data Engineer. He’s a prolific writer, with over 375 articles on technologies such as Microsoft Fabric, SSIS, ADF, SSAS, SSRS, MDS, Power BI, Snowflake and Azure services. He has spoken at various events such as PASS, SQLBits, dataMinds Connect and many others. He frequently delivers educational webinars on MSSQLTips.com. For his efforts, Koen has been awarded the Microsoft MVP data platform award for many years.
- MSSQLTips Awards:
- Leadership Award (200+ Tips) – 2021
- Author of the Year – 2014/2020/2022
- Author Contender – 2024/2025