Problem
On a typical workday, you are required to deploy, update, and manage multiple Azure resources. In this article, we look at the Azure Resource Manager (ARM) tool to help you simplify the management of your Azure resources.
Solution
The Azure Resource Manager (ARM) was created to help deploy and manage Azure resource entities. Unlike the Azure Service Management (ASM) tool, ARM enables you to group different resources into one entity to deploy and manage collectively.
In this tutorial, you will learn how to access Azure services through the ARM using the Azure Command Line Interface (CLI) on your local machine.
What is Azure Resource Management?
Azure Resource Manager is Azure’s deployment and post-deployment management tool. Each request made through Azure’s SDKs, APIs, or tools (e.g., Azure CLI) is passed through the ARM to be authenticated and authorized before being forwarded to the requested Azure service.
ARM enables you to create declarative functions for managing Azure Resources such as virtual machines, storage accounts, web apps, databases, and virtual networks while having predefined Resource Suppliers, which are sets of Rest operators that make it easy to interact with the functionality of an Azure Resource.
Understanding Azure Resource Manager
ARM has an Infrastructure as Code (IaC) tool called ARM templates that enables you to provision reliable and consistent infrastructure. Other examples of IaCs include HashiCorp Terraform and Ansible. Microsoft has created a new domain-specific programming language (DSL) called Bicep with a declarative syntax and functionality similar to the ARM templates but aims to make it simpler to work with. ARM is written as JSON files, while Bicep has its own language and syntax, but when you deploy a Bicep file, it is automatically converted to an ARM template file.
When you deploy an ARM template, ARM converts it into REST API operations and sends it to the appropriate Azure services. This is an example of a template which creates a storage account resource:
"resources": [
  {
    "type": "Microsoft.Storage/storageAccounts",
    "apiVersion": "2022-09-01",
    "name": "mystorageaccount",
    "location": "southafricanorth",
    "sku": {
      "name": "Standard_LRS"
    },
    "kind": "StorageV2"
  },
]
ARM converts the definition to the following REST API operation, which is sent to the Microsoft.Storage resource provider:
PUT
https://management.azure.com/subscriptions/{subscriptionId}/resourceGroups/{resourceGroupName}/providers/Microsoft.Storage/storageAccounts/mystorageaccount?api-version=2022-09-01
REQUEST BODY
{
  "location": "southafricanorth",
  "sku": {
    "name": "Standard_LRS"
  },
  "kind": "StorageV2",
  "properties": {}
}
ARM templates enable you to separate operations into smaller pieces of templates and put them together on deployment. You can also preview what your template will do before deploying it by using the what-if operation.
In its simplest form, the barebone structure of an ARM template is a JSON file with the following attributes:
{
  "$schema": "https://schema.management.azure.com/schemas/2019-04-01/deploymentTemplate.json#",
  "languageVersion": "",
  "contentVersion": "",
  "apiProfile": "",
  "definitions": { },
  "parameters": { },
  "variables": { },
  "functions": [ ],
  "resources": [ ], /* or "resources": { } with languageVersion 2.0 */
  "outputs": { }
}
Learn more about the definitions of these elements: Understand the structure and syntax of ARM templates. These elements enable you to create (define), delete, update, and even analyze your Azure Services.
Just like normal functions, parameters indicate that values must be provided in the template when executed. Variables enable you to define expressions expected to be used later in the template. Resources contain items you plan to deploy, and the outputs are equivalent to the “return” function, which enables you to get values from your template and pass the value to another template, allowing you to chain all your templates.
Installing Azure CLI
First, make sure you have CLI installed on your machine. This tutorial assumes you are using Windows. Follow this link to download and install Azure CLI.
After installation, you need to sign in to your Azure account. You can do this using Azure CLI. Azure CLI authentication options include using Azure Cloud Shell, the browser interactively, a service principal, a managed identity, or a Web Account Manager (WAM).
Azure CLI Sign-In
In this tutorial, you will use the interactive sign-in using the browser and VS Code. First, open your VS Code and add the Azure CLI Tools extension:

Then navigate to the Terminal and write the following command:
az login

This command will trigger your default browser to authenticate your sign-in:
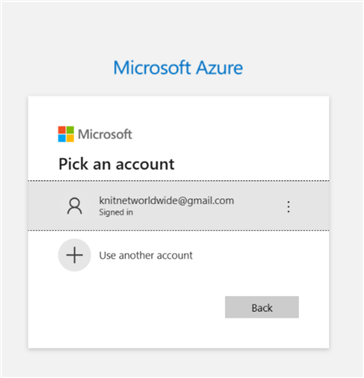
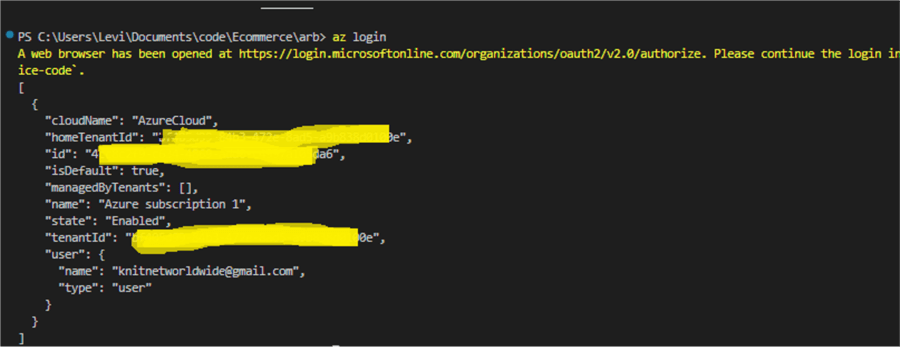
After authenticating your account in the browser, you will be redirected to a success page. Now, heading back to your VS Code terminal, you should be logged in and see an account summary as a JSON output:
Now, let’s create a template.
Creating ARM Templates
Let’s keep the first template simple. You will create an empty Resource Group and deploy it. While you are on your VS Code, create a new file named ‘FirstAzureDeployment.json’ and add the following code to it:
{
  "$schema": "https://schema.management.azure.com/schemas/2019-04-01/deploymentTemplate.json#",
  "contentVersion": "1.0.0.0",
  "resources": []
}
In the code above, the “$schema” element refers to the location of the JSON schema file, the “contentVersion” element is the version of the template, and the “resources” element houses the resources you are planning to deploy. Since the main goal of this article is to introduce you to using the ARM services, we won’t deploy a resource for simplicity.
You can use the following Azure CLI command on the terminal to create a Resource Group:
az group create --name myResourceGroup --location "South Africa North"
Once again, after your command is done processing, you will get an output confirming the successful operation:

If you are not sure about your region, head over to this website to search for your preferred region:

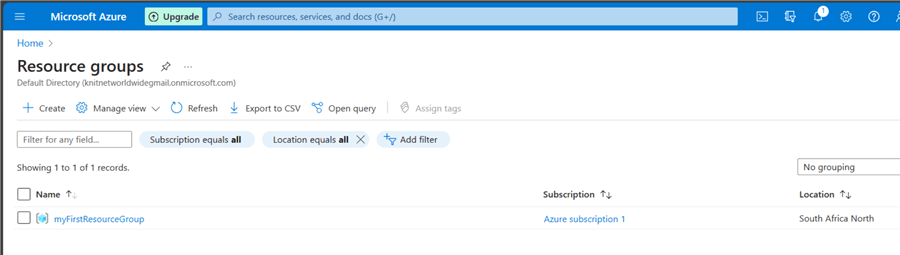
If you still have any doubts, head over to your home page on the Azure Portal, click on the left menu, and select “Resource groups”:

You should see your new Resource Group added:
Great work! You have created your first Resource Group using a custom ARM template and deployed it successfully using Azure CLI on your local machine. Although this was easy, using JSON to create ARM templates can be limiting. To simplify complex functionalities and deployments, you should use Microsoft’s new Bicep programming language to create ARM templates instead of JSON.
Next Steps
- Learn how to manage Azure DataBricks using the Azure CLI
- Learn how to create Azure Container Instances for SQL Server
- Learn how to Start, Stop, Delete and Monitor Azure Container Instances for SQL Server
- Learn how to deploy Azure SQL Database Using Resource Manager PowerShell cmdlets
- Learn how to deploy Azure SQL Data Warehouse Using Resource Manager
- Getting Started with Azure Blueprints

Levi Masonde is a developer passionate about analyzing large datasets and creating useful information from these data. He is proficient in Python, ReactJS, and Power Platform applications. He is responsible for creating applications and managing databases as well as a lifetime student of programming and enjoys learning new technologies and how to utilize and share what he learns.
- MSSQLTips Awards:
Trendsetter (25+ tips) – 2025 | Author of the Year Contender – 2023 | Rookie of the Year Contender – 2022


