Problem
SQL Server 2025 was recently released, and with it, a lot of exciting new features. For AI solutions and developers in general, two major features have been introduced: Vector datatype support and REST Endpoint support. So, using these features in conjunction, we can achieve SQL Server semantic search capabilities inside the SQL engine.
Solution
New Vector and AI models support provide the ability to call embedding models to enrich our T-SQL capabilities with SQL Server semantic search using natural language to query our tables. At a glance, it will look like this:

We can capture the natural language question as a nvarchar variable, then using embedding AI models and the new vector functions, we can return relevant records from our desired tables based on the description, matching how close or approximate they are to the question the user made.
Note:
- The scope of this tip is not to teach about RAG or Vector databases in general. It is assumed you are familiar with these terms. If you are new to this, please refer to this video first and then proceed with this tip.
- You must understand the limitations of how semantic search works, so you can set your expectations. Semantic search DOES NOT mean that the SQL engine will figure out on its own which tables to pull and make a query for you; rather, it means that you can index a specific column, or a concatenation of multiple relevant columns, so the SQL Server semantic search can return close results to those descriptions.
Example Set Up
For this demonstration, you need:
- SQL Server 2025
- An embedding AI Model (two options):
- Option A: A local model (like Ollama) – Less powerful and not so accurate.
- Option B: An online model (like Azure OpenAI or OpenAI) – More powerful and modern models.
- Clear information to search in user tables. Bad, incomplete, or poor information will not generate reliable results.
If you selected Option A (local model), the following section will guide you through setting up Ollama locally and configuring HTTPS to use it on the SQL Server engine.
If you plan to use an online model (Option B), please proceed to the section called Testing our Model.
Set Up a Local Model using Ollama (Option A)
A local model is ideal for development, as you will not spend extra money, but it can lead to inaccurate results. As indicated in the documentation, only HTTPS endpoints are allowed on the SQL engine. So, we must perform extra steps on our local environment.
You will need the following:
Ollama
Download Ollama from the official site, and run the setup as an administrator.

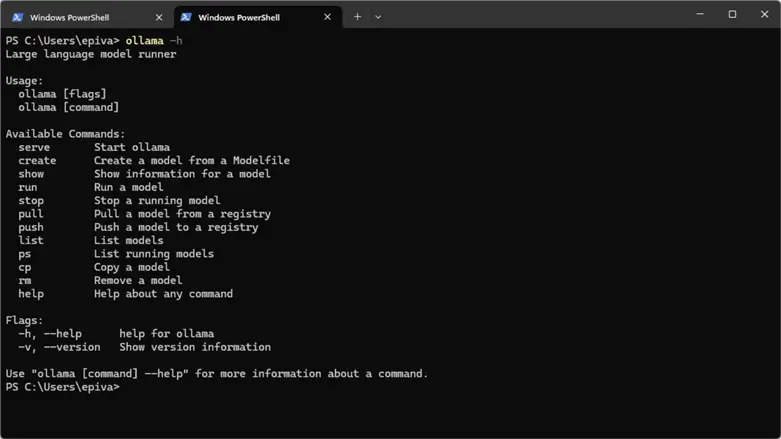
Validate that the installation is successful by running ollama -h in a PowerShell window.
Add Embedding Models
You need an embedding model to use semantic search. The default Ollama model is a completion model. So you must download an embedding model of your preference.
Download these two models using the following command:
ollama pull all-minilm
ollama pull nomic-embed-text
You can review the list of available models here. I encourage you to evaluate different models as they can adapt better to your specific needs.
Generate a Local SSL Certificate
Download and install OpenSSL.
Validate OpenSSL installation path binaries (usually C:\Program Files\OpenSSL-Win64\bin) are added to PATH.

Validate it with PowerShell by running openssl version.
Create a new folder to store the certificates. For this example, I will create a new folder C:\certs.
Open an elevated PowerShell session and run the following command (it assumes the previous folder exists):
openssl req -x509 -nodes -days 365 `
  -newkey rsa:2048 `
  -keyout C:\certs\cert.key `
  -out C:\certs\cert.crt `
  -subj "/CN=localhost"
Validate that a .crt file was created in the folder:

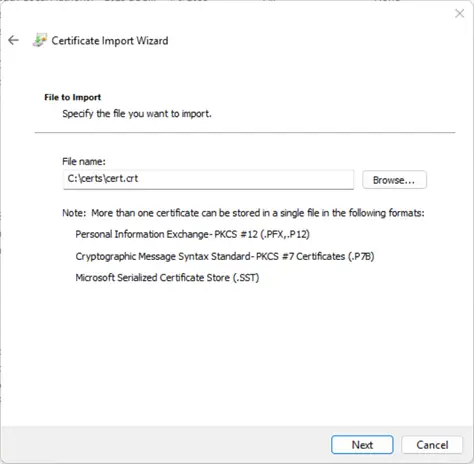
Then, import the .crt file to your computer certificates. (Make sure computer certificates snap in, and not user certificates.)

Then import the certificate using Action > All Tasks > Import.
Make sure Local Machine is selected. If not, open the console again, and ensure Local Machine is selected.

Locate the file we created and click Next.
Put the certificate in Trusted Root Certification Authorities.

Finish the wizard and import it.
Install and Configure NGINX
We will use NGINX to serve our Ollama API over HTTPS using the certificate created in the previous step. Download NGINX. Unzip the contents on the C: drive. The folder name can change based on the version downloaded (For this example: C:\nginx-1.27.5)
Navigate to C:\nginx-1.27.5\conf and create or modify the configuration file nginx.conf with the following contents, making sure that the path to your certificates match:
worker_processes auto;

events {
    worker_connections 1024;
}

http {
    server {
        listen 11435 ssl;
        server_name localhost;

        ssl_certificate      C:/certs/cert.crt;
        ssl_certificate_key  C:/certs/cert.key;
        ssl_protocols        TLSv1.2 TLSv1.3;
        ssl_ciphers          HIGH:!aNULL:!MD5;

        location / {
            proxy_pass http://localhost:11434;
        }
    }
}
Update the hosts file so it can resolve localhost via DNS C:\Windows\System32\drivers\etc.
Add the following line at the end: 127.0.0.1 localhost.
Start NGINX in PowerShell. You must start it every time the machine restarts.
cd C:\nginx-1.27.5\
.\nginx.exe
If this executes fine, continue validating the model.
Testing the Model
Whether you use a local or online model, you need to validate the connectivity first via a simple API call.
For the Local Model (Option A), test it using https://localhost:11435/api/embeddings with the following body:
{"model":"nomic-embed-text","prompt":"test text"}For this example, I’m using Postman locally installed. You can use curl in PowerShell, depending on your personal preference.
If the call is correct, you must see the vectorized representation of your text:

For an Online Model (Option B), like Azure OpenAI:

Once the connectivity is tested, we can proceed with SQL Server.
Configuring SQL Server
Connect to your newly installed SQL Server 2025 instance and enable REST API calls:
EXECUTE sp_configure 'external rest endpoint enabled', 1;
GO
RECONFIGURE WITH OVERRIDE;
GO
Next, it’s time to create the external model. Note that this is a database-scoped object, so you must select your desired database first. I will show you an example of the local model and the online model.
Local Model (using Ollama)
Make sure the correct embedding model you downloaded is specified:
use AdventureWorks2022;
GO

CREATE EXTERNAL MODEL MyOllamaModel
WITH (
      LOCATION = 'https://localhost:11435/api/embed',
      API_FORMAT = 'Ollama',
      MODEL_TYPE = EMBEDDINGS,
      MODEL = 'nomic-embed-text'
);
Online Model (using Azure OpenAI)
Replace https://<yourproject>.openai.azure.com/ with your endpoint name, and make sure the API version is the correct:
use AdventureWorks2022;
GO
--- create master key if not present yet
CREATE MASTER KEY ENCRYPTION BY PASSWORD = 'YourStrongPasswordHere!';
GO

-- Create access credentials to Azure OpenAI using a key:
CREATE DATABASE SCOPED CREDENTIAL [https://<yourproject>.openai.azure.com/]
    WITH IDENTITY = 'HTTPEndpointHeaders', secret = '{"api-key":"<Your-API-Key>"}';
GO

-- Create the EXTERNAL MODEL
CREATE EXTERNAL MODEL MyAzureOpenAiModel
WITH (
      LOCATION = 'https://<yourproject>.openai.azure.com/openai/deployments/text-embedding-ada-002/embeddings?api-version=2023-05-15',
      API_FORMAT = 'Azure OpenAI',
      MODEL_TYPE = EMBEDDINGS,
      MODEL = 'text-embedding-ada-002',
      CREDENTIAL = [https://<yourproject>.openai.azure.com/]
);
Once created, test to see if it is working fine with a simple call to AI_GENERATE_EMBEDDINGS:
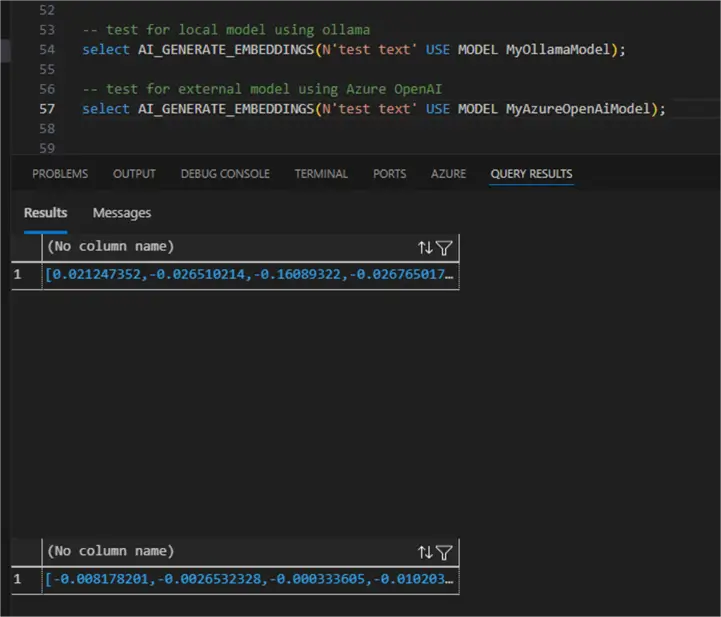
-- test for local model using ollama
select AI_GENERATE_EMBEDDINGS(N'test text' USE MODEL MyOllamaModel);

-- test for external model using Azure OpenAI
select AI_GENERATE_EMBEDDINGS(N'test text' USE MODEL MyAzureOpenAiModel);
If everything is ok, you will see the proper vectors:
Set Up the SQL Server Semantic Search
The next thing is to have proper data to search. For this example, I am using the products table from AdventureWorks2022 database. Using the query below, I am concatenating multiple relevant fields to generate the chunks for the embedding vectors.
--- add all the info you want to search to the chunk, for example description, category, color, etc...

SELECT v.Name + ' ' + ISNULL(p.Color, 'No Color') + ' ' + pc.Name + ' ' + v.ProductModel + ' '
       + ISNULL('Category: '+ pc.name+ '-' +ps.name,'')+' '
       + ISNULL(v.Description, '') + ' ' + 'price:' + CAST(p.ListPrice AS VARCHAR(20)) + ' '
       + ISNULL('size:' + p.Size + ' ' + p.SizeUnitMeasureCode + ' ', '')
       + ISNULL('weight:' + CAST(p.Weight AS VARCHAR(10)) + ' ' + p.WeightUnitMeasureCode, '') AS FullProductDescription
FROM Production.vProductAndDescription v
    INNER JOIN Production.Product p
        ON v.ProductID = p.ProductID
    INNER JOIN Production.ProductSubcategory ps
        ON p.ProductSubcategoryID = ps.ProductSubcategoryID
    INNER JOIN Production.ProductCategory pc
        ON ps.ProductCategoryID = pc.ProductCategoryID
WHERE v.CultureID = 'en';
Next, we need a column to store the vector data. This step depends on where you want to store it. You can add a new column to the same products table or create a new table. For clarity, I will create a new table:
create schema [vectors];
GO

DROP TABLE IF EXISTS [vectors].[product_vectors];

CREATE TABLE [vectors].[product_vectors]
(
    [ProductID] [int] NOT NULL,
    embeddings VECTOR (768),
    chunk NVARCHAR (3000)
);

--REQUIRED FOR VECTOR SEARCH
CREATE UNIQUE CLUSTERED INDEX CI_product_vectors ON [vectors].[product_vectors]([ProductID]);
Then, generate the vectors for each description row.
IMPORTANT NOTE: You must generate the vectors with the same model you intend to search them with; otherwise, you will have unrelated results.
-- insert into the vector table using AI_GENERATE_EMBEDDINGS function
DROP TABLE IF EXISTS #TMPPRoducts;

SELECT  p.productID,
        v.Name + ' ' + ISNULL(p.Color, 'No Color') + ' ' + pc.Name + ' ' + v.ProductModel + ' '
        + ISNULL('Category: '+ pc.name+ '-' +ps.name,'')+' '
        + ISNULL(v.Description, '') + ' ' + 'price:' + CAST(p.ListPrice AS VARCHAR(20)) + ' '
        + ISNULL('size:' + p.Size + ' ' + p.SizeUnitMeasureCode + ' ', '')
        + ISNULL('weight:' + CAST(p.Weight AS VARCHAR(10)) + ' ' + p.WeightUnitMeasureCode, '') AS FullProductDescription
INTO  #TMPPRoducts
FROM Production.vProductAndDescription v
    INNER JOIN Production.Product p
       ON v.ProductID = p.ProductID
    INNER JOIN Production.ProductSubcategory ps
        ON p.ProductSubcategoryID = ps.ProductSubcategoryID
    INNER JOIN Production.ProductCategory pc
        ON ps.ProductCategoryID = pc.ProductCategoryID
WHERE v.CultureID = 'en';

-- for large tables, insert the information in batches to improve performance
INSERT INTO [vectors].[product_vectors]
select productId, AI_GENERATE_EMBEDDINGS(FullProductDescription USE MODEL MyOllamaModel), FullProductDescription
from #TMPPRoducts;

SELECT * FROM [vectors].[product_vectors];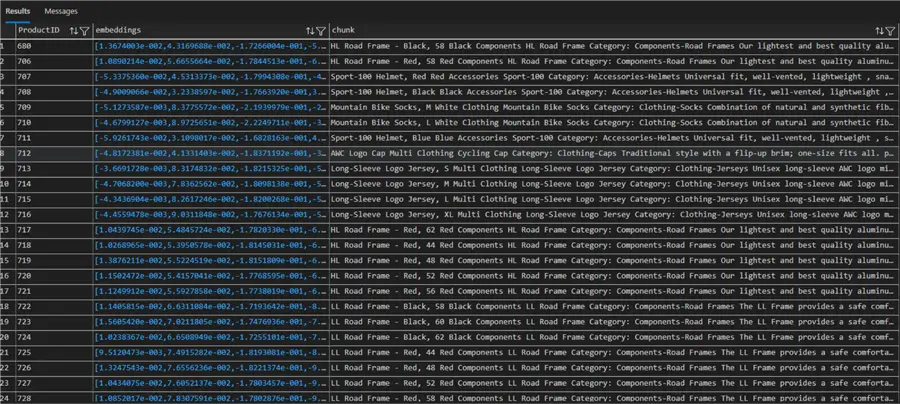
If you can see the embedding vector for each description, then it is okay to continue.
Perform the Semantic Search
We can now perform a semantic search using our vectorized information. For that, SQL Server offers 2 functions: VECTOR_DISTANCE and VECTOR_SEARCH.
VECTOR_DISTANCE
This function calculates how close one vector is to another, using different calculation metrics (cosine, Euclidean, or dot). For this case, it tells us how similar one text is to another. We can order the results based on how close the search argument is to our data.
This function is best used for explicit search terms (for example, looking for articles about Leonardo Da Vinci).
Example 1
A vague search for “blue products”
DECLARE @querytext NVARCHAR (3000) ='i want blue products'
DECLARE @search_vector vector(768) =  AI_GENERATE_EMBEDDINGS(@querytext USE MODEL MyOllamaModel);

--COSINE Measures angle between vectors 0 = similar, 1 = opposite

SELECT TOP(10)
p.ProductID,  p.chunk,
vector_distance('cosine', @search_vector, p.embeddings) AS distance
FROM [vectors].[product_vectors] p
ORDER BY distance;
It did well, as only blue products were ranked first:

Example 2
A more specific search.
For a local model, the results were close. As we searched for jerseys, shorts and vest were also returned, but they are still similar as they are all clothing.

VECTOR_SEARCH
At the time of writing this article, this function performs an ANN (approximate nearest neighbor) against a vector index. Therefore, we must define a vector index first on the table we want to perform the search.
This function performs better over large sets of data since an index is used.
Since this function is still on preview (at the writing of this article), we must enable some trace flags for it to work:
DBCC TRACEON(466, 474, 13981, -1)Then we can create our vector index on our vector column. Again, only ANN is supported for now:
--required vector index for the vector_search to work
CREATE VECTOR INDEX vec_idx ON [vectors].[product_vectors]([embeddings])
WITH (METRIC = 'cosine', TYPE = 'diskann', MAXDOP = 8);
GO
Once created, we can perform the search. First, let’s search for hand products. It properly returns gloves and other relevant results.
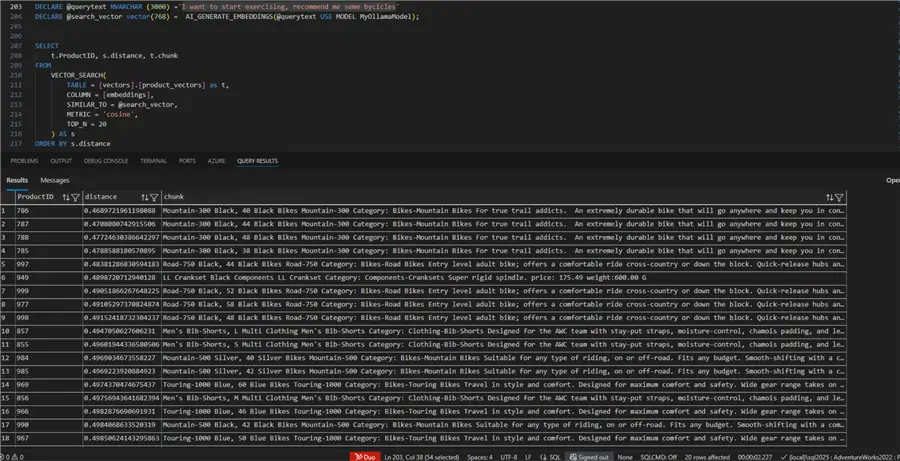
DECLARE @querytext NVARCHAR (3000) ='I want products for my hands'
DECLARE @search_vector vector(768) =  AI_GENERATE_EMBEDDINGS(@querytext USE MODEL MyOllamaModel);

SELECT
    t.ProductID, s.distance, t.chunk
FROM
    VECTOR_SEARCH(
        TABLE = [vectors].[product_vectors] as t,
        COLUMN = [embeddings],
        SIMILAR_TO = @search_vector,
        METRIC = 'cosine',
        TOP_N = 20
    ) AS s
ORDER BY s.distance
Our last example, a natural question, which is properly interpreted, and relevant results were returned:
Next Steps
- Download SQL Server 2025
- Try and experiment with other models to determine which one best fits your needs. Online models are more accurate but are billed based on usage.
- Read more about the new AI features in SQL Server 2025.
- Make sure to try Copilot in the new SSMS 21.

Eduardo Pivaral is an MCSA, SQL Server Database Administrator and Developer with over 15 years of experience working in large environments.
- MSSQLTips Awards: Trendsetter (25+ tips) – 2020 | Author of the Year Contender – 2019 | Rookie of the Year – 2018


nice article Eduardo! this feature has to be standard soon.