Overview
The Table or Matrix Wizard guides you through creating a report step-by-step. This topic will create our first report using the wizard.
Explanation
Launch the Table or Matrix Wizard from either the Getting Started dialog or the New Report or Dataset dialog. Select Table or Matrix Wizard. The first step is to choose a dataset:
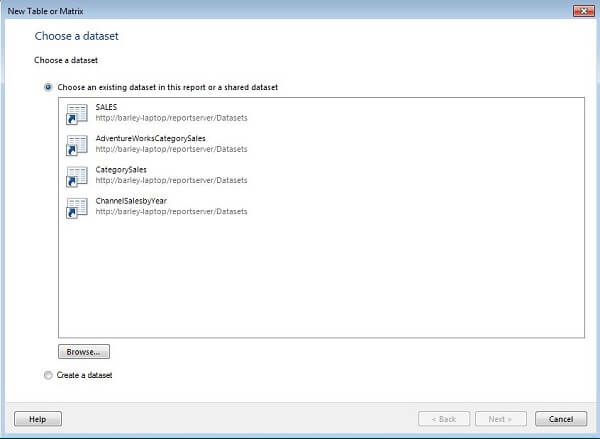
The default behavior is to use an existing shared dataset. Select a dataset from the list or click Browse to search for the one you want. The dataset created in the Getting Started section hasn’t been used yet so it’s not shown in the list. Click Browse, navigate to the appropriate folder where you saved it, select the dataset, and click Open:
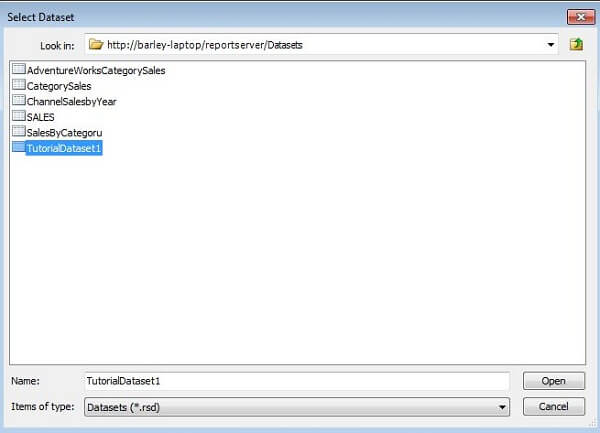
You will return to the Choose Dataset dialog with TutorialDataset1 selected; click Next to continue to the Arrange fields dialog. Fill in the dialog as shown below:
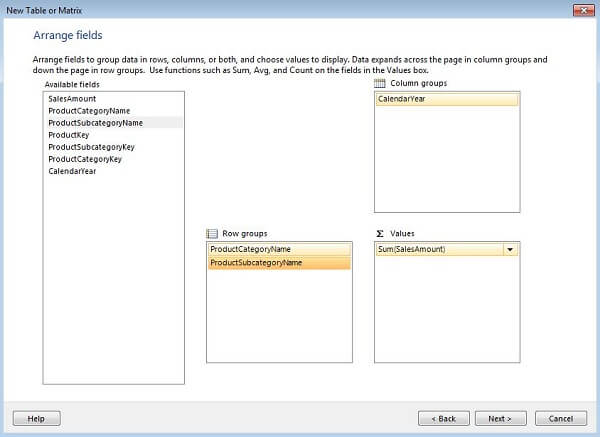
The Arrange Fields dialog has three places for you to drag and drop fields from the Available fields list: Row groups, Column groups and Values. The Column groups spread out across the page, Row groups spread out down the page, and Values are placed at the intersection of the rows and columns. The above choices provide a simple matrix-type report. To get a tabular report, drag and drop all of the desired columns into the Values list.
Click Next to continue on to the layout dialog; fill in the dialog as follows:
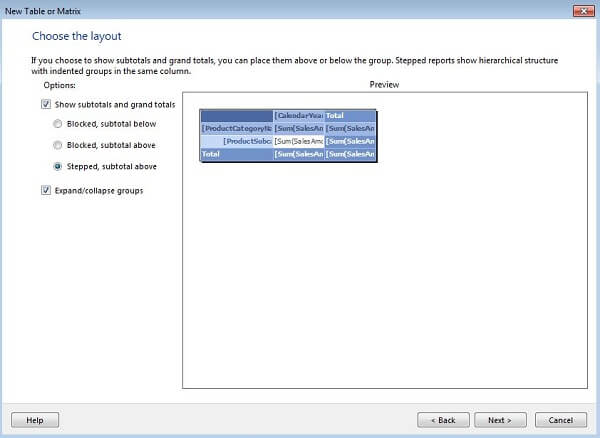
As you change the radio button selection under Show subtotals and grand totals, the layout updates to reflect your choice. Expand/collapse groups is checked by default; this allows clicking the plus sign to expand and clicking the minus sign to collapse.
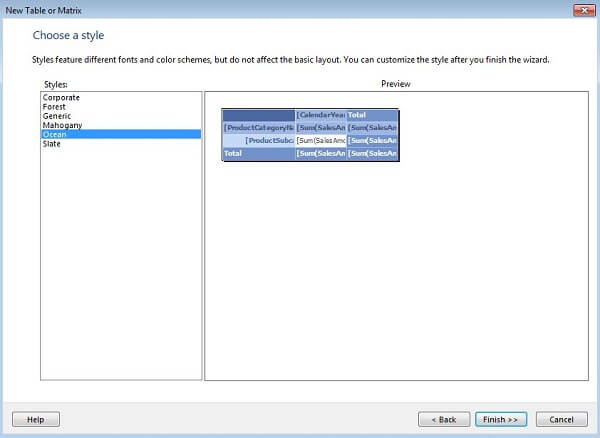
Click Next to continue on to the style dialog; select one of the styles as shown below:
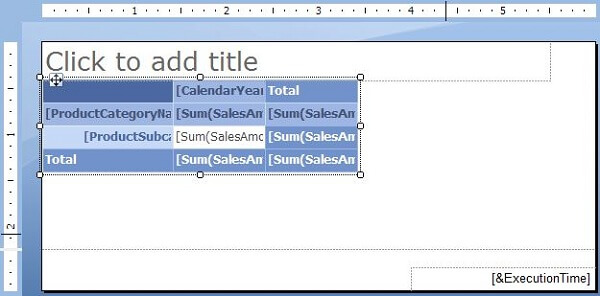
Click Finish to complete the wizard. You have created the following report:
Click the Run button on the ribbon to preview the report:
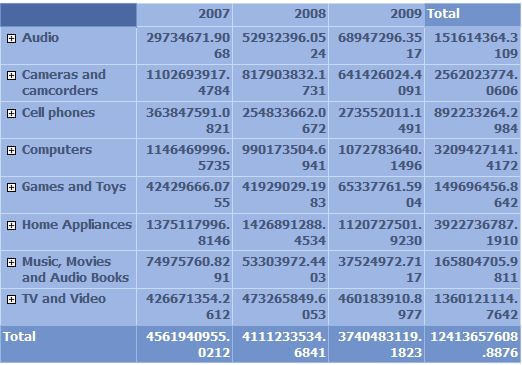
At this point the report needs a little bit of cleanup; you can fill in a report title, click in the report cells, and go to the Properties window to clean up the formatting. Nonetheless, you have created a report by clicking through a couple of dialogs in the Table or Matrix Wizard.
You can save the report to your local hard drive, a folder in the Report Manager (if SSRS is in native mode), or a SharePoint document library (if SSRS is running in SharePoint Integrated mode). Click the diskette icon at the top of the Report Builder window or select Save from the Report Builder menu, then navigate to the appropriate folder. Deploying reports will be covered in a later section of the tutorial.
Additional Information
- Tutorial: Creating a Matrix Report (Report Builder 3.0)
- Tutorial: Creating a Basic Table Report (Report Builder 3.0)

Ray is a Principal Architect at IT Resource Partners focused on SQL Server and Business Intelligence. He is a Microsoft Certified Solutions Expert (MCSE) in Business Intelligence, a MSSQLTips.com BI Expert and Ambassador. He is also a co-author of the book: SharePoint 2010 Business Intelligence Unleashed.
- MSSQLTips Awards: Champion (100+ tips)