By: Vitor Montalvao | Comments (5) | Related: 1 | 2 | 3 | 4 | > Azure
Problem
This is my fourth tip that is part of a tutorial to help people that are moving for the first time to SQL Azure. If you did not read my previous articles and want to learn how to create a database in SQL Azure and perform basic configurations, you can read them now and then return to this tip to continue your learning.
- SQL Azure Create Database Tutorial
- Overview of Basic Configuration Options for SQL Azure
- How to use Azure SQL Database features and settings
You should use this article as a tutorial and follow it step-by-step. I will also try to share my experience on the differences that I have found when I was moving from SQL Server to SQL Azure for the first time.
Solution
In this tip I will explain how to work with a SQL Azure database from SQL Server Management Studio (SSMS).
SQL Server Management Studio (SSMS)
If you do not have SSMS installed on your computer then you can download from here.
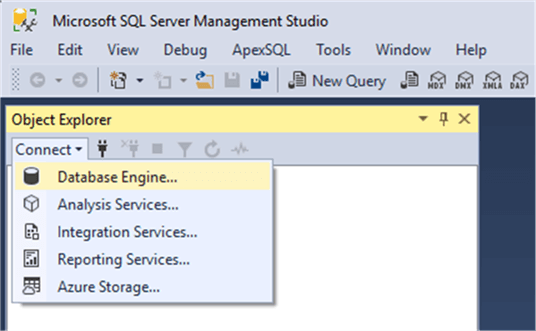
When you run SSMS you should have a blank screen only with the Object Explorer pane. Click on Connection and choose the Database Engine… option:
Before you connect to a SQL Azure database you should have already one SQL Azure database created through the SQL Azure Portal and have at least one SQL Azure user also created (those were explained on my first tip SQL Azure Create Database Tutorial and have a firewall rule set to allow connections from your computer which was explained in my second and third tips.
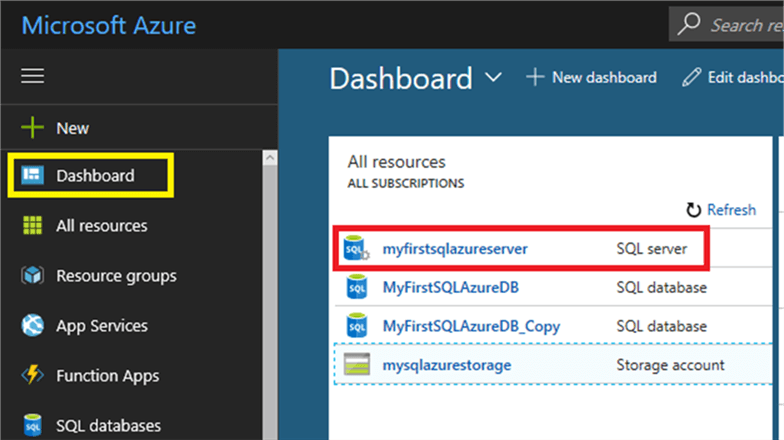
The following screen shows where in the SQL Azure Portal you can get the necessary information to provide for the connection in SSMS. Login to the Microsoft Azure Portal and in the Dashboard pane click on the SQL Azure server that you want to get information from:
Then in the SQL Azure server menu choose the Firewall/Virtual Networks options. This will open a new right pane with the allowed IPs. If yours is not present then add it.
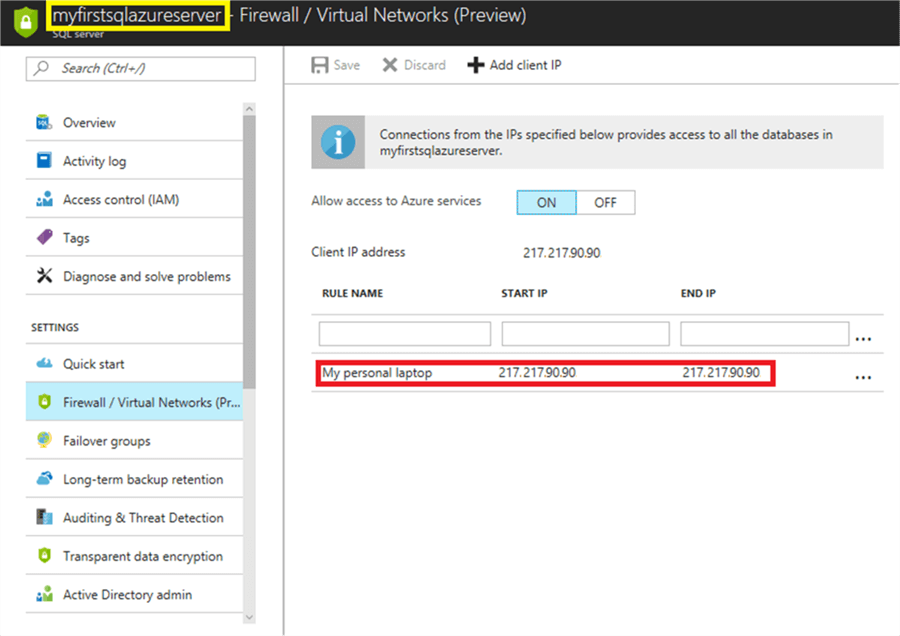
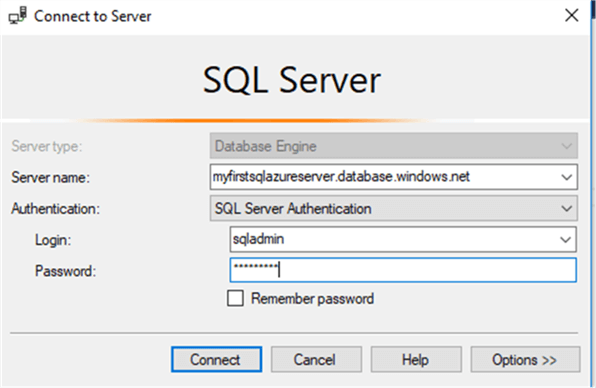
On the title you have the SQL Azure server name. That is the name that you will need in SSMS, followed by the full address “.database.windows.net”. You will also need the user credentials (check my first article to know or review how to create this user). So, in my case, my connection window is as follows:
After connecting, you can see in the Object Explorer pane the SQL Azure server. I have it expanded, so you can see that there are fewer options compared to a regular SQL Server instance installation:
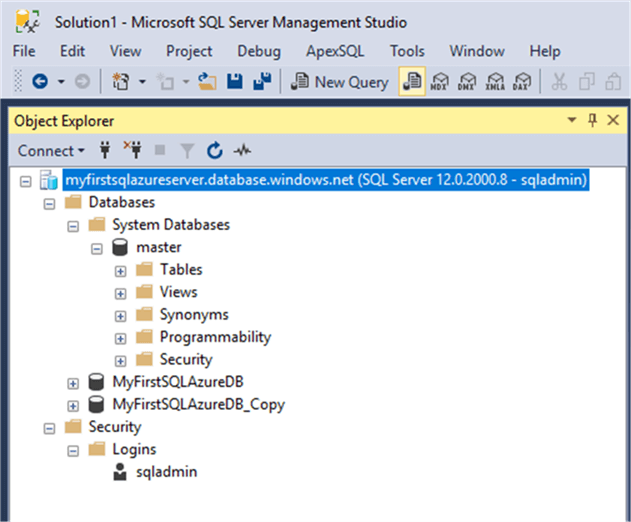
The only system database that you can see is master and there are no Server Objects, Replication, AlwaysOn, Audit, SQL Agent or other typical options that you can find in a regular SQL Server instance. This is how SQL Azure works and as I wrote in my first article about this topic, the mindset for SQL Azure is Database As A Service (DBaaS), so do not expect to find things like Linked Servers, Management Plans, SQL Agent Jobs, as well as other options you might be used to working with in SQL Server.
With that said, you can know use your database by opening a New Query window and start to type your T-SQL commands:
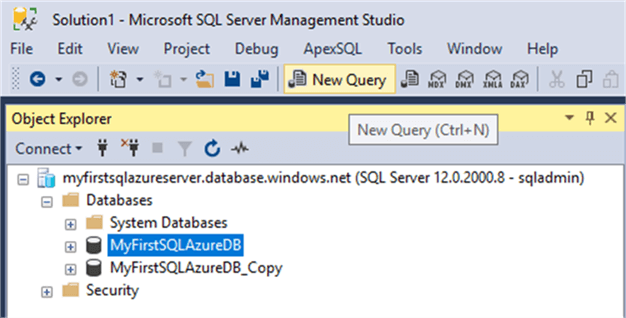
One thing that we cannot do in SQL Azure is to change the database context in the query window. Following is an example that shows this. This is the code that I will run and it returns the current database name and then it will try to change the database context and it ends presenting the new database context:
SELECT DB_NAME()
GO
USE MyFirstSQLAzureDB_Copy
GO
SELECT DB_NAME()
GO
Copy the above code and paste it to a new query window and replace the database name in the USE statement with a database name that really exists in you SQL Azure server (you will need to have two databases to be able to perform this test). After that execute the query:

As you can see there is an error message, the USE statement is not supported. Let’s see the results pane to check what really happened:
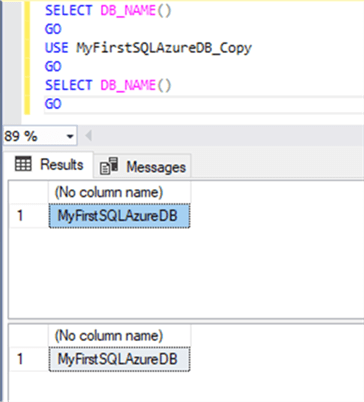
As expected the database context did not change and we stayed in the same database.
This is important to know because if you want to change databases you will need to connect to the other database. With SSMS this can be done in the connection window. For that, after providing the necessary information for the connection, click the Options >> button:
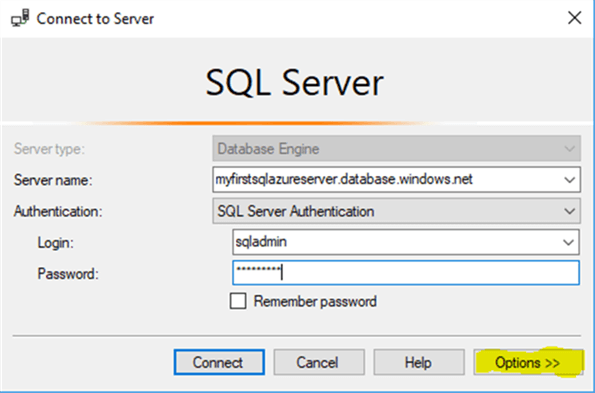
Then in the Connect to Database field, enter the database name that you want to connect to:
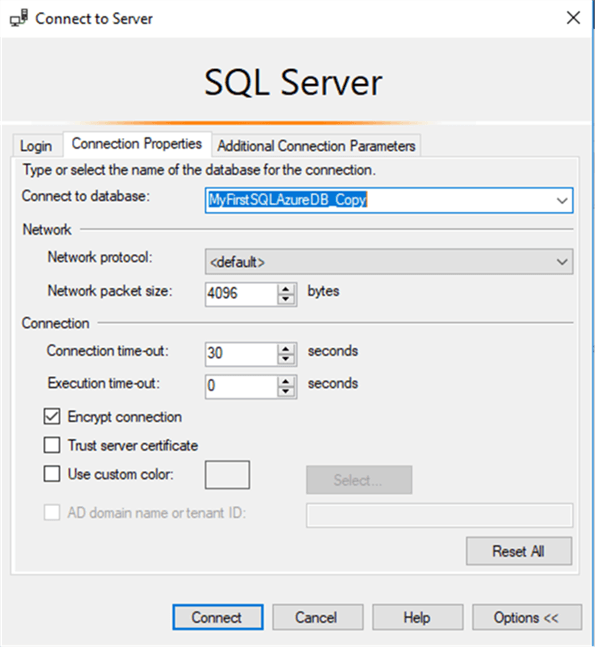
Click on Connect and if all information that you provided is correct you should be working now on the desired database.
Use sqlcmd to Connect to an SQL Azure Database
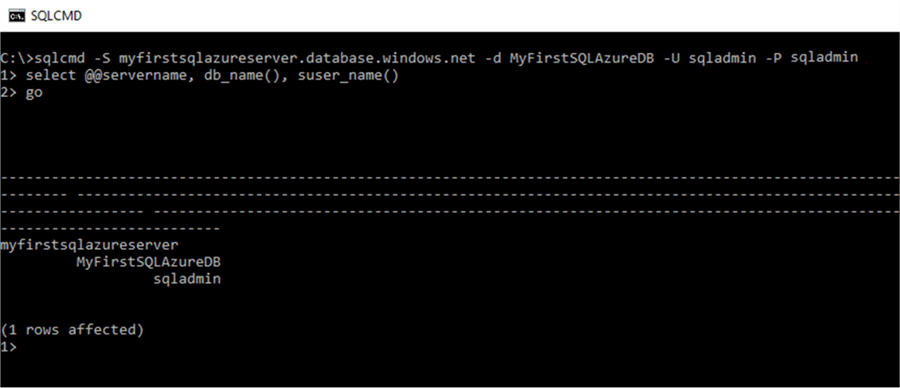
You can also connect to a SQL Azure database using the sqlcmd utility. A typical command is:
sqlcmd -S sqlAzureServerName.database.windows.net -d databaseName -U sqluser -P password
Notes:
- If you are using an Azure Active Directory user then use the -G parameter as explained in the provided sqlcmd link.
- A firewall rule must exist to allow your computer to access the desired SQL Azure server (see above in the SSMS section how to do create the necessary firewall rule).
Below is the example for the SQL Azure database I am using in this article with a very simple SELECT to confirm the connection was successfully:
PowerShell to Connect to SQL Azure Server
To use PowerShell to work with any Microsoft Azure resource you will need first to have installed the Azure PowerShell Modules. If you do not have it, then download it from here. Follow the instructions that are in the download link to install the Azure PowerShell Modules.
When you have the Microsoft Azure PowerShell installed and the necessary firewall rule created to allow your computer to access the desired SQL Azure server (see above in the SSMS section how to do create the necessary firewall rule), then follow the next steps to connect and work with a SQL Azure database.
Start by connect to your Microsoft Azure account by running the Add-AzureAccount command let. This will present the Azure login window:
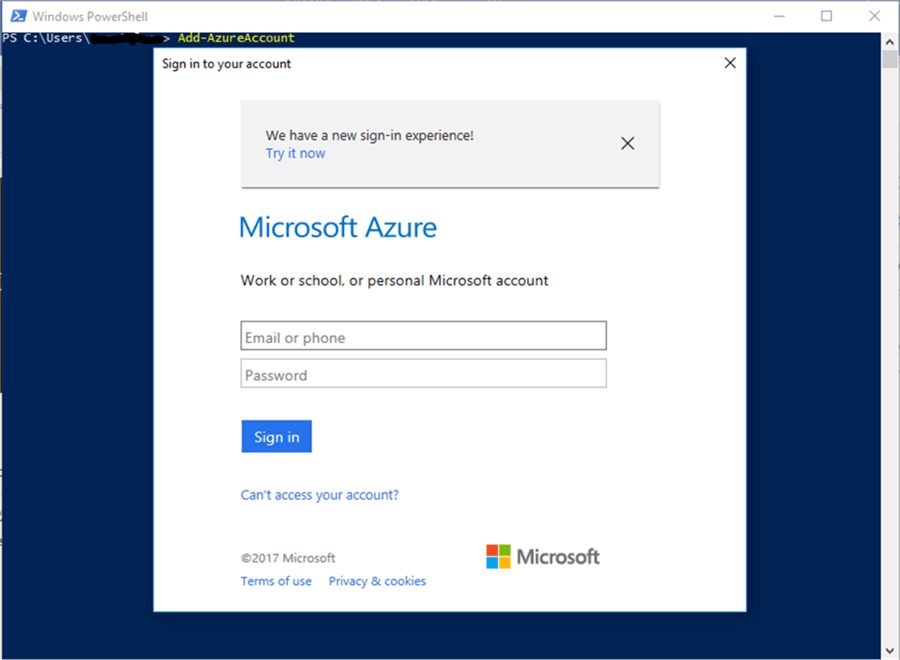
With that you are already connected to your Azure subscription and you may now perform SQL Azure commands. For example, to get a list of databases from a SQL Azure server use the Get-AzureSqlDatabase cmdlet:
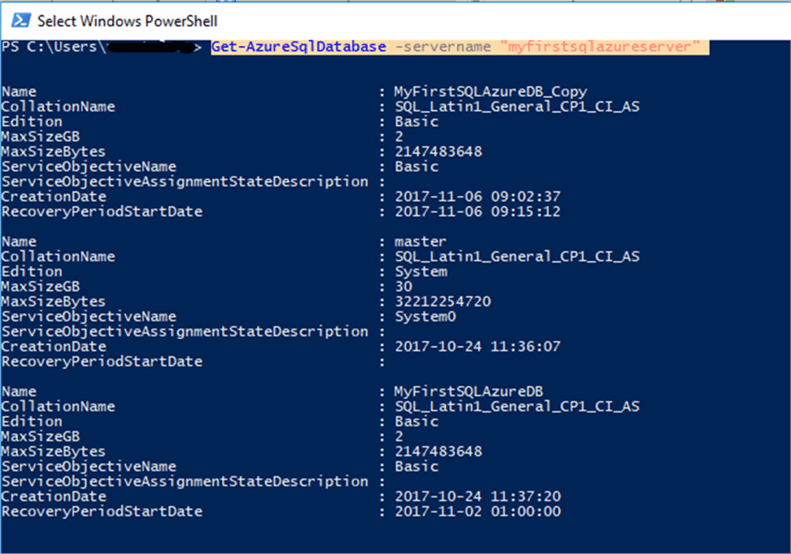
With that you can execute a query on any of your databases by running the Invoke-sqlcmd cmdlet:

Connection Strings for SQL Azure
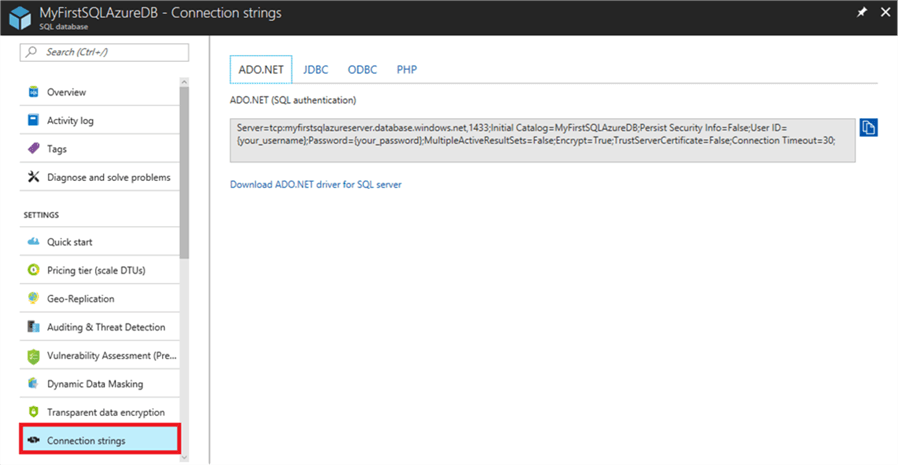
When developing applications, you will need to set a connection string in your application to connect to a SQL Azure database. In the Microsoft Azure Portal, you can retrieve the connection string to be used by your application and for that you just need to login in the Microsoft Azure Portal and go to the desired SQL Azure database, click on the Connection Strings option and copy the information you need depending on what you are using (actual options are ADO.NET, JDBC, ODBC or PHP):
Next Steps
- Stay tuned for my next tips in this series.
- Check out these other related articles:
About the author
 Vitor Montalvăo is a SQL Server engineer with 20 years of experience in SQL Server, specializing in performance & tuning, data modelling, migration and security.
This author pledges the content of this article is based on professional experience and not AI generated.
View all my tips


