By: Daniel Farina | Comments | Related: > SQL Server on Linux
Problem
SQL Server is now available to run on Linux and with that there is the need to upgrade the Linux operating system just like for Widows. So, in this tip we cover how to upgrade an Ubuntu Linux server.
Solution
We are used to upgrading the Windows operating systems. We do so with each service pack release as well as other Windows updates, but the way we are used to upgrading the OS is different on Linux based systems.
A Linux distribution is what it is called and it is an operating system update made from a software collection, which is based upon the Linux kernel and a package management system. There are lots of Linux distributions. Amongst the variety of distributions, some of them are multiplatform which means it can be used on different CPU architectures and there are others that work only for a specific architecture like x64, ARM, DEC Alpha, MIPS, RISC, Itanium and many others. Furthermore, there are distributions that are made to work just for embedded devices like the open source distribution OpenWrt which is a distribution made for embedded devices like routers.
The Upgrade Process
If you had the chance to read my previous tip where I explained the usage of Aptitude, which is the back end of apt-get, to upgrade application packages. In that tip I covered apt parameters which are almost the same as apt-get parameters. But apt-get has a parameter that is not present in apt which is dist-upgrade.
According to apt-get man page, the dist-upgrade parameter in addition to performing the function of upgrades, also intelligently handles changing dependencies with new versions of packages because of its smart conflict resolution system. Furthermore, the man page warns us about the capability of the dist-upgrade parameter to remove packages according to the rules dictated by its conflict resolution system, so you have to take care with this.
apt-get dist-upgrade
The do-release-upgrade command
This tool is used to upgrade the Ubuntu distribution to its latest release by using the command-line. Even when Debian based systems like Ubuntu can be upgraded by using apt dist-upgrade, using do-release-upgrade is recommended because it has the ability to handle system configuration changes sometimes needed between releases. Furthermore, do-release-upgrade is the preferred command to use in case the machine has no graphical interface or if the machine is to be upgraded over a remote connection.
Following is a description of do-release-upgrade most relevant parameters:
| Parameter | Description |
|---|---|
| -d | If the system is using the latest supported release then upgrades to the development release. |
| -p | Attempts to upgrade to the latest release using the upgrader from Ubuntu-proposed repository. |
| -m MODE | Run in a special upgrade mode: "desktop" for regular upgrades of a desktop system and "server" for server systems. |
On the next screen capture you will see the execution of do-release-upgrade on a remote server using a ssh terminal.
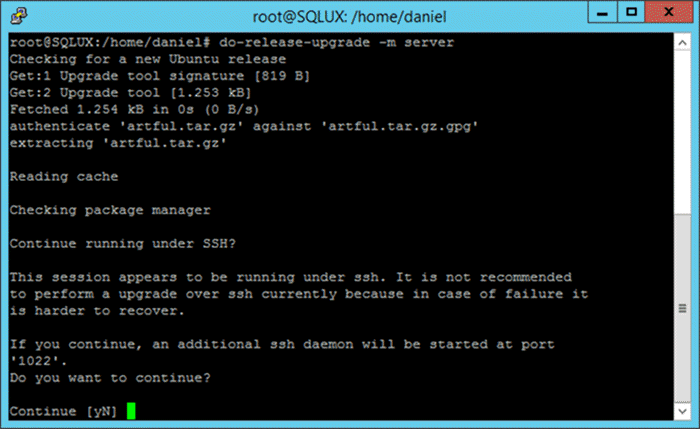
As you may have noticed on the previous image, the execution of do-release-upgrade warns us about running the command under a ssh connection. At this point, you are probably confused because a few paragraphs before I wrote that do-release-upgrade is the preferred way to upgrade Ubuntu remotely. The answer to this confusion is that even when do-release-upgrade is the preferred way there could be problems. For example, if the ssh daemon (sshd) is going to be updated then your ssh connection will close. That’s why do-release-upgrade informs us that it will launch an additional ssh daemon to listen on port 1022 (in your case it could be another port), so if your ssh connection closes you can resume the upgrade by connecting to the other ssh daemon.
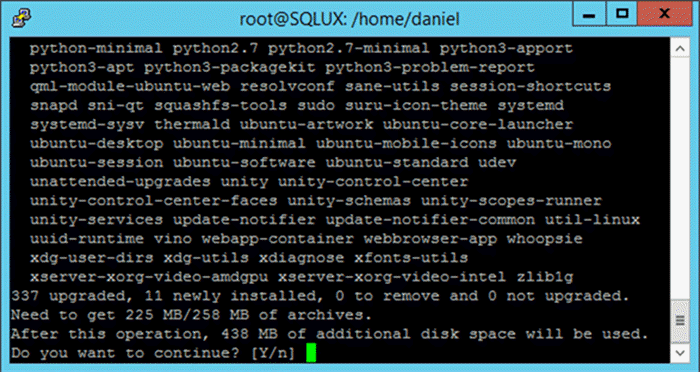
Next you will be notified about the download size and the disk space requirements.
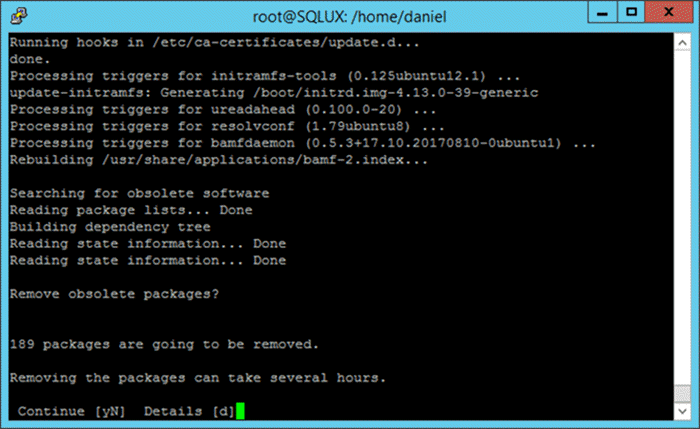
After the download and installation finishes, the do-release-upgrade will prompt you to delete obsolete packages.
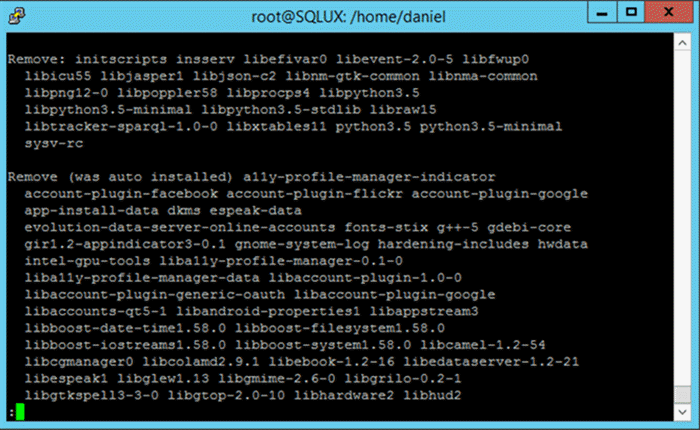
You can verify which packages are going to be removed by pressing the key "d" (for details). In such case you will see something like the next screen capture.
After you review the packages to be removed you must press the "q" key to go back to the previous screen and then press "y" if you want to continue and remove those packages or press "n" to abort.
Assuming you continue with the upgrade process, you will then be notified that the upgrade was complete and that you must restart the system. If you press the "y" key the system will be restarted and if you press "n" then you will have to restart the system later.
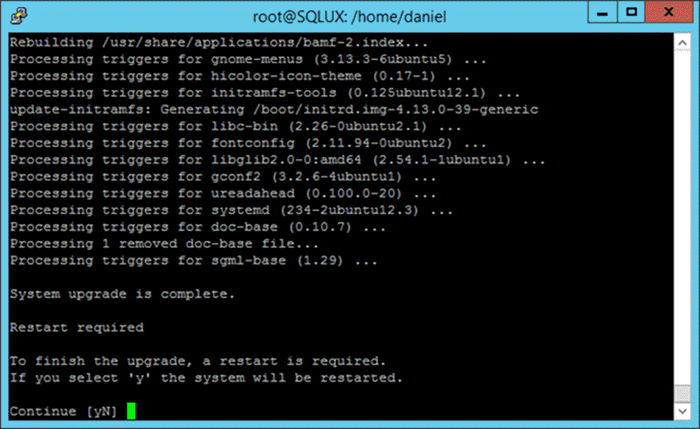
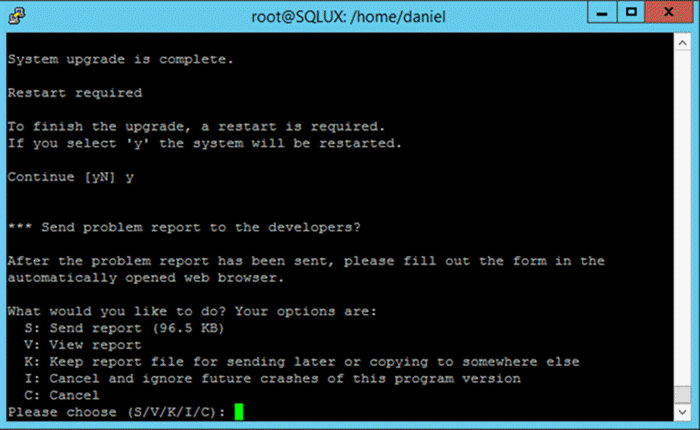
If something went wrong, you will see an additional screen about sending an error report to the developers of do-release-upgrade.
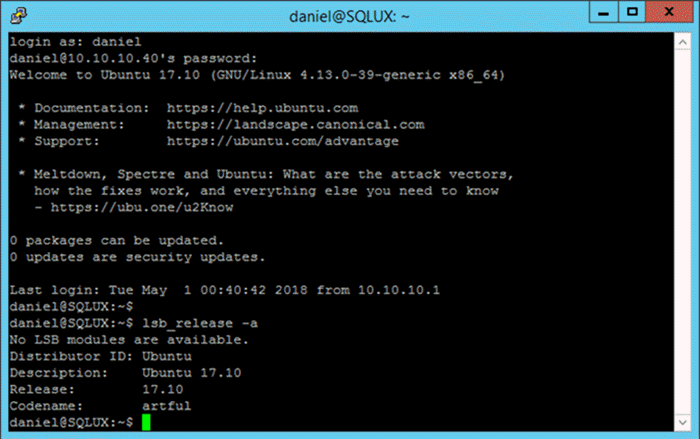
After finishing the upgrade process and having your system restarted, you will see the new version number when logging in via a ssh connection. Also, you can run the following command to see the distribution version.
lsb_release –a
The following screen capture illustrates the previously stated.
What If You Receive the Message “No New Release Found”?
When you upgrade your Ubuntu distribution you may face a situation where you know that there is a new release, but you get the warning message “No New Release Found”. This could happen with either the do-release-upgrade or the apt-get dist-upgrade command. In such case, you must check the settings on the /etc/update-manager/release-upgrades configuration file and set it to the appropriate value according to your needs. You can use the editor of your choice, but if you are new to Linux I suggest you use nano to edit text files.
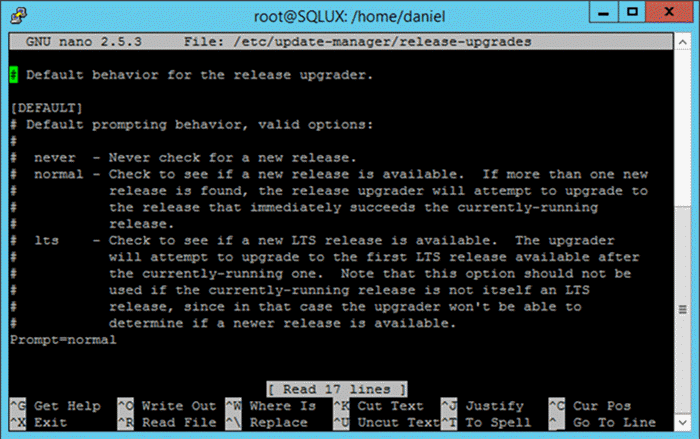
In the next table I copied the settings shown on the previous screen capture with its description.
| Setting | Description |
|---|---|
| never | Never check for a new release. |
| normal | Check to see if a new release is available. If more than one new release is found, the release upgrader will attempt to upgrade to the release that immediately succeeds the currently-running release. |
| lts | Check to see if a new LTS release is available. The upgrader will attempt to upgrade to the first LTS release available after the currently-running one. Note that this option should not be used if the currently-running release is not itself an LTS release, since in that case the upgrader won't be able to determine if a newer release is available. |
Next Steps
- If you need to upgrade SQL Server Linux the next tip will help: Upgrading SQL Server running on Ubuntu to latest update.
- New on Linux? On the following tip you will find the most used commands for SQL Server DBA’s: Top 10 Linux Commands for SQL Server DBAs.
- Also you want to learn other Linux administration basics you can read my previous tips on which I cover how to check for CPU Usage, Disk I/O and Disk Space.
- For more information regarding SQL Server and Linux check the SQL Server on Linux Tips Category.


About the author
 Daniel Farina was born in Buenos Aires, Argentina. Self-educated, since childhood he showed a passion for learning.
This author pledges the content of this article is based on professional experience and not AI generated.
View all my tips
