By: Fikrat Azizov | Comments (8) | Related: > Azure Data Factory
Problem
Data integration tasks sometimes require transferring files between on-premises and cloud sources. In this tip I'll explain how to create an Azure Data Factory pipeline to transfer CSV files between an on-premises machine and Azure Blob Storage.
Solution
Data Exchange Architecture
I will create two pipelines - the first pipeline will transfer CSV files from an on-premises machine into Azure Blob Storage and the second pipeline will copy the CSV files into Azure SQL Database. For those of you not familiar with Azure Blob Storage, it is a secure file storage service in Azure. In this tip we will cover how to transfer files to Azure Blob Storage and the next tip we will cover how to transfer files to Azure SQL Database.
As I mentioned in the previous post, ADF requires a Self-hosted Integration Runtime (SHIR) service to transfer data between an on-premises machine and Azure, as shown in the below high-level architecture:
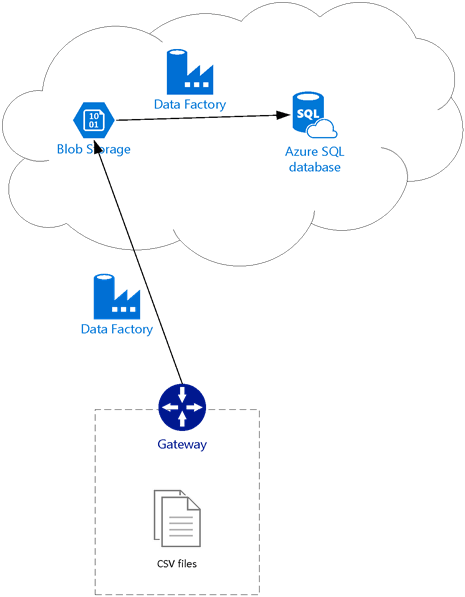
Although it is possible to transfer CSV files from an on-premises machine directly to Azure SQL Database, I have deliberately split this data flow into two pipelines, as we will need to use the second pipeline in one of the future posts which will discuss pipeline execution automation.
Preparing Source and Destination Tables
Since I have already installed and configured SHIR on my machine, I can start using it to transfer files to Azure.
For the purpose of this exercise, I have extracted data from the FactInternetSales table from the AdventureWorks 2016 database into a CSV format, divided it into three files, based on order year and placed them in the C:\Data\CSV folder on my machine. The first row in each file contains column headers, as you can see in the below snapshot.

Now, let's prepare the cloud location for our data flow jobs. There are a few ways to manage files in Blob Storage, one of which is using Azure Portal. I will use Azure Portal to create a Blob Storage account and related containers to serve as destination for the CSV files. Here are required steps.
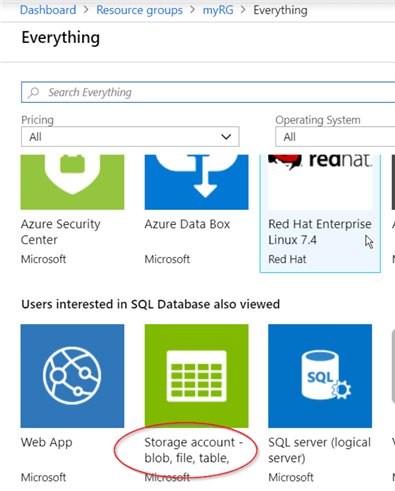
1 - Log in to Azure Portal, and I will open resource group 'myRG' which I created earlier and add a new resource, using '+Add' button.

2 - Select 'Storage account - blob, file, table, queue' resource type and confirm.
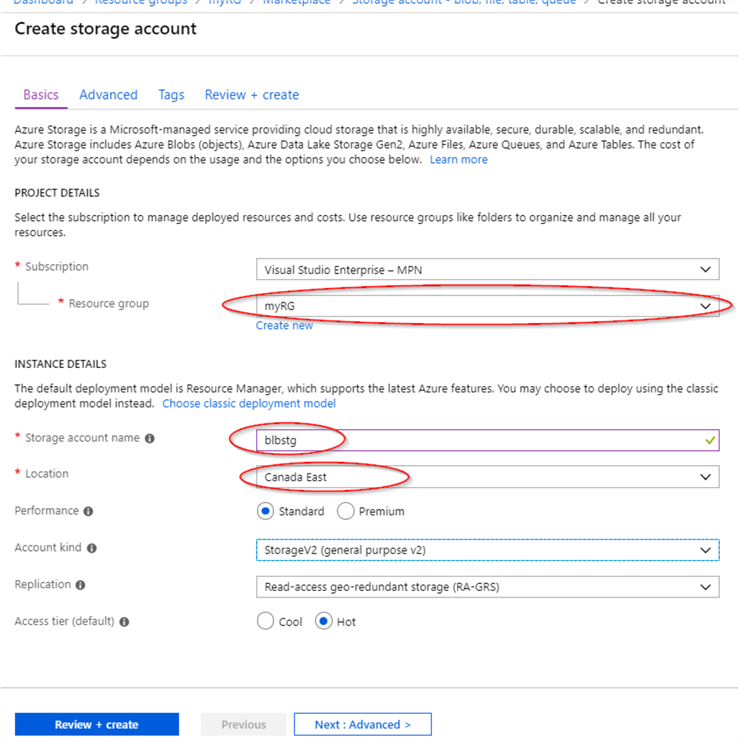
3 - Inside 'Create storage account' dialog window, select resource group 'myRG' from drop-down list, assign the name to the storage account (I named it 'blbstg'), select an Azure region near your location and confirm.
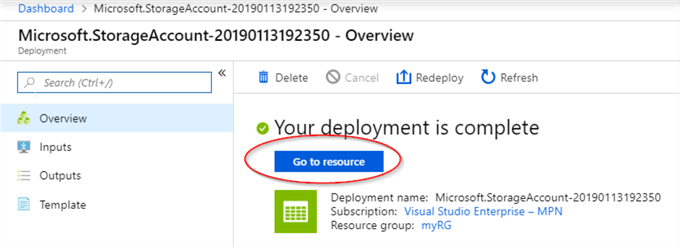
4 - Once the blob storage is deployed, open it using the 'Go to resource' button.
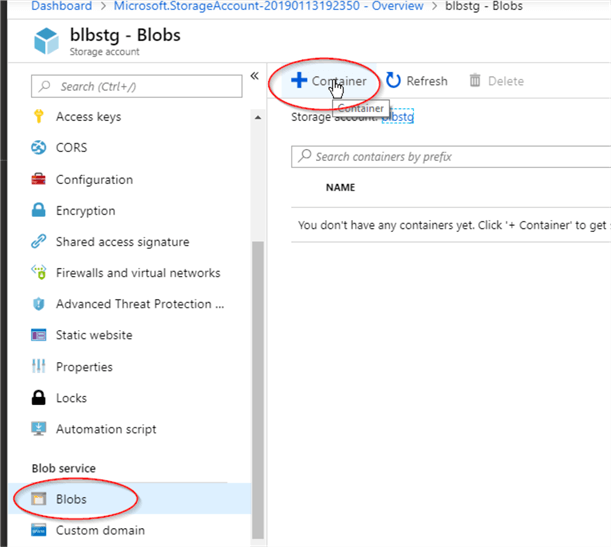
5 - The next step is adding a container to the blob storage. Containers are logical grouping of files (called blobs, in Azure terminology) and can be treated as equivalents of file folders. Files could be copied directly into them or you could create nested folders inside containers and copy files there. For simplicity sake, we will copy files directly into the container, which we are going to create next. To add new container from the Blob storage management screen, open the 'Blobs' tab and press the '+Container' button.
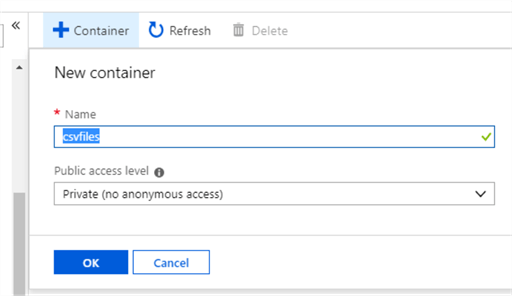
6 - Enter the name for the new container (I named it 'csvfiles') and confirm.
Creating Copy Pipeline
Now that we prepared the source and destination, the process of creating a pipeline is similar to what we did for database related pipeline in a previous post, see below steps.
1 - Linked services. We need to create linked services for the source and destination, here are the details.
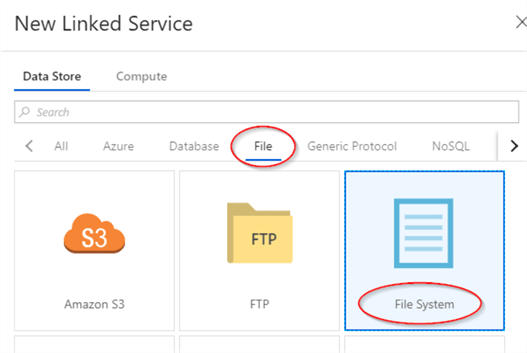
- To add a source linked service, open the 'Connections' tab on the 'Factory Resources' panel, add new connection and select the 'File System' type from the ADF authoring screen.
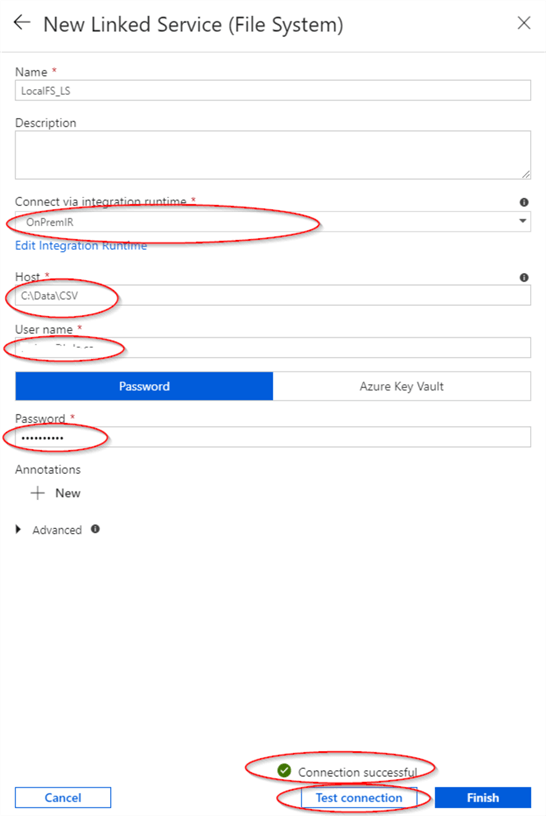
- Assign the name to the linked service name, select 'OnPremIR' from the integration runtime drop-down list, enter your domain user name in the format of 'USERNAME@DOMAINNAME', as well as a password. Finally, hit the 'Test connection' button to ensure ADF can connect to your local folder.
- To add a destination linked service, add a new connection and select Azure Blob Storage type.
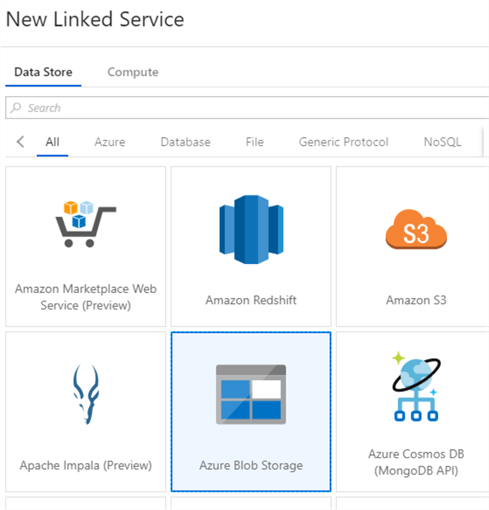
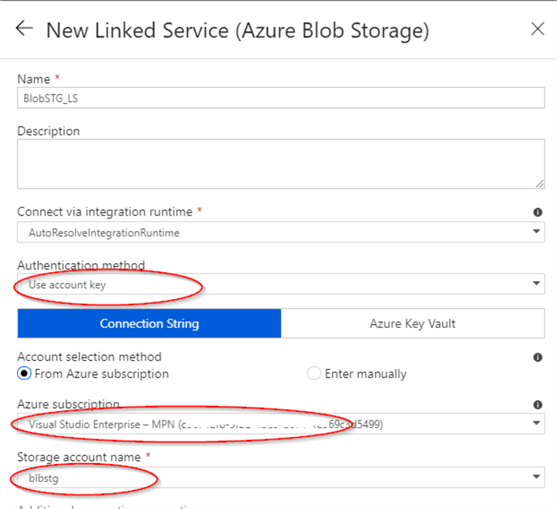
- Assign the name for the linked service, select 'Use account key' as the authentication method, select Azure subscription and storage account name from the respective drop-down lists.
2 - Datasets. Now that we have linked services in place, we can add the source and destination datasets, here are the required steps.
- To add source dataset, press '+' on 'Factory Resources' panel and select 'Dataset'.
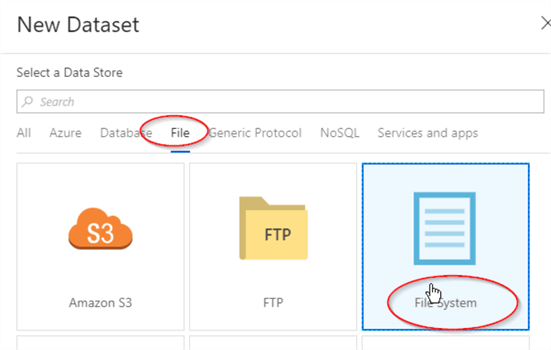
- Open 'File' tab, select 'File System' type and confirm.
- Assign the name to newly created dataset (I named it 'LocalFS_DS') and switch to the 'Connection' tab.

- Select the source linked service we created in step 1, check the 'Column names in the first row' box and ensure that 'File path' field points to the right folder.
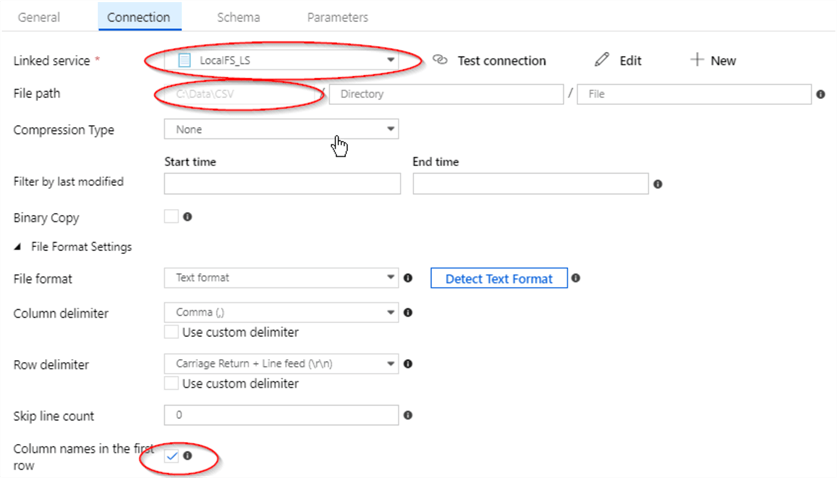
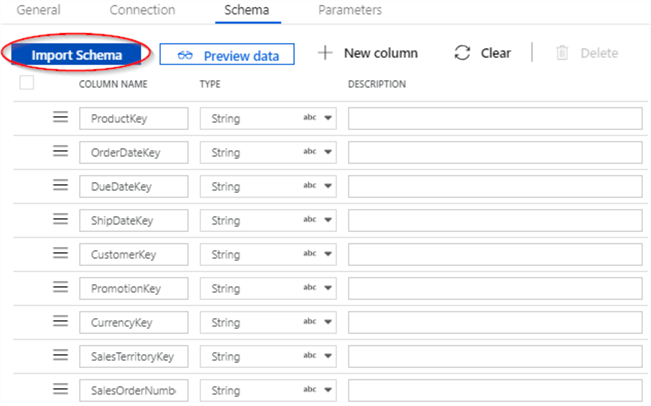
- Finally, open the 'Schema' tab and hit the 'Import Schema' button to import the CSV files structure.
- Similar to the source dataset, hit '+' on 'Factory Resources' panel and select 'Dataset', to add the destination dataset.
- Select the 'Azure Blob Storage' type and confirm.
- Enter dataset name (I named it 'BlobSTG_DS') and open 'Connection' tab.
- Select blob storage linked service we created in step 1, type blob container name we created earlier in the 'File path' field and check 'Column names in the first row' box.

3 - Pipeline and activity. The last step in this process is -adding pipeline and activity. Here are steps:
- Press '+' on 'Factory Resources' panel and select 'Pipeline'.
- Assign the name to the pipeline (I named it as 'OnPremToBlob_PL').
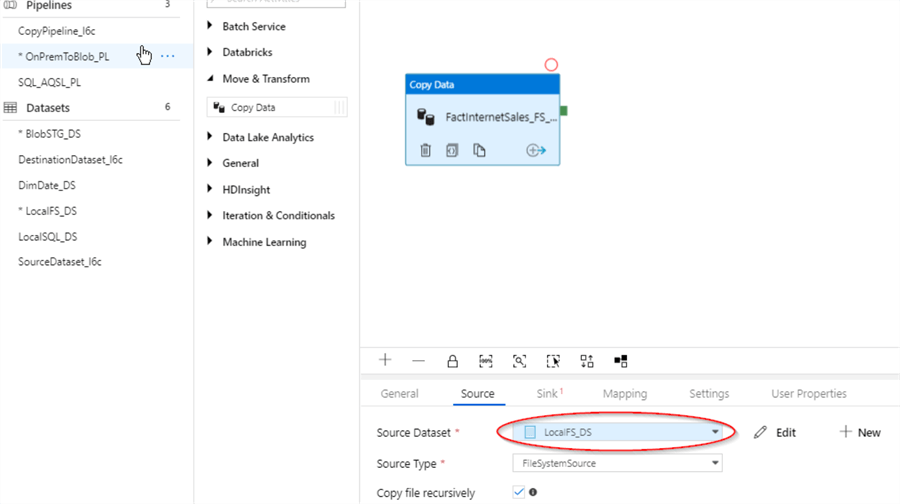
- Expand 'Move & Transform' category on the 'Activities' panel and drag & drop 'Copy Data' activity onto central panel.
- Select newly added activity and assign the name (I named it 'FactInternetSales_FS_BS_AC').
- Switch to 'Source' tab and select LocalFS_DS dataset we created earlier.
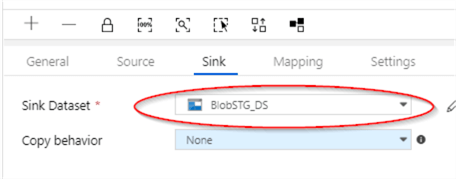
- Switch to 'Sink' tab and select 'BlobSTG_DS' dataset we created earlier.
4 - Publishing changes - Now that we've added all required components, last step is publishing these changes-hit 'Publish All' and check notifications area for deployment status.
Execution and Monitoring
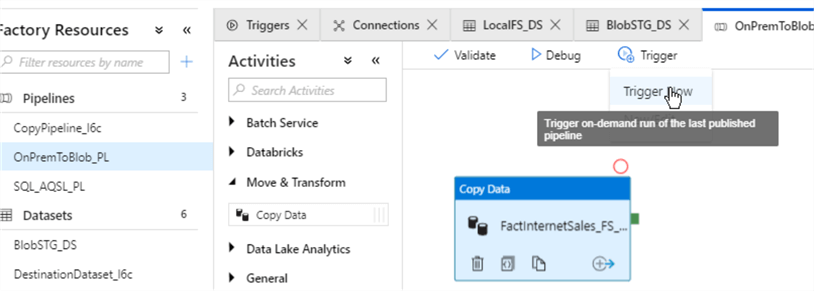
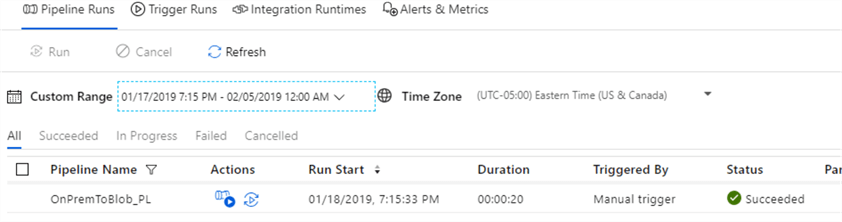
By now we know how to trigger a pipeline, so let's kick-off the pipeline we just created, using the 'Trigger Now' command under the 'Trigger' menu.
To check the execution results, open ADF Monitoring page and ensure that pipeline's execution was successful.
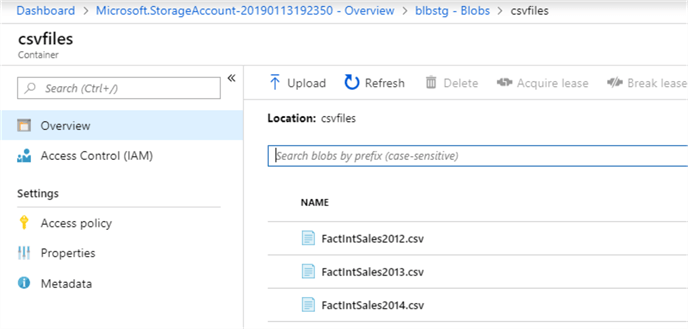
To verify that files have been transferred successfully, let's switch to the blob storage screen and open the 'csvfiles' container.
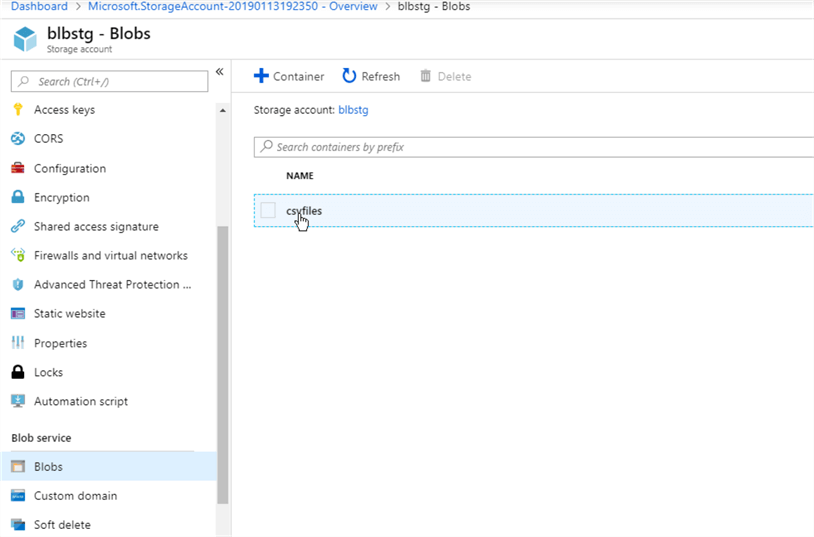
Congratulations, all three files have made it to blob storage.
Conclusion
In this post, we learned how to create pipelines to transfer files from an on-premises machine to Azure and as you may observed the process of creating pipelines and all its components is very similar, regardless of the type of pipeline. The pipelines we have built so far were simple pipelines, but we will add complexity as we progress.
In the next post, we will build a pipeline to transfer files into Azure SQL Database.
Next Steps
- Read: Transfer Data to the Cloud Using Azure Data Factory
- Read: Copy data from an on-premises SQL Server database to Azure Blob storage


About the author
 Fikrat Azizov has been working with SQL Server since 2002 and has earned two MCSE certifications. He’s currently working as a Solutions Architect at Slalom Canada.
This author pledges the content of this article is based on professional experience and not AI generated.
View all my tips
