Problem
Azure Data Studio’s (ADS) popularity has been growing, this is because it is a cross-platform tool focused on working with data related tools (not just SQL Server, as support for other databases is being added). It provides a great T-SQL editing environment to work with data on-premises and Azure, and Git integration.
This tool is open source, lightweight and fully customizable. You can create custom code snippets (as I explain in this tip), change the color theme on the fly, create data insights, create SQL Notebooks (as I explain in this tip) and a lot of other options to make the tool suit your very unique needs.
Among those customizations, you can create your own extensions (check this tip to learn more about ADS extensions), so you can share with your team or the community your own tools for easy deployment.
If you are not used to writing code, it can be difficult to know where to start, but with the tools available you can create your own extension very easily.
Solution
There are different types of ADS extensions, but in this tip we will focus on creating a dashboard extension, an example is the Server Reports Extension, by Microsoft, as shown below:

If you don’t have Azure Data Studio yet, you can download the latest version here.
Once you are comfortable using the tool and creating your own insights (check out this tip), you can start creating your own dashboard extension so you can share your own insights among your team or the community.
Creating an Azure Data Studio Dashboard Extension
In this tip we will show you how to create your first dashboard extension and how to create a .VSIX file.
Pre-requisites to Create an Extension
In addition to having Azure Data Studio up and running on your machine, you need some other tools to create an extension.
You need to download and install the following:
Node.js
A JavaScript runtime, you can download the latest version here. Make sure that during install, you select the add to PATH option, also include npm (Node.js Package Manager) in the installation options, it will be used to install the extension generator and package creator.
Visual Studio Code (VSCode)
It will be used to code and debug your extension, you can download it from here.
Azure Data Studio Debug Extension
- From your VSCode IDE, search and install that extension, also you can download it from here. It will allow VSCode to runtime debug the extension running an ADS instance.
Once you have download and installed all of the above, we are ready to set up our environment.
Preparing our environment
Open VSCode and open a new terminal (from the command palette or the menu):

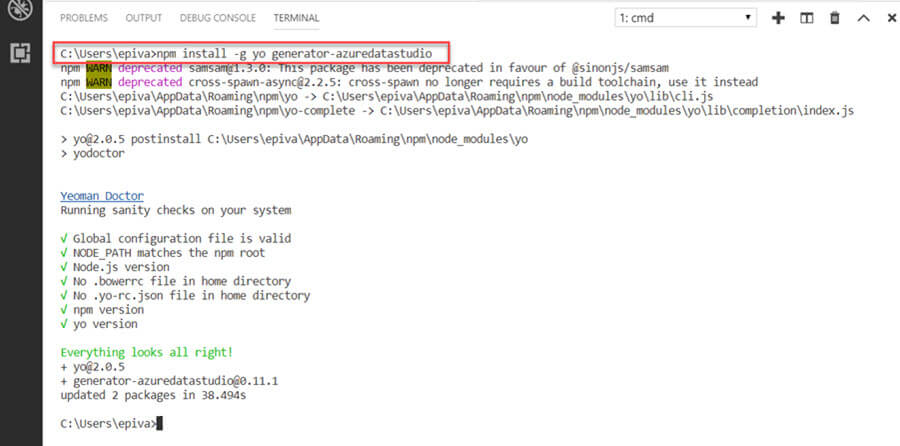
Once the terminal is open, select CMD terminal shell, we will install the Yeoman extension generator using npm with the following command:
npm install -g yo generator-azuredatastudio
For packaging your extension into a .vsix file, you need to install vsce using npm.
In the same terminal, run the following code to install the vsce package:
npm install -g vsce

And with that, our environment is ready, we can start creating extensions.
Creating the Extension
Using the terminal from VSCode, we will use the Yeoman Azure Data Studio extension generator to create an extension template.
To run the generator, use the following command:
yo azuredatastudio
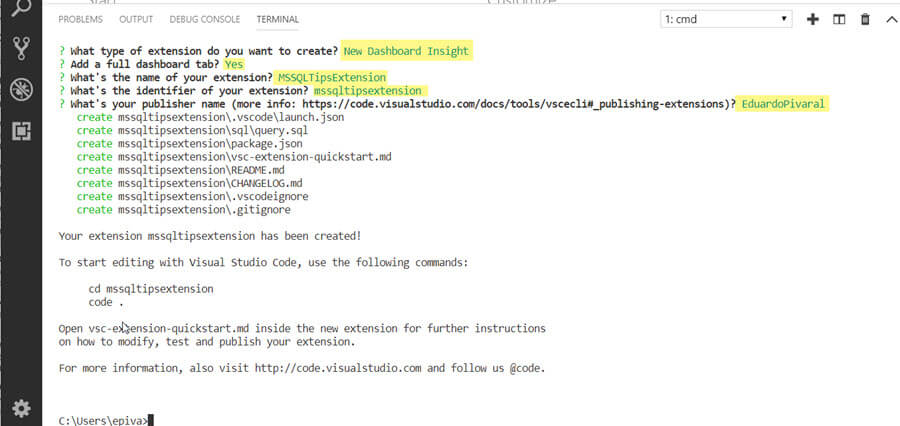
A list of options will display, you can see there are different templates, for this example we will create a dashboard extension, using the arrows select New Dashboard Insight:

After selecting the extension type, some questions will appear, fill those with the information you want, it should look like this:
The template has been created, now we can start working on it. For this, navigate to the folder created by the generator and access it, using the following command:
cd [yourextensionfolder]
And then access it using the following command:
code .

A new VSCode instance will open with the template generated:

First thing we will do, provide the T-SQL query you want for your dashboard, select the sql folder, and then open the query.sql file (you can create more later) and paste your T-SQL query, for this example we will use an AdventureWorks2017 database query:
SELECT
T.Name as [Territory],
SUM(O.SubTotal) as [SubTotal]
FROM AdventureWorks2017.Sales.SalesOrderHeader O
INNER JOIN AdventureWorks2017.Sales.SalesTerritory T
   ON O.TerritoryID = T.TerritoryID
GROUP BY t.Name;
Save the query file:

For the next step, we need the JSON widget code that this query will use, you can obtain it from ADS using the create insight option when running a query:

This is the code generated (after formatting it), you will only need the code highlighted (the type property), so copy it to the clipboard:

Return to VSCode and open the package.json file, locate the dashboard.insights property.
Search for the type property into it, and replace the existing code with the one you copied in the previous step:

(Optional): If you want to change the insight title and size, you can do it in the same package.json file, locating the dashboard.tabs property.
In here, under widgets-container, you can modify the size and name:

At this point, we are ready to debug our extension to see our progress so far.
Debugging our Extension
Depending on the generator and debugger version you are using, you can encounter an issue with the debugger, so to make sure the configuration is correct, select the .vscode folder and then open launch.json file.
Check the “runtimeExecutable” property, if it has “sqlops” value on it, it will give an error when starting the debugger.
To fix this, just change the property value to “azuredatastudio”.
It must look like this:

Once you have checked this value is the correct, you can start the debugger, selecting the option from the menu, or pressing F5:

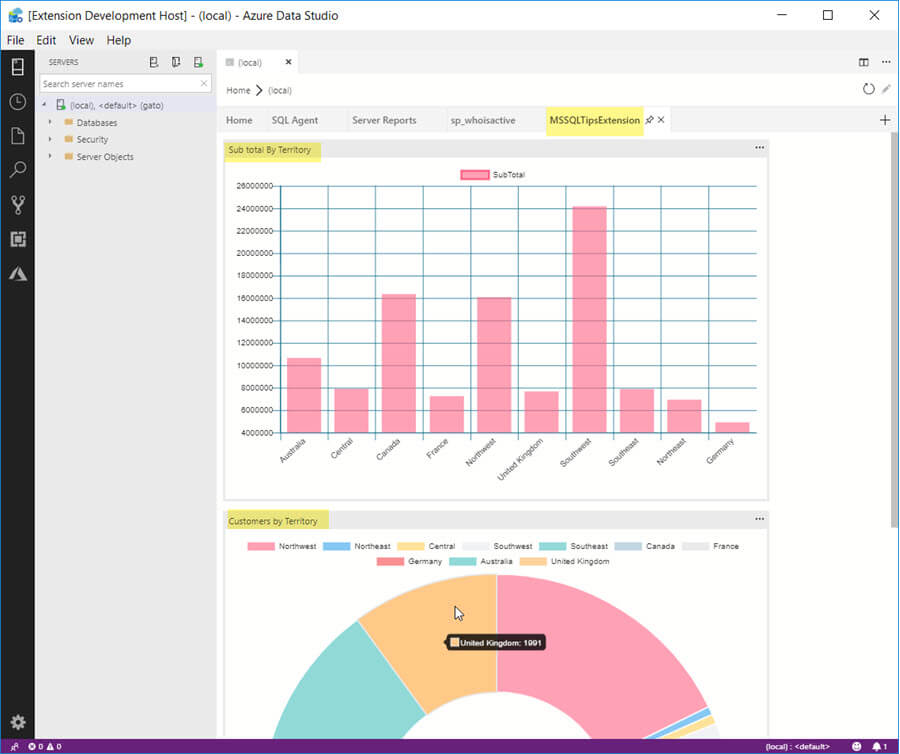
A new instance of Azure Data Studio will open, just navigate to the Dashboard and you will see a new tab with the extension we have created:

You can add more insights if you want. For this, you must create a new query file (for example query2.sql) and add the T-SQL code you want, then repeat the operation we did for our first insight, just locate on package.json the dashboard.insights property and add the new one separated by comma, change the id value and query file:

And in the widgets-container property, add a new container separated by comma, match the widget property value with the name of the insight of the previous step:

These are the results (running the debugger again):
You can add more insight if you want and play with the properties, and once you are happy with the results, we can package our extension in a .vsix file to be distributed.
Creating a .VSIX File
To create a .vsix file, some additional modifications must be made, so the vsce utility does not give us any errors.
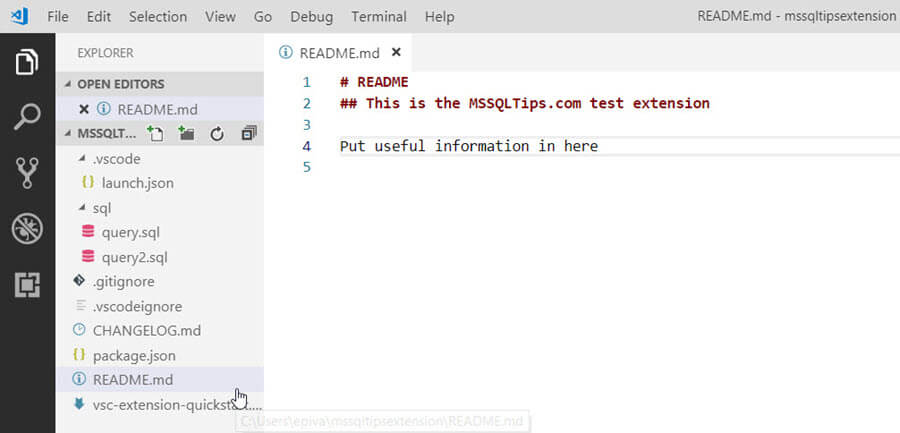
First, modify the README.md file (using Markdown language), a validation is made to make sure this file has been updated, just put useful information:
Then open the package.json file, and add a “repository” property, for value you can put a valid GitHub URL, or leave the value in blank.
In the engines property, modify the vscode value to a lower one (for example ^1.20.0) so you don’t have any issues when importing .vsix file to Azure Data Studio, since the VSCode build is checked at import time and can trigger an error if this value is higher that the vscode build of the ADS version you are importing the extension.

You can check the maximum VSCode version you need for your extension, checking the About option from the menu in Azure Data Studio:

Now we are ready to create our extension package.
Open a terminal and run the following command:
vsce package
If everything is ok, our .vsix extension will be created in the same folder:

And that is all, then you can distribute and import the .vsix file using the import option in Azure Data Studio:

Now the extension has been installed successfully:

Next Steps
- I have done this example on a Windows PC, but since all the tools used are cross-platform, you can do the same steps on a Linux or MacOS environment.
- Check my previous tip on how to create custom snippets on Azure Data Studio.
- Check my previous tip on how to create SQL Notebooks on Azure Data Studio.
- An excellent markdown language reference can be found here.
- You can find out more about VSCode extension here.
- You can download the latest Azure Data Studio release here.

Eduardo Pivaral is an MCSA, SQL Server Database Administrator and Developer with over 15 years of experience working in large environments.
- MSSQLTips Awards: Trendsetter (25+ tips) – 2020 | Author of the Year Contender – 2019 | Rookie of the Year – 2018