Problem
I have a comprehensive ETL solution developed with SQL Server Integration Services (SSIS). It can read and write data from files stored on a local network share. I want to migrate this solution to the cloud. I can migrate my packages to the Azure-SSIS IR environment in Azure Data Factory, but what about my on-premises network share?
Solution
Azure Data Factory supports a lift-and-shift scenario where existing SSIS projects can easily be migrated to the Azure cloud environment. In Azure, the SSIS package are executed in the Azure-SSIS Integration Runtime. But there are other dependencies which need to be migrated to the cloud as well. If your SSIS packages read files from a network drive, you can either give the Azure-SSIS IR access using a VNET, or you can migrate your whole set-up to Azure File Services or another service where you can store your files, such as Azure Blob Storage. In this tip, we’ll discuss Azure File Services.
The main benefit of Azure File Services (AFS) is that you can very easily migrate your existing SSIS packages, because AFS also supports UNC paths and the SMB protocol. For example, an SSIS package reads a flat file located at the following path:
In AFS, you’ll have a similar path, such as:
which makes it only a question of changing a parameter value to change the location of the flat file. For more information about the Azure-SSIS IR, you can read the following tips:
- Configure an Azure SQL Server Integration Services Integration Runtime
- Executing Integration Services Packages in the Azure-SSIS Integration Runtime
Azure File Services and SSIS
Setting-up Azure File Services
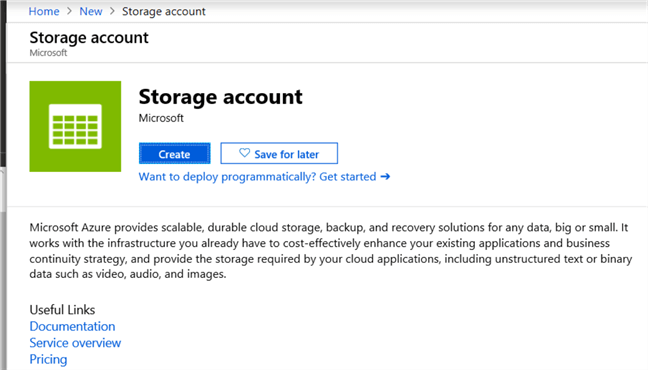
Log into the Azure Portal. If you don’t yet have a storage account, go to Add a resource and search for storage account.
In the next screen, you need to specify the configuration of the storage account, such as the subscription, resource group, the location etc.

Important options are the account kind (general purpose v2 or blob storage are recommended. Since we’re going to use files, storageV2 is the best option) and the access tier. Hot storage is useful for frequently accessed data, while cool storage is optimized for infrequent access. Both have different cost mechanisms, so choose the one best suited to your situation. In this tip, I choose cool storage since the files are going to be used in an ETL process, which runs only once a day.
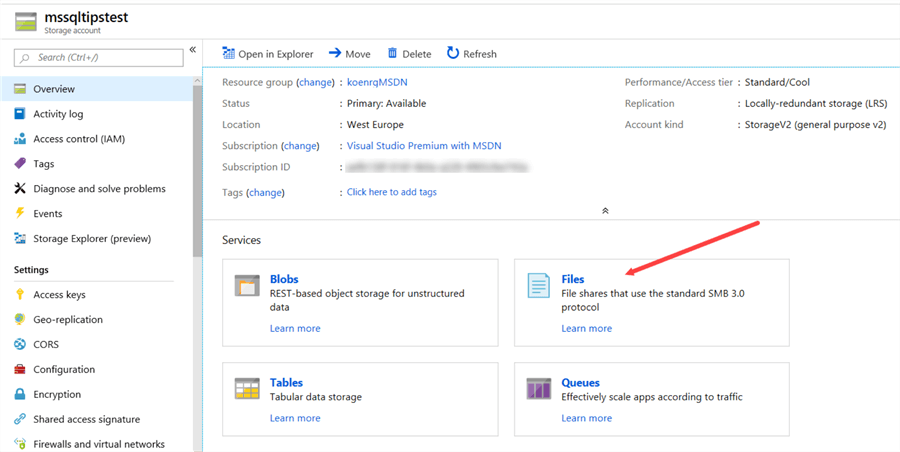
Once the storage account is created, you can go to the File Services section:
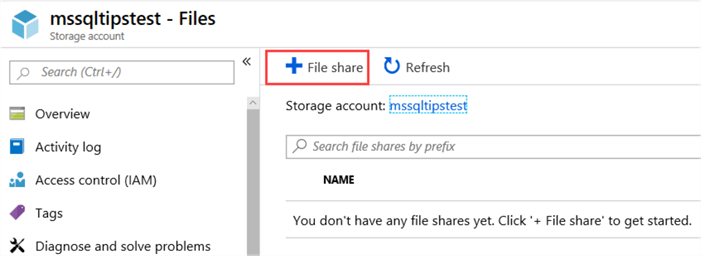
The next step is to create a file share by clicking at the +-icon at the top:
All you have to specify is a name and the quota, which specifies the maximum amount of GiB the share can handle. This property can be adjusted later on.

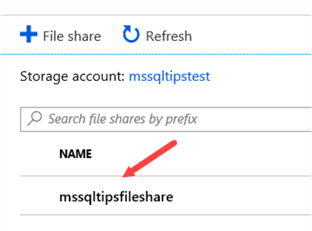
Click on the newly created share to open it.
In the share, you have many different options:
- Connect. This will create a mapped drive on your computer.
- Upload, Add Directory, Refresh and Delete Share are self-explanatory.
- With the Quota option, you can change the number of GiB we set earlier.
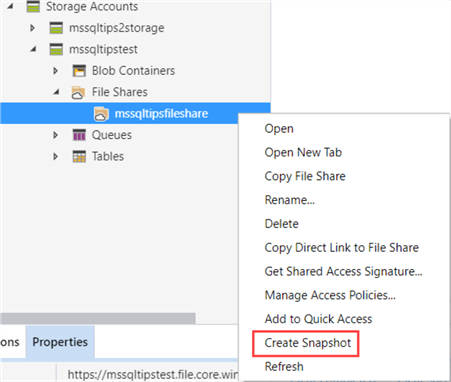
- You also have the option to create a snapshot of the entire file share with Create Snapshot. With View snapshots you can enlist them in the portal. There’s no option to specify a name though. Snapshots are taken incrementally and can be used as a back-up mechanism. Keep in mind they use storage as well, which needs to be paid for. You can find more information about snapshots in the article Announcing the general availability of Azure Files share snapshot.

When using Azure Storage Explorer, you have the same options as in the portal:

The Explorer also has the option to show the statistics of a folder, which is the number of subdirectories and the number of bytes it contains:

If you want to create a snapshot, you need to use the context menu:
Connecting to Azure File Services
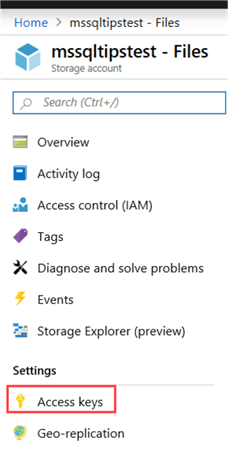
Azure File Services has been configured, but how can we access it from our own machine? In Windows, we need to add the credentials of the file share into the Credential Manager. First, we need to find the storage account key. In the portal, go to your storage account and select Access Keys from the menu:
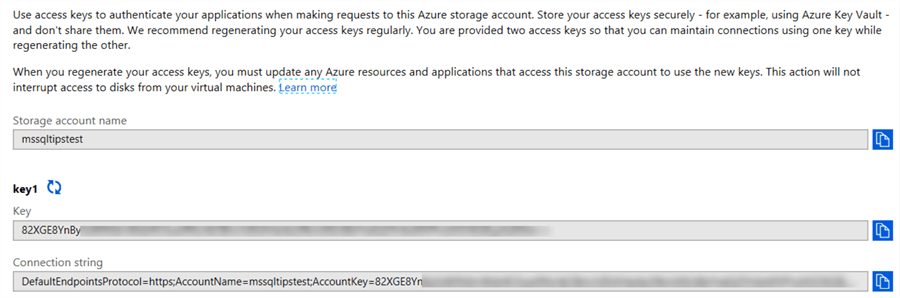
Here you can find the name of your storage account and two account keys. There are two keys available, so you can use one while you refresh the other. Copy the name and one of the account keys to the clipboard.
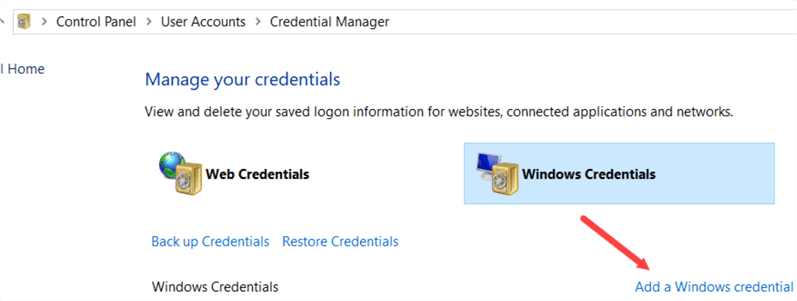
Open Credential Manager and go to Windows Credentials. There, choose to add a Windows credential.
You need to specify the following information:
- Network address. This is the name of your storage account, followed by .file.core.windows.net.
- The user name, which is AZURE\ followed by the name of the storage account.
- As the password you need to specify the account key.

Once the credential is added, you can simply browse to your file share as if it was locally on your network! Keep in mind the root folder is your storage account and the name of the file share, so browsing to \\mssqltips.file.core.windows.net will not work.

Another option to add the credential is to use the command line with the following command:
/pass:<YourStorageAccountKey>
If you create SSIS packages, they can access the file share from within Visual Studio, since they will use the credential you just specified. However, when the SSIS package is stored inside the SSIS catalog in Azure, it needs access to AFS as well when the package is executed. This means we need to add the credential to the SSIS catalog as well. This can be done with the stored procedure catalog.set_execution_credential. When logged into the SSISDB database, execute the following script:
@domain=
N'Azure',
@user=
N'mystorageaccount',
@password=
N'storagekey'
In the next part of the tip, we’ll integrate Azure File Services into an SSIS package.
Next Steps
- More tips about the Azure-SSIS IR:
- Configure an Azure SQL Server Integration Services Integration Runtime
- Executing Integration Services Packages in the Azure-SSIS Integration Runtime
- Parallel package execution in Azure-SSIS Runtime
- Automate the Azure-SSIS Integration Runtime Start-up and Shutdown – Part 1
- Azure-SSIS Integration Runtime Start-up and Shutdown with Webhooks – Part 2
- You can find more Azure tips in this overview.

Koen Verbeeck is a seasoned business intelligence consultant with over a decade of experience with the Microsoft Data Platform. He holds several certifications, including Azure Data Engineer. He’s a prolific writer, with over 375 articles on technologies such as Microsoft Fabric, SSIS, ADF, SSAS, SSRS, MDS, Power BI, Snowflake and Azure services. He has spoken at various events such as PASS, SQLBits, dataMinds Connect and many others. He frequently delivers educational webinars on MSSQLTips.com. For his efforts, Koen has been awarded the Microsoft MVP data platform award for many years.
- MSSQLTips Awards:
- Leadership Award (200+ Tips) – 2021
- Author of the Year – 2014/2020/2022
- Author Contender – 2024/2025


Hi Marlo,
do you mean the Azure-SSIS IR? (running your SSIS packages in ADF?) Because that should work. Make sure you’ve set the execution credentials in the SSISDB catalog.
Regards,
Koen
The File Share doesn’t work with Azure IR. You get an error. I think this is an only option for on-premise.
Hi Rob,
this stored procedure is normally only found in SSIS catalogs that support an Azure-SSIS IR, so either in Azure SQL DB or Azure Managed Instance. Is this the case? If you’re talking about your local SSISDB, you need to use windows credential manager to set the credentials.
Regards,
Koen
the stored procedure catalog.set_execution_credential is missing from my SSISDB. Do I have to install something, perhaps ADF, to get it?
Thanks very much Koen, yes that was the problem and I just missed that last line on your very helpful article. Sorted! thanks again.
Hi,
did you give permissions to the SSIS catalog using the catalog.set_execution_credential stored proc?
Regards,
Koen
Hi, thanks very much for such an informative and helpful article.
I followed everything I could and even able to see file data via flat file connection via mapped drive. When I execute the package from VS it’s all ok but when I execute it via ADF or SSISDB I keep getting this message,
{
“SsisDBOperationGuid”: “acc0264b-2f5e-4c32-b15f-6a3e4ef86bd7”,
“SsisDBOperationId”: 15,
“OperationErrorMessages”: “3/15/2021 2:31:30 AM +00:00 : adf:Error: The file name \”\\\\park.file.core.windows.net\\fileshare\\customer.txt\” specified in the connection was not valid.\r\n\n3/15/2021 2:31:33 AM +00:00 : adf:Error: The file name \”\\\\park.file.core.windows.net\\fileshare\\customer.txt\” specified in the connection was not valid.\r\n\n3/15/2021 2:31:35 AM +00:00 : adf:Error: The file name \”\\\\park.file.core.windows.net\\fileshare\\customer.txt\” specified in the connection was not valid.\r\n\n”,
“effectiveIntegrationRuntime”: “sqlserver (East US)”,
“executionDuration”: 21,
“durationInQueue”: {
“integrationRuntimeQueue”: 1
}
}
any thoughts?
Many Thanks