By: Ron L'Esteve | Comments | Related: > DevOps
Problem
As a Senior and Managing Architect that manages my own team's end to end project lifecycles, I am seeking a structured process for tracking team capacity, planning sprints, creating and updating tasks efficiently while collaborating with team members through real-time updates using an interactive and versatile dashboard and custom reporting experience. Basically, I am looking for a way to efficiently manage my team's time and work as we work though client deliverables so that we are all on the same page every day of the week throughout the life of the project.
Solution
Azure Boards, which is hosted by the Azure DevOps Service offers a cost-effective, customized and interactive process for planning, tracking and managing your projects efficiently in a Scrum agile framework. Azure Boards supports work assignments and status updates using a Kanban board. Additionally, Azure boards offers the ability to set team capacity and forecasting efforts through the life of the project. In this article, I will demonstrate how to set up Sprints, set team capacity, create tasks and work items, and manage boards efficiently.
Creating a New Project
Let's start by creating a new Azure DevOps project by navigating to https://azure.microsoft.com/en-us/services/devops/ and then creating a new account and/ or signing into an existing account.
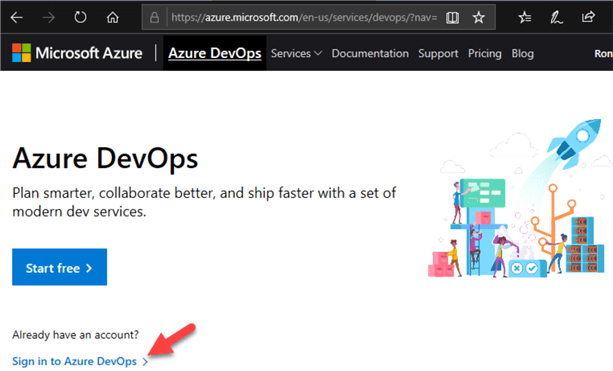
Once I am signed into my Azure DevOps account, I will be presented with my Organization's Azure DevOps homepage. I can either modify the Organization settings and/or create an entirely new organization as needed.
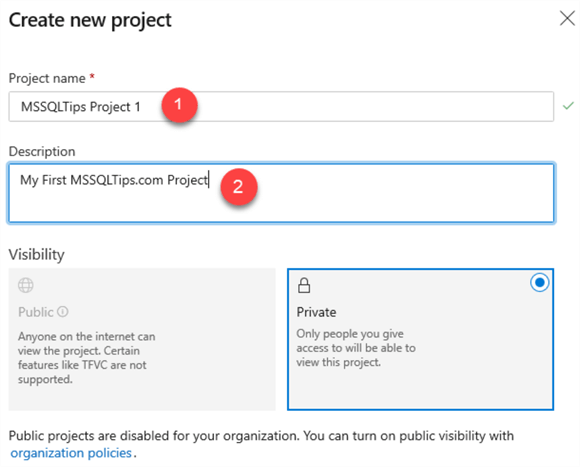
I'll go ahead and click 'Create Project' to create my first project.

I will then give my project a name, an optional description, and leave my project's visibility to the default of 'Private'.
Git versus Team Foundation Version Control
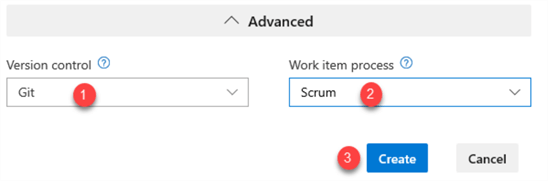
When I scroll down to the Advanced selections, I will have the ability to choose a Version Control of either Git or Team Foundation. Microsoft's article Choosing the right version control for your project, does a great job of explaining the differences between each of the version control options that might fit different use cases. Since I am interested in a distributed version control system, I will go ahead and choose Git.
Agile versus Scrum
I am also presented with the option to choose between an Agile, Scrum, CMMI or Basic work item process. There are benefits and use cases for each option that are well documented by Microsoft's article Choose a Process. For this demo, I will choose Scrum.
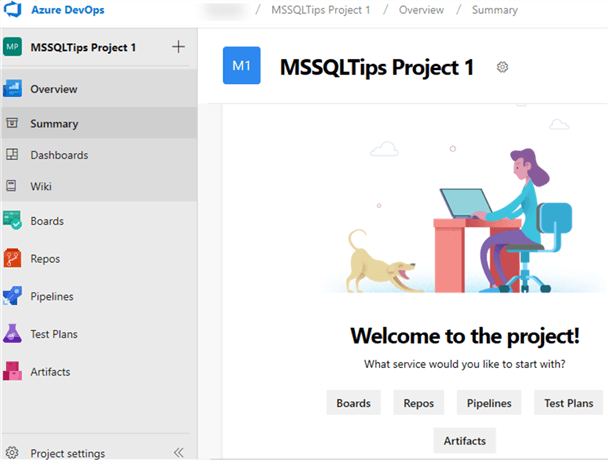
Once I finish creating my project, I will be ready to begin creating my sprints and planning for my team's capacity for my project.
I will begin this capacity planning process by clicking on 'Project settings' on the lower left-hand corner of the page, then select 'Project configuration'. Within the Iterations section, I will see my newly created project listed. I can then add 'New Child' sections for my Sprints. Once my sprints are added, I will click the … icon to set the Start and End dates of the sprints.

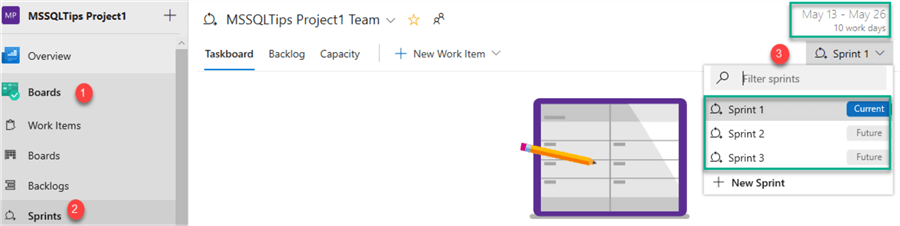
Next, I will click 'Team configuration' to verify the default iteration and backlog iteration settings and that all of my Sprints were just created are displayed in the Iteration section.

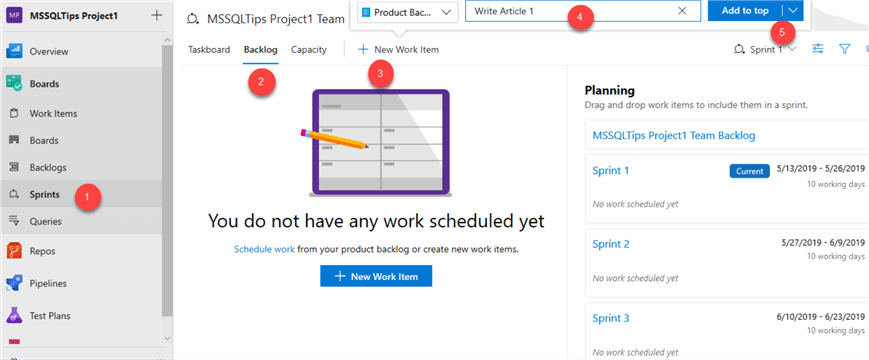
Once completed, I will navigate back to the Boards and click Sprints. I will now notice that by default I see the current Sprint 1 and I can also see the additional future sprints that I have created. Additionally, I can see that the board displays the dates that I have set for Sprint 1 and tells me the number of working days I have remaining for the current sprint.
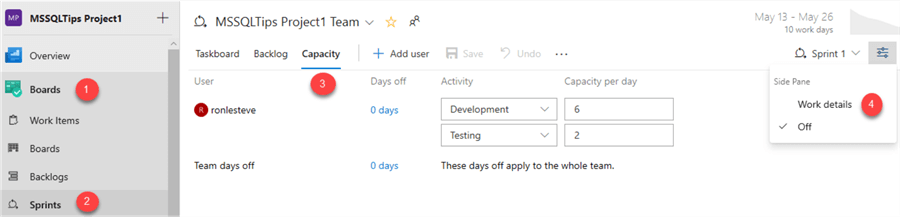
Now that I have created my sprints for this project, I am ready to begin adding team members and setting their capacity. Within the Sprints section, I will click the 'Capacity' tab. I can now add my team members to the Capacity plan by clicking 'Add user'. I can also factor in 'Days off', activity type, and Capacity per day.
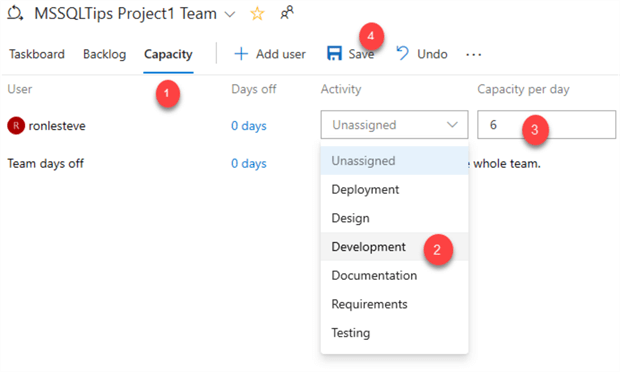
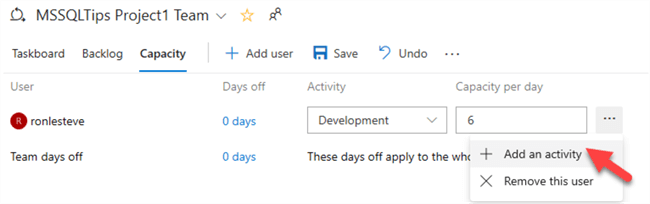
To accurately track my capacity for certain tasks per day, I can add additional activities to my capacity. In my scenario, I want to able to develop for 6 hours per day and spend 2 hours per day testing my code. I will add an activity by clicking the … icon, then select 'Add activity'.
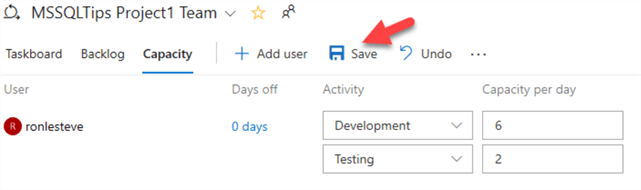
Now I have accurately captured my capacity of 8hrs per day spread appropriately across Development and Testing activities. I can add additional team members and can customize their Activity and Capacity per day across multiple activities.
Now that I have my sprints created and my team's capacity set, I am ready to begin creating work items. I will do this by once again navigating to 'Sprints' and selecting the Backlog tab.
Next, I will click 'New Work Item' and add a work item to my Product Backlog.
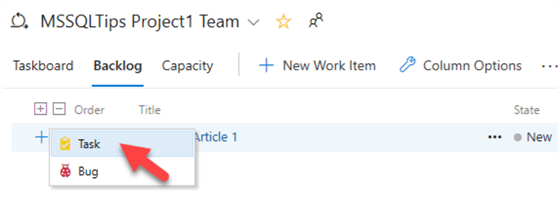
Once the work item is created, I can begin adding tasks to the work item.
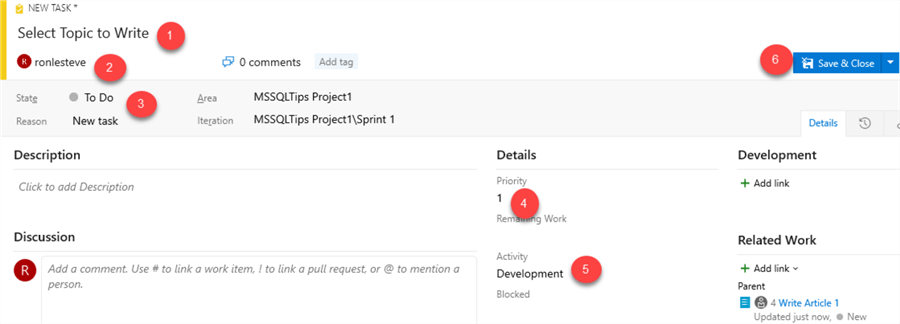
When the New Task GUI appears, I will do the following:
- Give my task a name
- Assign the task to a team member
- Set the state of the task as 'To Do'
- Set the priority of the task
- Set the Activity type
- Save and Close
Customizing Task Field Options
While creating my task, I have noticed that there are additional fields that I am interested in tracking at the task level that I do not have as task details.
I can add additional task detail that will help me track additional metrics such as Begin Date, Target Completion Date, Hours Completed, etc.
I can customize my task's field options within my organization's settings.
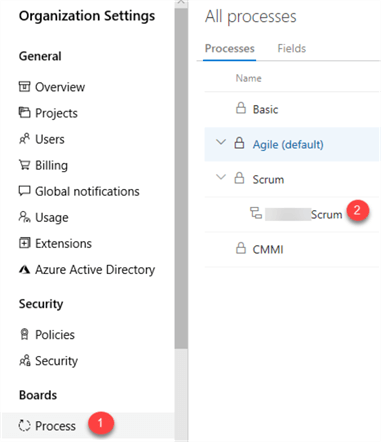
Within 'Organization Settings', I will click 'Process' under Boards. Next, I will select my Scrum process.
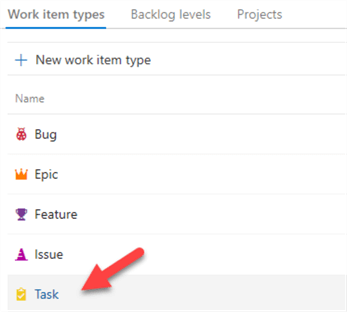
This will display all my Work Item types. I will select 'Task' since this is the work item type that I want to customize.
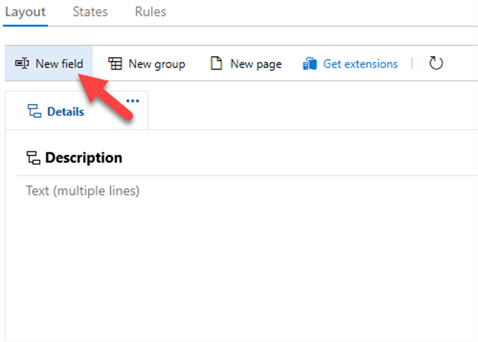
Under the Layout tab, I will click 'New Field'.
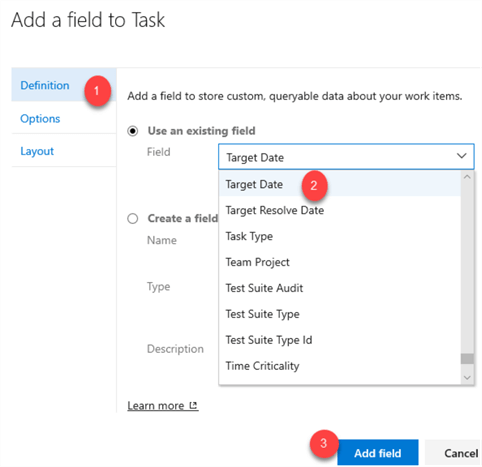
When the 'Add a field to Task' GUI appears, I will select the field drop down under 'Use an existing field' within the Definition section. I will then select 'Target Date' since this is a field I want to track. Once selected, I will click Add Field.
Similarly, I will also add a few other fields that I want to track at the task level.
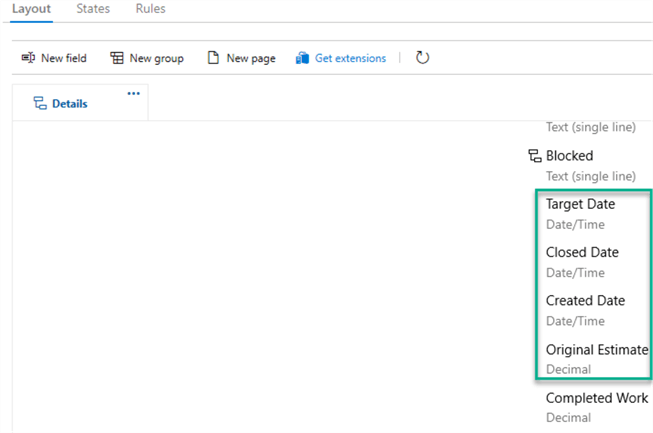
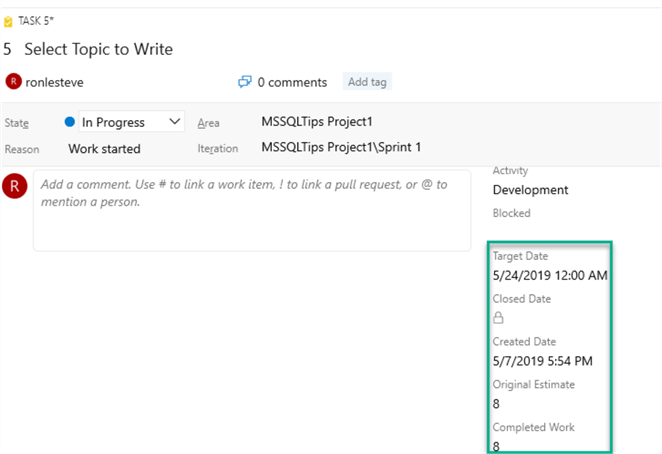
When I navigate back to my task, I can see that the new custom fields have been added to my Task.
Viewing Work Details
Now that I have finished creating my project, set up my sprints, set my teams capacity and assigned my first task, I can track my work details by navigating to Boards > Sprints > Capacity, selecting the filter icon and then clicking 'Work Details'.
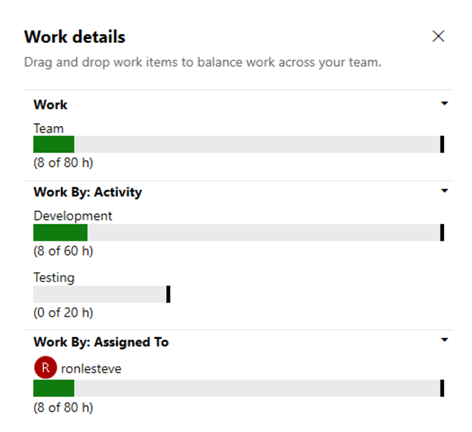
This will display a visualization of my Work details on the right-side pane of my Sprint Capacity tab.
Within this visual, I will be able to easily track total team work hours assigned by team member and activity for the sprint.
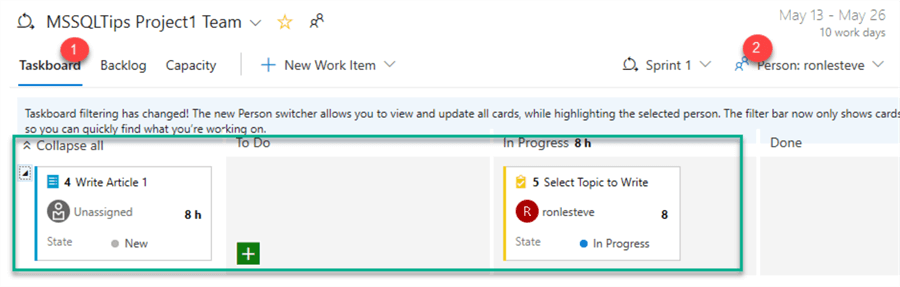
Additionally, when I navigate to the Sprint Task board, I will be able filter team member by my sprint and I will then be able to see the User Story along with the task assigned to that user story. Notice how the Task board also displays the hours and visual representation of the state of the task as it progresses through various stages. The neatly organized Task board makes it easier to track multiple User Stories and tasks for multiple team members and Sprints through the lifecycle of the project.
Deleting Projects
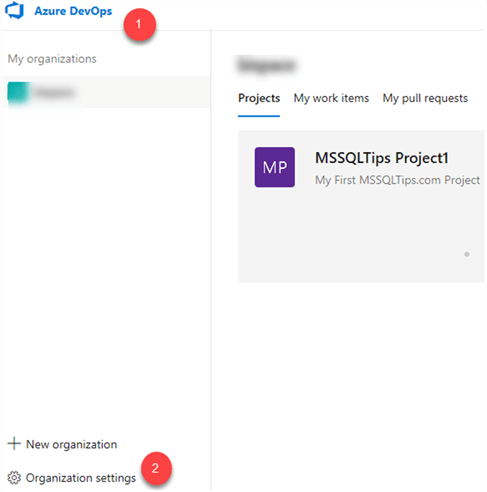
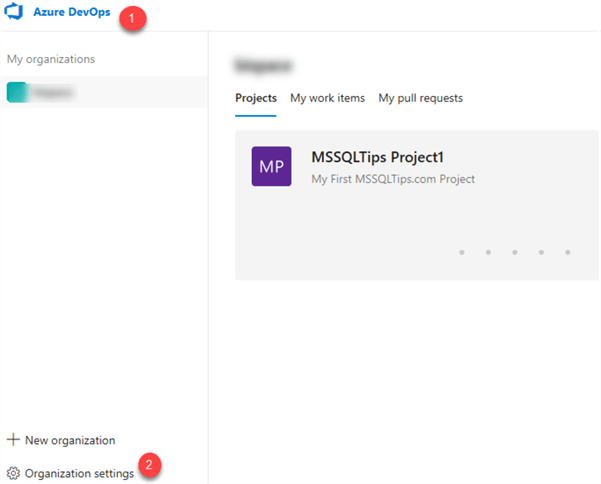
Once my project is complete, I might want to delete the project from my Organization. I can do this by navigating to my Organization's homepage by clicking on the Azure DevOps icon.
Next, I will click Organization Settings.
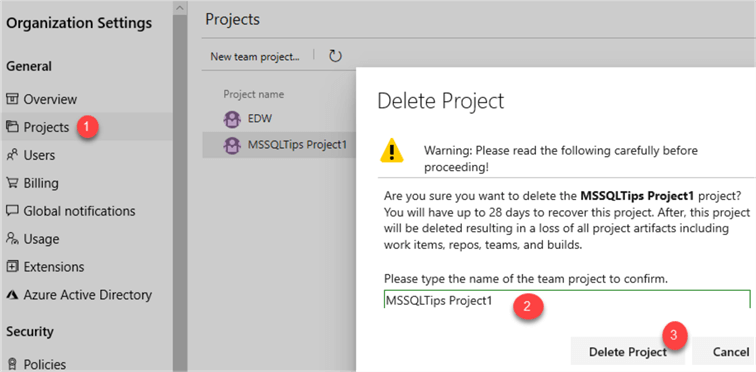
I will then click Projects, type the name of my project that I want to delete and then click 'Delete Project'.
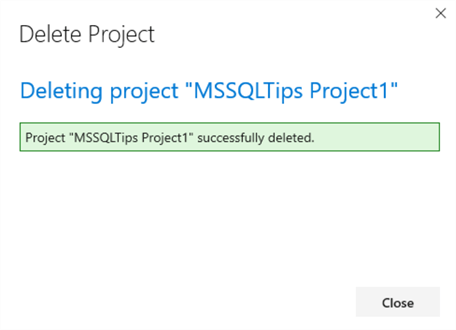
When the project is deleted, I will receive a message indicating that the project has been successfully deleted.
Next Steps
- This article contains an introduction to Azure Boards within Azure DevOps. In this article, I outlined and demonstrated how to create a project, set up sprints, add and set team members capacity, assign and track tasks, and lastly how to customize tasks and delete projects.
- For more information on managing multiple project and teams, check out Portfolio Management which discusses how to support a management view of multiple team progress.
- For additional information related to driving cross team visibility and alignment by tracking work status on an iteration-based calendar, be sure to check out Delivery Plans.
- For extended insights and analytics to track lead time, cycle time, velocity, burndown and burnup metrics through widgets and visualizations, check out Analytics.
- For other Azure DevOps add-ins that are specific to Azure Boards, check out the Marketplace.


About the author
 Ron L'Esteve is a trusted information technology thought leader and professional Author residing in Illinois. He brings over 20 years of IT experience and is well-known for his impactful books and article publications on Data & AI Architecture, Engineering, and Cloud Leadership. Ron completed his Master’s in Business Administration and Finance from Loyola University in Chicago. Ron brings deep tec
This author pledges the content of this article is based on professional experience and not AI generated.
View all my tips
