Problem
How do I use Row Level Security in Power BI? Is it true that I need to use Roles to manage security? Where are the permissions granted? Can you walk through an example demonstrating how to setup Power BI Row Level Security?
Solution
Of course, security is on the mind of everyone especially as the amount of data has continued to grow; with the privilege of so much data, we need to be clear about what data can and cannot be viewed by those individuals who are consuming the data.
Security in Power BI comes in several forms and levels. First, of course, the appropriate license (pro vs premium) is required to access the Power BI Service on the cloud (or to use the related on-premises resources in Power BI Report Server). Next, access must be granted to datasets, reports, and more appropriately the APP housing the dashboard, reports, and datasets. This level of access is centered on access to the whole report or dashboard. The final layer of access at the data set level centers around row level security. Although a bit of a misnomer, as it is not truly row level (due to possible aggregations and such at the data level), the row level security features do work on a line by line level by providing a way to restrict access at the data level based on specific values in a dataset. Certainly, with this sort of access, some limitations do exist which we will outline in this tip.
The best way to see the benefits of using row level security is through a sample case study. However, before we get into the example, you need to be sure to download the latest version of Power BI desktop from here. Additionally, we will be using the WideWorldImportersDW database as a basis for our data sources; this database can be downloaded from GitHub. If you need a refresher on bringing data into Power BI please see this tip.
Create a Power BI Report to Setup Row Level Security
To help get us started, I created a Power BI report file and added two tabs to the report. The first tab contains a bar chart and slicer while the second tab includes a matrix and another bar chart, as illustrated in the next two screen prints.


Now that the report is set up, we can begin the process of setting up row level security. The process overall is a two-step process with step 1 taking place in Power BI Desktop and step 2 occurring online either within the Power BI Service in the cloud or on a Power BI Report Server. Both steps must be performed, or the security will not work as desired.
Setting Up Roles in Power BI
The first step actually requires the use of roles. Each role is established by naming the role and then using a quasi-filtering process to establish what specific data that role has access to see. Of course, if you have many roles, maintenance could be a challenge as could be assigning report consumers to these roles. However, the alternative of setting up a user access cross reference table could be equally as daunting.
To setup the roles, you must select the Modeling tab, and then Click on Manage Roles, as shown below.

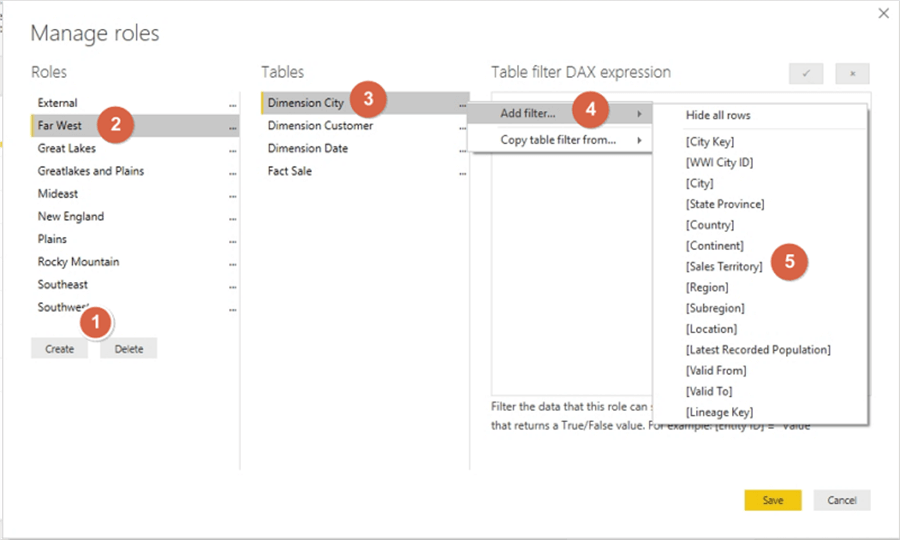
The process continues by first selecting the Create option and then naming the role, Far West in the below example. Be sure to name the roles appropriately and consistently as it will be used in Step 2. After naming the role, we need to select which table will be utilized to limit the assigned roles level of data access. Next, select Add filter and finally select the field that will be used for filtering. In the below illustration, Sales Territory from the Dimension City table is selected as the table / field to be used for row level security.
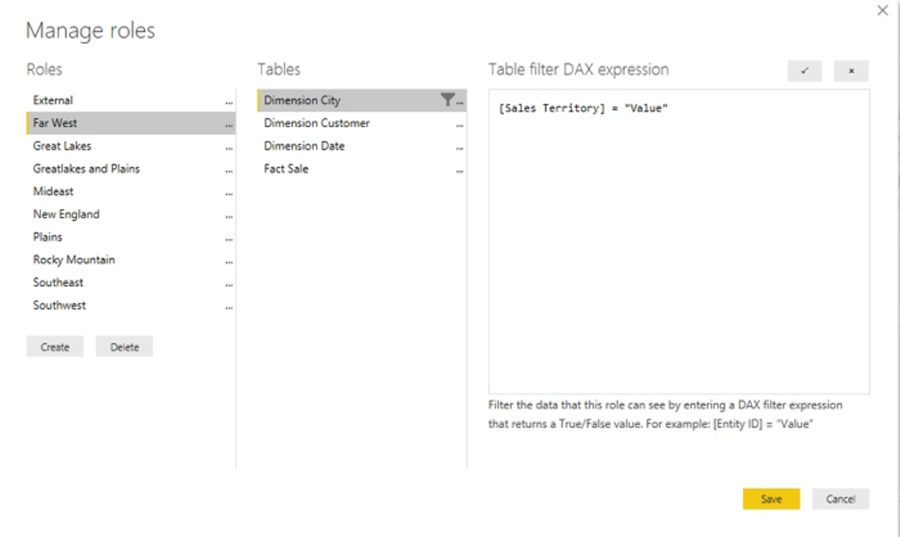
Once Sales Territory is selected, the Table filter DAX expression field is prepopulated with the column name and = “Value”. The “Value” argument must be replaced with an actual value that this role will be limited to seeing.
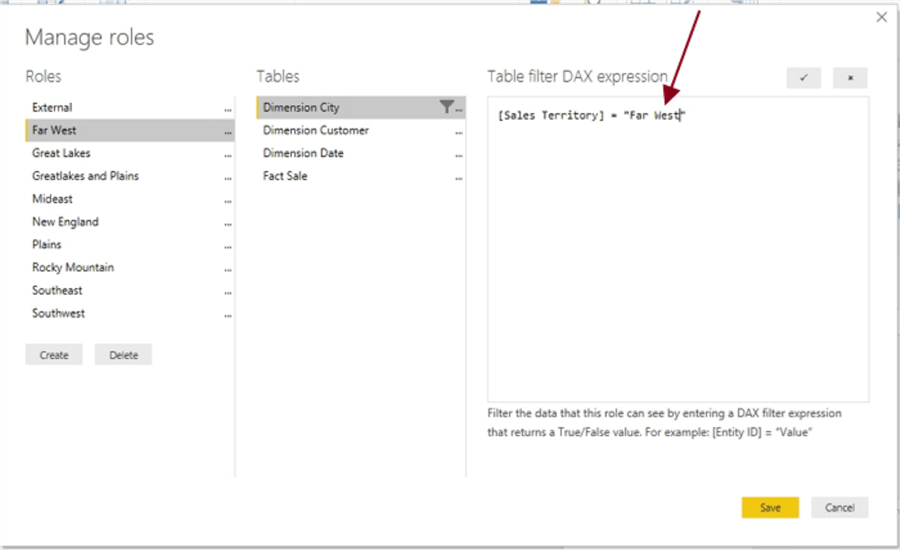
For this illustration, “Value” is replaced with “Far West” as the sales territory data filter for this role. Additionally, you will notice that a total of ten roles were created based on the various sales territories in the data.
Thus, in a similar fashion, we can see that the Great Lakes role uses the Sales Territory of Great Lakes. We follow this same process for each of the rest of the roles we would like to create.

In the upper right corner of the DAX expression box, you will notice a checkmark and a x button. The checkmark button validates the DAX expression that was entered whereas the “x” button acts as an undo button by reverting back to the original value for the filter. Please note that the “x” revert button only works while actively working on the role filter; if you save and exit the manage role window, the revert option is no longer available.
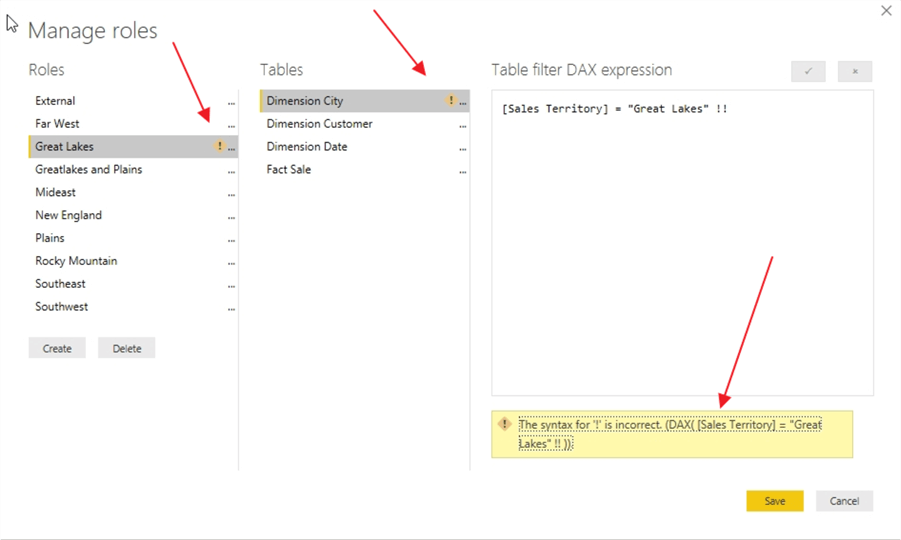
As shown below, the addition of two random exclamation points creates an invalid DAX statement. Utilizing the checkmark, we can see three places that indicate where a problem exists: 1) under the Manage Roles column, 2) under the Tables column and 3) under the DAX expression box where a full error message is given indicating the location of the problem.
If you attempt to save the role with the incorrect DAX, you can save it, but you will receive both a warning error message upon saving, as shown next.

Additionally, on the main design grid, a warning message is also displayed which indicates an issue exists with the role security filter.

Some other items to mention about the manage roles process is that you can actually add multiple DAX filter expressions to a particular role. As shown in the subsequent screen print, the GreatLakes and Plains role actually includes both the Plains and Great Lakes sales territories. Double bars, “||” act as an OR statement in the DAX expression.

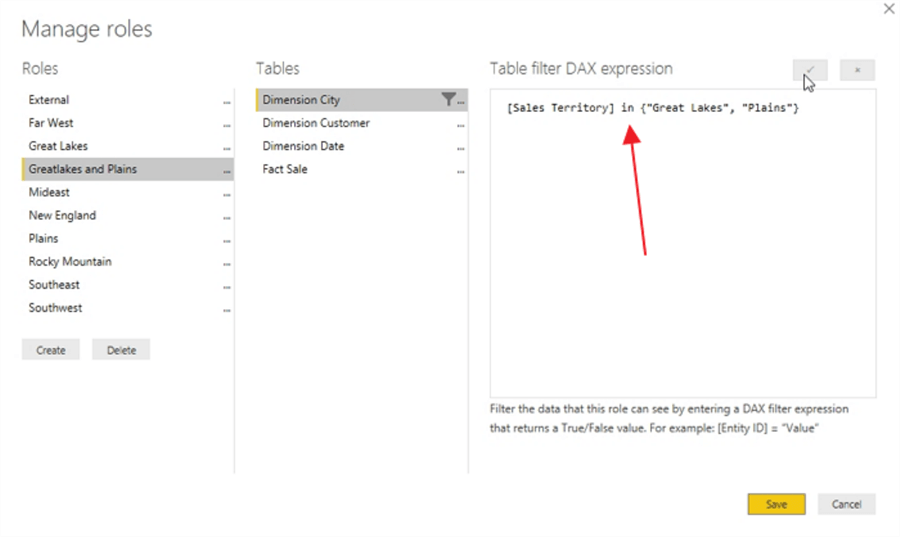
Alternately, we could use the IN keyword for the DAX, as shown below.
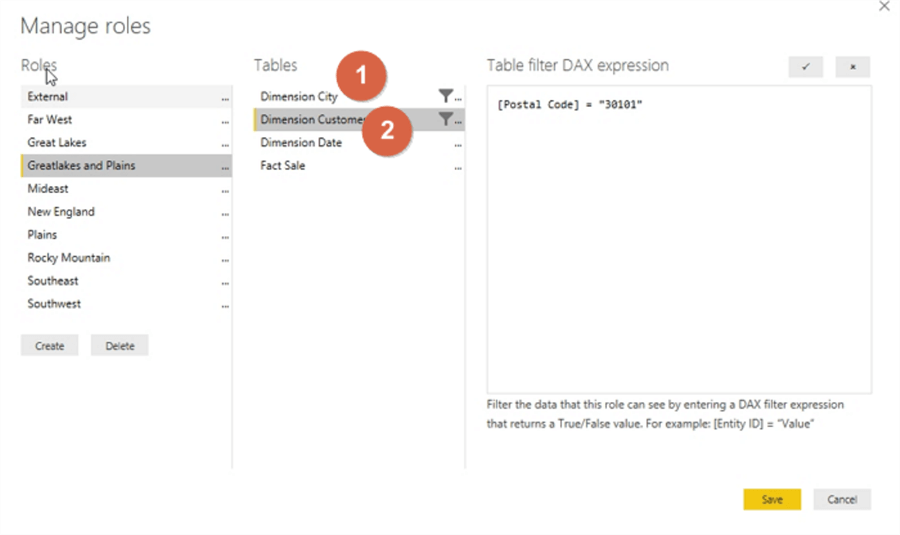
We could create an “AND” condition by, for instance, adding a second filter for a certain zip code which is illustrated in the below screen print. Also notice how two filter icons appear in the Tables column.
It is easy to see how the possibilities are endless on creating various role-based security filters and functions. We do need to be careful about creating a large number of roles as it could get unmanageable if one is not careful in the definitions. There are certainly ways to work around these issues.
Now that we have created several roles, but before we publish the dashboard(s) and report(s), we will likely want to test our setup. Fortunately, the View as Roles button allows us to complete just such testing.
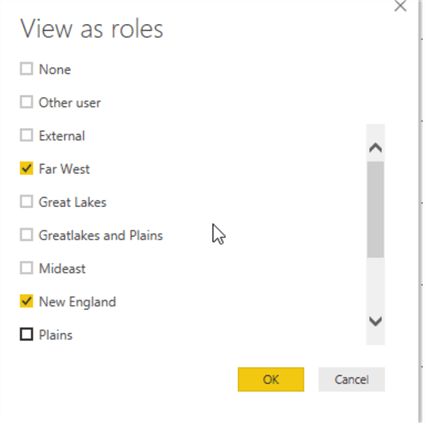
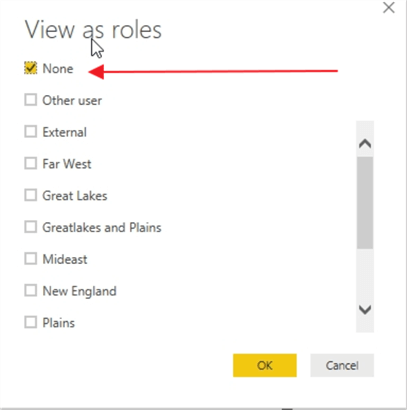
Clicking the View as Roles button opens the view as roles selection window.

By clicking on the Far West role, we enable the filter for that role.

Now only the Far West sales territory profits are shown on the visual, only the States \ Provinces in the Far West sales territory are shown on the slicer, and the legend only shows Far West.

The role is applied to ALL pages on the dashboard or report that use the selected data sets. Unrelated data sets and queries would not be impacted.

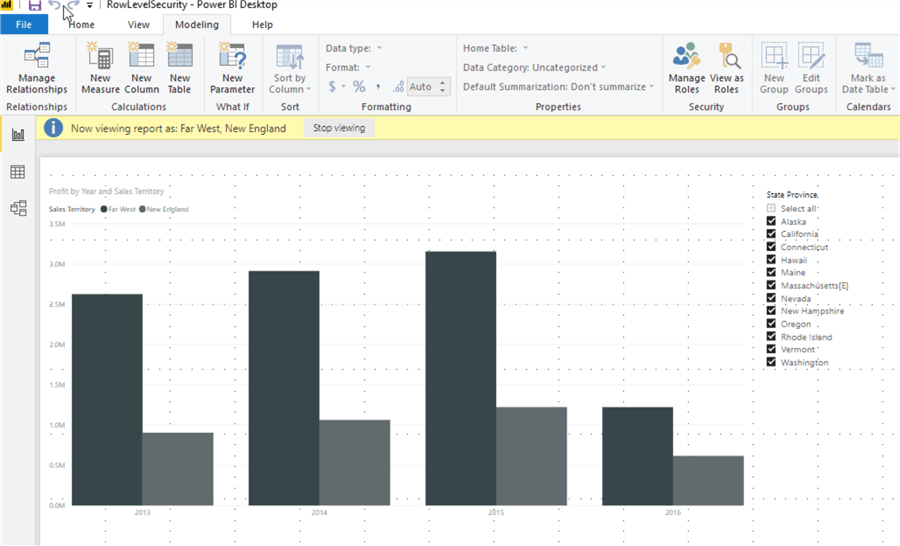
We can also see what occurs if someone is part of multiple roles, Far West and New England, in the below example.
A report or dashboard consumer belonging to both roles would see both sets of data, acting in an OR fashion.
Under Manage Roles, selecting the None option reverts the report designer back to seeing all data.
At this point, we are ready to publish our data to the Power BI Service in the cloud; once we publish to the cloud, we will need to move on to the second part of the Row Level Security process.

Setup Security for Power BI
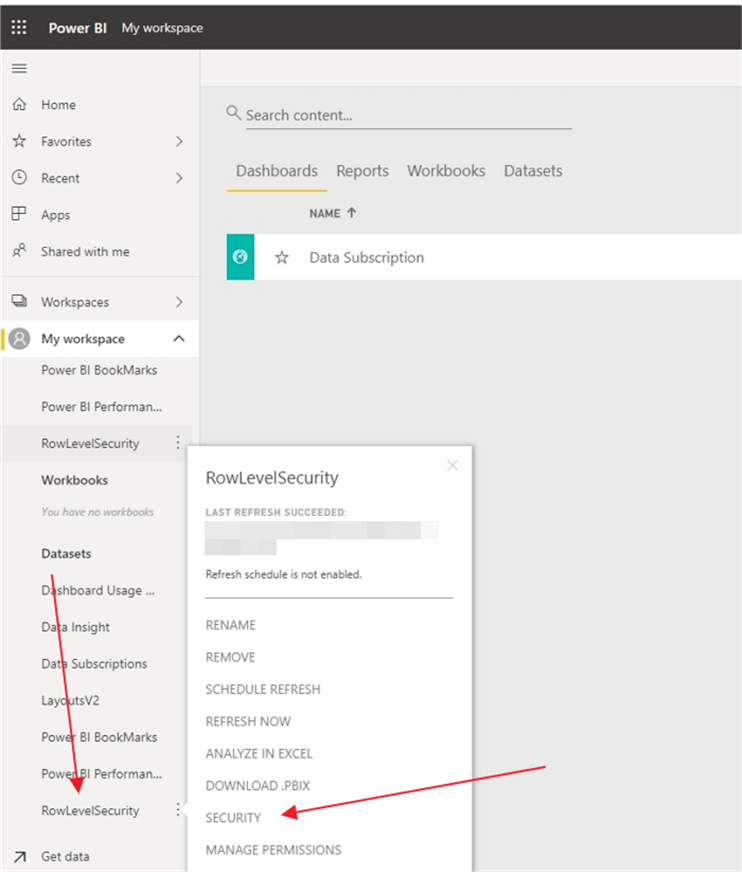
Now that the data set and report are published, we would want to navigate to our Workspace where the data set resides. Once in the workspace, you will find the data set involved and select the security option.
Now, individual users, distribution lists, or active directory groups can be added as members of roles. This process is where we assign actual users or groups to the roles we have defined; hopefully you can see the importance of naming the roles appropriately now. It would be very beneficial if the members added were active direct groups created specifically to add users to set roles, sales territory in our example. Thus, if an active directory group already was established for the Far West views, we could simply add that AD group. Of course, individuals can also be added, but that becomes an administrative burden if the users with access becomes substantial.
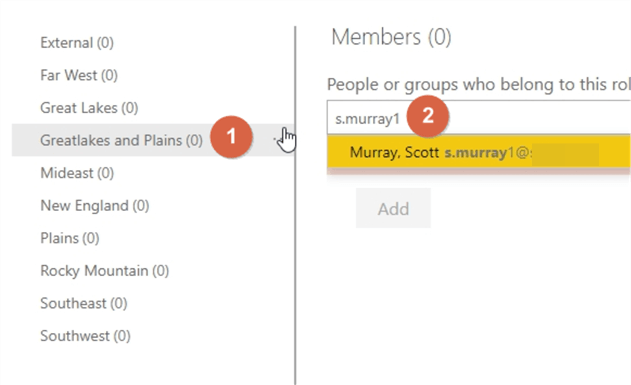
As you type an AD group name, a distribution list, or a user’s ID or email address, Intellisence automatically shows you a list of available users or groups. Once you enter all the groups or users, the next step is to click the Add button.

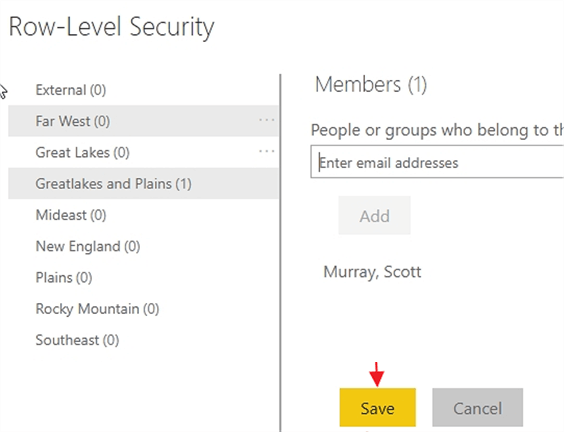
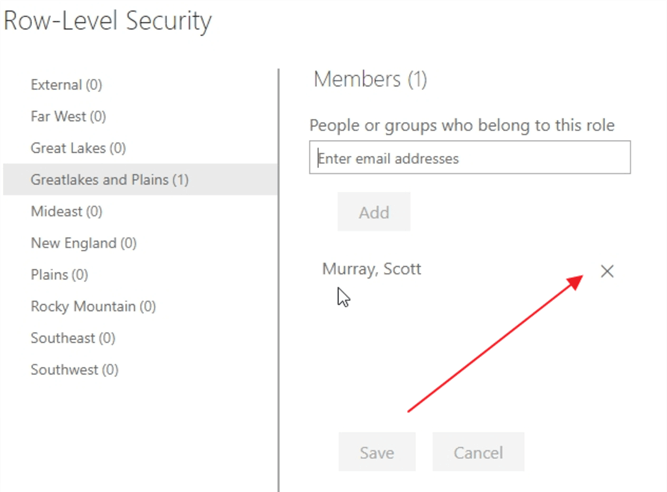
Finally, you must click save to save additions that were made to the role membership.
You can also click on the X next to the user or groups name to remove a particular user. However, those changes must also be saved.
User or groups can be added to multiple roles, but these additions have a combining effect by adding to the data that a group or user can view.
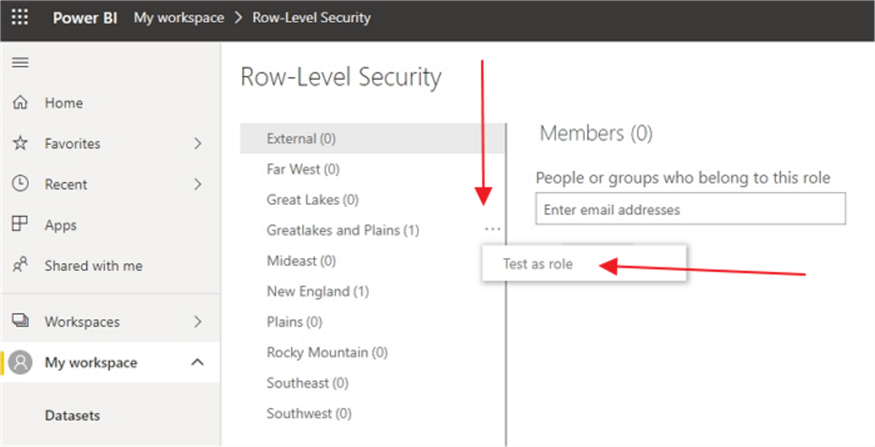
Our final step in the process is to once again test how our role is working. Click on the ellipse button next to the Role name, allows for the selecting the Test as role link.
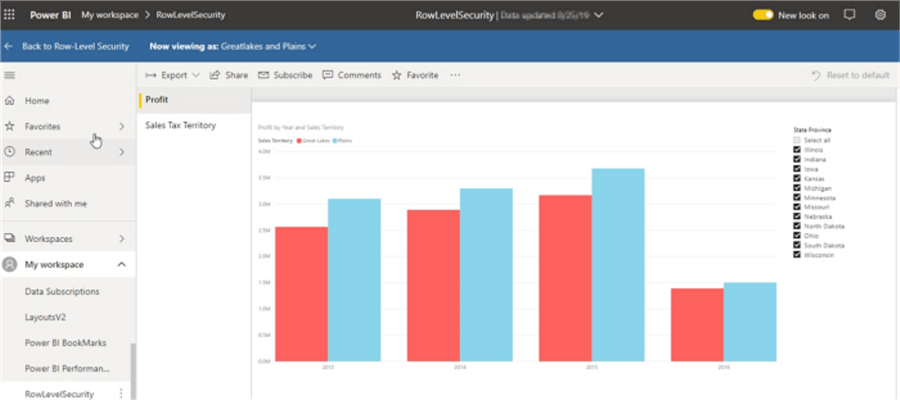
As shown below, we can see that the role is set properly, with only the Great Lakes and Plains sales territory showing.
Summary
One question that comes to mind is what happens when a user has access to get to the report, dashboard, or APP, but has not been assigned as a member of a role. That individual will see NO data. Also, if a user had edit permission for the report and dataset (generally a content administrator for instance), then that user will see all data and can change their own membership within a role.
As you can see Row Level Security in Power BI could really be called Role Level Security; it is a powerful tool that can be used in conjunction AD groups, email addresses, and user ID’s in such a way to create limited access via a role-based filter.
Next Steps

I have a passion for crafting Business Intelligence Solutions for my user groups. My experience includes almost 15 years of SQL Server involvement with the last 12 years focused specifically on Business Intelligence, SharePoint, OLAP, SSRS, and Decision Support solutions. Currently, I am a Business Intelligence Architect in the healthcare industry, and I also teach database and analytics classes for Kennesaw State University, Southern New Hampshire University, and Reinhardt University. My education includes an MBA and an undergraduate in Accounting (yes I am a reformed accountant!), both from Kennesaw State University. I enjoy every day by trying to grow my faith and spend precious time with my family. I have been happily married to my wife of over 20 years, and we have two teenagers one who we home school with the help of a University Model School, Cornerstone Prep in Acworth, GA (cornerstoneprep.org). Our other child is a Construction Management major at KSU’s Southern Poly / Marietta campus. We are a soccer and Cross Country (XC) family who play, coach, and referee soccer or run for fun most every day. For several years, our family has volunteered (and played with the dogs and cats) at Etowah Valley Humane Society in Cartersville, GA.
- MSSQLTips Awards: Champion (100+tips) – 2016 | Author of the Year – 2015 | Author Contender – 2014, 2016-2021


