By: John Miner | Comments | Related: 1 | 2 | 3 | > Azure Integration Services
Problem
Integration Services has a colorful product history over the last 15 years since its release. The extract, translate and load product was introduced with the release of SQL Server 2005. This was a major change in design philosophy with programming tasks divided into control flows and data flows. Microsoft introduced the SSIS catalog in SQL Server 2012 to satisfy runtime tracking requirements of packages. The idea of a flight recorder was a major enhancement. Not only did the package have a step by step trace of its execution, it has runtime statistics for each step. The incremental package deployment option in SQL Server 2016 eliminate duplicate code from being copied to the catalog. Both enhancements have truly made SQL Server Integration Services a world class product.
There are a ton of packages out there written in various versions of the product. The management of folders and files is part of normal data processing. If your company is thinking of lifting and shifting these packages to Azure Data Lake Storage, how can you replicate these file management tasks using SSIS?
Solution
The most recent Azure Feature Pack for Visual Studio 2019 was released in November of 2019. Microsoft has been supplying the SSIS developer with a set of tools for Azure since 2012. Most systems designed for Azure use two types of storage: Blob Storage and Data Lake Storage. The Flexible File Task is the next evolution in managing files that reside on local, blob and data lake storage systems. System designers should only use generation 2 of Azure Data Lake Storage. The prior version is deprecated and will not work with this control.
Today, we are going to investigate how the Flexible File Task can replace existing legacy file management code.
Business Problem
There are three use cases that in which the Flexible File Task can come in handy.
| Use Case | Feature |
|---|---|
| 1 | Copying and deleting files saved in local storage. |
| 2 | Copying and deleting files saved in blob storage. |
| 3 | Copying and deleting files saved in data lake storage. |
Because this Flexible File Task works in a variety of storage layers, replacing existing code with this new control might be a good idea. This will ease any future migrations to the cloud. Usually I like to compare and contrast older versus new controls. However, that is not possible since Azure Data Lake Storage went to general availability in February 2019. This feature pack is the first set of tools that work with the newer storage system.
It is assumed that a development machine with Visual Studio 2019 and the SSIS extensions has been created. See this prior article for a typical build list for a development machine. In addition, the Azure Feature Pack for Visual Studio 2019 must be downloaded and installed within the environment. I chose to install the x86 feature pack since drivers are plentiful for this build version.
The focus of this article will be on using the new control with Azure Data Lake Storage, Generation 2.
Local Data Files
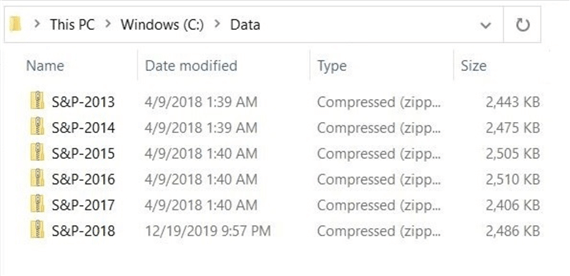
The Flexible File Task can only be used to copy and delete files. It is important to have a set of staged files that can be used in the example packages that we created. The image below shows the combined S&P 500 daily stock information compressed into a one zip file for each year. Each zip file contains 505 data files, one for each S&P 500 company. There is a total of 6 years of data shown in the image below.
Use Case #3 – Azure Data Lake Storage
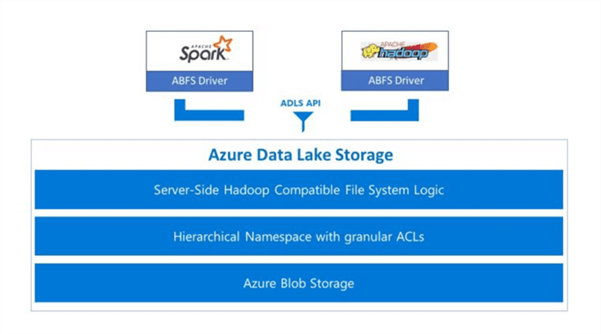
The most exciting part of the new Azure Feature Pack is the ability to work with files stored on Azure Data Lake Storage, Generation 2 (ADLS2). The Azure Blob Filesystem (ABFS) Driver is an interface between the client and the Azure REST API. Please see the below image from Microsoft for details. This driver supports the Hadoop Filesystem logical calls from Big Data Tools such as Azure Data Bricks and Azure SQL Data Warehouse. It took Microsoft several months to write the new task controls, the destination connection and the source connection to work with ADLS2.
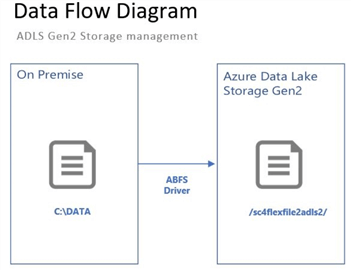
The diagram below shows a typical file movement from on premise to the cloud. In this section, we are going to use a For Each Loop Container to iterate over both local and ADLS2 files. This repetitive loop will allow for a single action be applied to a group of files. Thus, we can copy or delete a bunch of files using this design.
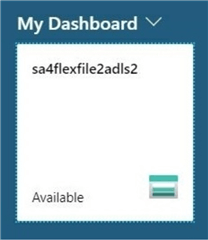
At this time, let us create a blob storage account and a data lake storage container. Please adopt an Azure object naming convention for your company. I am using the abbreviation "sa" for storage account and "sc" for storage container. The image below shows a storage account on the default dashboard in the Azure Portal.
Bug Found In Control
Before we move onto the examples, I need to talk about a bug in Azure Feature Pack for Visual Studio 2019. The Flexible File task in version 15.1.16.0 might error when working with ADLS2. I had to work with the engineering team to find the bug and they suggested the work around.
The image below shows the output from the failed execution. The error message states "Attempted to access an element as a type incompatible with the array." How do we catch the actual root cause of the bug?

We need to apply break points on the package before and after the reporting of the error. The system internals, process explorer utility can be used to examine the runtime executable used for debugging (DtsDebugHost.exe). The image below shows the root cause of the issue. There are two versions of the Newtonsoft.Json.DLL being loaded into memory.
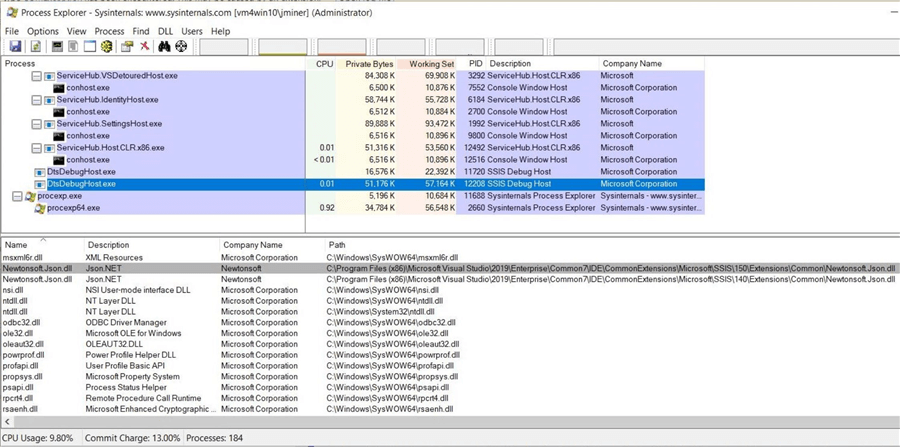
The fix for this current issue is to find the "DtsDebugHost.config" file under AppData folder for the current user profile. Edit the file. Insert the below redirect statement (XML) just before the closing tag </assemblyBinding>. Make sure your restart Visual Studio to get this new binding correctly applied.
<dependentAssembly>
    <assemblyIdentity name="Newtonsoft.Json" publicKeyToken="30ad4fe6b2a6aeed" culture="neutral"/>
    <bindingRedirect oldVersion="4.5.0.0-12.0.0.0" newVersion="11.0.0.0"/>
</dependentAssembly>
Assigning rights to Service Principle
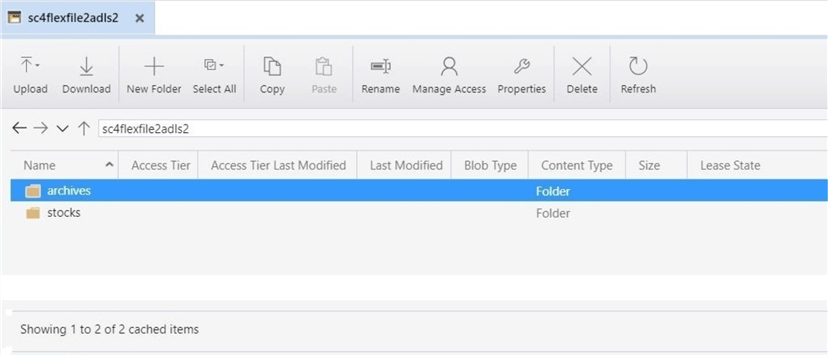
The File System Task has to use a connector to log into Azure Data Lake Storage. It only supports a user defined service principle. Please see my prior article on how to create a service principle. Azure storage explore is still the only way to assign ACL rights to directories that you create. Please see my article on using azure storage explorer with ADLS2. Please create two directories underneath the root directory of the file system. The image below shows the stocks directory for unprocessed files and the archives directory for processed files.
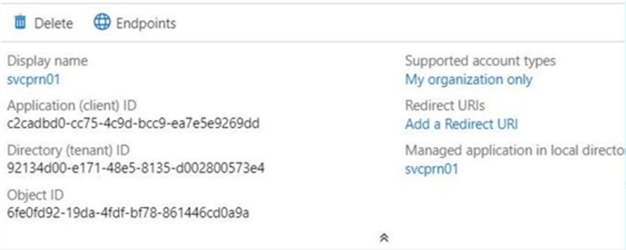
Please grab the application id, directory id, and object id assigned to your service principle. The image below shows the details of the service principle named svcprn01. Use the third hyper link on the left to obtain the object id for the service principle. An application key (secret) will need to be defined for the principle. Please see Microsoft documentation for details.
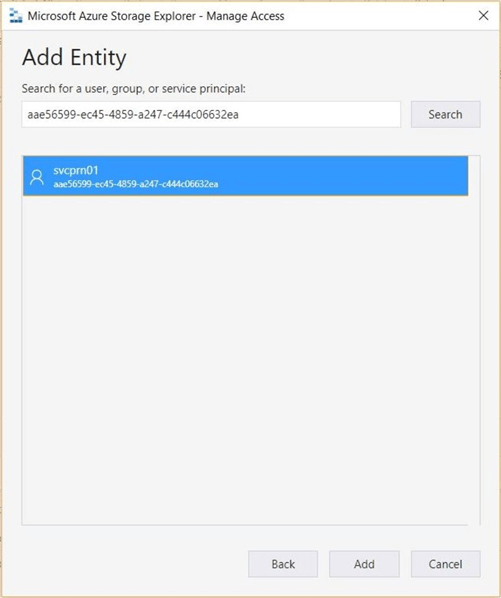
The image below shows a look up of the svcprn01 using the hidden object id.
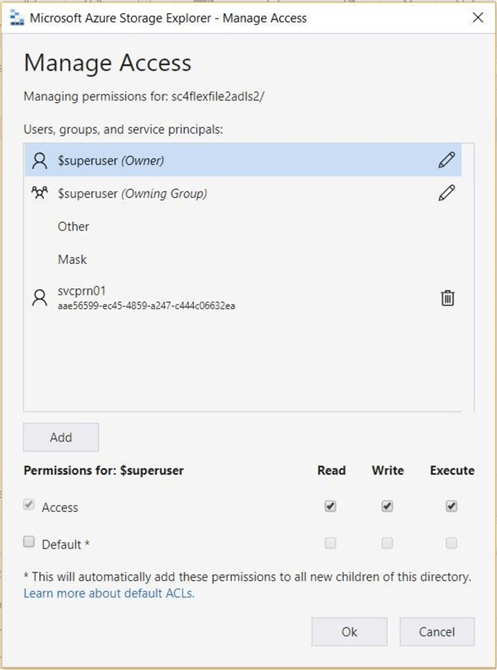
Please assign access control permissions of read, write and execute to the service principle at the root and subdirectories. The image below shows the assignment at the root directory. Repeat the same action for the /stocks and /archives sub-directories.
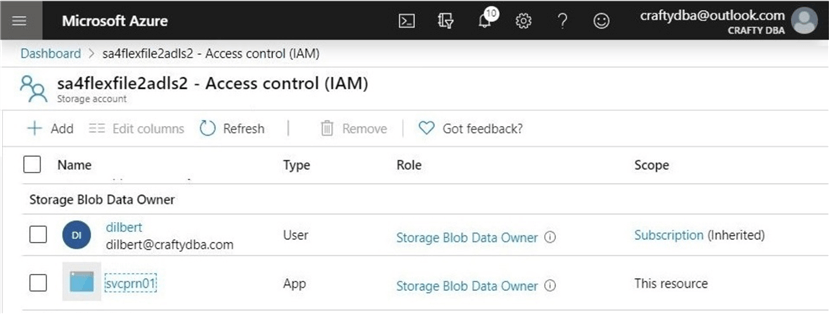
Last but not least, the Service Principle needs to be given RBAC rights to the storage container in Azure. We can see below that both the user (Dilbert) and the service principle (svcprn01) have owner rights.
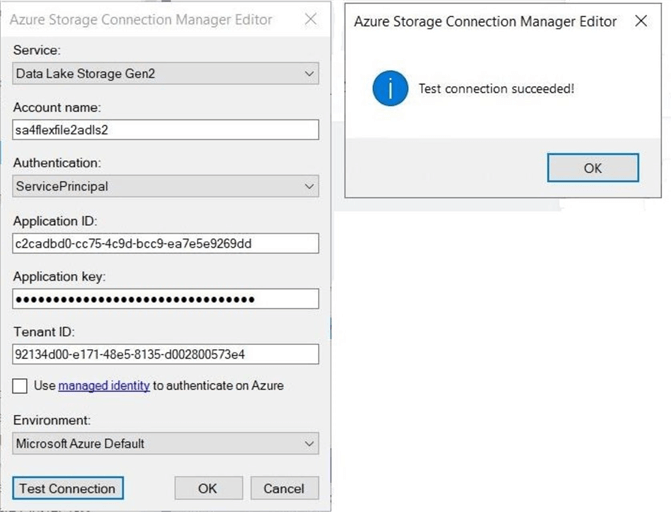
Make sure you test the connectivity of the ADLS Gen 2 connector before proceeding. If you get a failure, please double check the permissions.
Copy Local Files to ADLS2
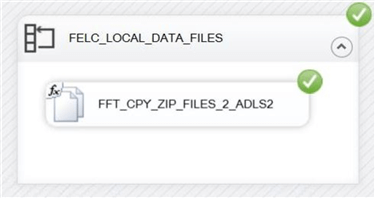
The last package will use three unit tests to make sure the Flexible File task is ready for production use. The first unit test is to copy a bunch of files from the c:\data directory on premise to the \sc4flexfile2adls2\stocks directory on ADLS2. The successful execution of the "FELC_LOCAL_DATA_FILES" container is shown below. The "For Each Loop Container" uses an enumerator to find any matching files. Then, for each file it will call the "Flexible File Task" to perform an action. This design pattern will be used for all three unit tests.
The "For Each Loop Container" will be looking for any files in the source directory that have a zip extension. This control has many different enumerators. We are interested in the enumerators for LOCAL and ADLS2 storage.
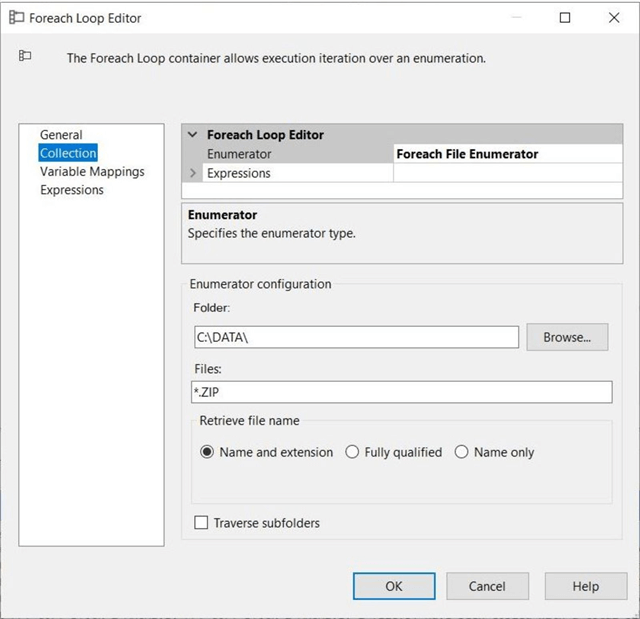
Please define three variables for this task: [varFileNm] – dynamically updated by loop container, [varSrcDir] – the location of the source files, and [varDstDir] – the location of the destination files. In addition, we need a second destination variable and a second file name variable. These variables will be explained and used later on.

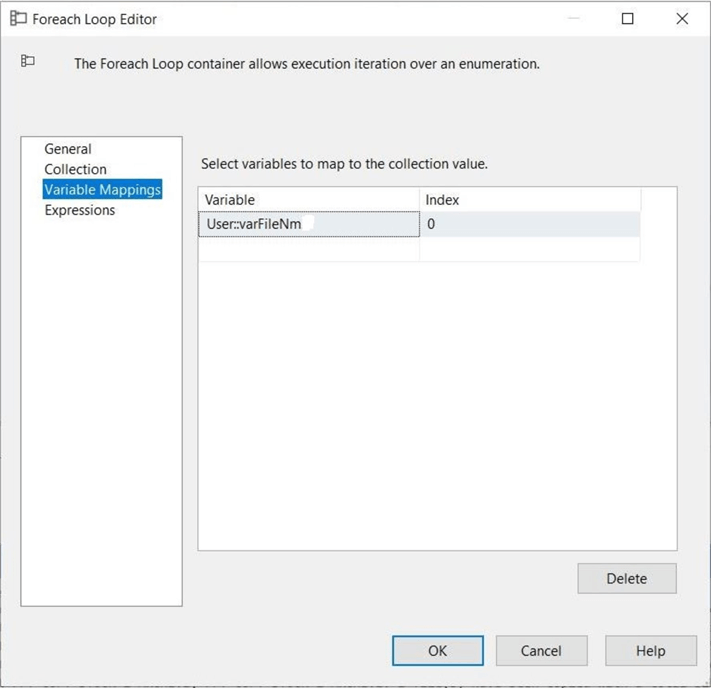
Make sure that you map the file name variable to the output of the container given at index 0.
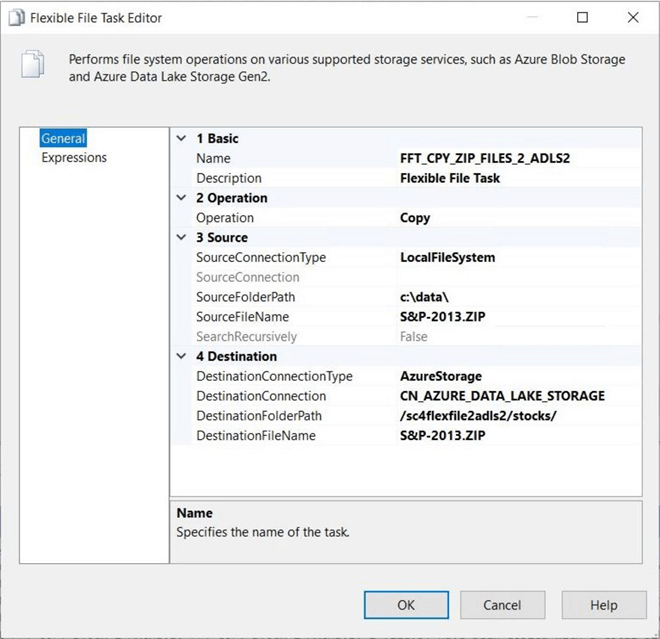
Initially, we have to hard code the "flexible file task" so that errors are not produced. Mark the task object delay validation property to true to avoid errors.
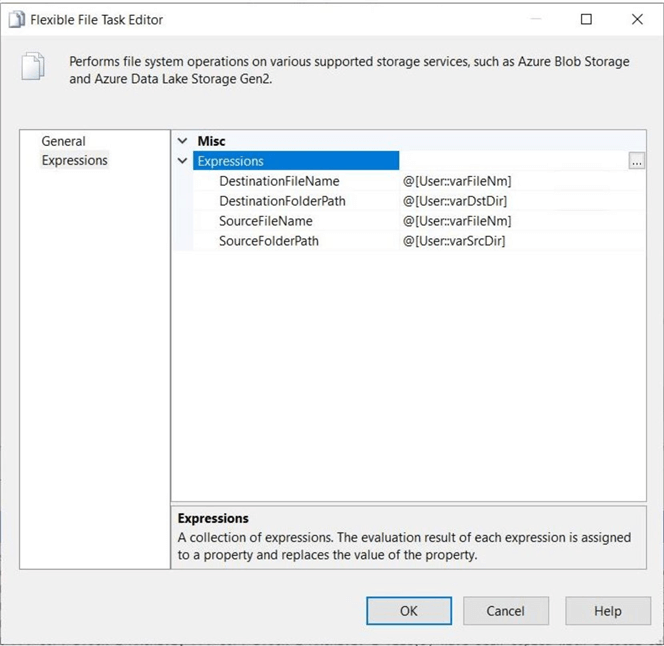
The most important part of the process is to map the properties exposed by the control to the variables that we defined. Use the task editor to set the property expressions. In this example, we are using the three variables that we previously defined. This mapping turns a static execution into a dynamic execution.
A successful execution of the container will copy the files from on premise to Azure Data Lake Storage. The Azure Storage Explorer image shows the results of Test 3a. Please disable this container so that we can create the next two unit tests.

Flexible File Task – Manage files in ADLS Gen2
The second unit test is to copy 6 files from \sc4flexfile2adls2\stocks to the \sc4flexfile2adls2\archives folder. The successful execution of the "FELC_ADLS2_STOCK_FILES" container is shown below.
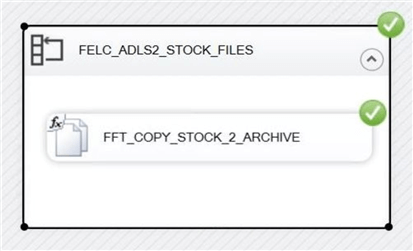
There are configuration differences to note when using the ADLS2 enumerator. First, the folder path to the storage is using LINUX like pathing. Second, there is no pattern matching to reduce the resulting file list. Third, we cannot dictate the format of the retrieved file name.
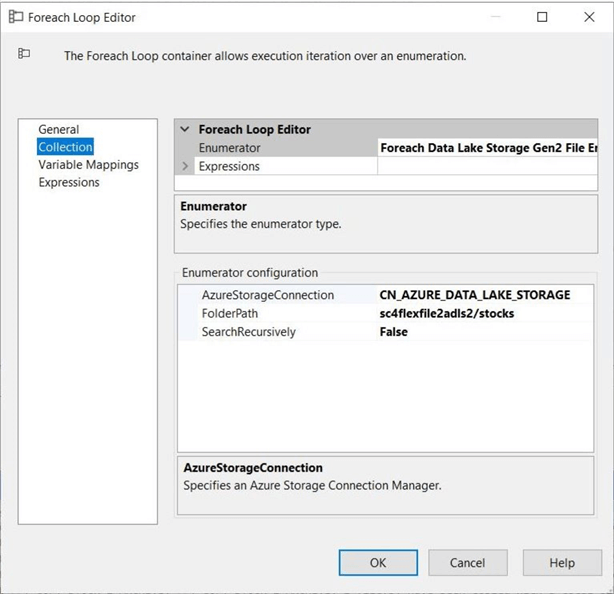
To shorten the article, I am only going to skip steps that are the same and previously examined in the prior paragraph. For instance, the variable mappings section will be using a different variable, varFileNm2. However, this step uses the same dialog box seen before and is required for the next two unit tests.
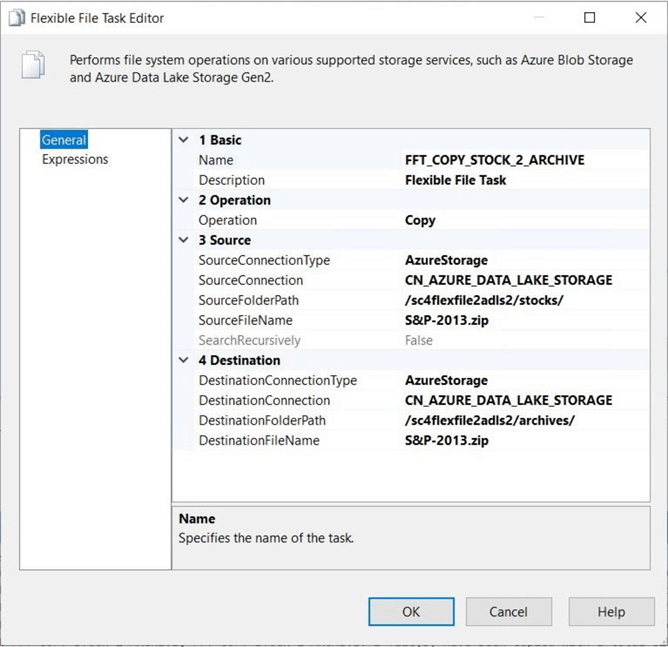
The above image shows the source and destination connections using data lake storage. The folder paths are pointing to the directories that we created using the Azure Storage Explorer. The image below shows the property expression to variable mapping. Why did I choose to use a different file variable? Unlike the local file system enumerator, we have no control over the format of the file returned by the for each loop. I wanted to point this out. The returned file name is a fully qualified path. We will have to use functions in SSIS to create a formula to extract the file name.
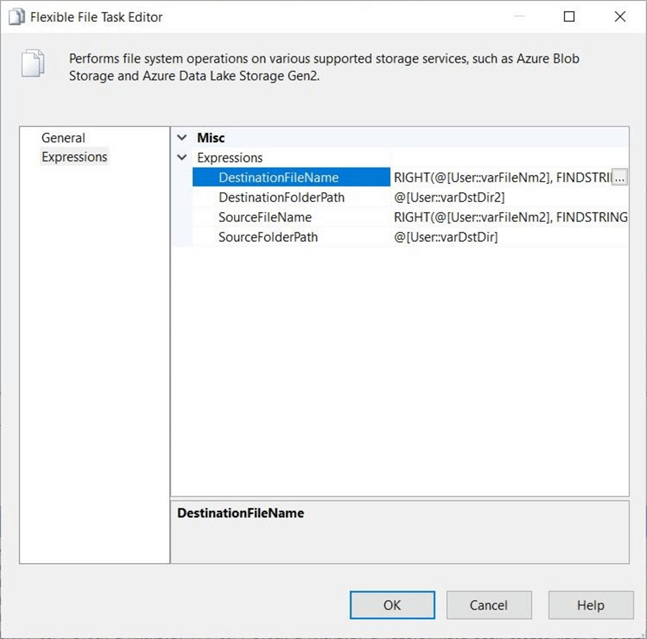
The image above shows the usage of three variables. The file name variable will have to be modified. Please see the image below. Use the expression builder to enter the following formula. It will return just the file name assuming it is proceeded by a slash.
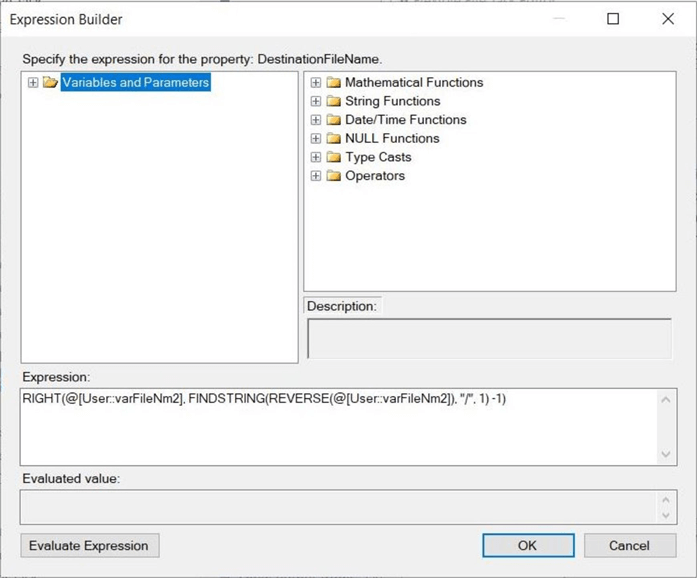
A successful execution of the container will copy the 6 files from the stocks to archives directory. Please disable the "For Each Loop Container" at this time so that we can create the final test.

The third unit test deletes the 6 files from the \sc4flexfile2adls2\stocks folder to complete the logical MOVE action. The successful execution of the "FELC_ADLS2_ARCHIVE_FILES" container is shown below.
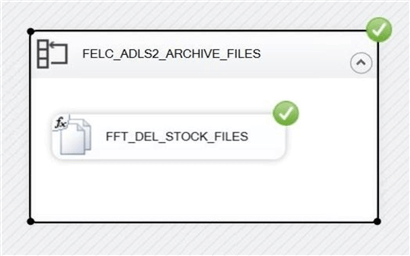
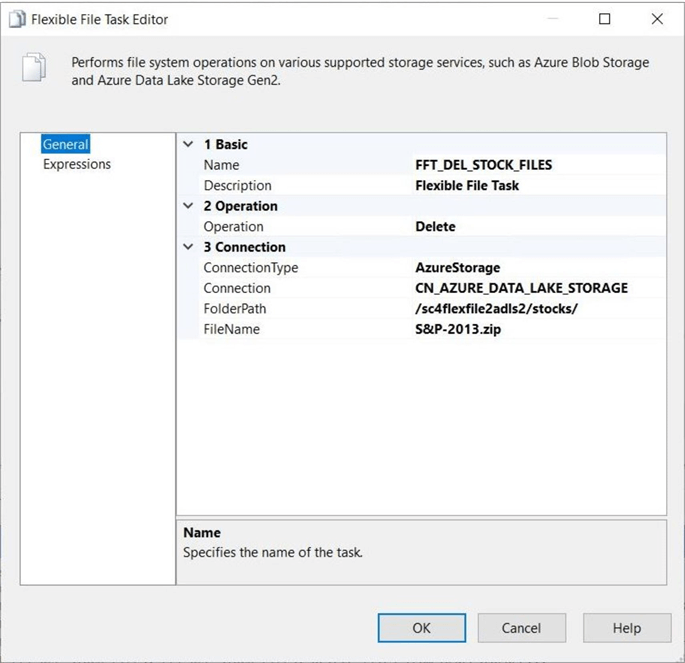
Similar actions must be executed to setup the enumerator and variable mappings of the "For Each Loop Container". Since these steps are not new, I am going to jump right to the "Flexible File Task" properties. The connection, folder path and file name are hard coded in the image below. We will need to use expressions to variable mappings to make this task dynamic.
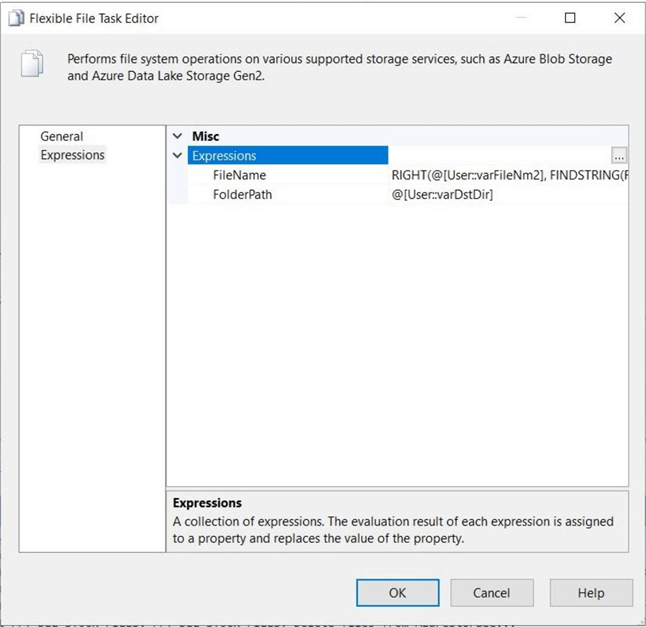
Again, we need to apply a SSIS formula to the convert the fully qualified path to just the file name and file extension.
Summary
In February of 2019, Azure Data Lake Storage Generation 2 (ADLS2) went to general availability. However, toolsets like PowerShell and SQL Server Integration Services were unable to take advantage of this new storage. The Flexible File Task released in November of 2019 allows the developer to write programs that can copy and delete files to, from, and within ADLS2 storage.
The Flexible File Task is the next evolution in controlling the copying and deleting of files regardless if they exist in local, blob storage or data lake storage. You might want to consider replacing older controls with this newer one when legacy programs are changed. This preparation will ease the transition to the cloud if you still want to use SSIS as an ETL tool.
Regarding security, the use of a service principle or managed identity is always preferred over a certificate. That is why ADLS2 storage is more secure since it has both RBAC and ACL levels of permissions. Regardless of what type of Azure storage you are using, always test your connections before usage.
In closing, the use of naming conventions and documentation make the longevity of the package easier for the teams on support. The "Flexible File Task" must be used in conjunction with a "For Each Loop Container" to copy or delete a set of files. Next time, we can talk about the Azure Data Lake File System Task which performs the bulk actions within one control. It is important to note that the Azure Storage Explorer is still the main application to create directories, delete directories and manage file system access.
Next Steps
- What is new in the Azure Feature Pack for SSIS 2019
- Use the Azure Data Lake File System Task in a control flow
- Use the Flexible File Source in a data flow
- Use the Flexible File Destination in a data flow
About the author
 John Miner is a Data Architect at Insight Digital Innovation helping corporations solve their business needs with various data platform solutions.
This author pledges the content of this article is based on professional experience and not AI generated.
View all my tips


