By: Garry Bargsley | Comments (4) | Related: > Azure
Problem
If your company is like mine, they are migrating applications to SaaS/PaaS offerings when possible. Whether it is applications, databases or something else, these offerings limit administrative overhead for environments that are already experiencing resource constraints. One of the things that would be nice to move to the cloud is the SSRS Report Server databases.
Solution
Enter the Azure SQL Managed Instance offering. While this service is a couple years old, Microsoft continues to mature the offering and allow more applications to work on the platform.
One of the most recent is the use of Azure SQL Managed Instance to host the ReportServer databases for use with SQL Server Reporting Services (SSRS). This might seem like a small feature addition to the product, for people like me that are on a fast track to migrate everything to Azure SQL Managed Instance this checks another box off the short list.
Pre-Requisites
- Azure SQL Managed Instance
- SQL Server Account - Used for connecting to the Azure SQL Managed Instance
- Azure Virtual Machine - Same Azure Subscription as Azure SQL Managed Instance
SQL Server Reporting Services Installation Steps
Download the 2019 SSRS installer here.
From your Azure Virtual Machine, launch the installer from the location you saved the download to.
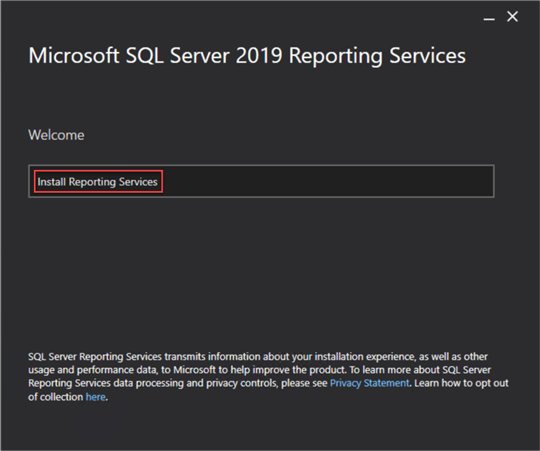
Choose Install Reporting Services and click Next.
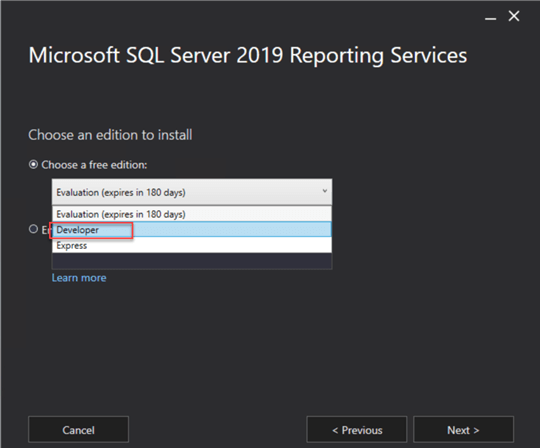
Choose the appropriate Edition to match your licensing. In this example we will use the Developer Edition. Once selected choose Next.
Now you will want to accept the license and click Next.
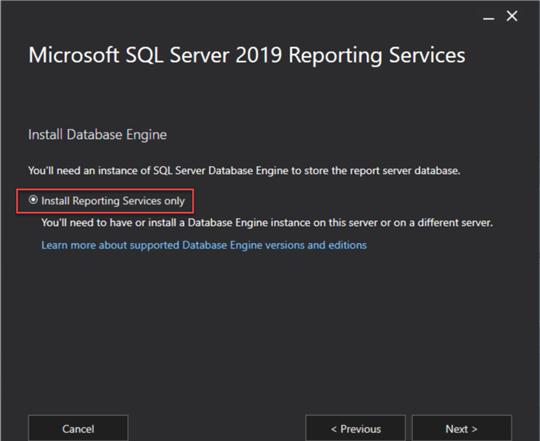
Choose Install Reporting Services Only and click Next. This will be your only option since the SQL Server Database Engine is not on the server.
Change the Installation Location to a path of your choice, if you would like, then click Install.
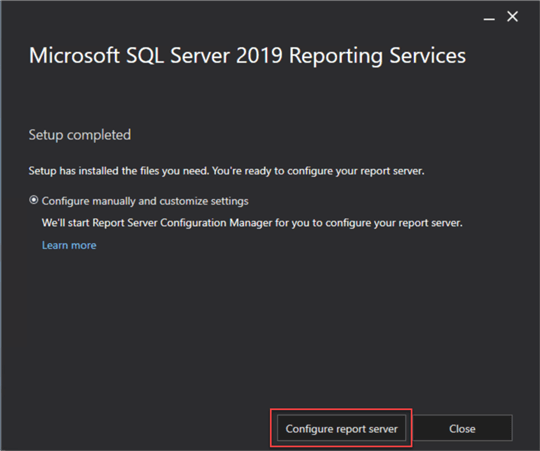
Once the installer finishes click the Configure Report Server button to open the settings.
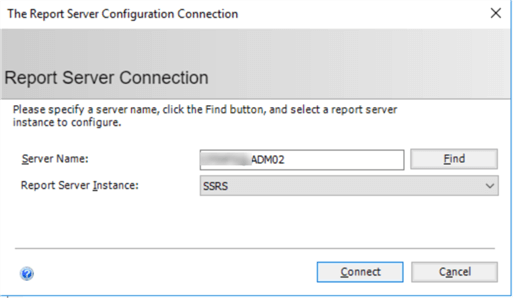
When the Report Server Configuration Manager screen opens click Connect.
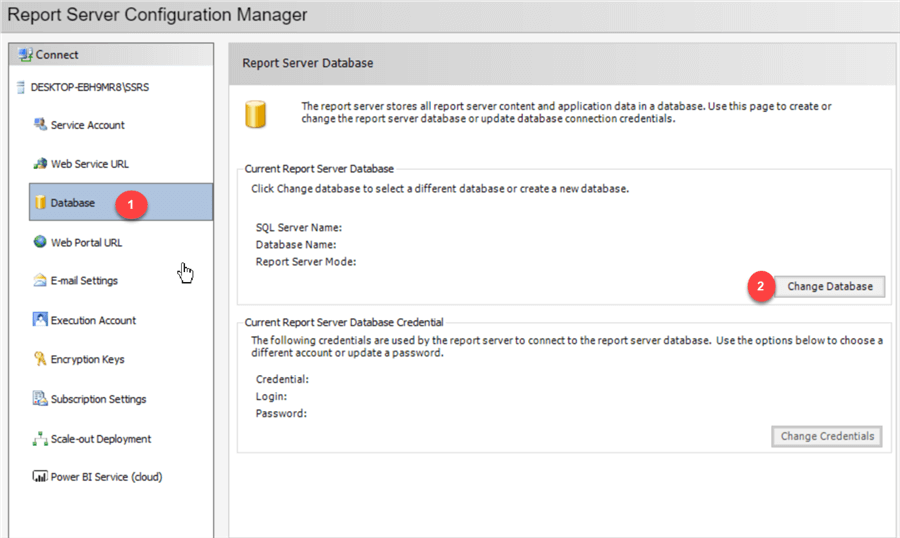
Once the main screen loads choose Database and then click Change Database to enter the connection information.
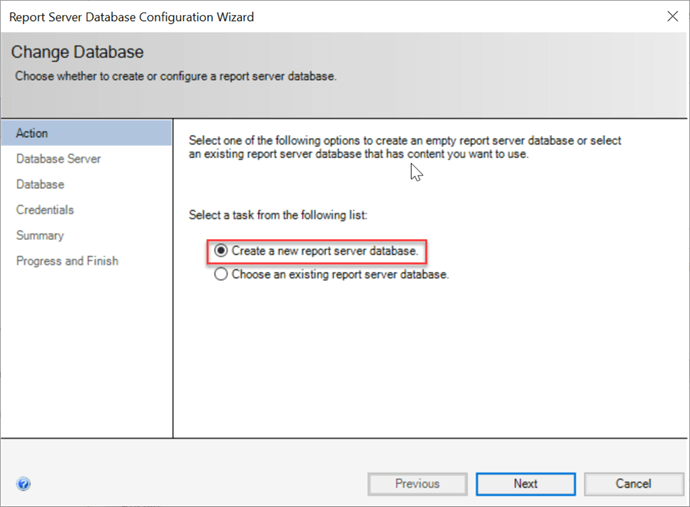
Since we are building a new SSRS installation we will keep the default option selected and then click Next.
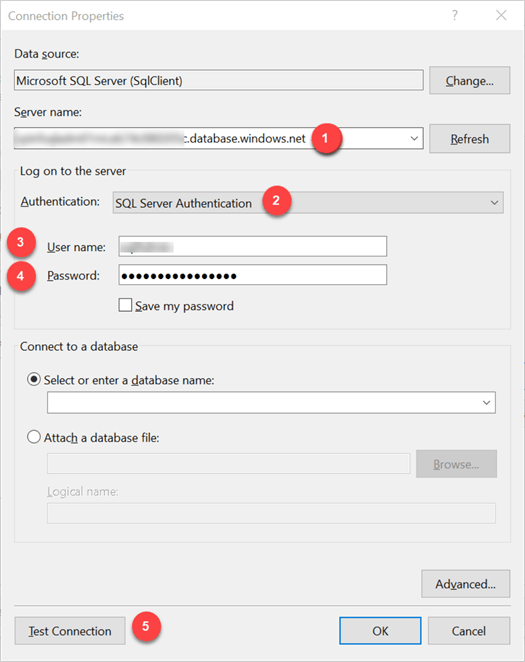
Enter the database information:
- Server Name = Azure SQL Managed Instance
- Authentication Type = SQL Server Account
- Username = SQL Server Account login on the Azure SQL Managed Instance
- Password = Password that goes with your SQL Server Account
- Test Connection
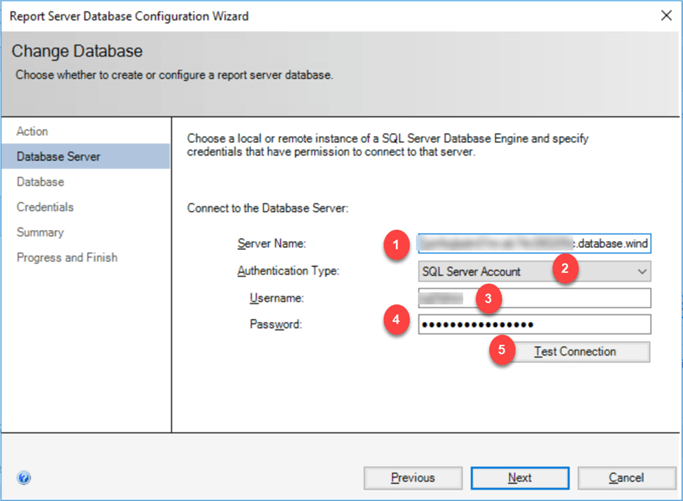
Once your connection test is successful, click Next.
On the database configuration you should leave the default of ReportServer then click Next.
Again, since we are using a SQL Server Account the account information needs to be entered:
- Authentication Type = SQL Server Credentials
- User name = SQL Server Account Login on the Azure SQL Managed Instance
- Password = Password that goes with your SQL Server Account
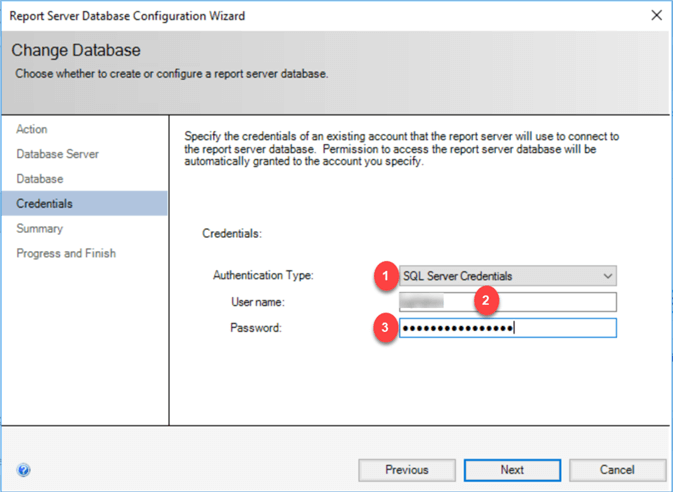
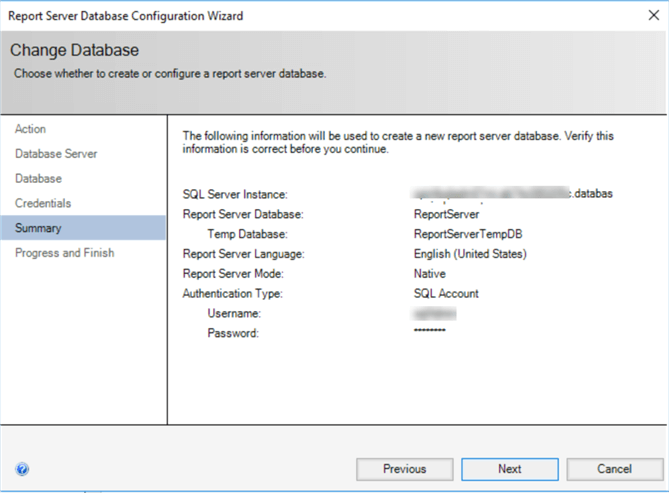
Click Next to proceed to the summary screen, verify all your settings and click Next to begin the database setup.
After clicking Next, you will see the installation progress. Once complete you will see Success for each step, then click Finish.
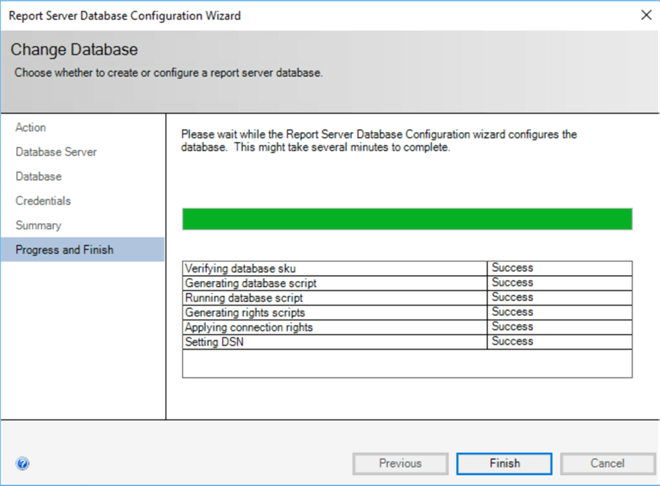
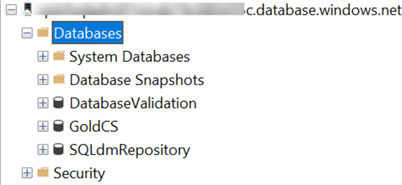
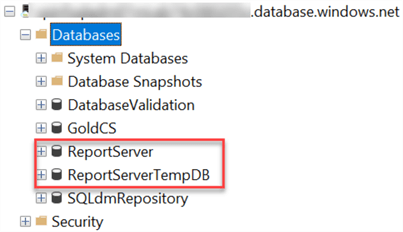
Voila, just like that we have ReportServer and ReportServerTempDB on our Azure SQL Managed Instance.
| Before | After |
|---|---|
|
|
Now that we have the ReportServer databases deployed, setup the Reporting Services Web Server components for executing reports.
Back in the Report Server Configuration Manager screen choose Web Service URL, then click Apply. This will apply all the default settings for the Web Service.
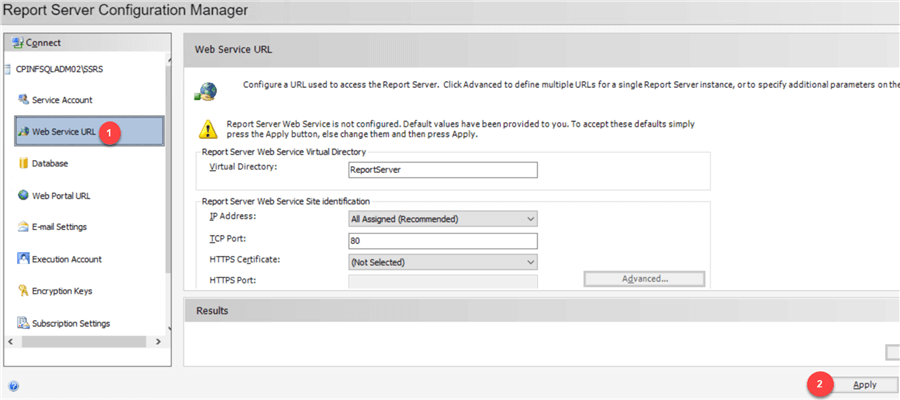
The Web Service configuration is complete when you see "The task completed successfully" under the Results section.

Now click Web Portal URL, then click Apply to accept the defaults and start the Web Portal configuration process.
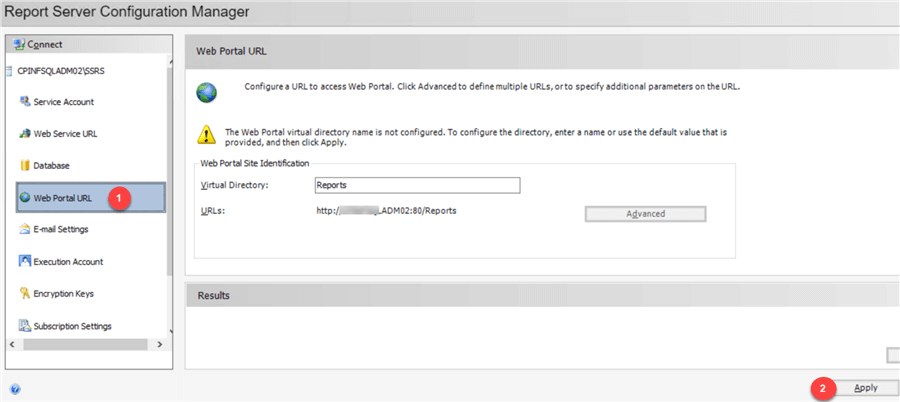
The Web Portal configuration is complete when you see "The task completed successfully" under the Results section.

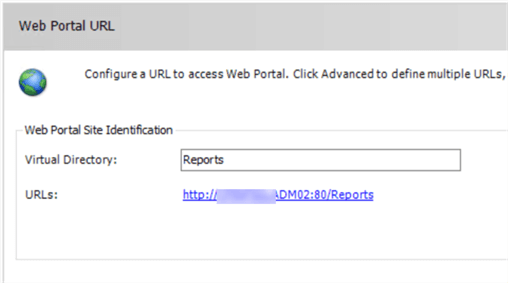
While on the Web Portal URL screen, click the URLs link to launch your web browser to your newly configured SSRS server.
Just like that you have an SSRS server configured to use an Azure SQL Managed Instance PaaS server.
That was a simple and straightforward installation / configuration process.
Bonus Tip #1: Create an SSRS report
Open Visual Studio 2019.
Note: if you need help configuring Visual Studio for Report Server click here.
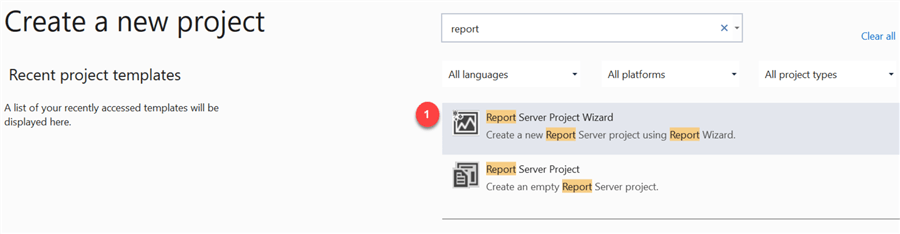
Click Create New Project.
Type Report in search box then choose Report Server Project Wizard and choose Next.
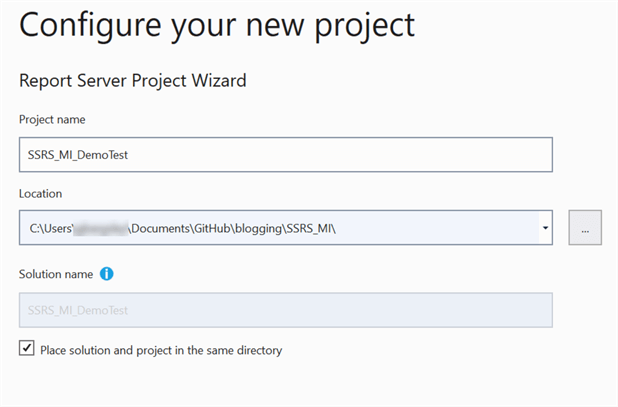
Configure the new project by entering a Project Name and location then click Create.
The Report Wizard will start, click Next.
The first step in the report creation will be to add a data source, enter the Name and click Edit.
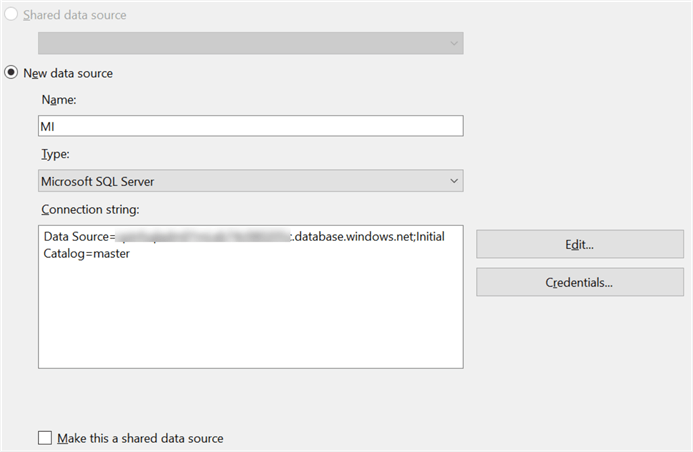
Now we will enter the connection information for the data source:
- Server Name = Azure SQL Managed Instance
- Authentication = SQL Server Authentication
- User name = SQL Server Account Login on the Azure SQL Managed Instance
- Password = Password that goes with your SQL Server Account
- Test Connection
Once the test is successful, click Ok to save Connection.
Back on the Data Source Screen choose Next.
Since we are going to do a simple report that just lists the databases on our Azure SQL Managed Instance these steps will be simple.
In the query string section enter SELECT * FROM sys.databases then click Next.
For the Report Type let us use the default of Tabular and click Next.
Choose some of your favorite columns from sys.databases and push them to the right under the Details section.
I choose some of my favorites and then clicked Next.
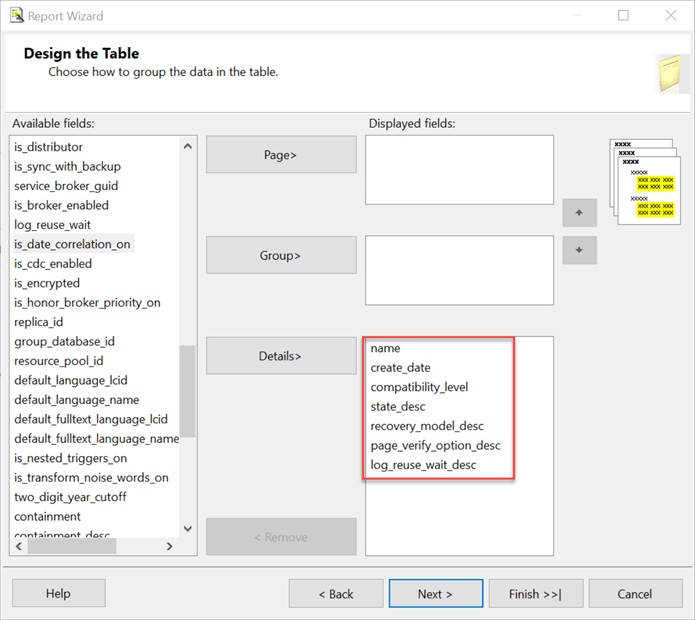
The final step is to give the report a name. I called my example DemoTest_MI_DatabaseList.
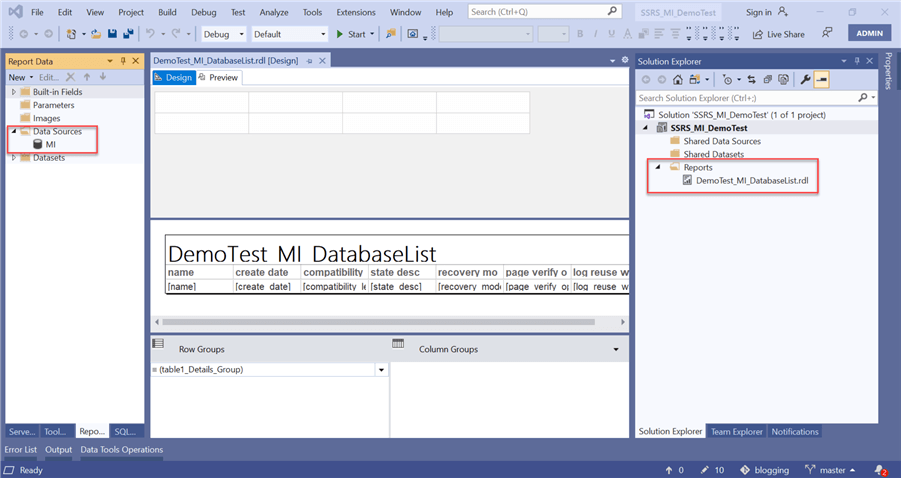
Once you click Finish, you will see that all the heavy lifting of report build is done for you.
Now the Report Project has a Data Source and an RDL report file.
If you want to Preview the report, in the preview window, a list of databases from the Azure SQL Managed Instance will load.
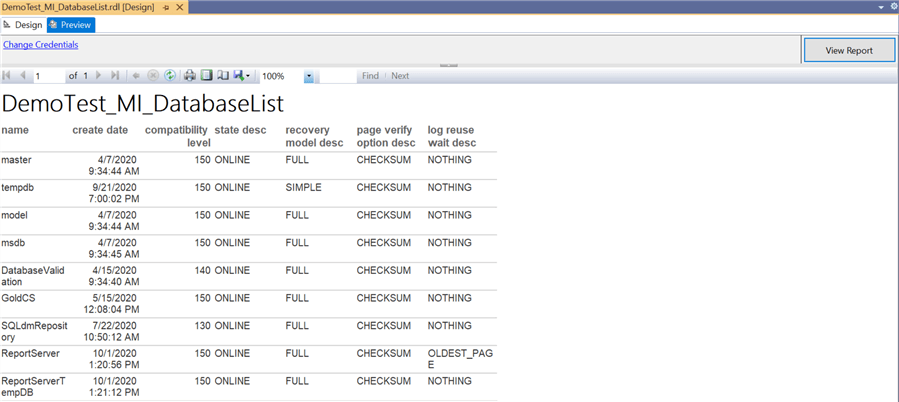
You have a working report.
Bonus Tip #2: Deploy Report to SSRS server
It is now deployment time for our new Database List report.
Right click on the SSRS_MI_DemoTest project name and choose Properties.
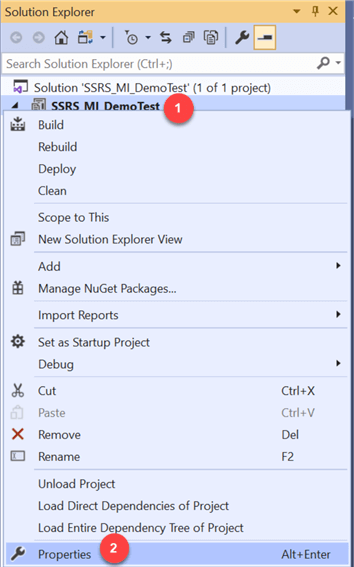
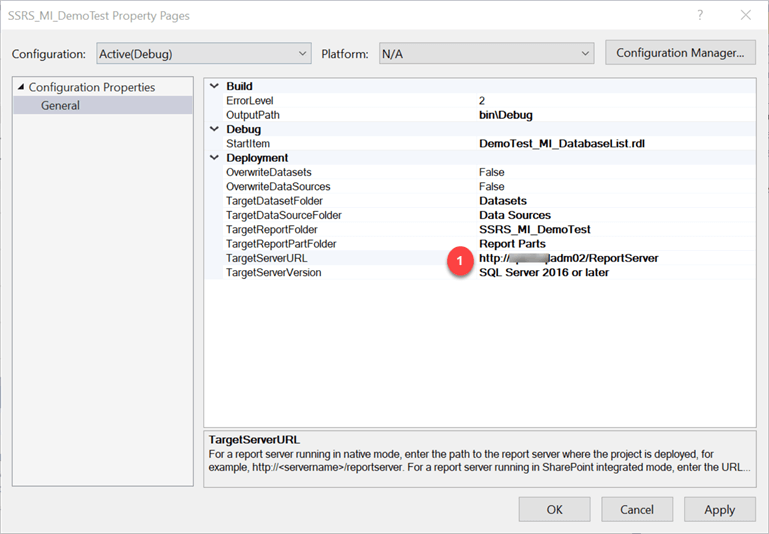
The TargetServerURL will need to be changed to match name of the server running our SSRS server, then click OK.
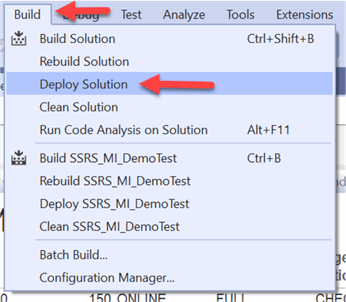
Now that our deployment settings are configured, click on Build > Deploy Solution.
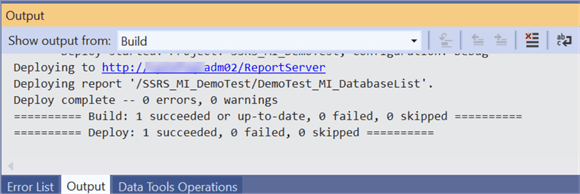
The project will build and deploy based on your configuration. The Output window will show deployment successful.
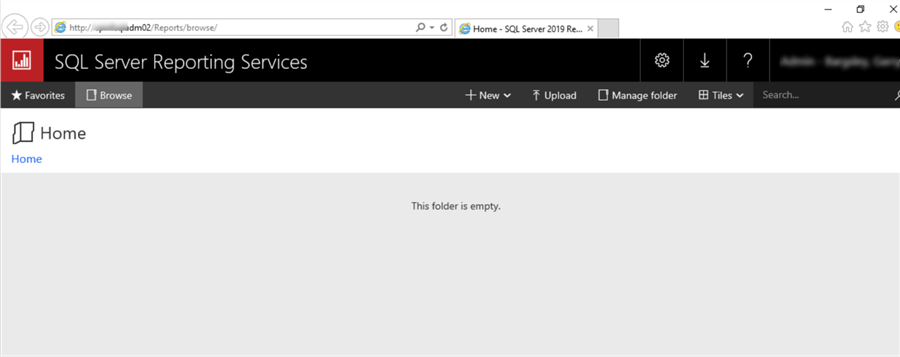
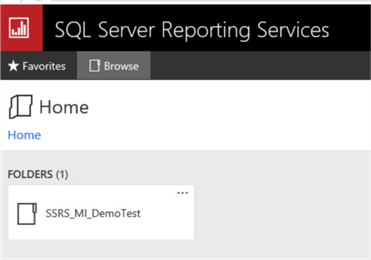
Login to your server or access it from a connected network machine at http://servername/reports.
From the Home screen we will see the SSRS_MI_DemoTest folder. Click the folder and you will be taken to the DemoTest_MI_DatabaseList report.
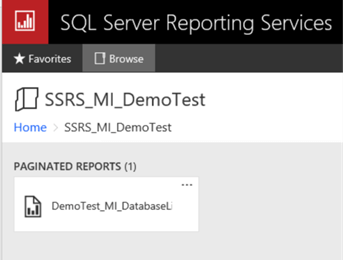
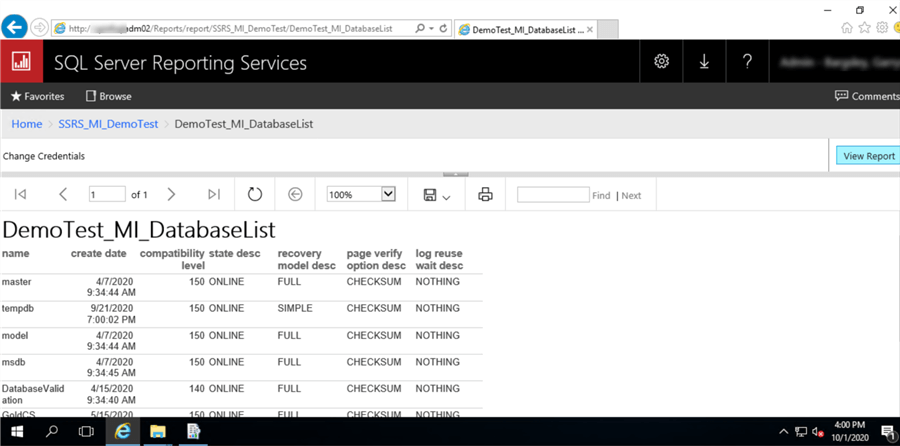
The moment of truth is here. Run the DemoTest_MI_DatabaseList report.
We have a list of databases from our Azure SQL Managed Instance.
Next Steps
- This article shows you how to use Azure SQL Managed Instance as a database backend for SSRS server databases. Until recently this was not a supported option by Microsoft. This is a great move forward for the Azure SQL Managed Instance platform and reduces the need for an IaaS installation of SQL Server to host SSRS.
- Additional Resources


About the author
 Garry Bargsley is a SQL Server Database Administrator with over 20 years experience in the technology field. His interests and specializations are SQL, Azure, PowerShell and Automation.
This author pledges the content of this article is based on professional experience and not AI generated.
View all my tips
