By: Vitor Montalvao | Comments | Related: > Azure
Problem
During development, my team and I need to deploy several VMs with SQL Server installed. However, we often spend too much time creating and deploying these VMs in different phases of the project. How can we accelerate this process?
Solution
In this article we are going to look at the options in Azure VMs with a SQL Server instance using templates to reduce the deployment time.
Azure VM Template Generation
As usual during the development cycle, teams create and dispose of virtual machines as they need. This task can take time away from other important parts of the project. Let's see how we can reduce the VM deployment time in Azure.
NOTE: In this article I will use a creation of an Azure VM as example. Keep in mind that the same steps can be done for any other Azure resource (Storage, Container, etc…) and tasks.
I'm expecting that readers of this article have some experience creating an Azure VM from the Azure Portal. However, if you are new to the creation of Azure VMs, please follow these instructions to create a new Azure VM.
You can also try to use any existing SQL Server VM template from the Azure Marketplace or create your own from scratch. I will skip all the steps of the Azure VM since this it is out of the scope of this article and I'm expecting you to already know the information (if not, I've provided the link above to the official Microsoft webpage to teach how to create a VM). You can input your own values for the respective parameters. Just execute all the steps and stop at Review+Create where you'll see a link to download the template for automation (you might see a similar screen, but with different information regarding what you chose for this exercise):
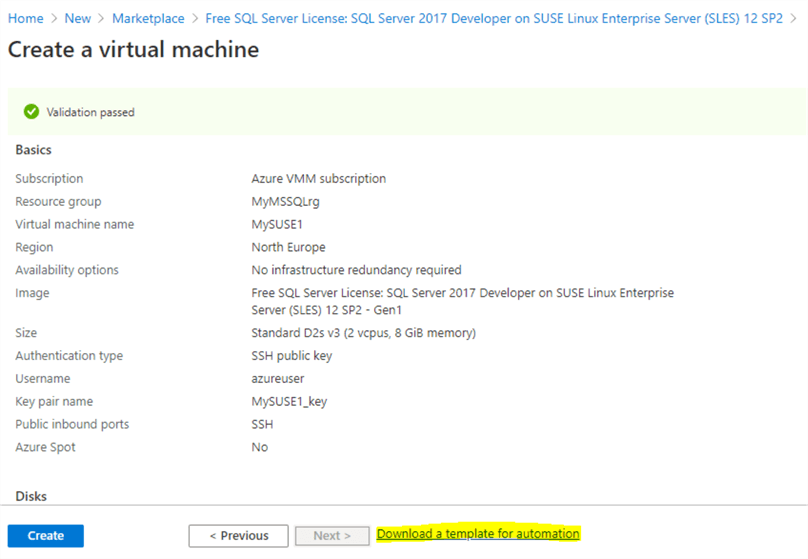
After reviewing and confirming that the information provided is correct, click on the link: Download a template for automation. You'll see a screen with the respective JSON code for this template with the following 3 options (Download, Add to library, Deploy):
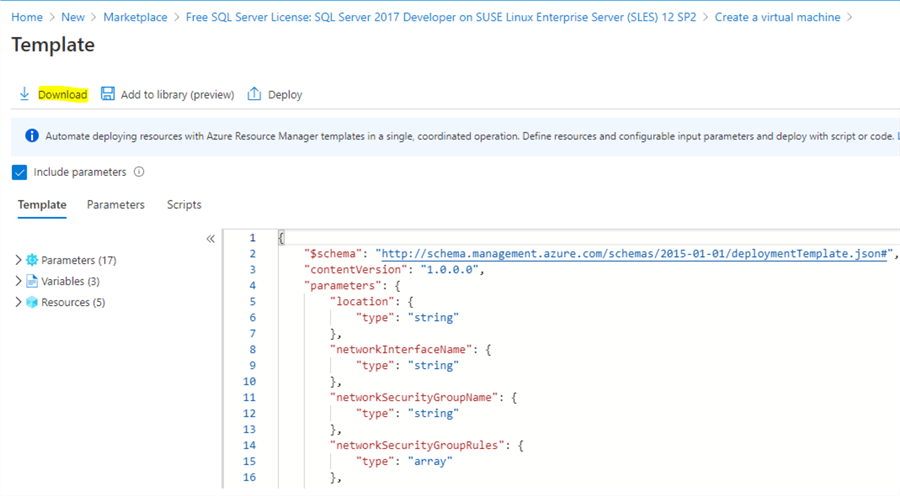
Clicking on Download, it will download a template.zip file to your local computer. This zip file has 2 JSON files in it which store the code you saw in the above Azure screen.

The template.json has the configuration information for the template and the parameters.json has the values you provided for the creation of this VM.
Edit and change the template.json if you want to add or remove parameters.
Edit and change the parameters.json if you want to provide new values for your new VM.
Azure VM Deployment
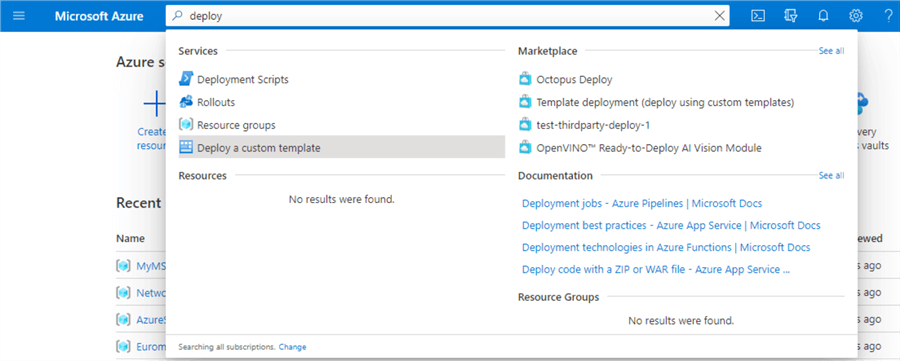
Do NOT click on the create button since we'll create the VM from these new 2 json files. In the Azure Portal search field, type "deploy" and then choose the "Deploy a custom template" option.
You'll see the following screen:
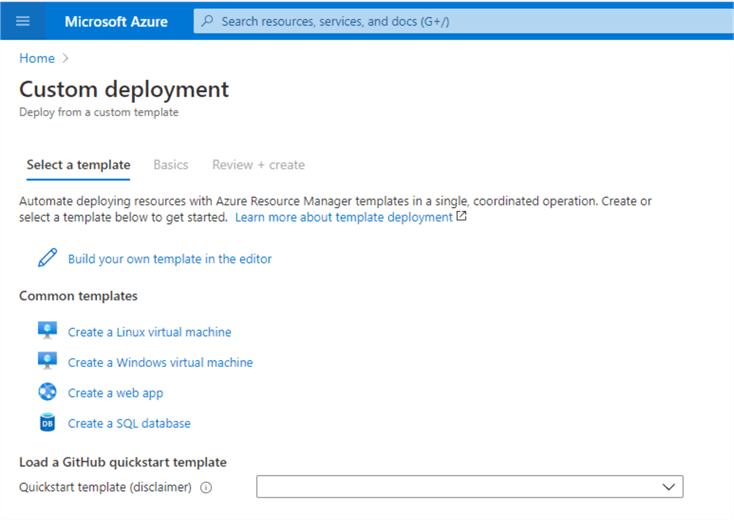
Before we proceed with the next step, instead of creating our own templates, we could have come here immediately and chosen a template from the Common templates option. Take some time to check out the available templates.
Returning to our exercise, click on "Build your own template in the editor" as shown above and you'll get the following screen:
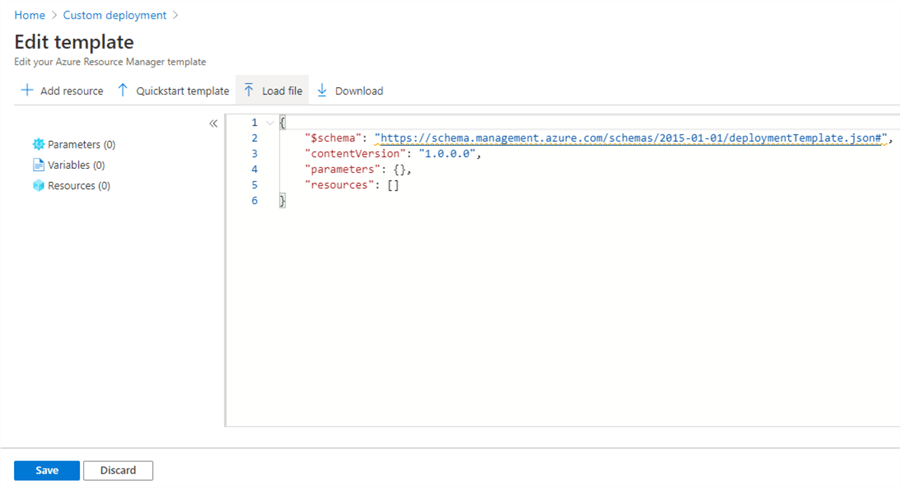
Click on the Load file option and open the template.json file you've downloaded and click on the Save button. You'll see a similar screen to the following. You'll see all the available parameters without any values:
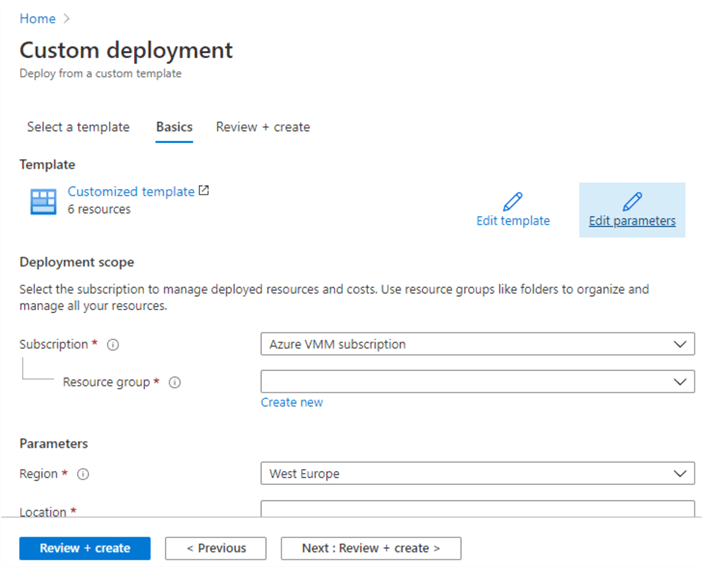
Click on the "Edit parameters" option and load the file parameters.json that you've downloaded before. Take the time to review the values and change them, if needed. Click on the Save button to return to the previous screen. You should see all the parameters with the respective values loaded from the parameters.json file:
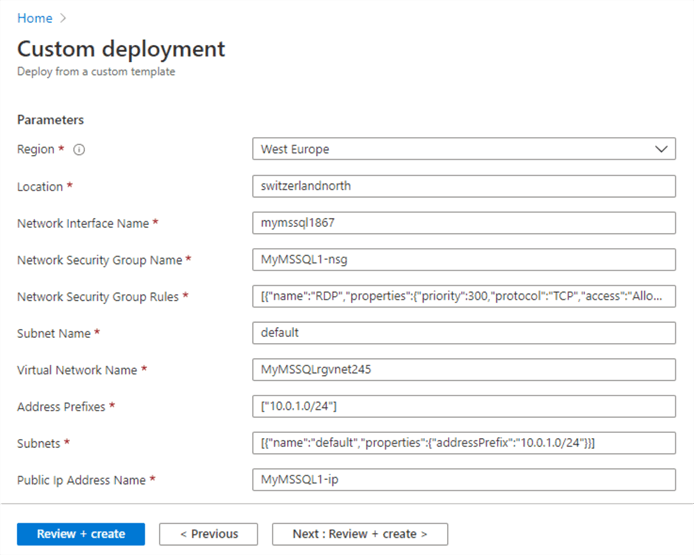
Confirm that all are correct and click on the "Review + create" button. It will validate before creating the VM.
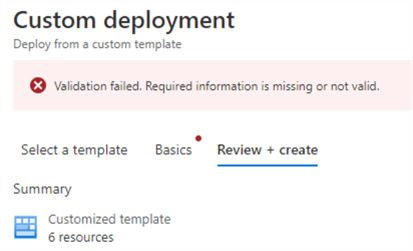
If you see the following message, it's because you missed at least one parameter, return and provide the necessary values:
If validation is successful, you'll see the following message:
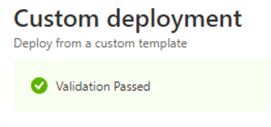
Click on the Create button to start the deployment. You'll see a screen with the deployment information:
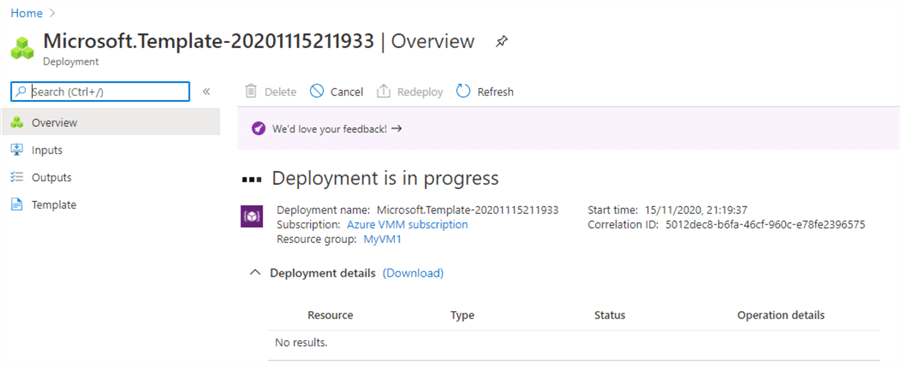
Depending on what you are deploying, it can take varying amounts of time. In the case of a VM, you'll see in the Deployment details the creation of all the necessary resources for the Azure VM creation. When the Deployment is complete, you'll see a similar screen to the following:
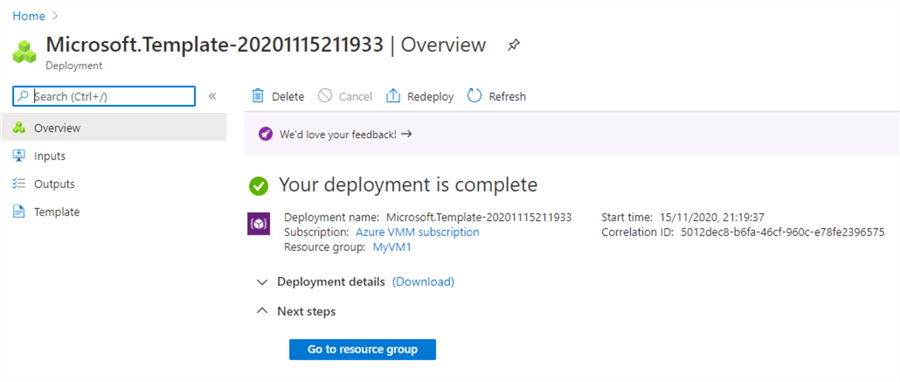
Click on "Go to resource group" as shown above to go to the newly create Azure resource group. Your Azure VM has been created and you can start using it immediately:
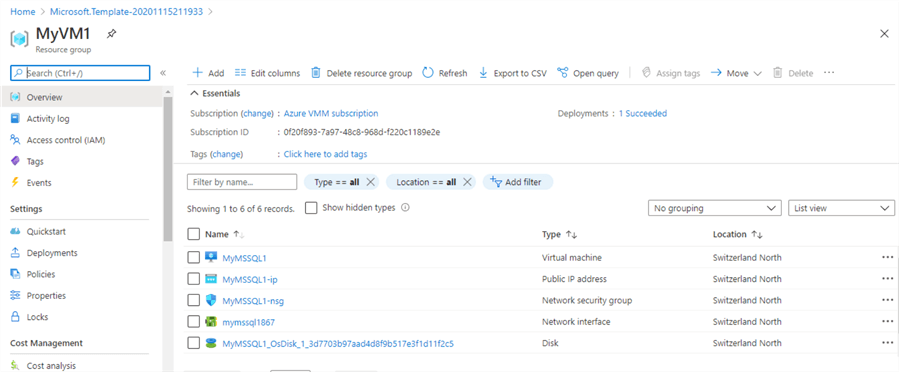
You and your team can start to use this and other templates for development. You can also store the templates in your team GitHub repository to share with all team members. This will reduce the creation and deployment times of your Azure resources.
Next Steps
- Learn more about the Azure VM deployment best practices.
- Check out on how to reduce and optimize costs in Azure.
About the author
 Vitor Montalv„o is a SQL Server engineer with 20 years of experience in SQL Server, specializing in performance & tuning, data modelling, migration and security.
This author pledges the content of this article is based on professional experience and not AI generated.
View all my tips


