Problem
In this tip we will examine how to configure different behaviors for fields in SharePoint Online Forms customized with Power Apps. The default SharePoint list and library forms offer limited capabilities, so we show how this can be enhanced with Power Apps.
Solution
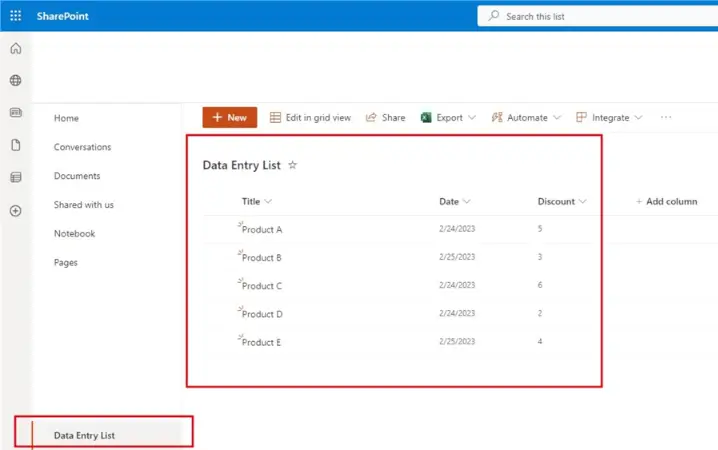
We will examine a scenario in which users fill in certain business KPIs into a SharePoint online list. However, the form they use is enhanced with PowerApps. This enhancement provides a plethora of options for beautification and business rules implementation. The same can be applied to Document Library forms too. This is part 2 of this tip in which we will focus on fields. Part 1 focused on forms.
Fields
The fields you can add to a Power Apps form correspond identically to the number and type of columns you have in your SharePoint list or library. The form control additionally allows us to add or remove fields, configure their behavior (e.g. enable, disable, make required) or format their text input, background border and other properties. Here we will focus on modifying their behavior properties.
Remember Power App does not (yet) support working with list content types. You can use the built-in field Content Type, add it to a form and configure field visibility according to the selected content type.
Here is the list of the requirements we had previously:
Title field
The Title field is frequently not needed in a form, and this is also the case here. We have two options for it:
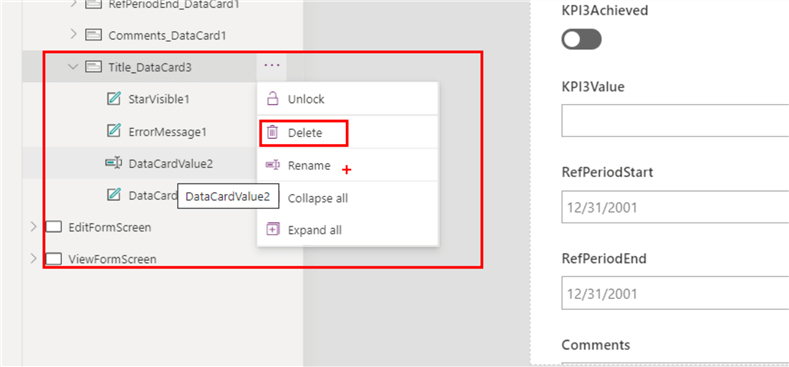
Make it not required and hide it from the form. To do so, select the field, then on the right pane unlock the field. Then choose the Required property and set it to false.

Once that is done, select the field from the list on the right and delete it. Removing fields prior to ensuring they are not required may prevent you from saving the form. Additionally, a field that is required for the content type is automatically set to required in the Power Apps form, but the reverse is not true. This fact means Power Apps gives you more flexibility for setting the Required property.
Alternatively, we can put some basic identification for our list item by automatically filling the Title column value with the initials of the author and the current data. This is the formula for it:
Left(
    First(
        Split(
            User().FullName,
            " "
        ).Result
    ).Result,
    1
) & Left(
    Last(
        Split(
            User().FullName,
            " "
        ).Result
    ).Result,
    1
) & "-" & Text(
    Today(),
    "[$-en-US]mmddyyyy"
)
The formula splits the name of the user by an empty space and takes the initials of the first and last name. Then the current time is concatenated while being formatted to display month, day and year without slashes. Also, notice the built-in Power Apps formula language property called Result. It is particularly handy when you use Split or other formulas that output an array. With Result you can access the scalar value out of the array.
KPI Achieved fields
All the KPI Achieved fields must be mandatory. Let’s look closer though what a field (or data card in Power Apps) consists of:
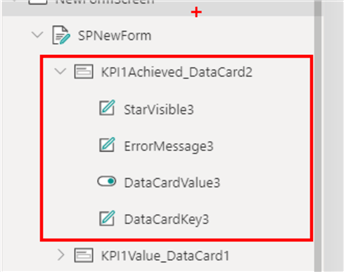
By default, every data card has:
- StarVisible: label shown if the field is required. Its Visible property by default is set to:
And(
    Parent.Required,
    Parent.DisplayMode = DisplayMode.Edit
)
- ErrorMessage: allows you adjust the position and text of the error message in case a user skip filling in the field
- DataCardValue: the object you can refer when the you need the value from the field
- DataCardKey: the object that acts like a title of the field
So, we can select the DataCardValue field for the KPI Achieved data cards and set the Required property to true in case this configuration has not been done on the list.
KPI Value fields
All our value fields must be mandatory if the corresponding KPI Achieved is true. To achieve this, we must access the Required and the DisplayMode properties:
| Property | Formula | Comment |
|---|---|---|
| Required | If( KPI1AchievedValue.Value, true, false ) | KPI1 Achieved? column is a true/false one, so we don’t have to write KPI1AchievedValue.Value = true in the If-statement because the value itself is either true or false. |
| DisplayMode | If( KPI1AchievedValue.Value, Edit, Disabled ) | It is helpful to provide visual clues. Therefore, if the KPI is not achieved, we set the display mode of the relevant KPI value field to Disabled or Edit accordingly. Alternatively, we could manipulate the visible property and hide the data card completely. |
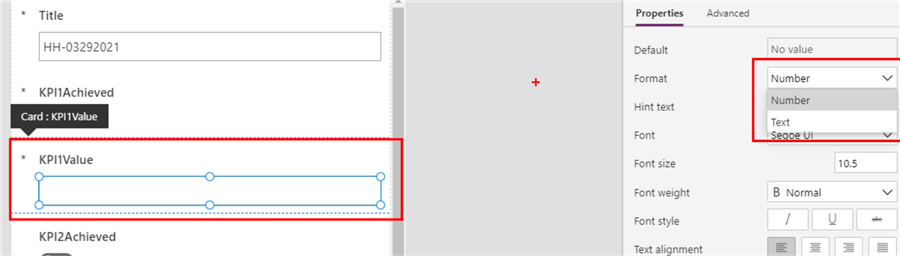
Format the field input as number
The expected data type of the input is important to be set correctly. If you select the value field, the Format setting in the right pane has two options. Number will be selected by default if the SharePoint column is numeric.
Reference Period Start field
To showcase some of the functionalities for date and time in Power Apps, we must set the Reference Period Start column default value to the first of the current month. This can be achieved by passing the following formula to the DefaultDate property of the data card value field:
DateAdd(
    Today(),
    -Day(Today()) + 1,
    Days
)
We use the DateAdd() formula to which we pass:
- Date: Today() which is a built-in object in Power Apps. Now() does the same trick.
- Number of units: because we want the 1st of the current month, we subtract the number of days elapsed. We add 1 as an offset to make sure we don’t go to the previous month.
- Units: Days, which is a built-in parameter of the DateAdd() formula.
Reference Period End field
To make sure the default data is set to the end of the current month, we must again change the DefaultDate property:
Switch(
    Month(RefPeriodStart.SelectedDate),
    1,
    DateAdd(
        RefPeriodStart.SelectedDate,
        30
    )
    /*repeat for the other 11 months accordingly*/
)
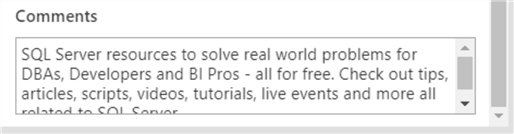
Comments
By default, the Mode of all value fields is set to Single line. We can change that to Multiline for the Comments.
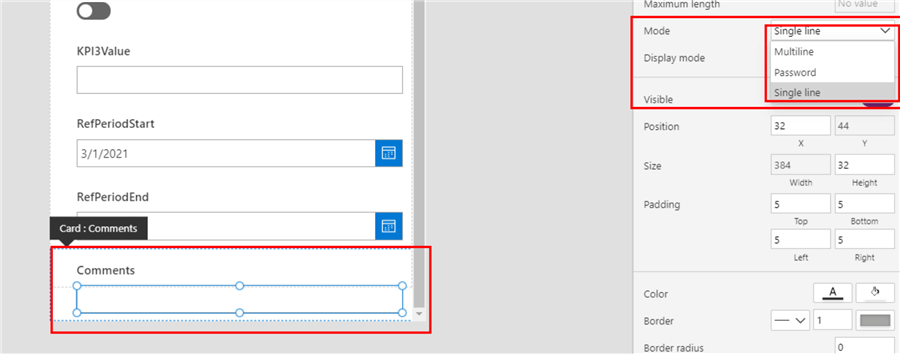
Additionally, we should set the Height property of the value field to suitable number, e.g. double or triple the default of 32. As a result, the Comments field will be properly formatted and automatically insert a vertical scrollbar when the text is too long.
Requirement’s Overview
Did we answer all requirements? Let us see:
- All users must be able to create items:
- Yes, by default a NewForm is configured for the NewScreen. In a similar way you may completely disable list input by leaving the OnNew property blank.
- Only certain users can edit existing items
- If you are not the admin, the SPEditForm is in View mode. This should be coupled with disabling Quick edit and/or appropriate user permissions.
- Title column is not needed at all
- Required is set to
falseand the field is removed.
- Required is set to
- All columns are required but if any of the KPI Achieved? Yes/No columns has value “No”, the corresponding KPI Value column is not required
- We have implemented a conditional formula for both the Required and DisplayMode properties.
- Start of reference period must be in the previous month
- Achieved by using the DateAdd formula
- End of the reference period must be + 30 days
- Also achieved by using the DateAdd formula
- Comments must be high and wide enough for multiple lines of input.
- Configured by changing the text mode and height of the value field.
As a final note, do not forget to copy or adjust the modifications of the data cards of the New form to the other forms of your SharePoint form Power App.
Next Steps
- Review Part 1
- Understand data cards in Power Apps
- Understand SharePoint forms integration
- Power Apps formula language.

Hristo Hristov is a seasoned data professional with 10+ years of experience spanning the intersection of data engineering and smart manufacturing solutions. Since 2017, he has specialized in implementing advanced analytics solutions for bridging the IT/OT gap.
A technical writer with over 80 published articles on data and AI technologies, Python development, and cloud solutions. Passionate about transforming complex data into business value through innovative applications of Azure Data Platform, Python, IoT solutions, databases, and other cloud technologies.
Currently applying Industry 4.0 best practices, focusing on IoT connectivity, and implementing data and AI systems in manufacturing. Hristo holds a degree in Data Science and several Microsoft certifications covering SQL Server, Power BI, and related technologies.
- MSSQLTips Awards
- Achiever Award (75+ tips) – 2026
- Rookie of the Year – 2021
- Author Contender – 2022/2023/2024/2025