Problem
You might send emails at work frequently (hourly, daily, weekly, or monthly). Do you find that there are times when you need to remember to do so? Or, when you are out of the office, do these emails need to wait until you return? The good news is that you can automate these emails based on your chosen schedules using Power Automate.
Solution
There are many scenarios where you can leverage automated email generation. But for this tip, I will describe how you can set this up using your email account and a distribution list or shared mailbox with Power Automate.
The image below demonstrates a summarization of how the entire process works.

Sample Scenarios for Automated Email Schedules
Although many scenarios might prompt you to automate your email creation, I will narrow these down to the options below.
- Sending emails from your O365 Outlook account to another O365 Outlook account at work
- Sending emails from a Shared O365 Outlook account or Distribution List to a group of emails at work
Sending Emails from O365 Outlook Account to Another O365 Outlook Account at Work
This is when you need to send an automated email from your personal O365 account to another O365 Outlook account at work. You can use the “Send an email (V2)” action in Power Automate by following the steps below.
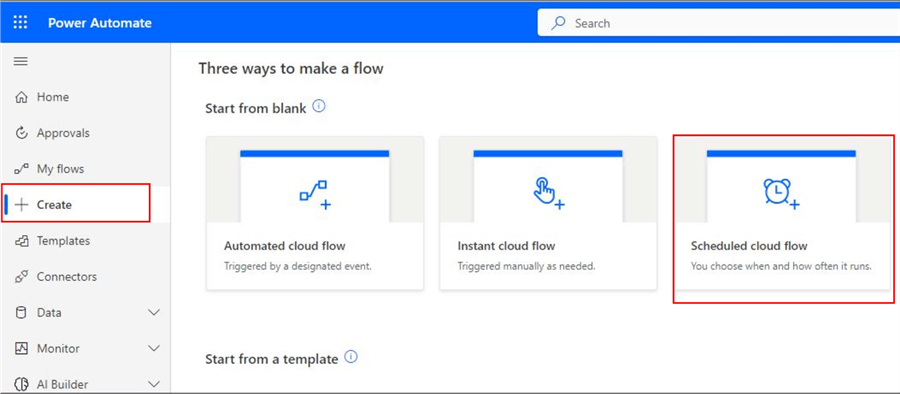
Step 1: Open the Power Automate Tool and Create a Scheduled Cloud Flow
To begin, open Power Automate at https://make.powerautomate.com/. Click “Create” and select “Scheduled cloud flow,” as seen in the image below. This will allow us to schedule when and how the emails should be sent using a trigger for this scenario.
A new window will open where you will enter a name for the flow; I called it “Send email to Test team,” as seen in the image below. Next, you will provide the start date, time, and frequency you want the emails to be sent. I have completed this demo to be triggered and sent at 9:00 am every Monday, as seen in the image below. After entering the data, click Create.

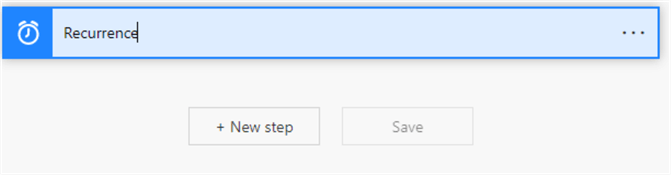
Step 2: Add a New Action Step to Configure Details about the Email
To configure this step, click “+ New step” at the bottom of the page, as seen in the image below.
Search for “Send an email (V2)” in the search bar and choose this action from the list, as seen in the image below.

A new window will appear where you will specify the email addresses of the people you are sending the email to in the “To” section. I have entered just a single email address, but you can add more to this section. Next, add a subject and an email body as you prefer. See the image below.

The “To,” “Subject,” and “Body” are the mandatory sections in this action in that you must enter values. There are further advanced options that you might also like to configure. To do this, click “Show advanced options” at the bottom left (seen in the image above). The image below shows the available advanced options, which I will not go into much detail. Since I am using my O365 Outlook account for this demo, I do not need to re-enter my email on the “From (Send as)” section as it would already recognize my account.

Step 3: Save and Test Your Flow
The next step is to save your work and test the flow. Once saved, you should see a notification at the top left if it’s successful, as seen in the image below.
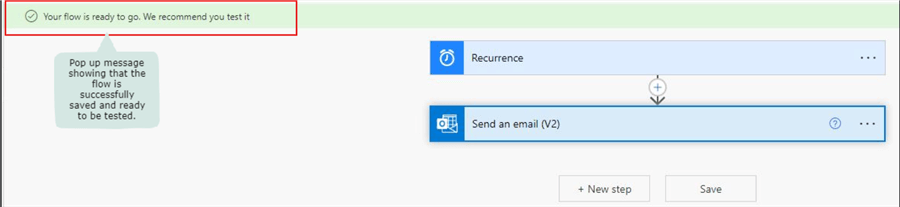
After testing the flow, you should see another notification, as in the image below. You can also check with the email accounts to be double sure.

Sending Emails from a Shared O365 Outlook Account or Distribution List to a Group of Emails at Work
When leveraging a Distribution List account to send automated scheduled emails, there are some prerequisites you should be aware of first, and include:
- Ensure you are added to the Distribution List
- Ensure you have a “Send As” permission assigned for you alongside other permissions
Check with your O365 Admin to verify your permissions before configuring the Power Automate flow. It will fail to trigger if you do not have the correct permissions, even if it runs successfully when manually tested.
This demo is related more to sending scheduled emails using a Distribution List in Microsoft O365 Outlook.
Step 1: Open the Power Automate Tool and Create a Scheduled Cloud Flow
See Step 1 in the previous scenario, as it is identical, so refer to that section.
However, Step 2 below has differing actions.
Step 2: Add a New Action Step to Configure Details about the Email
Search for “Send an email from a shared mailbox” action from the “Choose an operation” search box, and select the “Send an email from a shared mailbox (V2)” option, as seen in the image below.

A new window, like the image below, should open.
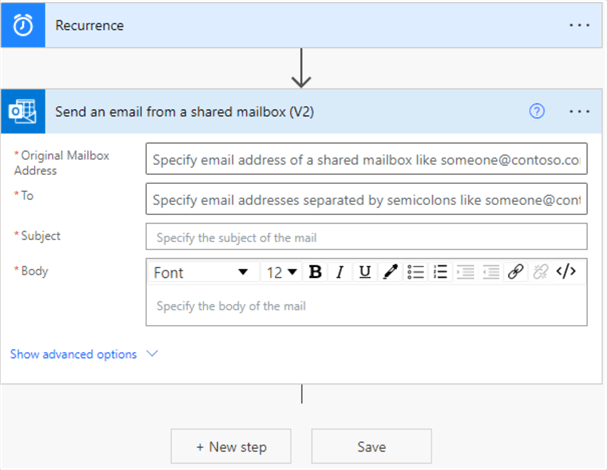
As highlighted in the image below, enter the specific information for this email instance into the following sections:
- Section 1: Enter the Distribution List account.
- Section 2: Enter the email accounts to which you need to send the emails, separated by semicolons where applicable.
- Section 3: Specify a subject for the scheduled emails.
- Section 4: Add a body message for your email.
These sections are mandatory to complete this step.

However, advanced options are available, highlighted in the image below. In the example, I have provided an email account where replies can be sent. Note: This can be the same Distribution List account or an O365 personal Outlook account.

Step 3: Save and Test Your Flow
The last step is to save the flow and test it. This is similar to Step 3 in the previous scenario.
In summary, you should schedule the flow trigger according to your business or personal requirements. Also, it is worth noting that you can use dynamic contents in configuring your email schedules, but I have done this demo without dynamic contents for simplicity. See Next Steps about how to achieve using dynamic content if you wish to learn more.
Next Steps
- Read this Microsoft documentation on creating email flows: Create flows for popular email scenarios.
- Dynamic content was greatly covered in this Enterprise DNA article: Power Automate Dynamic Content Overview.
- Check out my other articles on Power Automate.

Kenneth A. Omorodion is a Microsoft Certified Solutions Associate (MCSA) with 12+ years of enterprise application experience in Power BI, DAX, Microsoft Fabric, Business Intelligence, data warehousing, SSRS, T-SQL, and Azure. Beyond his technical skills, Kenneth has expertise working with stakeholders’ and business leaders to help them better understand key insights. He has a great track record of successfully delivering full life cycle Business Intelligence and data solutions to organizations with measurable business impact.
- MSSQLTips Awards
- Achiever Award (75+ Tips) – 2025
- Author of the Year-2021
- Author Contender-2022/2023/2024