Problem
If you develop mobile apps for smartphones (iPhone, Android, etc.) with Power Apps, you may require encoding a certain record and providing a physical link. How can you generate dynamic QR codes in a PNG format that points to a specific record in your app?
Solution
This tip will present a QR code generator solution, including a canvas Power App with a form control and an Azure function with Python runtime. This combination will enable generating a QR code and use it to link back to a record in the app.
Solution Elements
The solution consists of a canvas Power App and an Azure function. Let’s examine these two elements more closely.
Power App
For this setup, we will need a simple Power App consisting of two screens. The first screen includes a gallery displaying all items in our database of fruits and their available quantity:

The second screen contains a form control. It will be used for adding new items to the database. Additionally, we have a Save and a Cancel button:

To find out more about screens in canvas Power Apps, check out: Add a screen to a canvas app and navigate between screens.
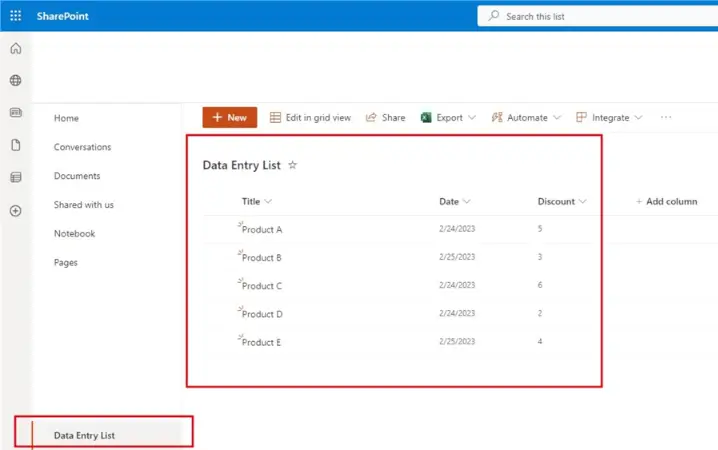
Backend
The backend of the app consists of a single Dataverse table with three custom columns:
- Name, primary name column, single line of text
- Description, single line of text
- Weight, decimal
The same backend can also be implemented with an SQL Server table. This is especially relevant if your app will handle excessive amounts of transactional data (e.g., more than 2 mil rows at a time in the table).
Azure Function
To develop the QR-generating functionality, we will use an Azure function with an HTTP trigger and Python 3.9. runtime. Here is how to get started developing the function:
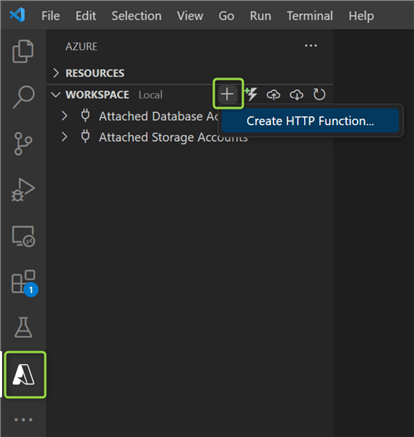
Step 1: Open VS code
Click the Azure extension. If you do not have it available, you can install it from the Extensions Marketplace. Under the workspace section, click Add and Select HTTP trigger:
Step 2: Follow the prompts
Select language:

Select environment:

Give the function a name:

After completing these steps, VS code will create a virtual environment for the function, the __init__.py file containing the core logic, as well as other project files required for the function to run:

If this is your first time working with Azure functions, I suggest checking out this tutorial: Quickstart: Create a function in Azure with Python using Visual Studio Code.
Step 3: Python Code
Now we must modify the boilerplate template of the __init__.py file. We need a method that will take care of the QR generation. To create this method, we must import some extra modules:
| Module Name | Install | Description |
|---|---|---|
| io | should be preinstalled | Required for converting the output image to a bytes’ array |
| qrcode | pip install qrcode | Required for generating a QR code as an image |
| Image | pip install pillow | Required by the qrcode module. Alternatively, you can just run pip install qrcode[pil] Still, keep in mind that an image cannot be served back directly; you will get TypeError: response is expected to be either of str, bytes, or bytearray, got PilImage. |
You can run these install commands in the VS code terminal. Beware: You must have activated the virtual environment first, or you might install these packages in another environment (such as the default one on your system). If you do not see .venv prefixed in your terminal output directory, navigate to the folder where the venv is hosted:
Activate it:
After activating, you can install the needed package, for instance, qrcode:
Having the additional modules available, this is how the complete code in __init.py__should look:
01: import logging
02: import qrcode
03: from io import BytesIO
04: import azure.functions as func
05:
06: def generate_qr(name: str, app_id: str):
07:     url = f'https://apps.powerapps.com/play/{app_id}?tenantId=556e6b1f-b06eeefc8e9&name={name}'
08:
09:     #Creating an instance of qrcode
10:     qr = qrcode.QRCode(
11:         version=1,
12:         box_size=3,
13:         border=3)
14:     qr.add_data(url)
15:     qr.make(fit=True)
16:
17:     img = qr.make_image(fill='black', back_color='white')
18:     img_byte_arr = BytesIO()
19:     # convert to png file
20:     img.save(img_byte_arr, format='PNG')
21:
22:     return img_byte_arr.getvalue()
23:
24: def main(req: func.HttpRequest) -> func.HttpResponse:
25:     logging.info('Python HTTP trigger function processed a request.')
26:
27:     if req.method == 'GET':
28:         try:
29:             name = req.params.get('name')
30:             app_id = req.params.get('appid')
31:             qr_img = generate_qr(name=name, app_id=app_id)
32:
33:             return func.HttpResponse(qr_img, mimetype='image/png')
34:
35:         except:
36:             logging.error('Wrong request body.')
37:             return func.HttpResponse('Wrong request body.')
38:     else:
39:         func.HttpResponse('Only GET request supported.')
The generate_qr function takes care of generating a QR code with two required parameters:
- A unique id for our record (in this case, the parameter
name) and, - The app id, which is globally unique and required for the absolute URL of the app to work.
The tenant id is also required, but I have decided not to make it a parameter. Unless you are working with a multi-tenant solution, you can leave it hardcode in the url variable.
In the code above, lines 10 to 15 create the QR code. In lines 17 to 20, we convert the output to a ByteArray so that it can be served as a function response. Lines 24 to 37 contain the main function. On line 25, we log a message to the function’s analytics workspace using the helpful logging package available by default when creating a Python function. On line 27, we explicitly check the request – it must be a GET one. This should also be enforced via the function configuration file (function.json):

Additionally, I have set the authLevel attribute to “function.” With this setting, a code will be required to call the function.
In the try block (lines 28-33), we extract the needed parameters from the query string (name and app_id) and pass them on to the QR generator function. Next, we serve the result as a function response of “mimetype png.” This type of response will be visualized in the browser and can be printed out directly. Finally, under the except statement (lines 35-37), we can log a custom error message and serve a meaningful error.
Step 4: Deploying the Function to the Cloud
To begin deployment, run pip freeze > requirements.txt in the terminal after navigating to the api subdirectory. This action will add all installed packages to the function module requirements file (requirements.txt):
Next, create a resource in Azure (if you do not have one yet). Click Create Resource in the resource section and select Create function app:

You will then be prompted to select the target subscription (depending on your environment), runtime stack (Python 3.9), and location (usually one closer to you, I chose West Europe). There will be a warning message displayed to select a resource group:

Click Select Existing, and you will need to choose an existing resource group. Once everything is successful, you will get a confirmation in the terminal:

Now, click the Deploy button in the workspace section and select Deploy to Function App…:

You will be prompted to pick the target subscription and resource, then confirm deployment:

If everything works as it should, there will be a confirmation of a successful deployment:

We can now test the function directly in the browser by visiting the link with the correct query string parameters provided:
The code can be found in the Function Keys section of your function in Azure. The result will be a QR code served back:

The size and overall appearance of the code can be adjusted from the generate_qr method. I have left a link to the qrcode package documentation in the Next Steps section.
Putting It All Together
Creating a QR Code from the App
To create a QR code from the app, we can pass the function endpoint to the Power Apps Launch function connected to the Save form button:

The function code and app_id are global app variables but can also be environment variables, depending on the scenario. The Nameof the fruit we take from the built-property LastSubmit of the NewForm. Since we are doing a GET request, we can easily pass the endpoint to Launch.
We can now create a new item:

Once we click the Save button, the data will be saved to Dataverse, and we will get a QR code in a new browser tab. From there, it is easy to print or save the code directly.
Scanning a QR Code from the App
To retrieve a record, we need to use a variable for the name of the fruit and filter the gallery in the HomeScreen by that variable upon scanning a QR code. First, let’s initialize a variable on the OnVisible property:

Then change the Items property of the gallery:
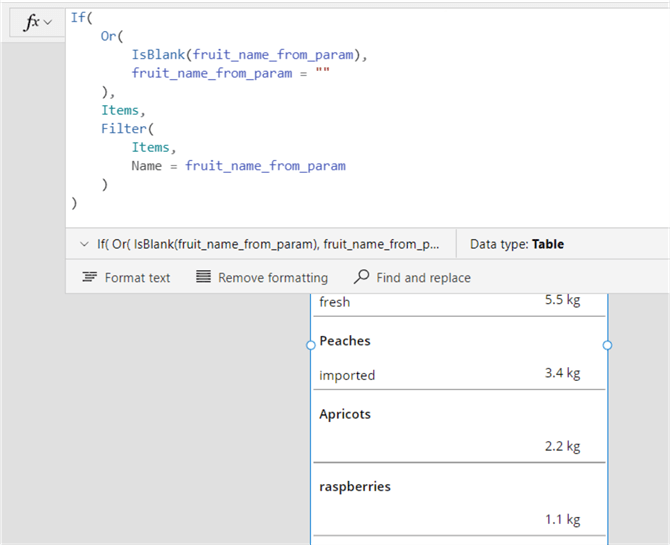
If(
    Or(
        IsBlank(fruit_name_from_param),
        fruit_name_from_param = ""
    ),
    Items,
    Filter(
        Items,
        Name = fruit_name_from_param
    )
In case there is no parameter passed, we will display all records. Otherwise, we will filter by it. Next, on the header, I also added the Power Apps barcode control and modified its OnScan property:

UpdateContext(
    {
        fruit_name_from_param: Right(
            BarcodeScanner1.Value,
            (Len(BarcodeScanner1.Value) - 120)
        )
    }
)
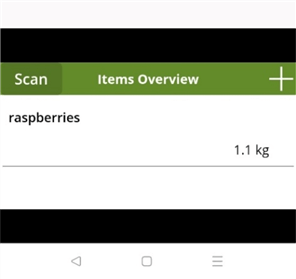
Thus, we can extract the name of the fruit from the query string that is parsed from the QR code into the helper variable. The character length is 120 of the URL, up to the start position of the name of the fruit. Now, we scan from the app:

The gallery will be filtered according to the name that was extracted from the encoded URL in the QR code:
Conclusion
With the help of an Azure function, we have created a Power Apps solution that allows generating a custom QR code, serving it in the browser, and finding a record back by scanning from the Power App. The QR code becomes a universal visual identifier of the unique underlying record. The code can also be scanned from outside Power Apps, for example, with Google Lens.
Next Steps

Hristo Hristov is a seasoned data professional with 10+ years of experience spanning the intersection of data engineering and smart manufacturing solutions. Since 2017, he has specialized in implementing advanced analytics solutions for bridging the IT/OT gap.
A technical writer with over 80 published articles on data and AI technologies, Python development, and cloud solutions. Passionate about transforming complex data into business value through innovative applications of Azure Data Platform, Python, IoT solutions, databases, and other cloud technologies.
Currently applying Industry 4.0 best practices, focusing on IoT connectivity, and implementing data and AI systems in manufacturing. Hristo holds a degree in Data Science and several Microsoft certifications covering SQL Server, Power BI, and related technologies.
- MSSQLTips Awards
- Achiever Award (75+ tips) – 2026
- Rookie of the Year – 2021
- Author Contender – 2022/2023/2024/2025