Problem
In a previous tutorial, I have written on how to combine multiple files from multiple folders in Power BI, but in that case the number or names of the columns was fixed. In this tutorial, we will look at how to combine files in Power BI when we are expecting column names or column numbers to change at any time, I mean when the column names or numbers are expected to change.
Solution
To demonstrate this, l will first demonstrate how we combine two datasets with fixed number of columns in Power BI and then demonstrate what happens when we have additional files to be combined but with additional fields and changed field names.
The sample datasets we will be combining are as seen in the diagrams below.

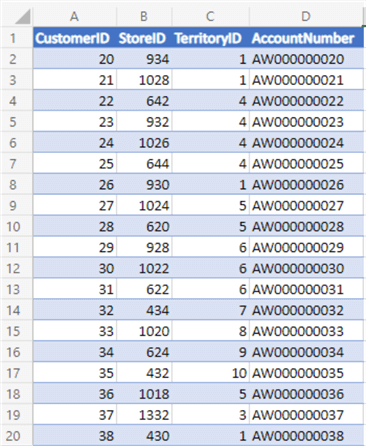
Both datasets above have four columns and the same column names, so it would be seamlessly combined in Power BI. Assuming these datasets are in SharePoint folders as seen in the diagram below, then we can combine them as follows.
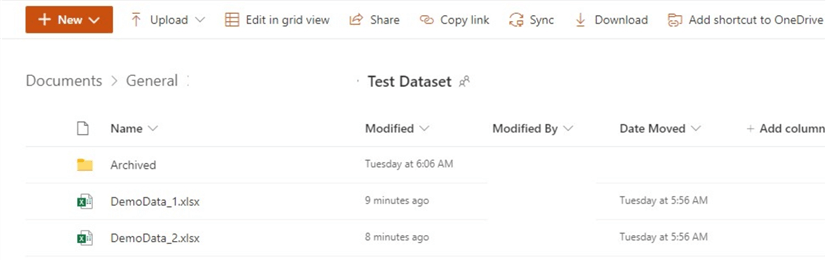
Get the URL of the SharePoint folder where the Power BI datasets are located. See this article on how you can get the root URL for the SharePoint folder and connect to Power BI.
Next, we expand and combine the two datasets above as seen below.

The above action would usually combine as many datasets in Power BI into a table as seen below.

But as soon as we include a third dataset with additional columns in the SharePoint folder, the new additional columns will not automatically show in the combined table. This is as shown in the diagram below.

To ensure the new columns show in the combined table, follow the steps below.
Step 1: Add the new dataset with additional columns.
To demonstrate this, I have used the dataset below. As can be seen, the new dataset has six columns, unlike the initial two datasets with four columns each.

The three datasets are as seen below while being combined in Power BI.

Step 2: Next, as usual we will just click on the expand point on the “Content” column.
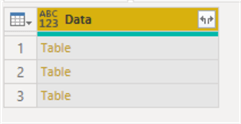
Step 3: Then, remove other columns except the “Data” column as seen below.

Once the above step is done, we are only left with the “Data” column as seen below.
Step 4: Next, we need to click on the expand point on the “Data” column as seen in the diagram below. Then click “Load more” to continue. This will now ensure all columns from all datasets are included in the combined table

The new columns are as seen in the combined table below.

But this is still not future proofed, as when there are other new columns on new datasets in the future, you would either manually repeat Step 4 or you would not see the new columns too. So, how do we automate this process to recognize additional (new) columns in the future without the need of manual resolution each time. To do this, do the following.
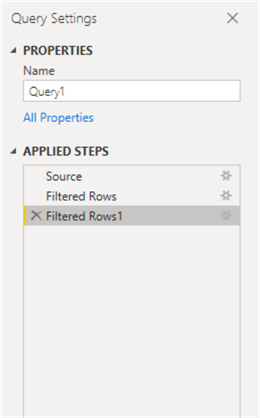
First, you need to navigate back in the “Applied Steps” up to the point where you “Removed Other Columns”, delete every step before that. See diagram below showing before deleting steps.
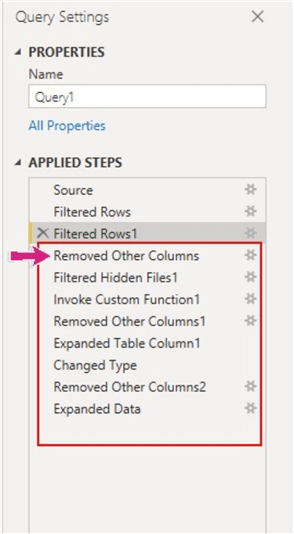
After deleting steps, you should be able to see the “Applied Steps” as like the diagrams below.

Next, you need to create a new column on the step above as seen below. In this case I have used “Custom Column” to add a new column to the step.

Then use the M Query as seen below to create the column.
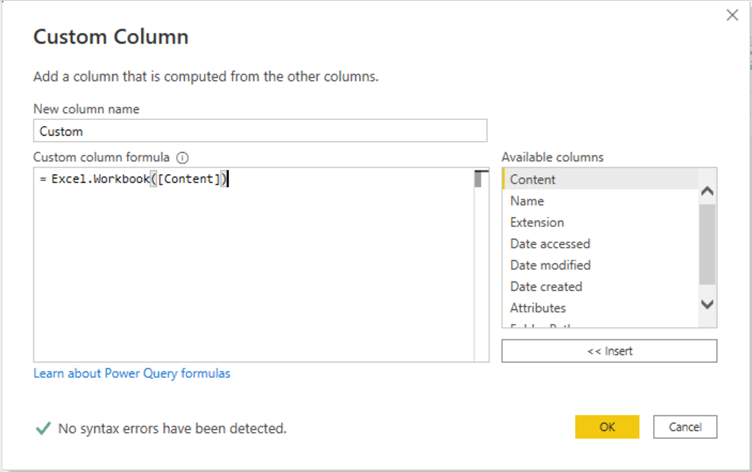
Excel.Workbook([Content])
Next, you need to remove other columns except the newly created “Custom” column.
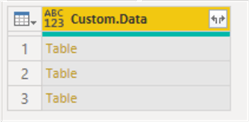
Next, click on the expand point of the column as seen in the diagram below, and then unselect other columns but only select the “Data” column as seen below. Then click “OK”.

The column created would now look like the one we had in Step 3 in the initial steps we did earlier as seen in the diagram below.
Thus, we would expect that if we repeat the expanding on the expand point as we have initially done, we end up with same issues as before where the actions to expand and include any new columns can only be done manually. Since we are planning on automating the expand actions, we will need to do one more action.
To do this, first you need to go to your “Applied Steps” and on the last applied step right click and select “Insert Step After” as seen in the diagram below.
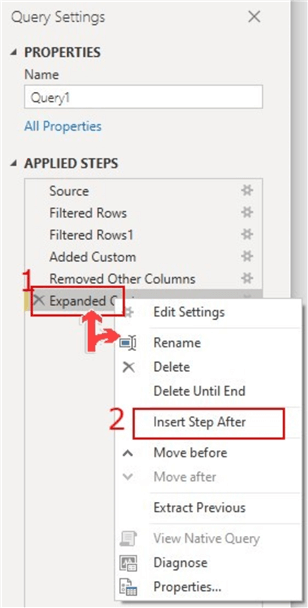
This would allow you to add a new step to your actions on this combined table by using a Power Query function “Table.Combine“. See diagram and query code below.

= Table.Combine(#"Expanded Custom"[Custom.Data])
That’s it! The automation is complete, you should now be able to see any new columns automatically in the combined table.
I want to give credit to Ruth Pozuelo of Curbal for most ideas behind this article. For those who don’t know about Ruth, she creates some great content on Power BI via her YouTube platform known as Curbal.
Next Steps
- Go through this Microsoft documentation on how the Table.Combine M Query function works.
- Go through this Microsoft documentation on how the Excel.Workbook M Query function works.
- See this article on Common Data Transformations in Power Query.
- See my other article on combining multiple files from multiple folders in OneDrive.
- Try this tip out in your own data as business requires.

Kenneth A. Omorodion is a Microsoft Certified Solutions Associate (MCSA) with 12+ years of enterprise application experience in Power BI, DAX, Microsoft Fabric, Business Intelligence, data warehousing, SSRS, T-SQL, and Azure. Beyond his technical skills, Kenneth has expertise working with stakeholders’ and business leaders to help them better understand key insights. He has a great track record of successfully delivering full life cycle Business Intelligence and data solutions to organizations with measurable business impact.
- MSSQLTips Awards
- Achiever Award (75+ Tips) – 2025
- Author of the Year-2021
- Author Contender-2022/2023/2024


