Problem
You’re running an ad-hoc query in a Microsoft SQL Server database with SQL Server Management Studio (SSMS) and need to further analyze the result set in an Excel spreadsheet. How do you export the data?
Solution
SSMS gives us a few options to get our results to Excel. As with most problems, there is more than one way to solve it so we’ll step through more than one solution that can all get us to the same place.
Getting Query Results from SSMS to Excel
These are the four methods of getting query results from SSMS to Excel we’ll be covering:
- Copy and paste from the results tab
- Save results as a delimited file
- Saving results directly to a fixed-width .rpt file
- Using the SQL Server Import and Export Wizard
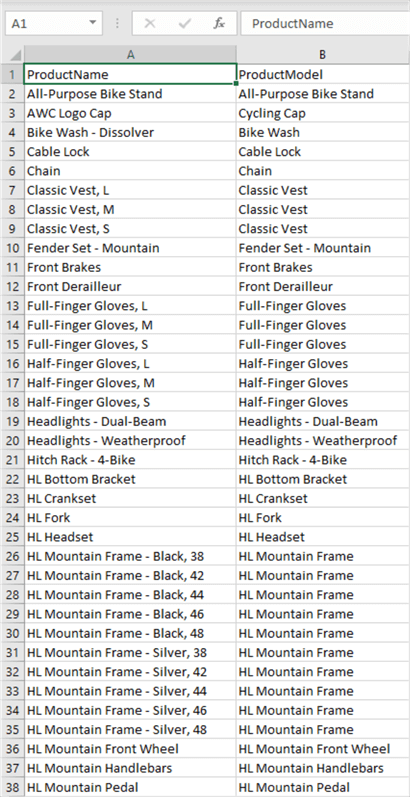
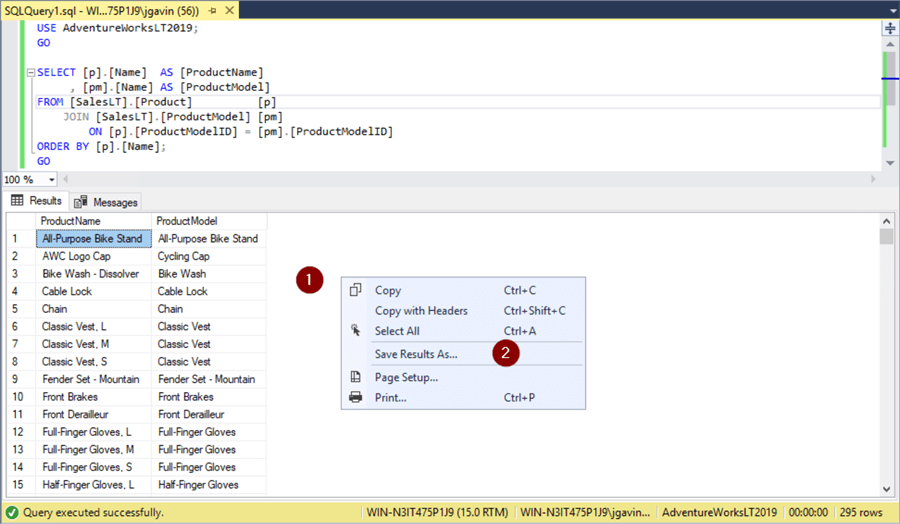
You would likely be working with a lot more data than this, but in the interest of keeping the screenshots clean and readable, and focusing on the solution instead of the data, we’ll run the following T-SQL query in an SSMS Query Window to obtain a list of product names and models from the AdventureWorksLT2019 database.
USE AdventureWorksLT2019;
GO

SELECT [p].[Name]  AS [ProductName]
      ,[pm].[Name] AS [ProductModel]
FROM   [SalesLT].[Product]      [p]
  JOIN [SalesLT].[ProductModel] [pm] ON [p].[ProductModelID] = [pm].[ProductModelID]
ORDER BY [p].[Name];
GO
Note: Examples were done with SSMS 18.11.1 which is the latest version as of this writing and Microsoft Excel for Microsoft 365.
Copy and Paste from Results Tab
This method requires the results to be sent to the default grid output. If the results are not going to the grid here is how to change it:
- Right-click in the Query Window
- Results To
- Results to Grid
Or simply Ctrl+D

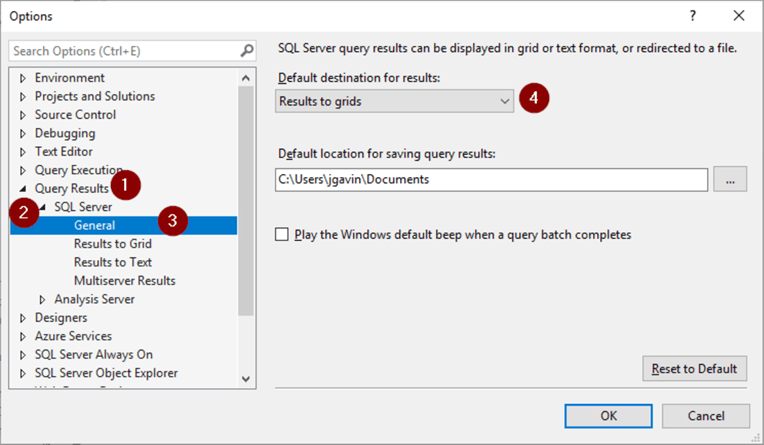
To make the setting permanent
- Tools
- Options…
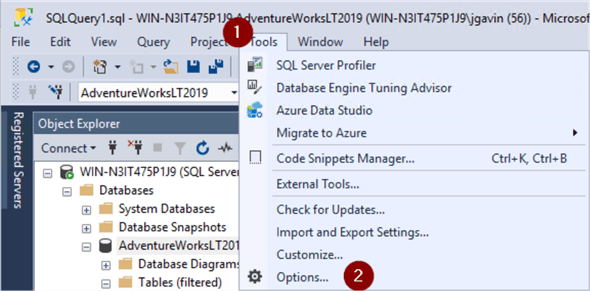
- Query Results
- SQL Server
- General
- Results to grids in the Default destination for results: dropdown
Okay, now we have our results going where we want them, we can quickly and easily get those results into Excel with a simple copy and paste. Note: you can also select a contiguous subset of the records but for this example, we’re presuming you’ve already filtered out what you want in the query.
- Click the box in the upper left-hand corner of the Results pane to highlight all records
- Click on Copy with Headers or Ctrl+Shift+C

Open a blank workbook in Excel
- Right-click
- Paste
Alternatively, Ctrl+V

And your results are pasted in the workbook and ready for your analysis.
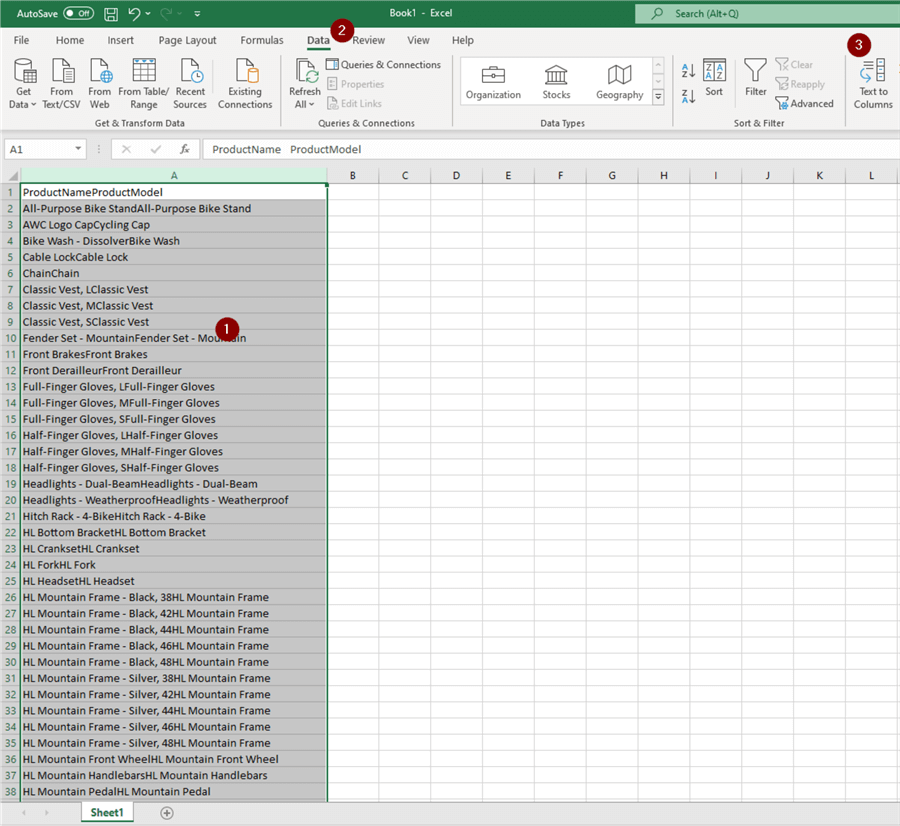
One annoyance you may run into is you paste your data into Excel and concatenates your columns and pastes everything into one column like this.
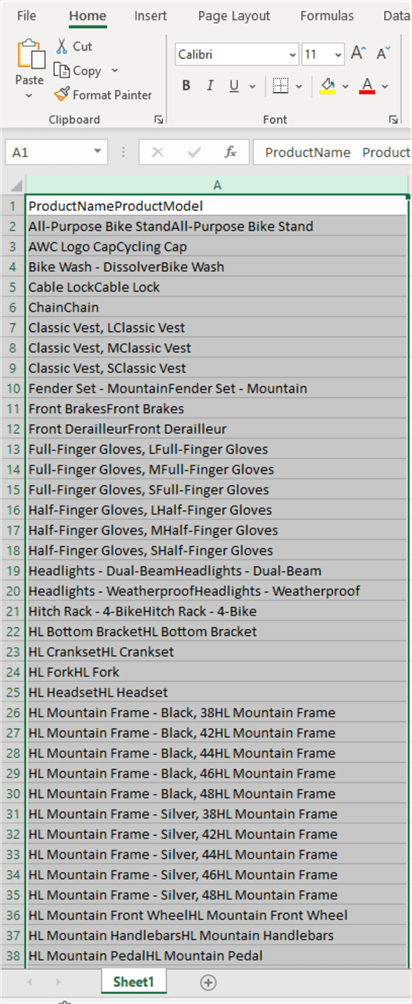
If this happens:
- Highlight the column
- Choose Data from the Ribbon
- ClickText to Columns
And the Text to Columns Wizard will open.
- Next
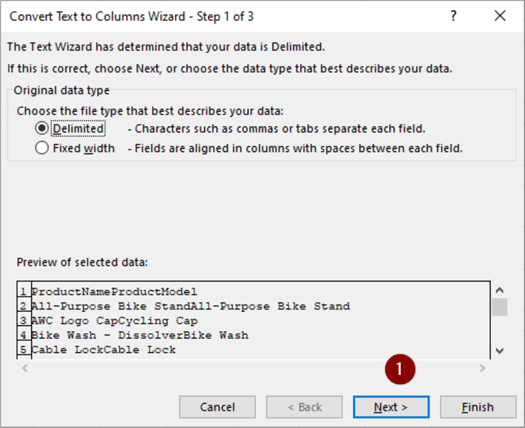
- Check the Tab box and be sure to uncheck any others
- Finish

Now each column is in its own Excel column where it belongs.
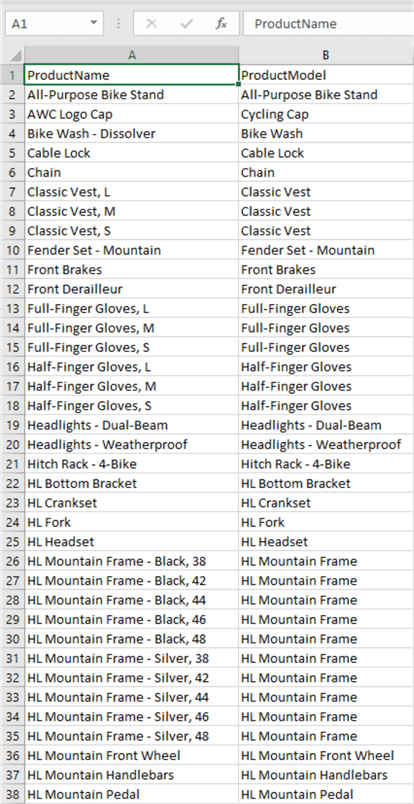
No need to save the change. Excel will remember it.
Save Results as a Delimited File
In addition to copying and pasting, SSMS also provides the ability to export the result set to either a comma delimited or tab delimited file that can be opened with Excel. Instead of highlighting and copying the results:
- Right-click in the Results window
- Save Results As…
- Select location to save the file
- Name file
- Select comma or tab delimited from Save as type dropdown
- Save

- Right-click file
- Open with and choose Excel
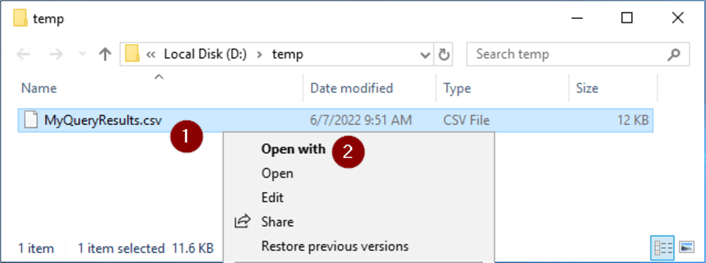
The file can now be saved as an Excel spreadsheet.
Saving Results Directly to a Fixed-Width .rpt File
Instead of a delimited file, we may want to work with a fixed-width file. SSMS also provides the functionality to output the results directly to a fixed-width file without going to the result pane.
- Right-click in Query Window
- Results To
- Results to File
Alternatively, Ctrl+Shift+F
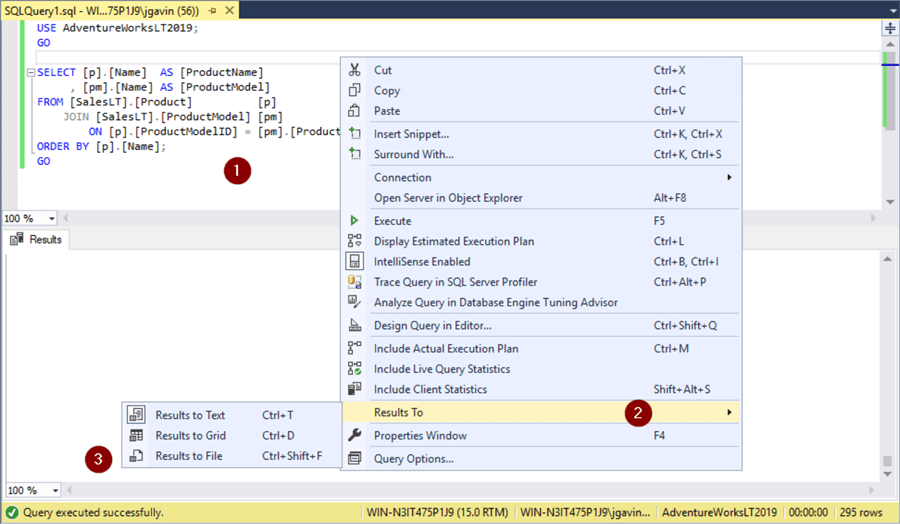
Run the query and you’ll be presented with a dialog box.
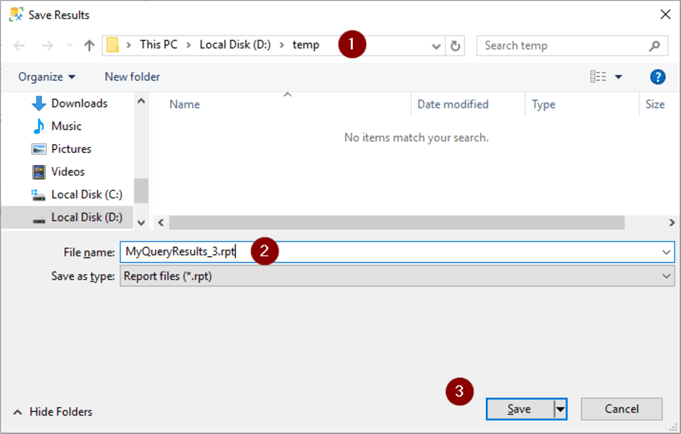
- Select the folder where you want to save the file
- Give the file a name
- Save
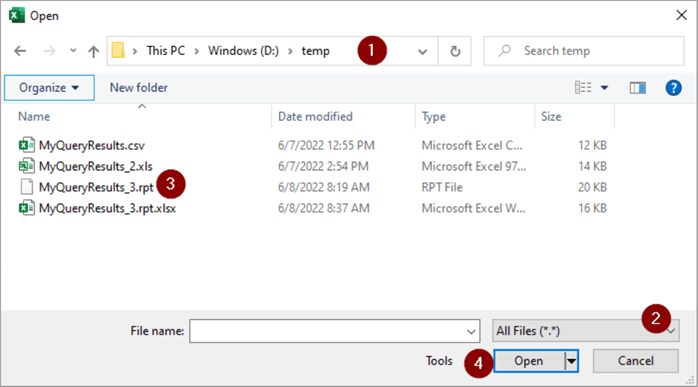
Open the file in Excel.
- Folder
- All files
- Click on file
- Open
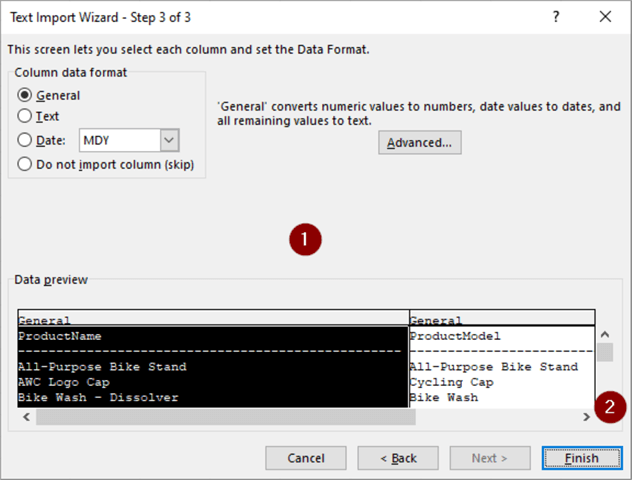
This will open the Text Import Wizard.
- Fixed Width instead of the default of Delimited
- Uncheck My data has headers. If you don’t have headers
- Next
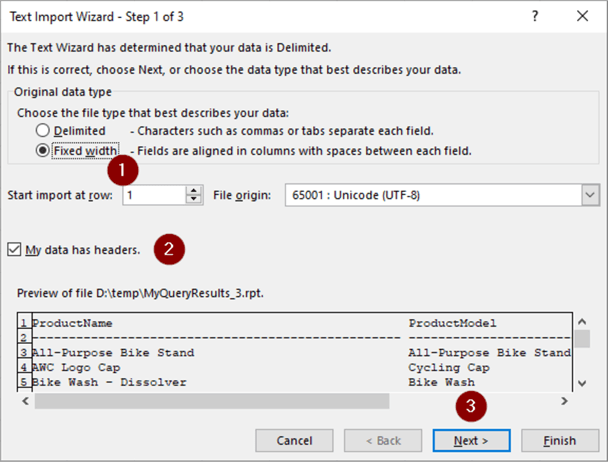
- Verify / edit break line(s)
- Next
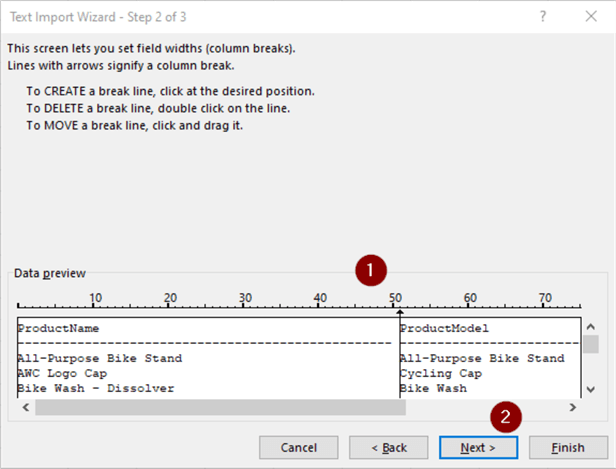
- Change data type if you wish
- Finish
Save as a .xlsx file.
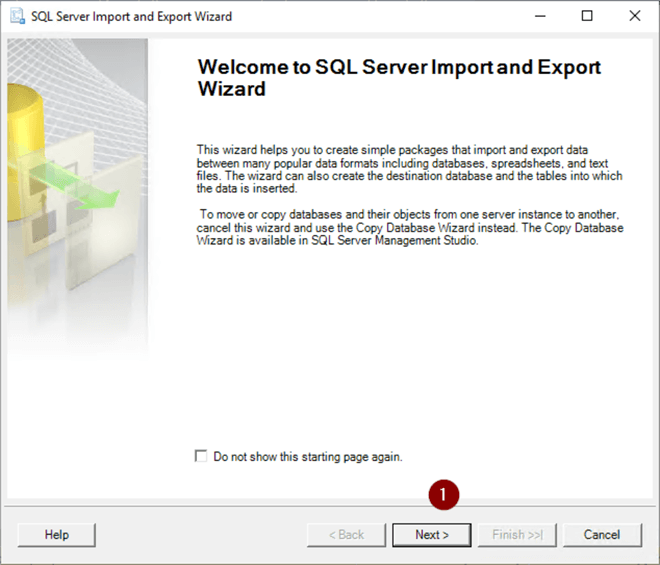
Using the SQL Server Import and Export Wizard
We can also use the built-in SQL Server Import and Export Wizard. The Import and Export Wizard is a tool that uses SQL Server Integration Services (SSIS) to copy data from a source to a destination via an SSIS Package. Here, the source will be the query to obtain a list of product names and models and we’ll export the results directly to an Excel file destination.
- Expand SQL Server in Object Explorer
- Right-click on the database you’re exporting from
- Tasks
- Export Data…

- Next
- Select Data source: from the dropdown
- Confirm or change Server name:
- Leave Use Windows Authentication (if you’re using the credentials you’re running SSMS or choose Use SQL Server Authentication and enter login and password)
- Confirm or change Database:
- Next

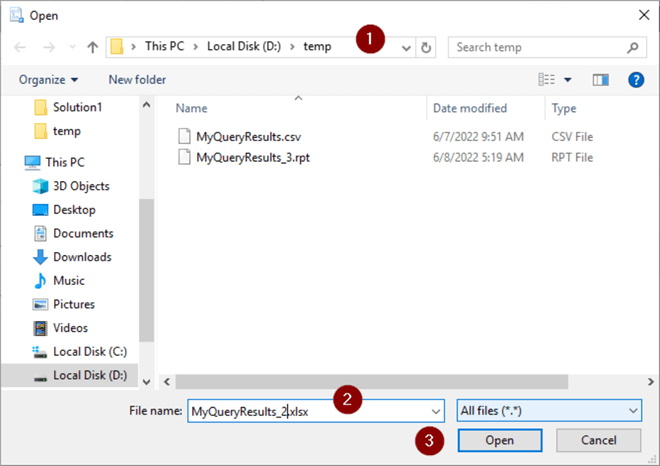
- Choose a location for destination file
- Name file
- Open
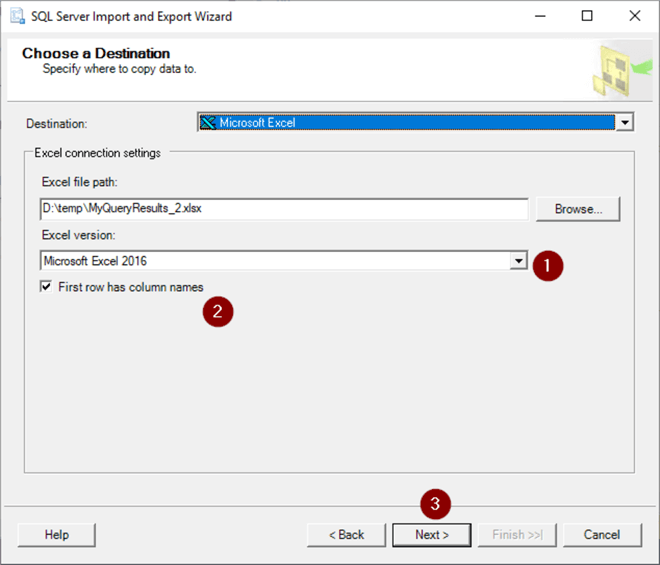
- Choose a version from the Excel version dropdown
- Leave the First row has column names checked if your data has headers, uncheck if not
- Open
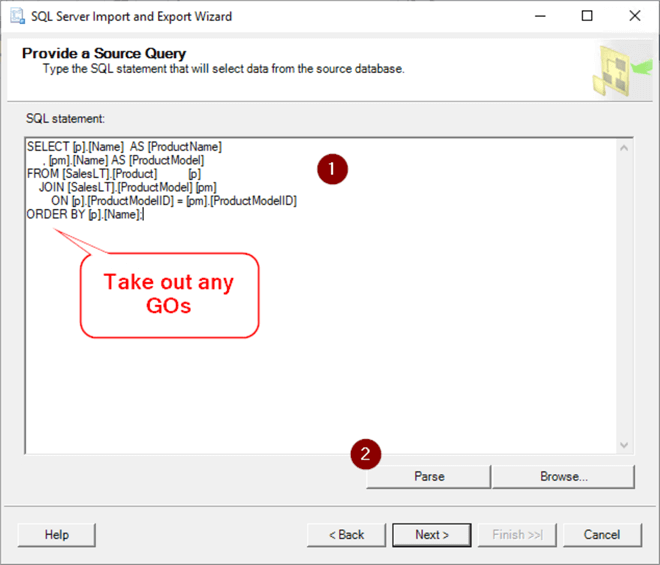
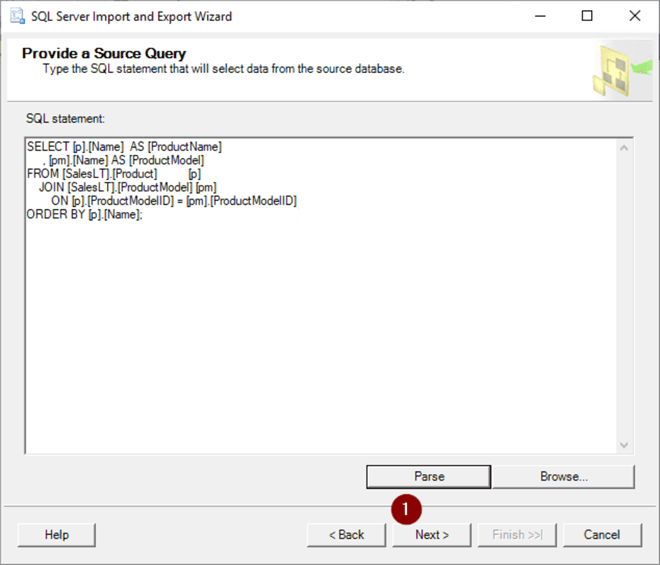
- Paste in SQL (take out GOs)
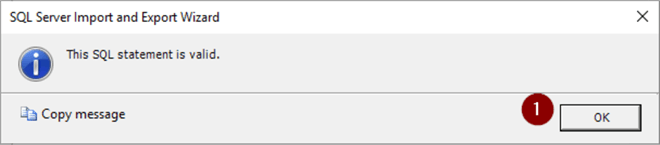
- Parse
- OK
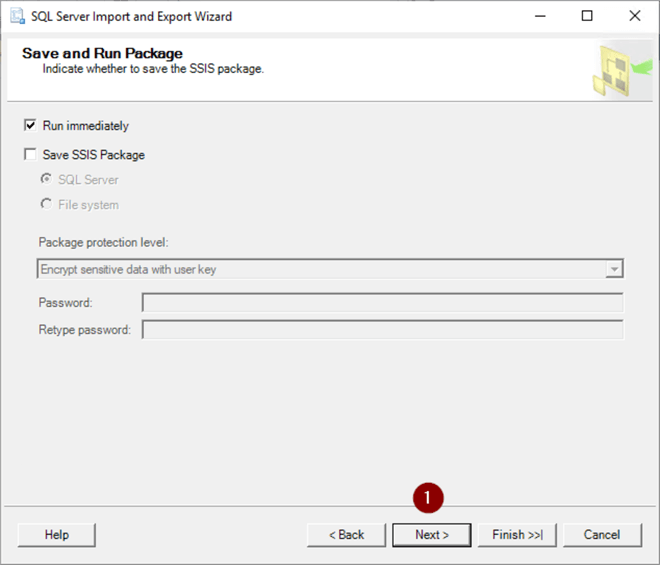
- Next
- Next

- Next
- Verify actions
- Finish

- Check for Success
- Close
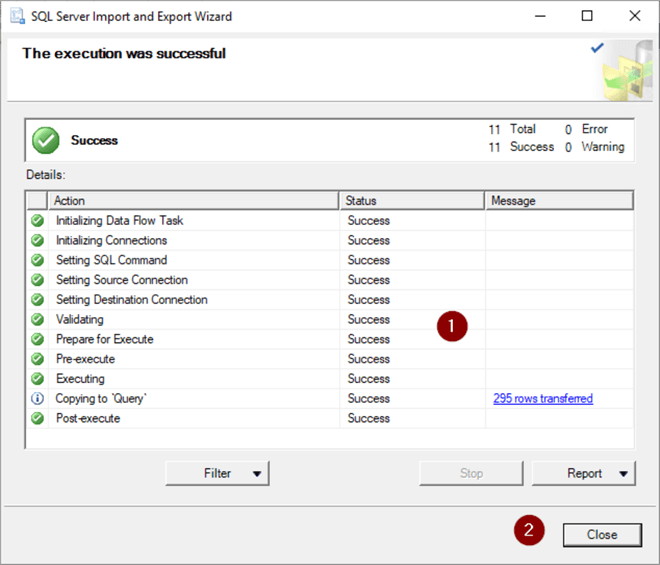
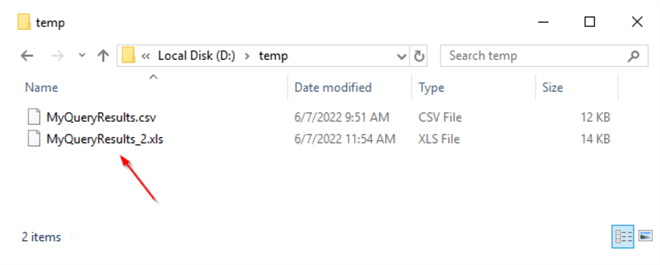
And here’s your file.
Next Steps
Here are some links to more tips and tutorials for SSMS export to Excel:
- SQL Server Management Studio Tips
- How to Export Data from SQL Server to Excel
- Export SQL Server Table to Excel with C#
- Export SQL Server Data to Multiple Excel Worksheets with Integration Services
- Export data from SQL Server to Excel
- Line Split Issues when Copying Data from SQL Server to Excel

Joe Gavin is from Greater Boston and has worked in technology as a Field Service Engineer for an automotive dealer computer system vendor, a Technical Consultant and Operations Analyst with Sybase and SQL Server based database applications in financial services and now works as a SQL Server Database Administrator.
- MSSQLTips Awards:
- Achiever Award (75+ Tips) – 2024 | Author of the Year – 2021 | Author Contender – 2024 |
- Rookie Contender – 2018


For addhoc situations is the best one – CopyWith Headers, Paste To Excel and ConvertToTable
on more “serious” situations is simple PowerQuery data from database, and custom query
NB! Don’t use wizard created function – a bit non readable
once created SQL Query is good to copy paste direct to formula (formula bar) is multiline format – result is easy editable sql in PQ function
SSMS Tools (add-in) adds a right-click menu option to the results pane to export directly to Excel.
Why the stock SSMS doesn’t have this is beyond me. Too many clicks the other ways SSMS currently does it.
Copying text data with the clipboard is easy.
Try this with decimal numbers, particularly when your SQL Server / SSMS uses other decimal separators than your Excel
Or with zip codes or phone number or other pseudo-numeric stuff.
For me the easiest (but not free) way is to use addons as Redgate SQL Prompt (Save as Excel in the context menu of the result grid) or SSMS Boost (Copy as XML spreadsheet), both exports the fitting data type.
There’s another easy alternative. Azure Data Studio is installed with SSMS.Just execute your query in that and use its Export to Excel function.
Kia ora Joe,
Another way to do this is to create a blank query in Power Query, then use this syntax:
let
Source = Sql.Database(“MyServerName”, “My_database_name”, [Query=”
PASTE the SQL Here
“])
in
Source
Close and load. You may get asked to authenticate the first time you run the query. The rerun just refresh from excel
Totally agree with Hanna