Problem
I wrote another tutorial about incremental refresh for SQL Server sources in Power BI. In that tutorial, we covered the implementation of incremental refresh where we have potentially large datasets running into millions, billions, or even more rows, and there is a potential for the datasets to grow significantly over time. Thus, incremental refresh configuration aims to ensure that partition filters are pushed to the source system when queries are submitted for refresh operations.
The challenge used to be that most data sources did not support this ability of pushing partition filters to the source system known as Query Folding. In my experience, I have the opportunity to work with many corporate clients and one thing that is common is how they source their data – it’s mostly Excel, CSV, or some other non-SQL based data sources. Thus, they have always been unable to implement incremental refresh on their reports even when they have to import millions of records, thereby leading to a very sluggish refresh of reports.
The good news is that Microsoft has introduced Power BI Datamart which will assist with incremental refreshes where this wasn’t easy to do before to meet your business intelligence needs.
Solution
In this tutorial, I will demonstrate an approach on how you can implement incremental refresh on a data source that does not normally support Query Folding within the Power BI Service. I will use CSV files loaded into SharePoint Folders as my data source for this demo. The dataset is seen below. In your case, this would usually be the fact table expected to grow over time.

Step 1: Create a Connection to the Data Source in Datamart
At the time of writing this article, the Power BI Datamart is still in Preview and a Premium feature; thus, to create a Datamart, you would require a Premium, a Premium Per User (PPU), or an Embedded capacity/license. To investigate and write this tip, I created a Datamart using a Premium capacity workspace and you can do the same by following the points below.
Once you have the workspace setup using Premium capacity or PPU, click on the “New” dropdown and select “Datamart (Preview)”.

Once the Datamart window opens, click on “Get data” as seen below.

Next, on the window that opens, narrow down the list of sources you want by selecting the “File” tab and choosing “SharePoint folder”, as seen in the diagram below.

Enter your SharePoint root folder path and other credentials like the image below. On the “Site URL”, enter the SharePoint root URL. The “Connection” authentication should be automatically populated if you use your organizational account. Then click “Next”.

On the next window that opens, click on “Transform data”.

The following window is a Cloud version of Power Query; hence you can work on the Power BI dataset like you would on the usual Power BI Desktop Power Query. Here we apply a filter on the “Name” column to filter for the dataset we need, as seen in the diagram below.

Next, I will exclude columns since I only need the details in the file. Then I will expand the “Content” column.

The result of expanding the “Content” column is below. After this, click “OK“.

Then click “Save“, but before that, you might want to do some data cleaning. For instance, if you look closely, I have changed the data type of the “Date” column to “DateTime” and that of “ProductID” to “Text“.

Step 2: Create the Datamart
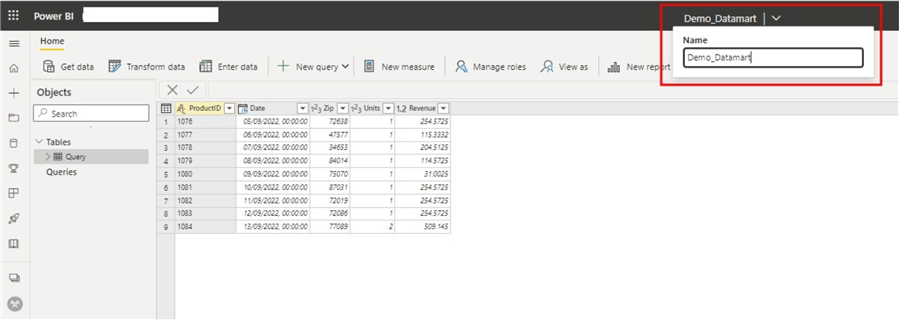
Once you click “Save“, the data will be loaded in the Datamart, as seen in the diagram below. You can now change the name of the Datamart; I changed this to “Demo_Datamart“, as you can see in the upper right corner.
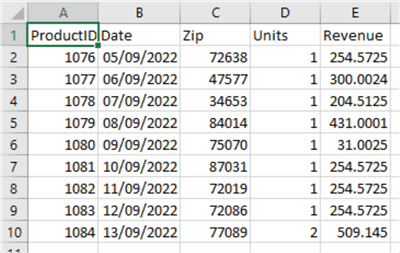
For clarity, see the actual data loaded into the Datamart below.

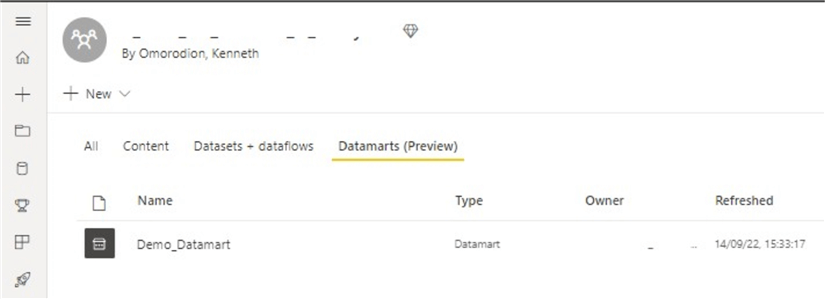
The Datamart can be seen within the Workspace you created and can be viewed in the “Datamarts (Preview)” tab, as seen in the following example.
Step 3: Configure the Power BI Incremental Refresh within the Datamart
Once the Datamart is created, we need to configure the incremental data refresh for the dataset within the Power BI Service. To do this, you can right-click the dataset name and select “Incremental refresh“.

Or you can click on “Table tools” and “Incremental refresh“, as seen in the diagram below.

Once the Incremental refresh window opens, it can be configured according to business requirements. For this demo, I have configured it to store up to 2 years of data (Storage period) and to refresh only the most recent 5 days of data (Refresh period). See the diagram below.

After this, click “Save” at the bottom right. Your incremental refresh is now configured and done within the Datamart (not in Power BI Desktop). After saving, you should see something like the diagram below about the configuration’s status.

Step 4: Testing the Power BI Incremental Refresh
To test the incremental refresh, let’s first understand what we have configured and expect it to do.
The dataset above shows that we configured the incremental refresh to store two years of data and only refresh data for the last five days. At the time this article was written, it was the 14th of September 2022. Hence we expect the refresh to only affect any data from today to the 10th of September 2022. Thus, all data earlier than that date should remain the same even when we alter it. And we also expect that if we update the dataset with a new row for the 14th of September (which is today), it should also get updated.
Let’s now alter this dataset and see if the incremental refresh behavior we expect works. Below are the changes I made to the data.

Looking at the diagram above, I have deleted the row for 6th September, changed the revenue value for 8th September and 11th September, deleted the row for 13th September, and added a new row for 14th September. We now need to refresh the Datamart.
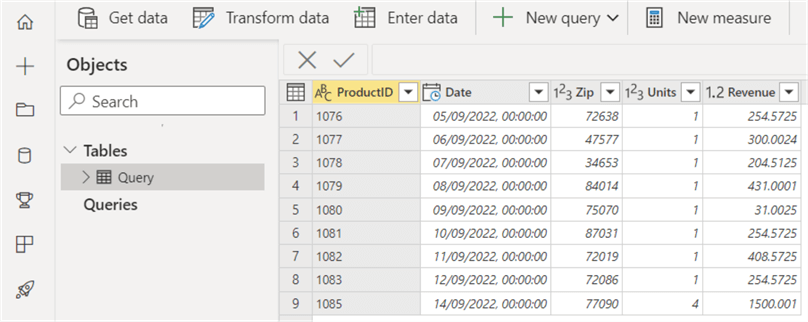
The above Power BI report shows that the Datamart refresh has only affected the past five days. The data row we deleted for the 6th of September was not affected as it’s been stored in the Datamart before and not within the five days of a refresh, hence left unchanged. You can also observe that although we changed the revenue value for the 8th of September, it was also left unchanged.
For those within the five days refresh policy, I changed the revenue value for the 11th of September from 254.5725 to 408.5725, and the changes were made. Similarly, I deleted the row for the 13th of September and added a new row for the 14th of September, both of which were made too.
In summary, when incremental refresh is configured within a Datamart, users are to connect to the Datamart as a data source in Power BI Desktop to leverage the incremental refresh. I will soon write another blog on the different approaches to connecting to a Datamart in Power BI Desktop. Still, it should be noted that this was also a preview feature when this article was written.
Next Steps
- Also, read about Implementing Incremental Refresh for SQL Sources.
- Read my other article: Incrementally Refresh Data in Power BI with Power Query for Integer Date Fields.
- Learn more about Power BI Datamart.
- Try this tip out with your data.

Kenneth A. Omorodion is a Microsoft Certified Solutions Associate (MCSA) with 12+ years of enterprise application experience in Power BI, DAX, Microsoft Fabric, Business Intelligence, data warehousing, SSRS, T-SQL, and Azure. Beyond his technical skills, Kenneth has expertise working with stakeholders’ and business leaders to help them better understand key insights. He has a great track record of successfully delivering full life cycle Business Intelligence and data solutions to organizations with measurable business impact.
- MSSQLTips Awards
- Achiever Award (75+ Tips) – 2025
- Author of the Year-2021
- Author Contender-2022/2023/2024


Great reason to use a datamart; thanks for the idea / article.