Problem
Recently, I wrote a tip called Implement Incremental Refresh for non-Query Folding sources in Power BI within a Datamart. However, some professionals may still need to configure the incremental refresh within Power BI Desktop (the previous approach before Datamart) since data sources like Excel, CSV, and Dynamics365 do not support query folding. This tip will help configure incremental refreshes for those sources within Power BI Desktop.
Solution
For data sources that do not support query folding, such as the SharePoint CSV file used in this demonstration, It is essential to get it into a Datamart first. This ensures that the dataset is stored in a SQL database, which on its own, supports query folding. As you may know, this dataset does not support query folding, and thus it is impossible to implement incremental refresh.
This tip I wrote demonstrates a step-by-step approach to configuring your Datamart in Power BI service. It assumes that you are not configuring the incremental refresh within a Datamart, but you would prefer to do this in Power BI Desktop.
Follow the steps below to implement the incremental refresh for non-query folding sources in Power BI Desktop.
Step 1: Connect to the Dataset in Datamart
Note: An additional resource to review is another recent tip on various ways to connect to a Power BI Datamart.
In this demo, I will connect to the Datamart model via an import mode, as seen in the image below.

In the next window, select the Datamart you have created. Click on the dropdown for connection and select “Connect to SQL endpoint“, as seen in the following image.

Next, expand and select the checkbox at the front of “model.DatamartName” and click “Transform Data“, as seen below.

The following window that opens gives the option to choose the connection mode. For this demo, I have selected an Import connection mode, as seen in the image below.

Step 2: Verify If the Dataset Supports Query Folding
As I mentioned earlier, if a data source does not support query folding, you cannot successfully configure incremental refresh on it. But since we have moved the source data to a Datamart and are now connected to the Datamart as a SQL Server database source, we expect it to support query folding.
To verify this, within the Power Query Editor window, go to the last transformation step of the data source and right-click on it, as seen in the image below.

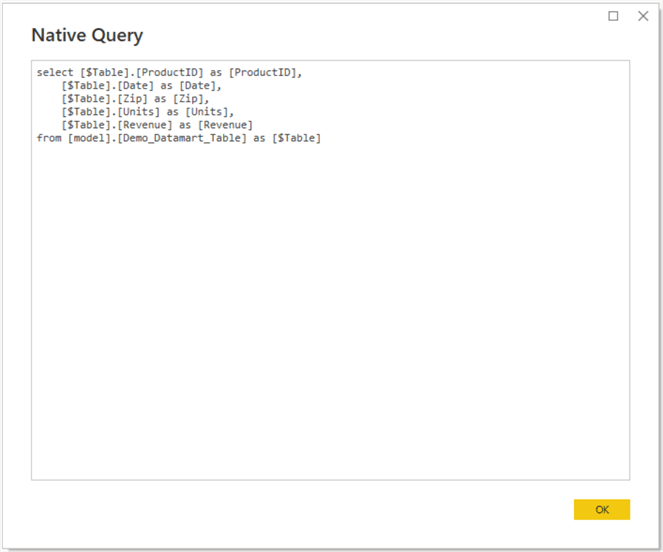
The fact that we can see “View Native Query” (not greyed out) confirms that the data source supports query folding. By clicking on the “View Native Query“, a new window will appear with a SQL query, as seen in the image below.
Step 3: Configure the Power Query Date/Time Parameters
Now that the dataset supports query folding, we need to configure two pre-defined or reserved and case-sensitive date/time parameters (RangeStart and RangeEnd) to be used to implement the incremental refresh.
To create the RangeStart parameter, go to “Manage Parameters” on the top ribbon within Power Query. Click on the dropdown and select “New Parameter“, as seen in the image below.

In the next window, enter details, as seen in the image below. Note: Don’t worry about the “Current Value” for date/time, as this can always be overwritten later, so I have entered any generic date/time value for now. Click “OK“.

To create the RangeEnd parameter, go to “Manage Parameters” on the top ribbon within Power Query. Click on the dropdown and select “New Parameter“, as you did for the RangeStart parameter. Enter the details as seen in the image below, then click “OK“.

Step 4: Configure the Parameters to Apply Filters to the Dataset
The filters are applied to a date/time column that determines the amount of data that needs to be refreshed each time. In this case, we will apply it to the “Date” column of the dataset. See below.

To configure this table, follow the image below for reference.

Next, click on “Date/Time Filters“, then click either “Between” or “Custom Filter“, as seen in the image below. For this demo, I clicked “Between“.

In the next window, leave on the Basic settings and configure as seen in the image below.

Step 5: Activate the Incremental Refresh on the Dataset within Power BI Desktop
To this point, we have configured the settings to activate the incremental refresh once the settings are loaded to the Power BI data model. To implement the activation, first, we must close Power Query Editor to apply the new settings. Then, follow the descriptions in the images below to complete the process.
Right-click on the table and click “Incremental refresh”, as seen in the image below.

The window in the image below appears.

Next, toggle the button under “Set import and refresh ranges“, as seen in the diagram below.

Then, enter values as required for your business. For this demo, on the “Archive data starting…“, I entered 3 and chose Years in the following dropdown. This means I want to keep only three years’ worth of data (three years of archived data).
Next, on the “Incrementally refresh data starting…”, I entered One and selected “Month” from the following dropdown (meaning I want only one month’s worth of data to be refreshed henceforth). See the final configuration in the image below.

Then, click “Apply“, and the incremental refresh configuration is complete. However, you will still need to save your work, publish it to the Power BI service, and configure a refresh schedule for the dataset or report as required. The first refresh attempt will be for all years of data in the dataset; afterward, it will only refresh a single month’s data, thereby making the refresh faster.
Note: There are some optional configurations within the incremental refresh window that I did not expand on in this tip because they are mostly optional and advanced topics. But there are links to learning about them in the Next Steps section below.
In summary, there is hardly a data source that cannot implement an incremental refresh in Power BI with the introduction of Power BI Datamart. All that is required is to first move the data to Power BI Datamart and then connect to the Datamart model in Power BI Desktop (that’s if you do not want to leverage Power BI Datamart itself to configure the incremental refresh).
Next Steps
- Read about Implementing Incremental Refresh for SQL Sources.
- Learn more about Power BI Datamart.
- Check this article out to learn more about how to configure the optional settings in incremental refresh.
- Read about how to configure incremental refresh in Datamart for non-Query folding sources.
- Get some more information about query folding from Microsoft documentation.
- Try this tip out on your data as business requires.

Kenneth A. Omorodion is a Microsoft Certified Solutions Associate (MCSA) with 12+ years of enterprise application experience in Power BI, DAX, Microsoft Fabric, Business Intelligence, data warehousing, SSRS, T-SQL, and Azure. Beyond his technical skills, Kenneth has expertise working with stakeholders’ and business leaders to help them better understand key insights. He has a great track record of successfully delivering full life cycle Business Intelligence and data solutions to organizations with measurable business impact.
- MSSQLTips Awards
- Achiever Award (75+ Tips) – 2025
- Author of the Year-2021
- Author Contender-2022/2023/2024


