Problem
You have a database application and now you need reports. In this article, we look at how to add a Report Server project to an existing Visual Studio Solution for a database and website along with how to develop reports.
Solution
In this article, we will add a Report Server Project to the Solution that was created in this series of articles, see numbered links above or Related Articles at the end.
To learn more about the Visual Studio solution, refer to this previous article for a step-by-step process and you can also download the Visual Studio Solution to use for this article. This will allow you to follow along with the steps covered below.
Adding a Reporting Project
In this tutorial, we will work through the steps to create a Reporting Project that enables you to create reports from a database.
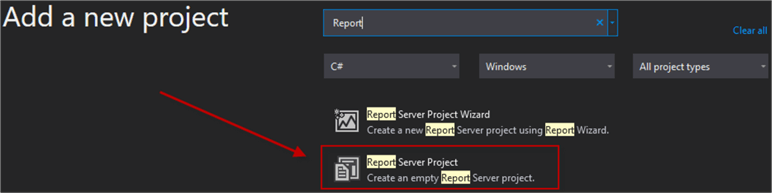
Open the HR Solution with Visual Studio and right-click on the Solution name and select: Add > New Project.

Search for Report Server Project on the Add a new project window, select the template highlighted below and click the Next button.
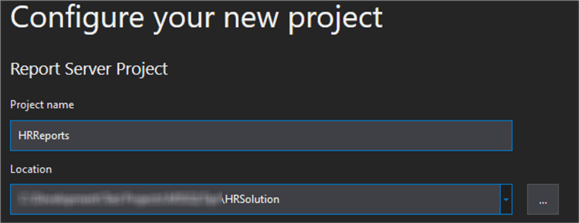
On the Configure your new project window, give your project a name like HRReports and click the Create button.
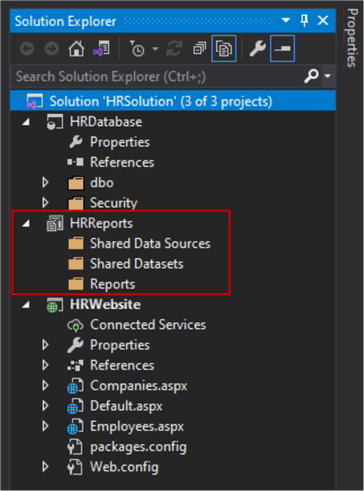
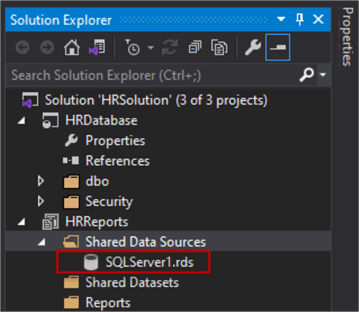
Now you should see a new project: HRReports in the Solution Explorer.
Add a Shared Data Source
Next, we will create a Shared Data Source that will be used by all the reports in the project that will connect to a specific data source.
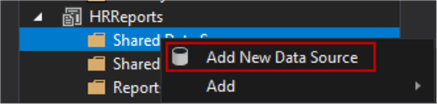
Right-click on the Shared Data Sources folder and click the Add New Data Source option.
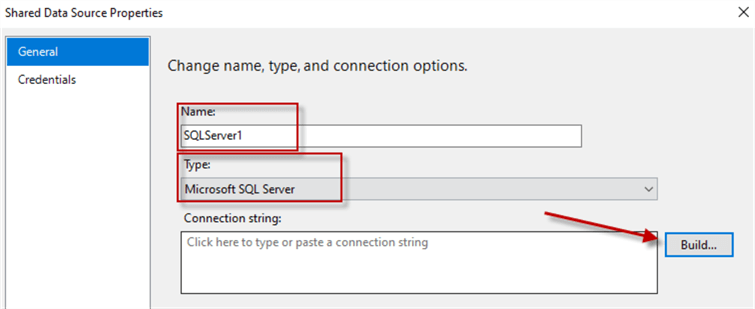
Now you should see a Shared Data Source Properties window where you will be creating a connection to the data source that will be hosting the data for the reports. First, you should specify a name for the data source and indicate which server you will connect to in the name of the data source, like SQLServer1. Next, choose the connection Type, in this case, it is Microsoft SQL Server. Then click Build.
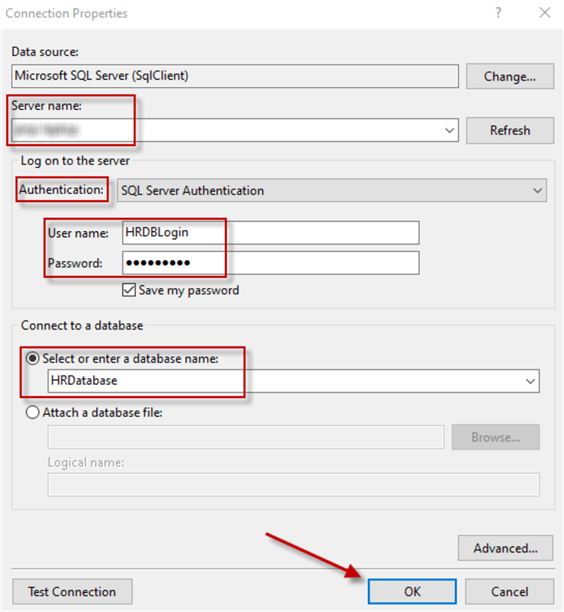
Another window will open where you specify the Server name, the Authentication and the database where the data will be coming from. Enter this data and click the OK button.
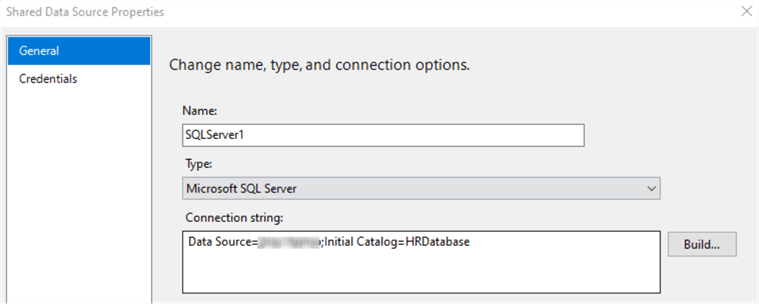
The Connection string textbox should now have the connection string to your SQL Server as shown below.
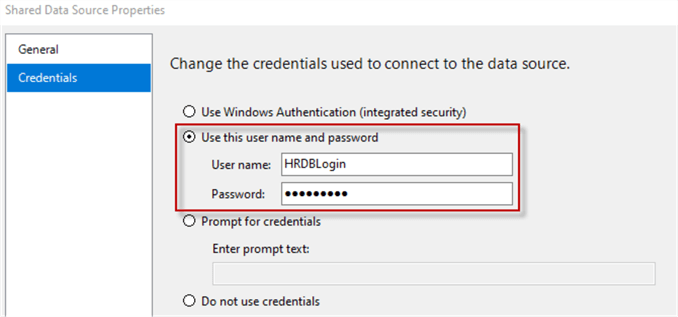
Click on Credentials and choose Use this user name and password, enter the correct information and click the OK button.
You should now see the shared data source that was created when you expand the Shared Data Sources folder.
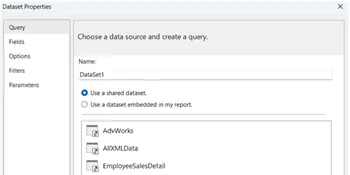
Add a Shared Dataset
You can create a shared data set if you have multiple reports to create that will use the same dataset or you can create a dataset in each report. In this tutorial, we will be creating a dataset that will be used inside the report.
Build Simple Report
Now you will be creating the first report for this project, which is the Companies report that will provide a list of companies from the companies table.
Right-click on Reports folder in the Solution Explorer and select Add New Report.

The Report Wizard will open and on the first screen, click the Next button.
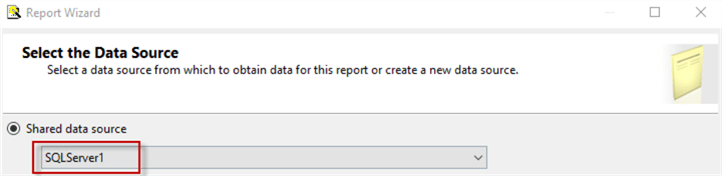
Next, select the data source you created above and then click the Next button.
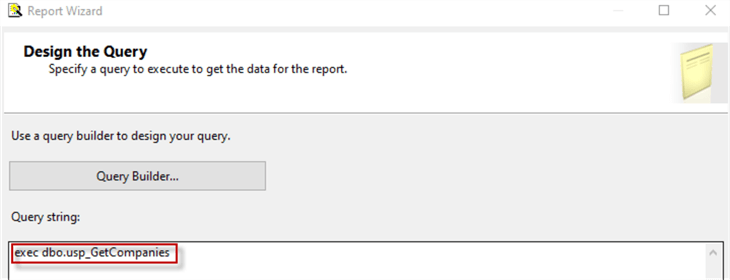
Next, you will see the Design the Query window where you can either click on the Query Builder button or type in the SQL statement that will be used with the report. In this case, I entered exec dbo.usp_GetCompanies, which is the Stored Procedure (created in a previous article) that will be returning a list of all the companies. Click on the Next button.
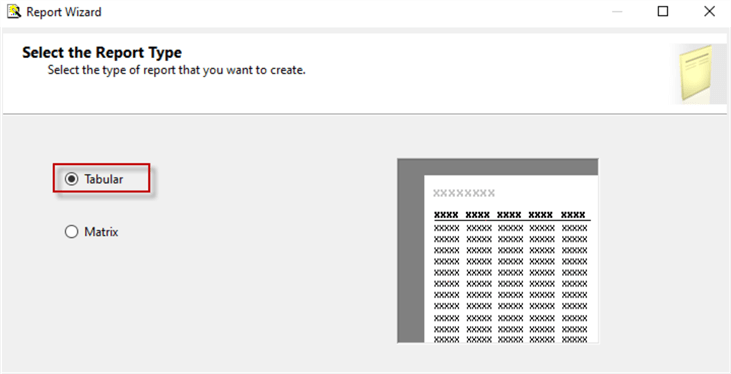
Next, you need to select the Report Type, either Tabular or Matrix. Select Tabular and click on the Next button.
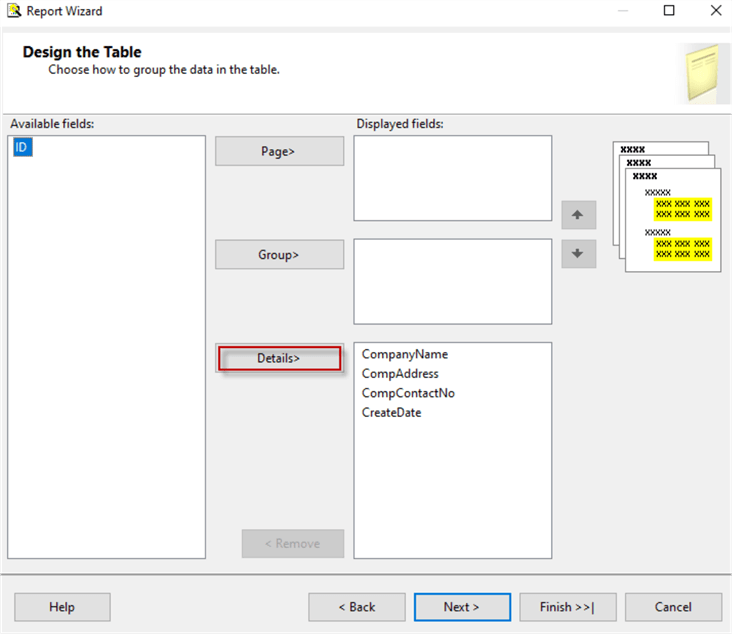
In the Design the Table window, click on the CompanyName, CompAddress, CompContactNo and CreateDate while holding the shift key to select all these columns and then click the Details> button which will move the selected fields to the right side. Click Next.
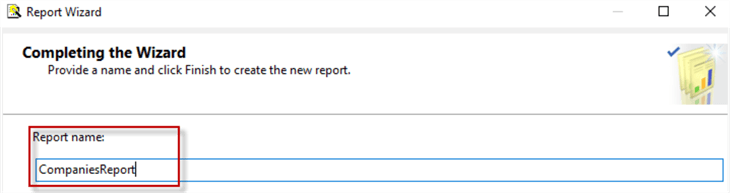
On the Completing the Wizard window, give the report a name CompaniesReport (or rptCompanies if you wish) and click the Finish button.
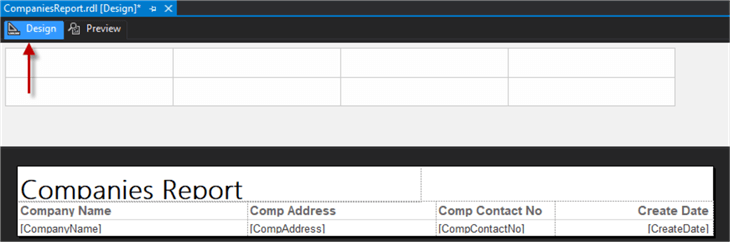
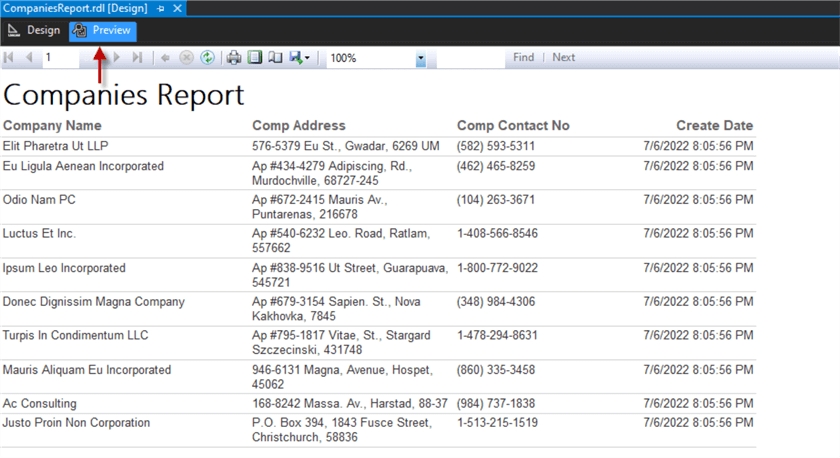
Your report is created and you will have access to it in the designer area. Notice that you have a Design and a Preview tab. The design tab is the area where you can make changes to your report and the preview tab is where you can view what the report looks like. In the image below, you can see the Design Tab and the Preview Tab in action.
Design tab:
Preview tab:
Following the above steps is the easiest way to create a report.
Build More Complex Report
Let’s see how to create a more advanced report that has two datasets. Right-click on the Reports folder again and select: Add New Report. The Report Wizard will open and on the first screen, click Next. You can select the same data source as above and click Next.
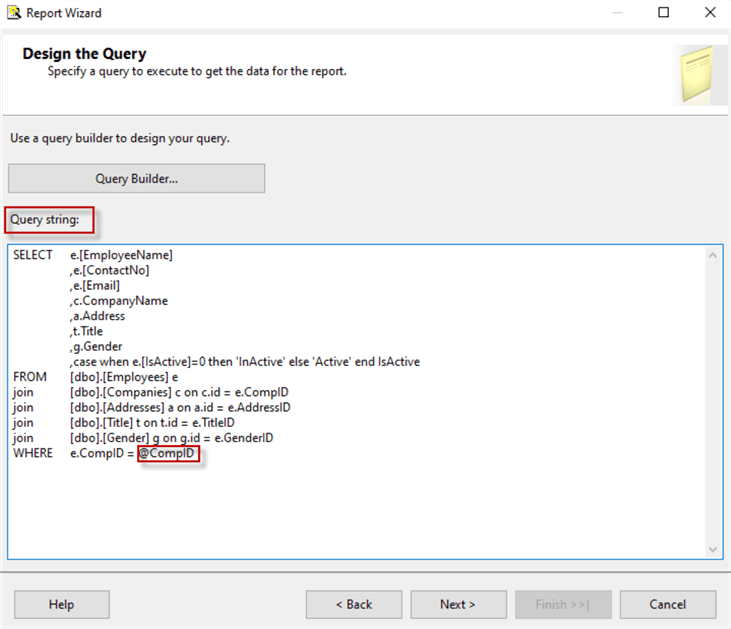
In the Design the Query window, you can type in the SQL statement in the Query string box that you will be using to extract the data to show on the Report.
I have created a join between most of the tables that you can use for this report. Copy and paste the SQL query below into the Query string box. Take note of the variable in the where clause: @CompID.
SELECT e.[EmployeeName]
 ,e.[ContactNo]
 ,e.[Email]
 ,c.CompanyName
 ,a.Address
 ,t.Title
 ,g.Gender
 ,case when e.[IsActive]=0 then 'InActive' else 'Active' end IsActive
FROM [dbo].[Employees] e
join [dbo].[Companies] c on c.id = e.CompID
join [dbo].[Addresses] a on a.id = e.AddressID
join [dbo].[Title] t on t.id = e.TitleID
join [dbo].[Gender] g on g.id = e.GenderID
WHERE e.CompID = @CompID
Click Next.
Select the Tabular report type and click the Next button.
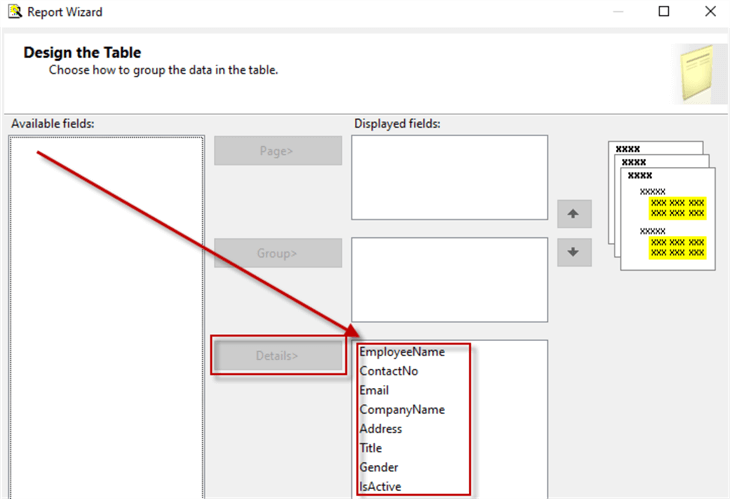
Highlight all the fields and click the Details button to move the selected fields into the Details box and click the Next button.
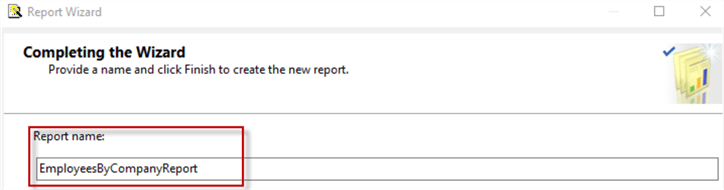
On the Completing the Wizard window, give your report a meaningful name, like: EmployeesByCompanyReport and then click the Finish button.
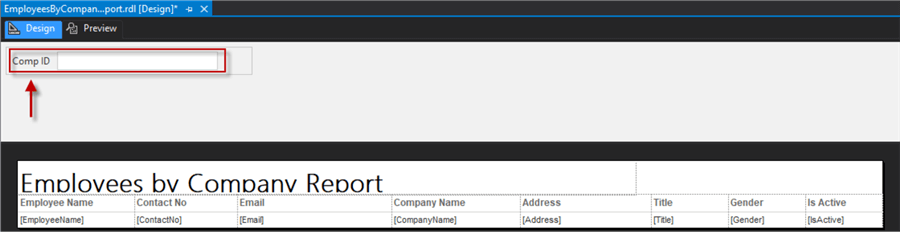
Your report will now be created in a Tabular format.
Notice the Comp ID and the textbox next to it on the top-left of the report.
Now click on the Preview tab of the report and type an ID from the Companies table in the text box and click the View Report button on the top right.
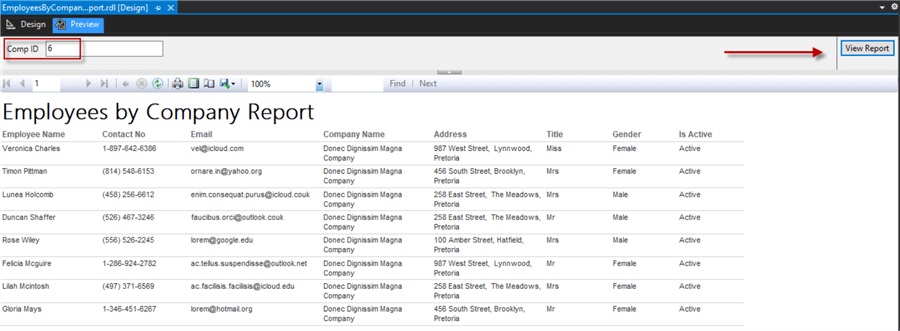
Your report will now be displayed in a Tabular format and only include data for that company ID.
Add Dropdown To Report
The last exercise that we will work through is to change the Comp ID into a dropdown box.
Click on the Design tab to get back to the design area. Open up the Report Data window (it normally is on the left side of the design area, or) by clicking on View, Report Data on the menu on top.
On the top left, you will see a few folders, like:
- Built-in Fields
- Parameters
- Images
- Data Sources
- Dataset
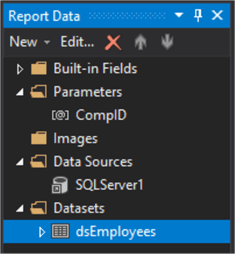
We first need to add a new dataset by right-clicking on the Datasets folder and select Add Dataset.
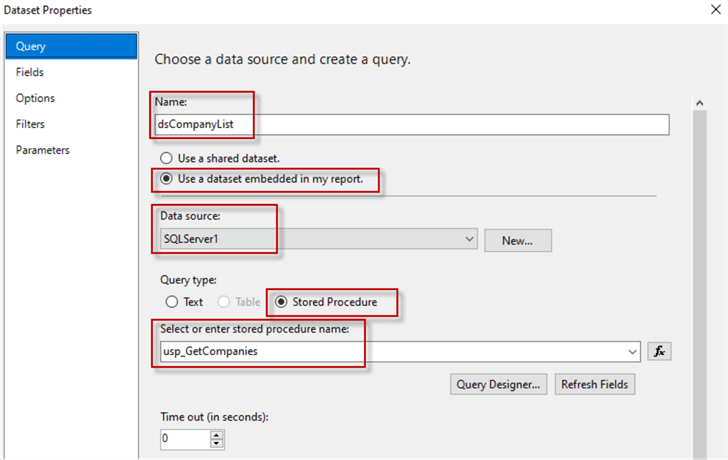
- give the new dataset a name, like dsCompanyList,
- click the Use a dataset embedded in my report radio button,
- click on the Data source dropdown and select the data source we have created before
- click the Stored Procedure radio button, then
- click on the dropdown box below Select or enter stored procedure name and select the stored procedure: usp_GetCompanies that was created in the database, then
- click the OK button.
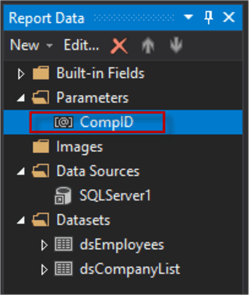
Now that we have created the second dataset, expand the Parameters folder (in the Report Data window) to show the @CompID parameter that was created in the SQL statement.
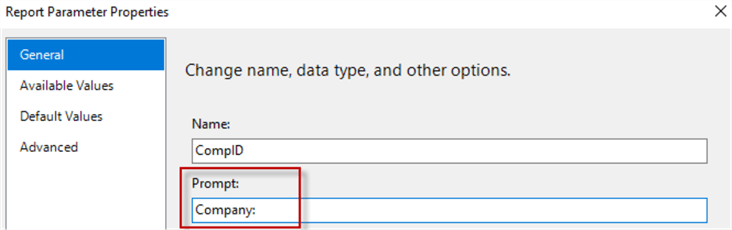
Double-click on it to show the Report Parameter Properties for the @CompID parameter.
On the General link on the left, change the Prompt to Company.
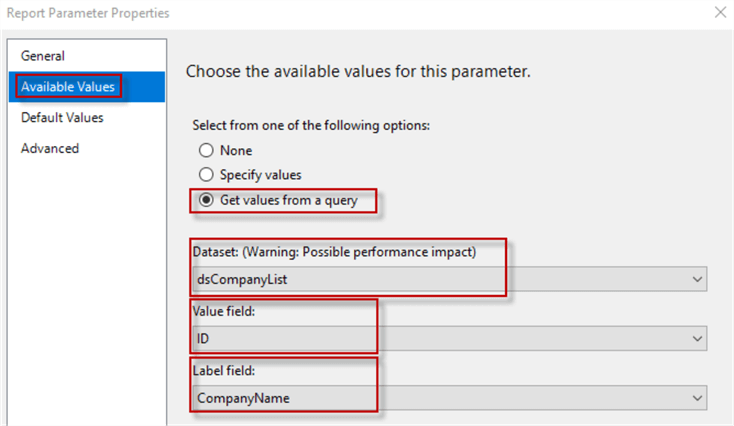
Click on the Available Values link on the left and select the Get values from a query radio button (on the right).
Now you can click on the dropdown below Dataset and select the newly created dataset dsCompanyList.
Click on the Value field dropdown and select ID and click on the Label field dropdown and select CompanyName.
Click the OK button to finish the configuration of the parameter.
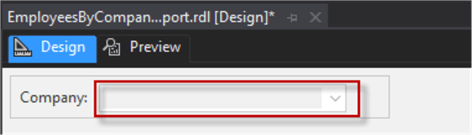
Now you should see in the Design tab that the textbox has changed to a dropdown box.
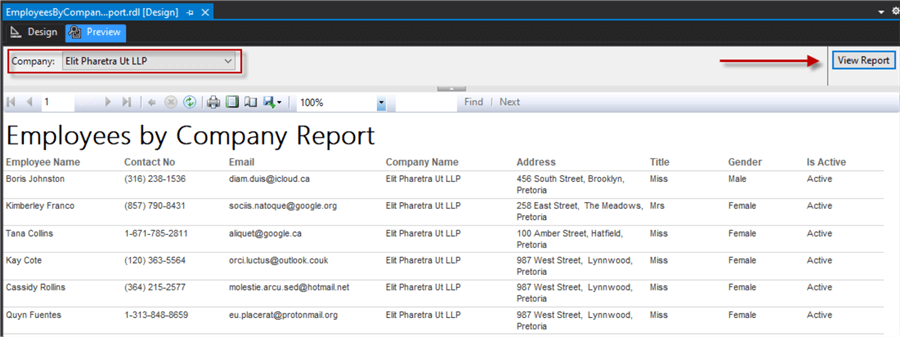
Click on the Preview tab and click on the dropdown next to Company select a Company and click the View Report button to show data for just that company.
There are many more configuration and layout changes that can be made on the report in the Design tab, but that is outside the scope of this tutorial. However, below are some links where you can read up on other report formatting options:
- Conditional Formatting for SQL Server Reporting Services Reports
- SQL Server Reporting Services Embedding .NET Code for Report Formatting and Error Handling
- SQL Server Reporting Services Expression Builder to Reformat or Convert Text Box Values
- SQL Server Reporting Services Formatting and Placeholders
Next Steps
- Follow along with this entire article series, by clicking on the numbered links at the top of this article or by looking in the Related Articles section below.
- Learn more about report building in this SQL Server Reporting Services (SSRS) Tutorial

Jan has years of experience in Information Technology which ranges from Unix Administration through System Administration and development, Web and Database Development and Administration and applying Agile methodologies. Jan has been working with databases since 1996 when he had his first exposure to Sybase databases. He got involved with SQL Server in the early 2000’s and had exposure to SQL Server 2000, 2005, 2008 and all the rest. Jan likes to find easy and secure ways to host data and has been using Sybase, SQL Server, and MySQL. He has a great passion for working with data and believe the best way to become an expert in a field is by teaching the subject.
- MSSQLTips Awards: Rookie of the Year Contender – 2022


I have followed your demo – thank you. I now have the same kind of set up with a report showing within its own project within a solution. I have two projects in my solution. I would like to know if you have a link to another demo for how to get the report that I have created to be visible on the front end web views. Thank you.