Problem
Microsoft SQL Server Integration Services (SSIS) is a very important Extract, Transform, and Load (ETL) tool widely used in corporate data management, data warehousing, data migrations and business intelligence. This ETL tool provides a powerful platform for coordinating and data workflow automation, including operational tasks, such as logging and scheduling, fault-tolerant error handling, support for big data sets scaling, and user-friendliness through its intuitive graphical interface. Built specifically for corporate data pipelines and analytics apps, SSIS gives data scientists the power to create, run, and monitor complicated processes of integrating information into one high-performance chain effectively.
Solution
The goal of this tutorial is to enable ETL developers to obtain practical knowledge to use SSIS in transforming and combining data through hands-on exploration to be ready for real-world challenges in managing information.
We’ll examine and discuss some of the most essential components and functionalities. We will begin by reviewing the Microsoft SSIS user interface and ways to navigate it. We will then address connection managers and set up connections to various data sources. Also, we will explore what makes control flow tasks different from data flow tasks and how they fit into data workflows.
In this demonstration, we’ll import an Excel \ CSV file into SQL Server, including derived column creation, conditional splitting, and the need for data conversion. Immediately after, we’ll look at variables and expressions in SSIS for dynamic data processing. Additionally, we will have another demonstration where multiple Excel \ CSV files are looped over until they reach the Microsoft SQL Server database to show how well it handles iterative copies of data via SSIS.
Creating an SSIS Project
First, we must create a new “Integration Services Project” using Visual Studio. Make sure you have already installed the SSIS extension from Visual Studio Market Place:
- Visual Studio 2019: SQL Server Integration Services Projects – Visual Studio Marketplace
- Visual Studio 2022: SQL Server Integration Services Projects 2022 – Visual Studio Marketplace

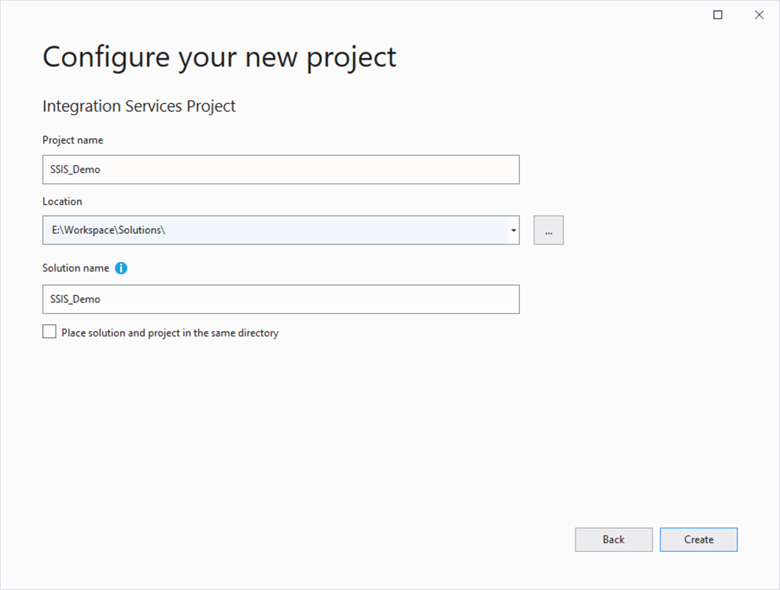
Next, we will configure the project name and directory.
SSIS Development Interface
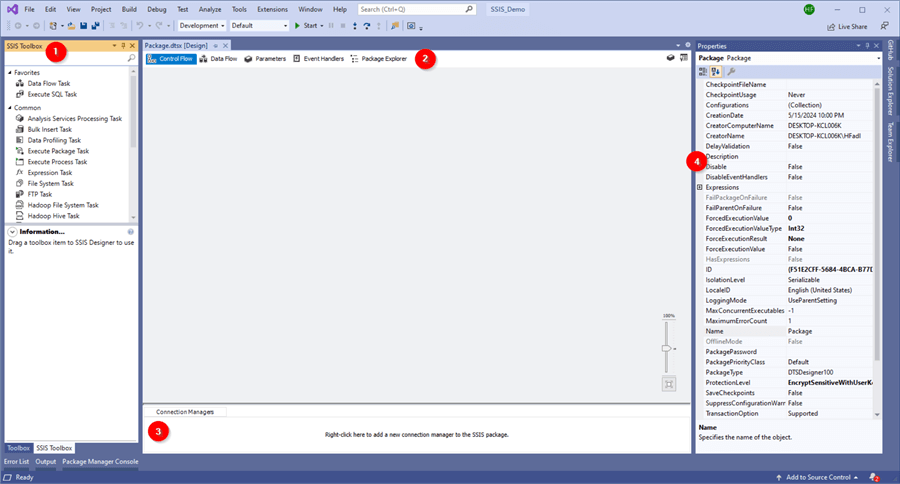
The integration services development interface will appear once the SSIS project is created using Visual Studio. As shown in the screenshot below, it is mainly composed of four areas:
- SSIS Toolbox
- Package Designer (five tabs)
- Control Flow
- Data Flow
- Parameters
- Event Handlers
- Package Explorer
- Connection Managers
- Properties
More tools and options are available. However, they are outside the scope of this beginner-level tutorial.
Connection Managers
Since data is the main component of any data integration and analysis solution, the first thing to do in the ETL package is to define all data connections using connection managers. SSIS supports a wide variety of connection managers. For this tutorial, we will use an OLE DB connection to connect to an SQL Server database and a Flat File connection to connect to CSV files.
New Flat File Connection
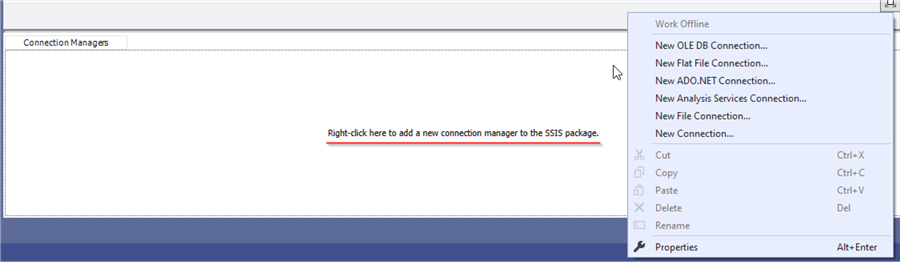
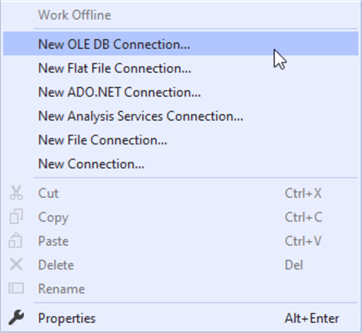
We will start by adding a Flat File connection to read from a source CSV file. Right-click in the connection managers panel and click “New Flat File Connection…”
Side Note: If you are interested in checking all available connection managers, click on the “New Connection” menu item to select from an extended list.
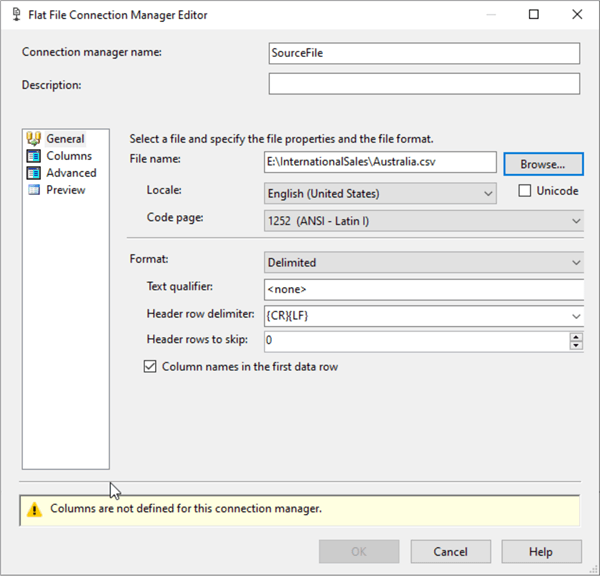
The Flat File connection manager editor will appear. Let’s first change the connection manager name to Source File.
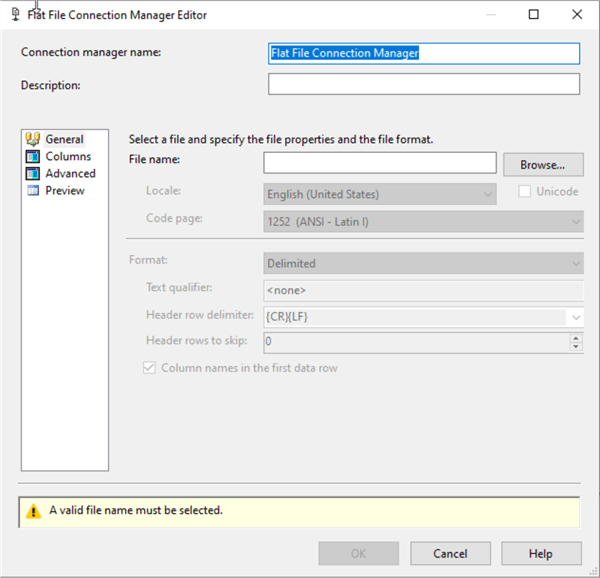
Now, we need to specify the source file path by clicking on “Browse…” Once we select a file, SSIS tries to detect the file metadata: encoding, text qualifier, row delimiter, etc. Sometimes, we need to edit those values manually as SSIS may not detect them accurately. After selecting the file, a warning appears mentioning that “Columns are not defined…”
Click on the Columns tab to let the connection manager detect the existing columns tab based on the first rows in the flat file.
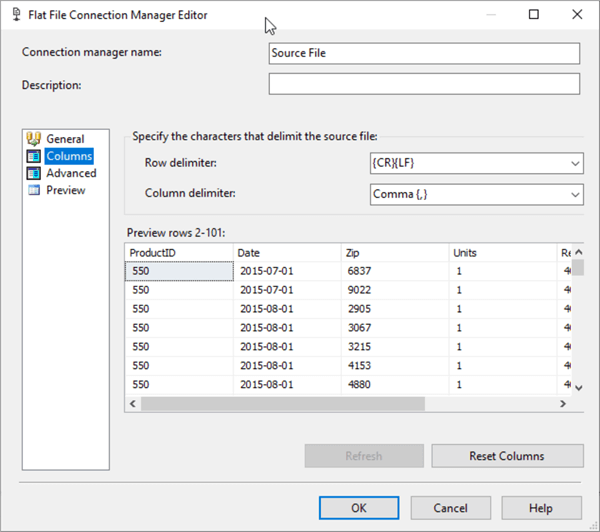
If these columns are not defined accurately or their data types need to be changed, they can be edited manually in the Advanced tab.

After defining the first data connection, click OK.
SQL Server Data Connection
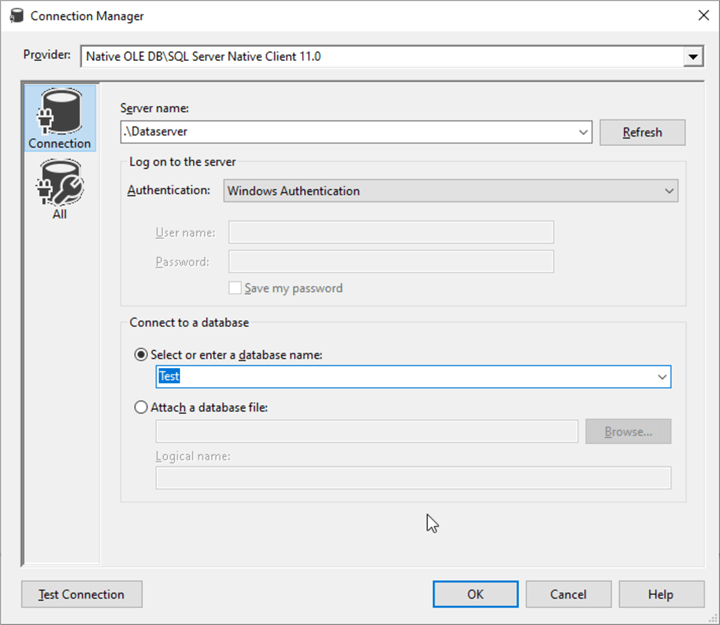
Now, let’s define the SQL Server data connection. We need to create an OLE DB connection manager.
In the Connection Manager editor, specify the SQL Server instance, the authentication parameters, and the database name. Other configurations are available in the All tab.
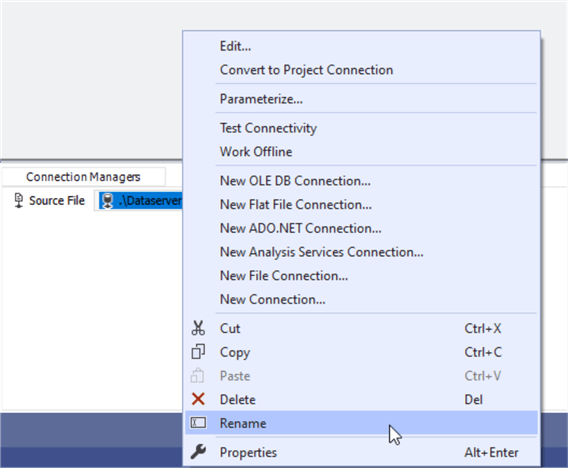
To rename the OLE DB connection manager, right-click on its icon in the connection manager area and click Rename.
Adding Tasks from the SSIS Toolbox
After adding and configuring the connection managers, we need to design our package. SSIS supports a wide variety of tasks, which can be found in the SSIS toolbox along with a brief description of each task.
Execute SQL Task
Let’s begin by adding an “Execute SQL Task,” which executes SQL statements using a connection manager that points to a relational data source.

Double-click on the Execute SQL Task icon or drag and drop it within the control flow area. Next, double-click on the Execute SQL Task component in the control flow to open the editor.
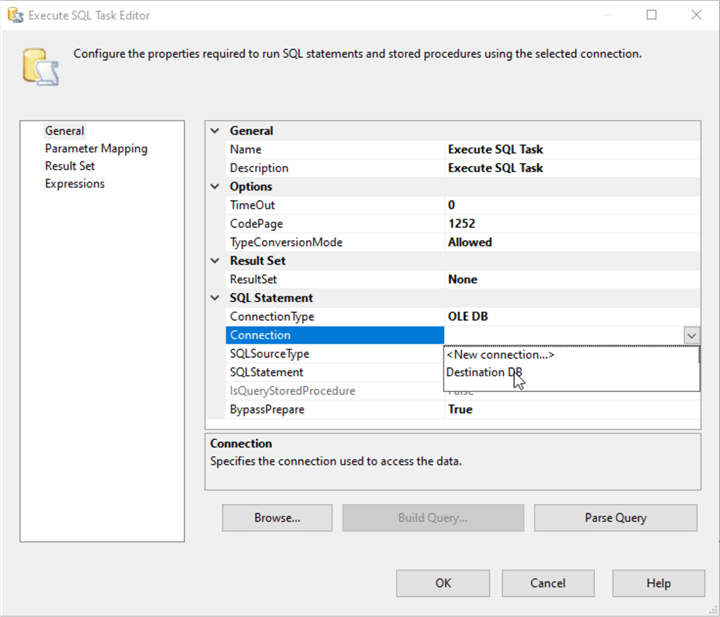
In the Execute SQL Task Editor, set the connection type to “OLE DB” since we are using an OLE DB connection manager. Then, select the connection manager we previously created.
Next, add our SQL statement in the “SQLStatement” property, as shown below.
CREATE TABLE [InternationalSales] (
   [ID] INT IDENTITY(1,1) PRIMARY KEY,
   [ProductID] INT,
   [Date] Date,
   [Zip] varchar(50),
   [Units] INT,
   [Revenue] NUMERIC(18,6),
   [Country] varchar(50),
   [SourceFileName] nvarchar(4000))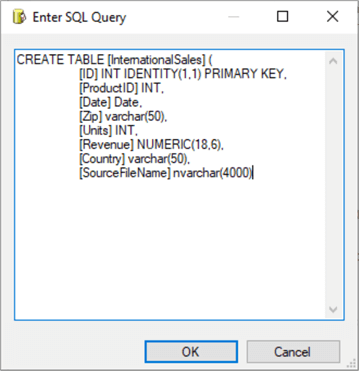
Click OK.
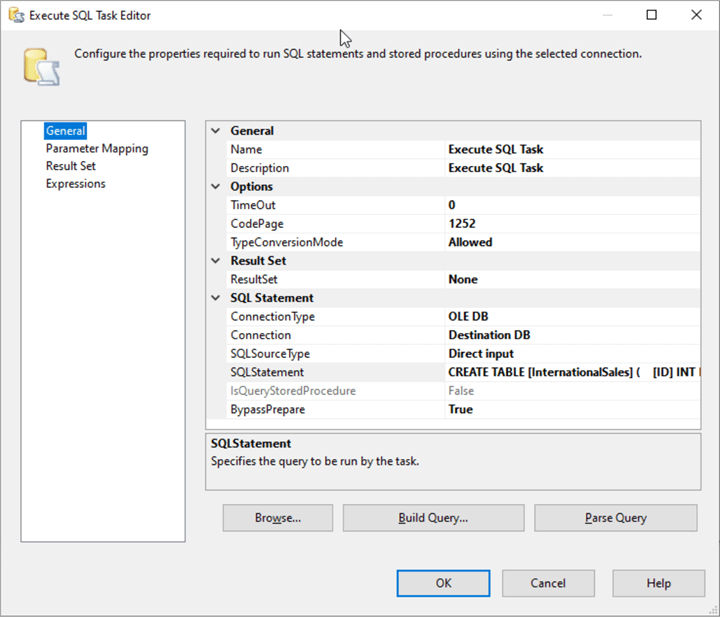
Click OK to finish configuring the task.
Test the Execute SQL Task
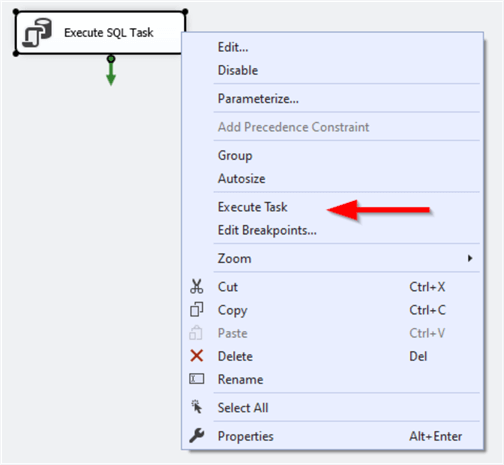
Now, to test this task, right-click on it and click “Execute Task” to execute it separately.
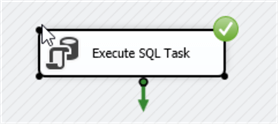
A green icon appears on the upper-right corner of the task to show that it was executed successfully.
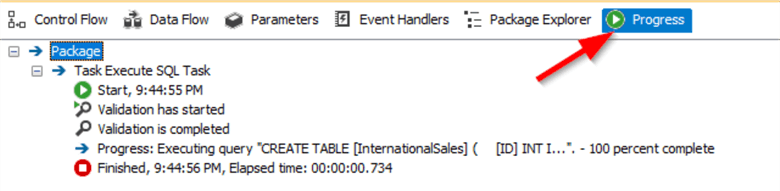
More details about the task execution can be seen under the Progress tab that appears after executing the task.
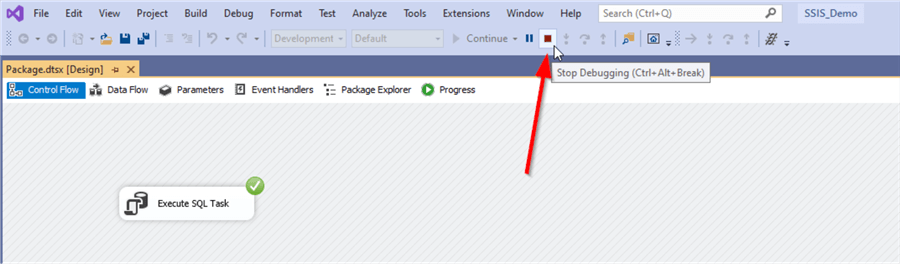
Now, click the Stop button to exit debug mode.
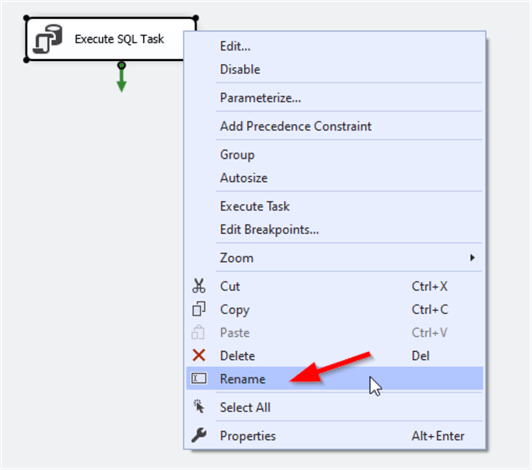
We can rename the task by right-clicking on it and clicking the “Rename” menu item.
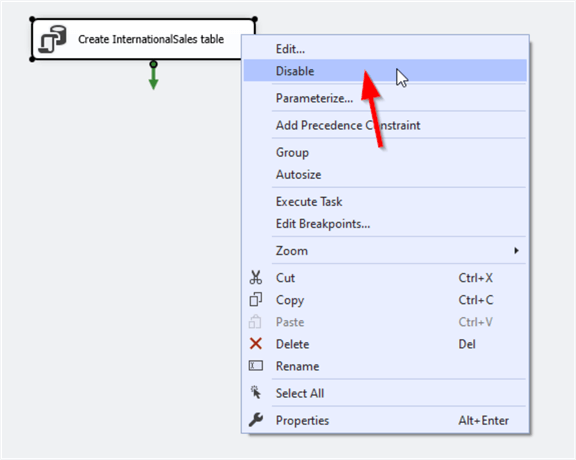
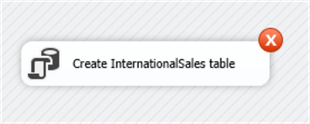
Also, a task can be disabled by clicking on the “Disable” menu item.
Failed Execute SQL Task
Let’s try to execute the SQL task for a second time. It fails, as shown below.
To check the cause of the failure, you can navigate to the Progress bar and read the package log.
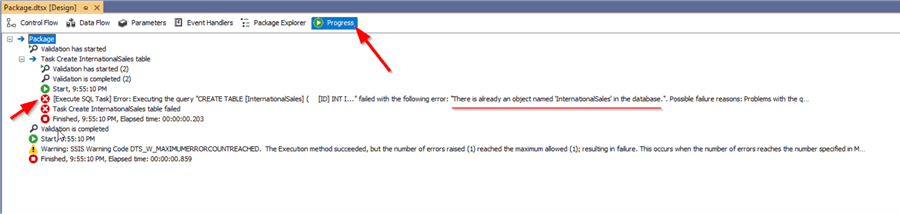
Since the error message is long and truncated, right-click on the error line and click on “Copy Message Text.“

Now, we can paste the error message into a new Notepad window to read the full error message.
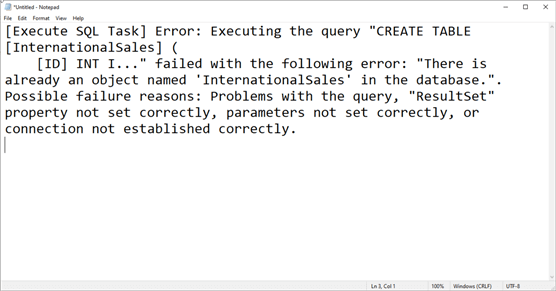
It looks like the task failed because the table was already created. To avoid this error, we can edit the SQL statement to handle this situation, i.e., create the table if it does not exist, and truncate it if it exists.
IF NOT EXISTS ( SELECT 1 FROM INFORMATION_SCHEMA.TABLES
WHERE TABLE_SCHEMA = 'dbo' AND TABLE_NAME = 'InternationalSales')
 CREATE TABLE [InternationalSales] (
    [ID] INT IDENTITY(1,1) PRIMARY KEY,
    [ProductID] INT,
    [Date] Date,
    [Zip] varchar(50),
    [Units] INT,
    [Revenue] NUMERIC(18,6),
    [Country] varchar(50),
    [SourceFileName] nvarchar(4000)
)
ELSE
 TRUNCATE TABLE [dbo].[InternationalSales]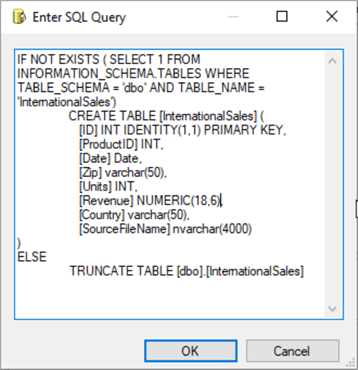
Working with Data Flows
Control Flow manages the workflow and execution order of tasks within an SSIS package. It supports executing command line operators, web services, XML tasks, file system operations, and more tasks. A data flow handles the extraction, transformation, and loading of data within an SSIS package. A package has only one control flow and can have multiple data flows.
For instance, we can create a destination table in the control flow and use a data flow to load the data into it.
Let’s add a “Data Flow Task” from the SSIS toolbox.
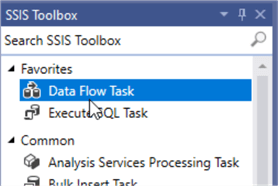
Click on the “Execute SQL Task” and drag the arrow into the new “Data Flow Task.”
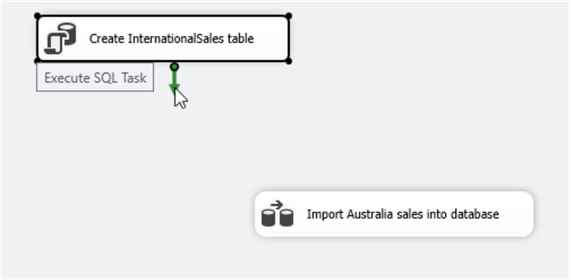
This will make both tasks connected and execute sequentially. This connector is called a “Precedence Constraint.” We can configure it by double-clicking on the connector.
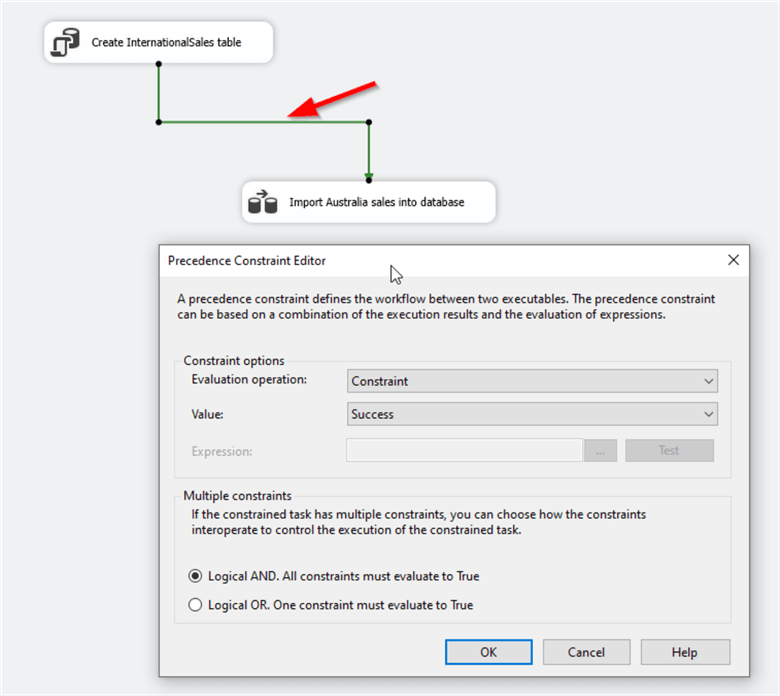
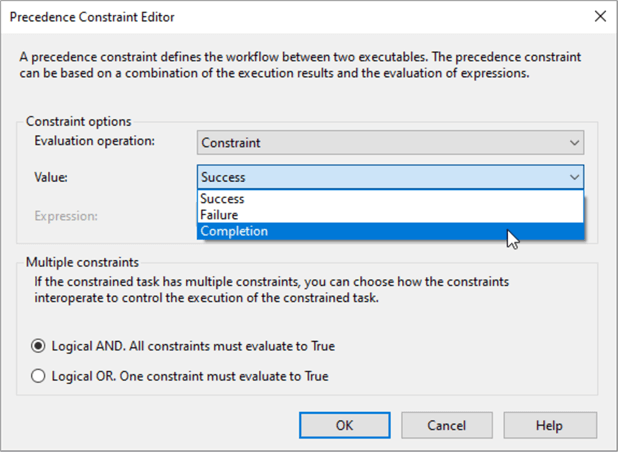
For example, let’s change the precedence constraint to completion. This will tell the package to execute the data flow task even if the precedent “Execute SQL Task” fails.
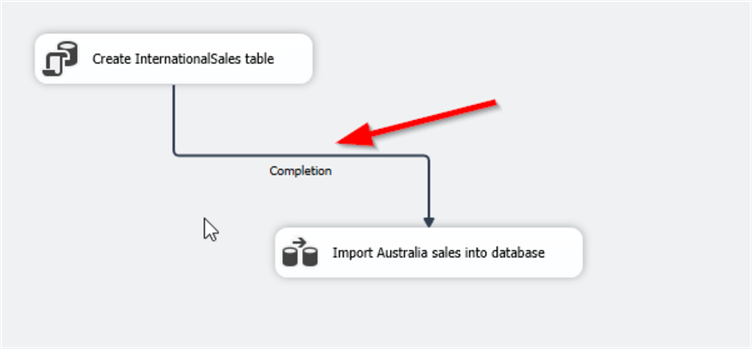
Connectors example with “completion” label.
Designing the Data Flow
After adding the data flow, double-click on the “Data Flow Task” component to navigate to the “Data Flow” area. Note that the SSIS toolbox changes at this level.
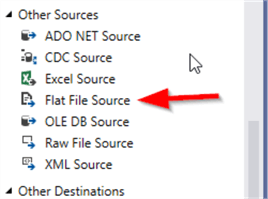
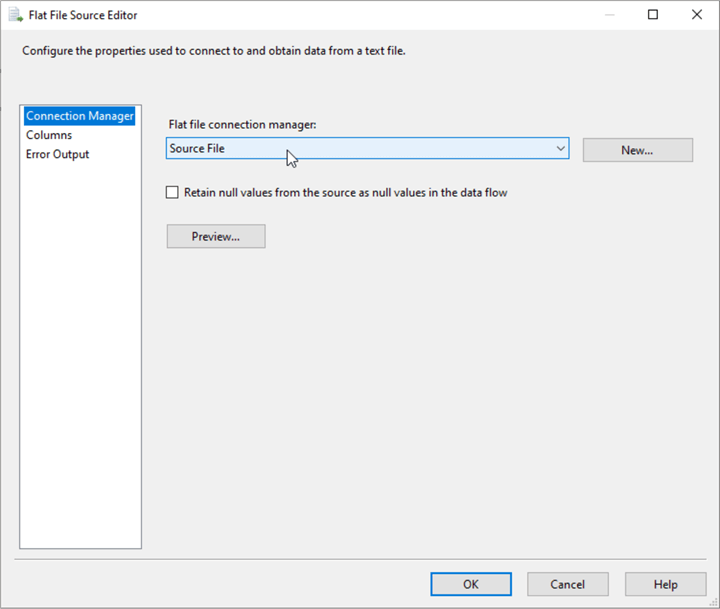
To read data from the Flat File connection manager, we need to add a “Flat File Source” component and select the connection manager.
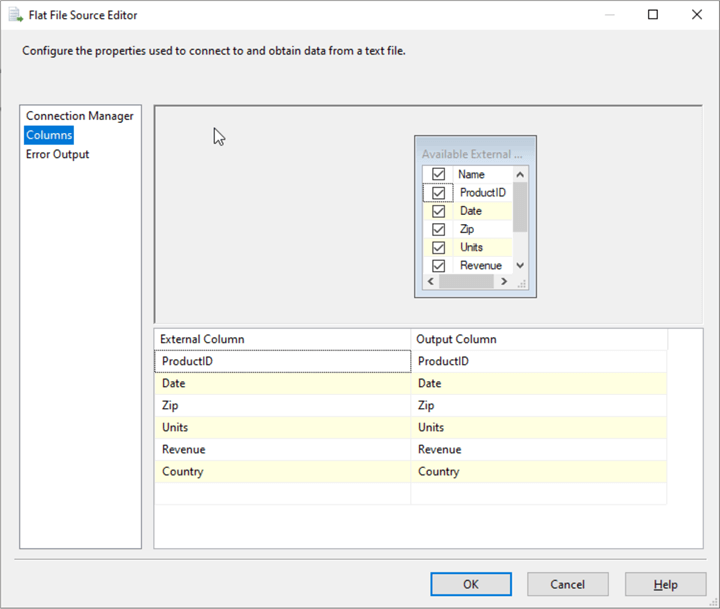
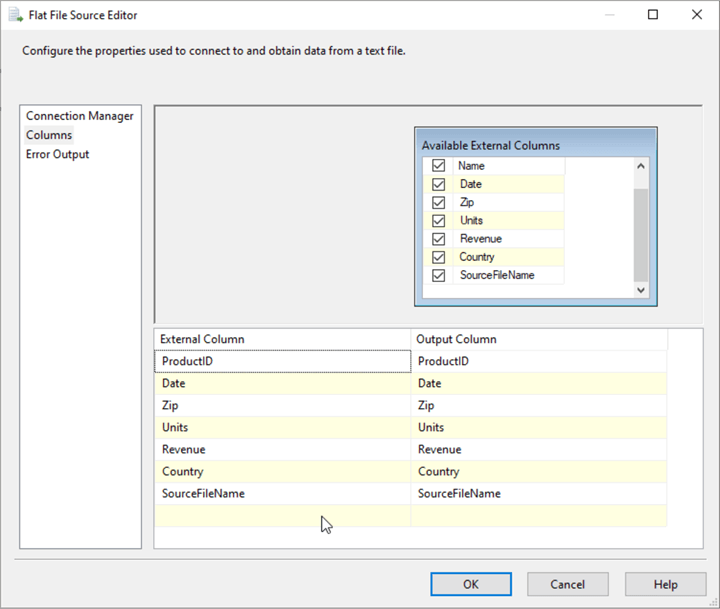
Then, click on the “Columns” tab to read and define the component metadata as well as configure the output columns; we can ignore some columns or assign others their aliases.
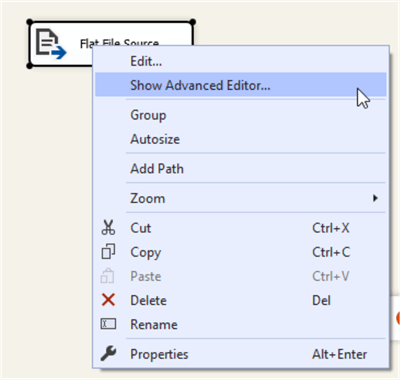
Moreover, we can add a column that contains the source file path. After closing the editor, right-click on the “Flat File Source” and click on “Show Advanced Editor…“
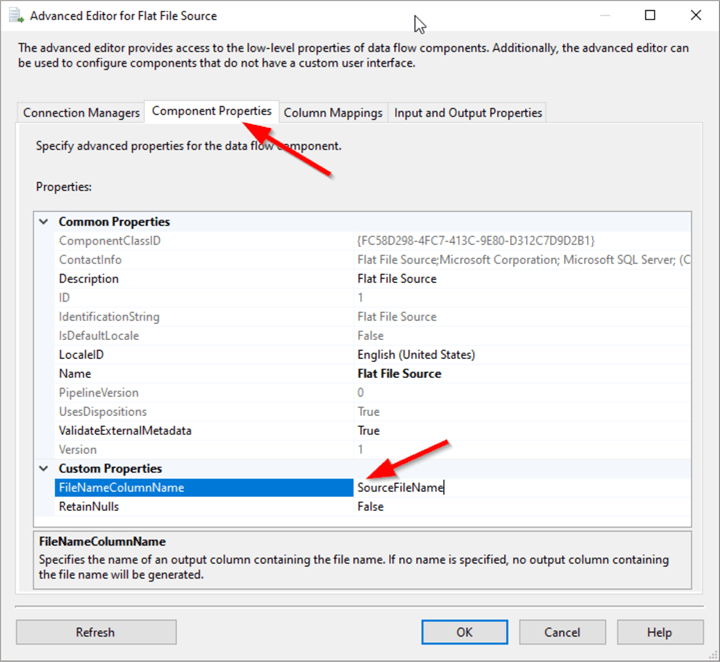
Navigate to the “Component Properties” tab. Assign a name to the “FileNameColumnName” property. In this tutorial, we will name it “SourceFileName.”
Now, when we recheck the input columns, we can see that a new column has been added.
Data Transformation
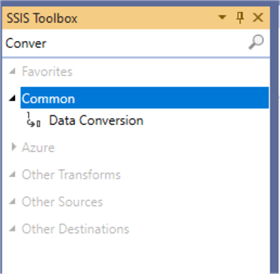
After reading the data from the flat file, we need to convert the columns’ data types from text to the appropriate types. The search bar located at the top can be used to search SSIS toolbox items. First, add a “Data Conversion” component.
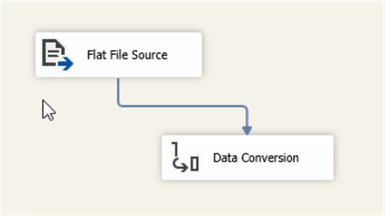
Now, let’s connect the “Flat File” component to it.
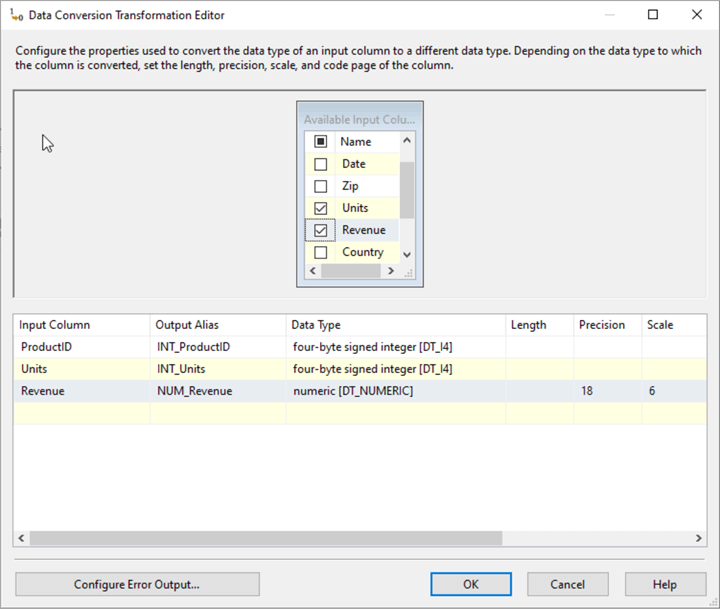
Double-click to open the data conversion editor and check three columns:
- ProductID (Output Alias: INT_ProductID, Type: DT_I4)
- Units (Output Alias: INT_Units, Type: DT_I4)
- Revenue (Output Alias: NUM_Revenue, Type: DT_NUMERIC, Precision: 18, Scale: 6)
Derived Column
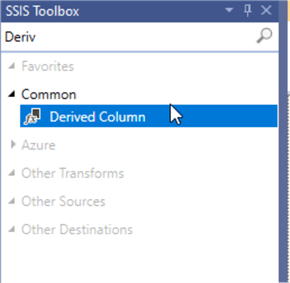
Now, let’s add a “Derived Column” component to apply some expression to the data.
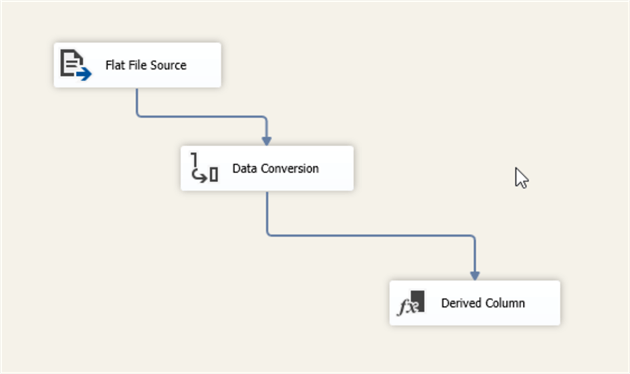
Let’s connect the output of the Data Conversion to the Derived Column component.
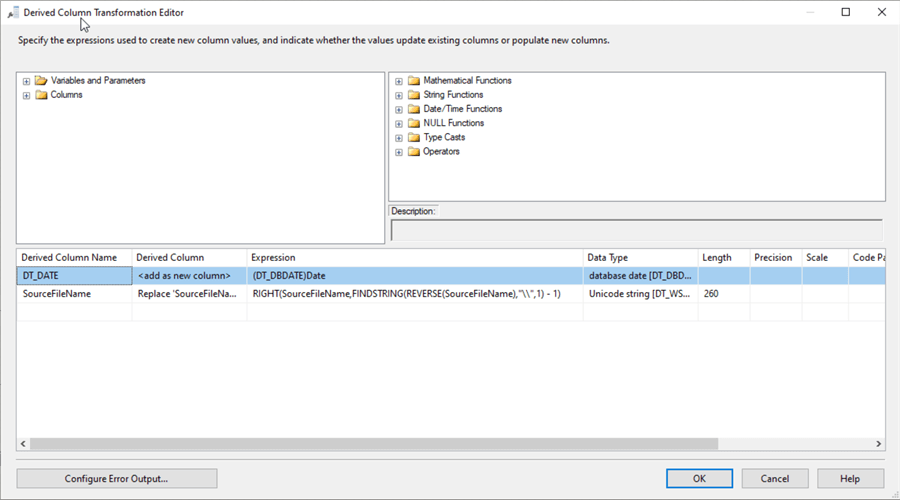
We need to add two derived columns transformation:
- Add a new column DT_DATE using the following expression: (DT_DBDATE)[Date]
- Replace the “SourceFileName” column with the following expression: RIGHT(SourceFileName,FINDSTRING(REVERSE(SourceFileName),”\\”,1) – 1)
Conditional Split
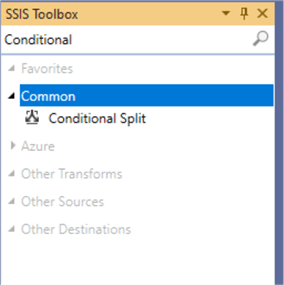
Now, let’s add a “Conditional Split” component to ignore all records having a date before “01 January 2020.”
We need to connect the derived column output to the conditional split component input.
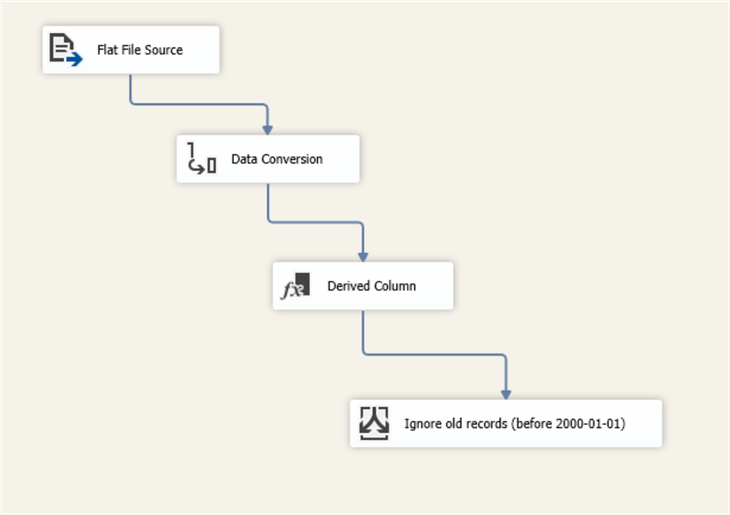
Double-click to open the conditional split editor. We need to define our filter condition: YEAR([DT_DATE]) < 2020.
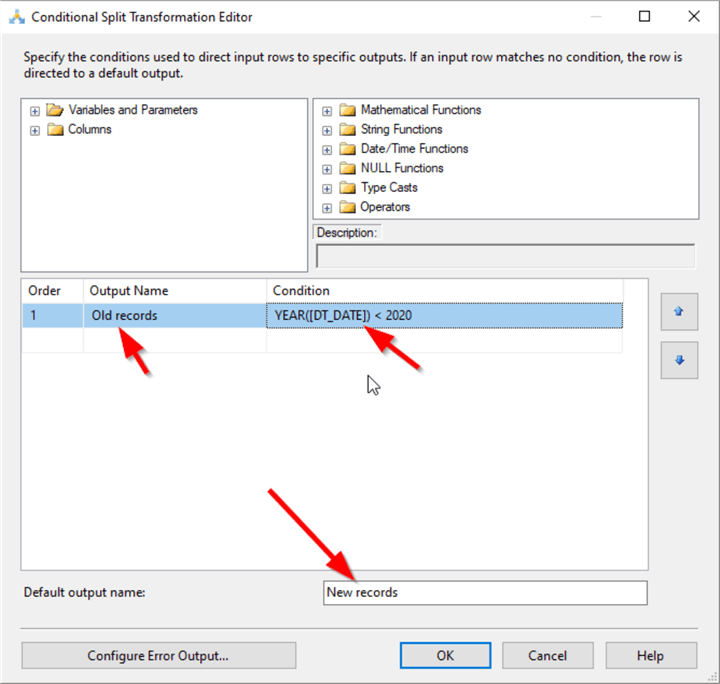
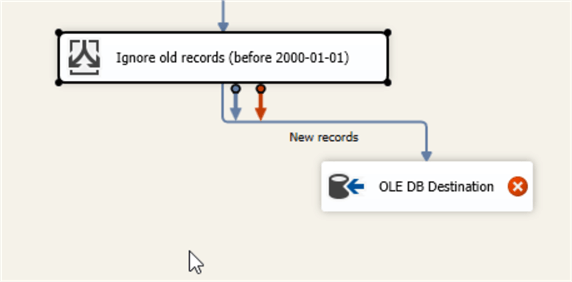
We need to edit the output names. The filter we added will be named “Old records,” and the default output name will be changed to “New records” since it will output the records that do not match the filters defined in the conditional split component.
OLE DB Destination
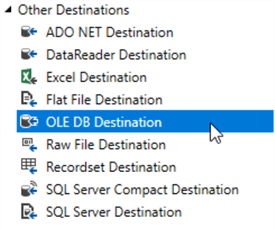
Finally, let’s add an “OLE DB Destination” component to insert the data into the destination table.
Once we connect the conditional split output to the OLE DB destination, a prompt will appear to select the component output that will be linked to the OLE DB destination component. In this case, select “New records.”
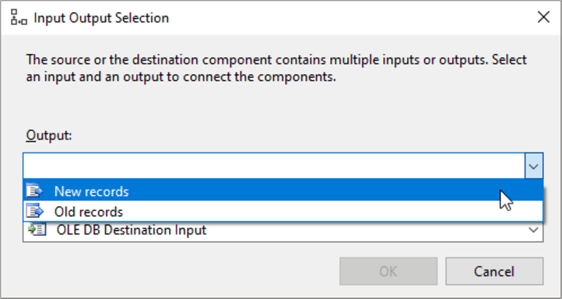
Note that after connecting the components, we can still use the other output, “Old records,” and link it to another component, if needed.
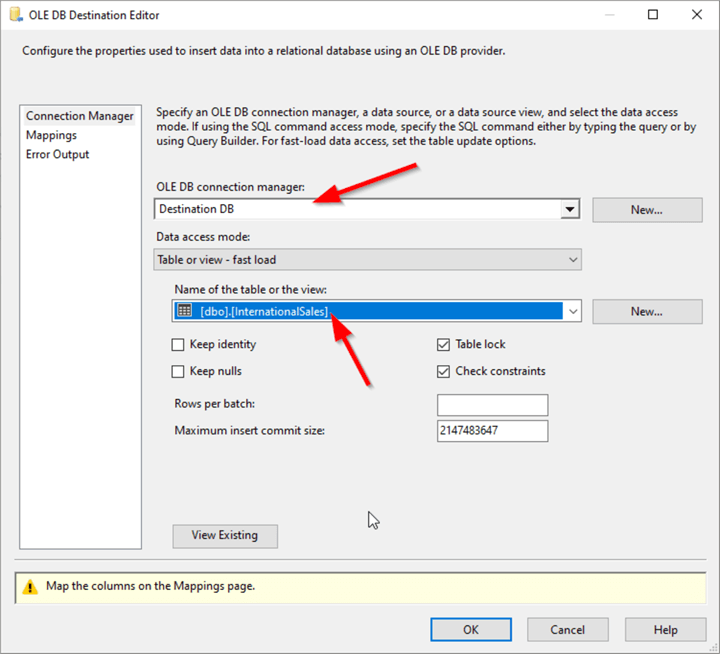
Double-click the OLE DB destination component to select the connection manager and destination table, as well as configure the data load options.
Next, configure the column mapping. Navigate to the “Mappings” tab and map the input columns to the SQL destination columns, as shown in the image below.

Adding Data Viewers
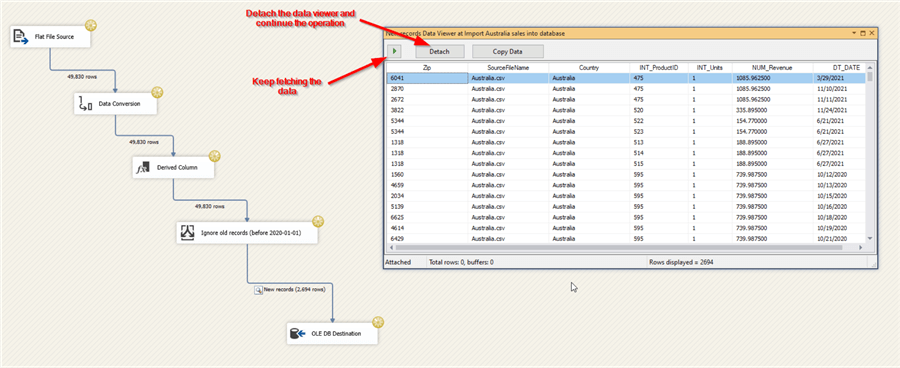
To monitor the data during the package execution, double-click on any data flow path (connectors) and enable the data viewer to select the columns to be monitored.

After executing the package, a window appears showing the data. Click on the Play button to continue fetching the data or the Detach button to stop monitoring the data and continue the package execution.
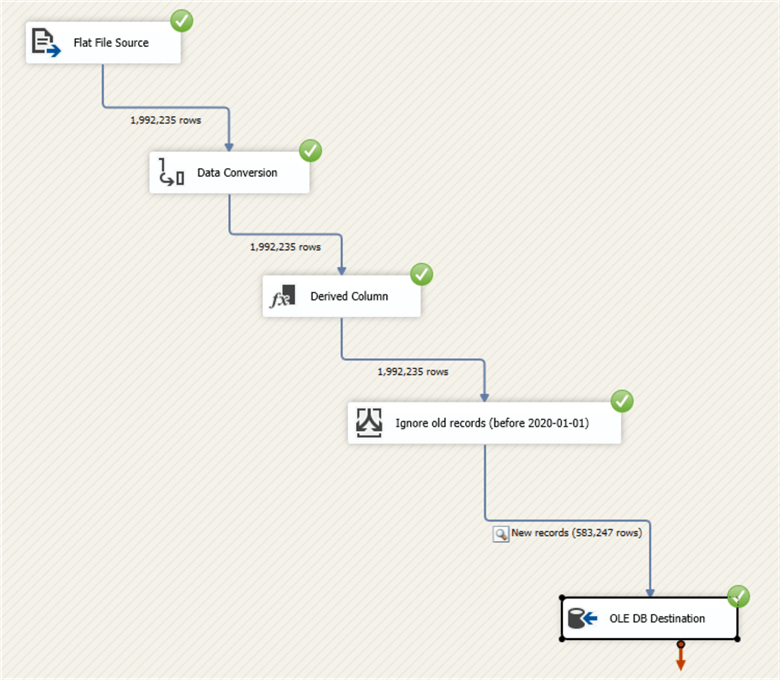
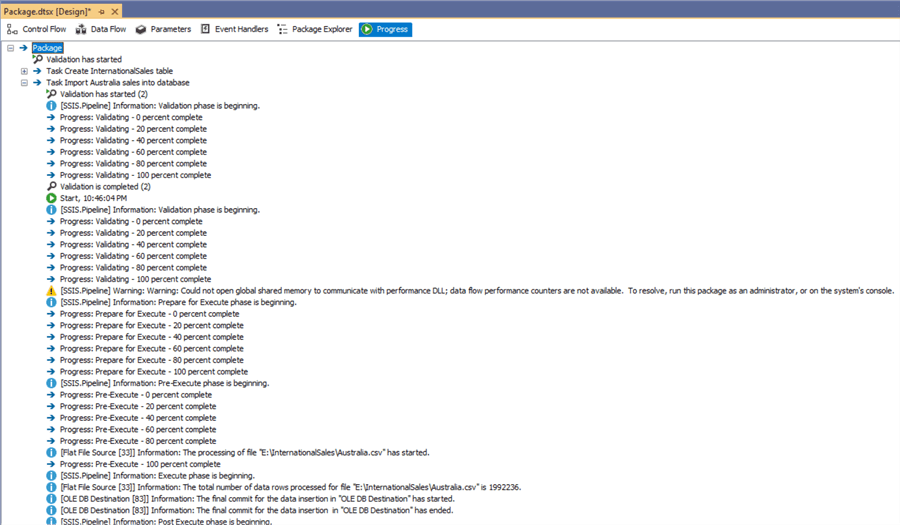
After executing the package, check the “Progress” tab to read the package execution log.
Inserting Multiple Flat Files into the Same Table
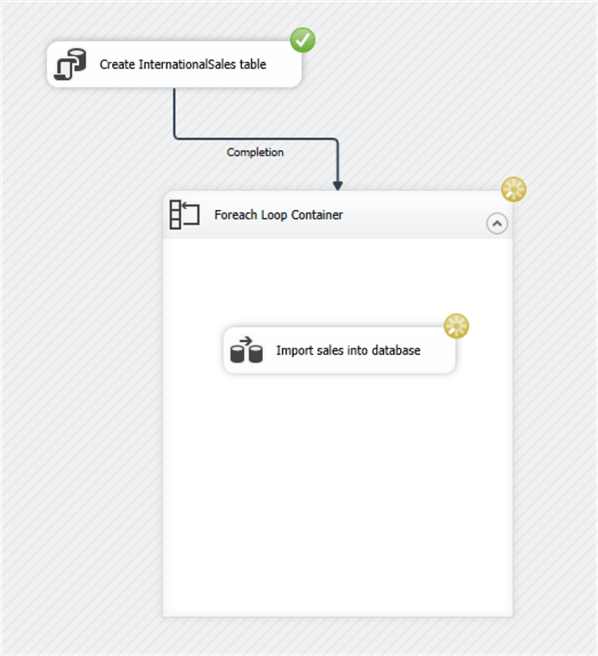
Consider that we need to loop over several flat files stored within a directory with the same structure. Go back to the control flow and add a “ForEach Loop Container.” Move the data flow task into the container (as shown in the screenshot below) and connect the execute SQL task to the container instead of the data flow task.

Working with Variables and Expressions
Right-click in the control flow area and click on “Variables.”

SSIS variables store values that can be used and updated during the execution of an SSIS package, allowing for dynamic control and configuration of tasks and data flows. In the Variables windows, click on “Add variable.”
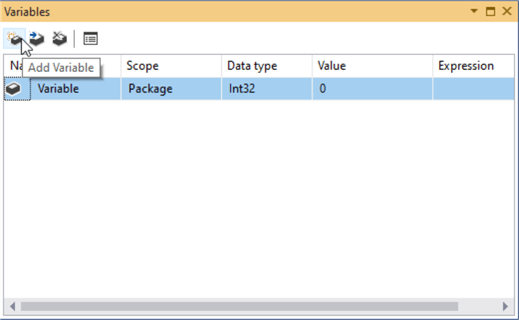
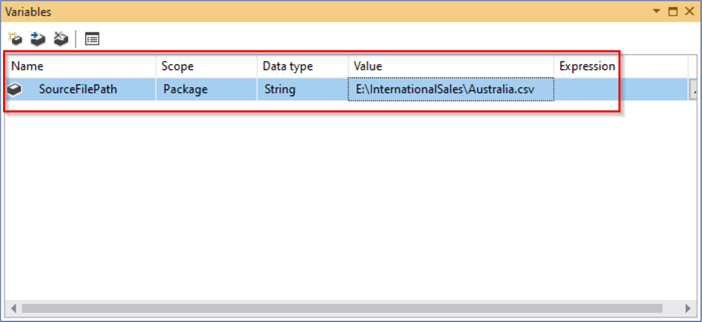
Add a new string variable named SourceFilePath and set the default value to the “Australia.csv” file.
Now, double-click on the ForEach Loop container. Change the Enumerator type to “Foreach File Enumerator.” Select the Source directory and change the Files filter to *.csv to only read the CSV files. Make sure that file names are retrieved in a fully qualified format (full path).

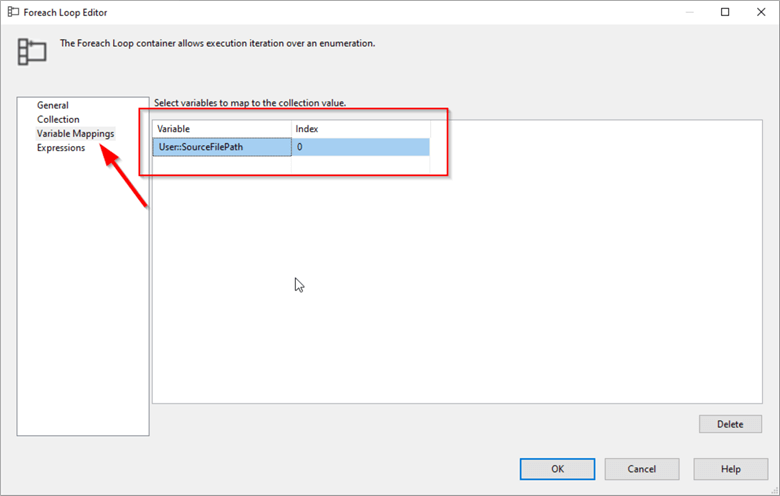
Next, go to the Variable Mappings tab and map the file name retrieved by each loop to the “SourceFilePath” variable we created previously. This allows the full path of each file to be read using this variable on each iteration.
Now, we should configure the flat file connection manager to read the input files. Click on the “Source File” connection manager. In the Properties tab, click on the button in the Expressions property.
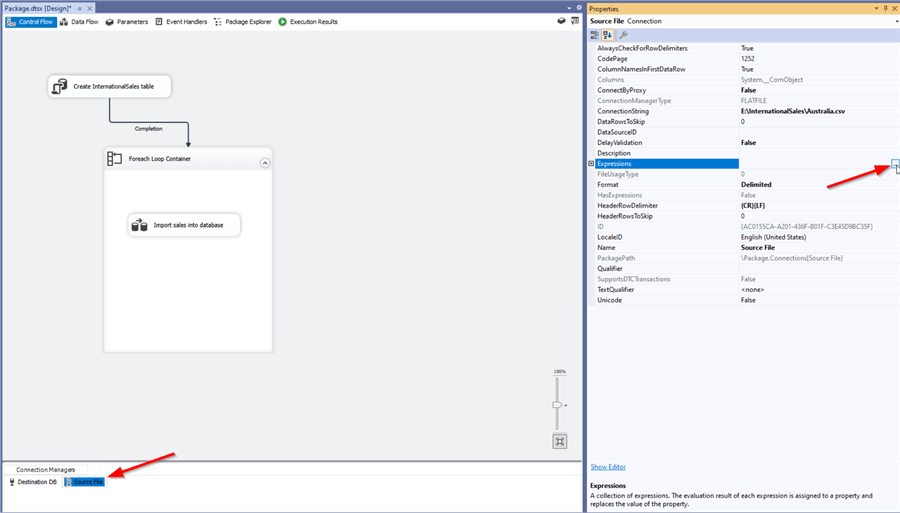
Add a new expression to the “ConnectionString” property as follows: @[User::SourceFilePath]
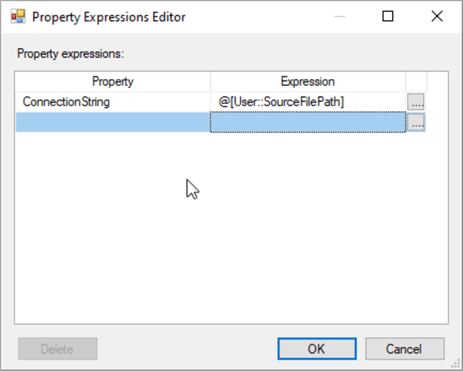
This will make the flat file connection manager link to the file path stored within the SourceFilePath variable.
Let’s try to execute the package. Note that the data flow task is executed several times.
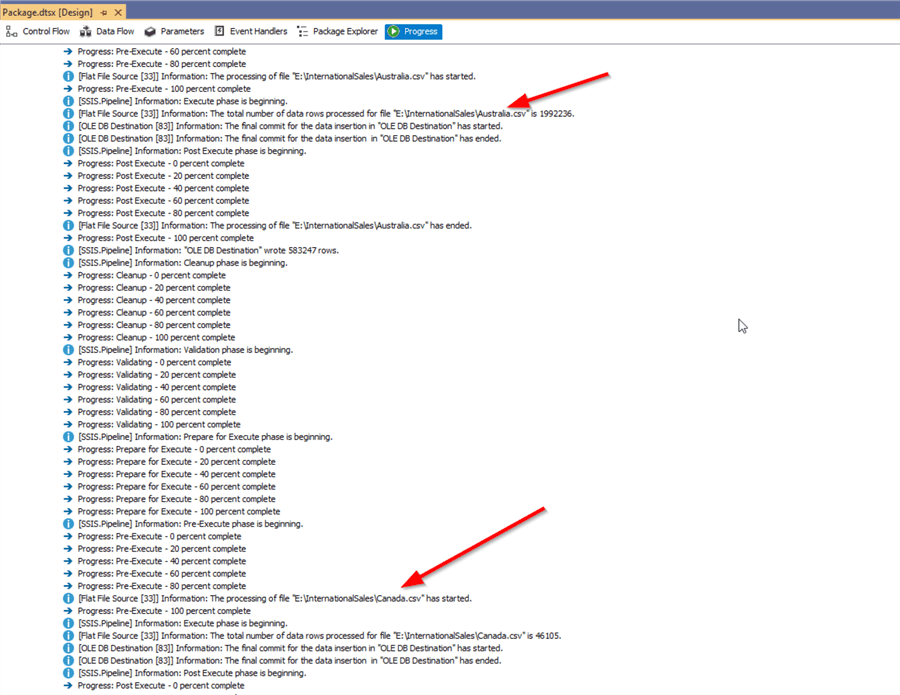
After the package execution finishes, go to the Progress tab and note that several files were manipulated.
Checking the Package Structure
To check how the SSIS package is structured, click on the “Package Explorer” tab to see the package tasks and components tree.
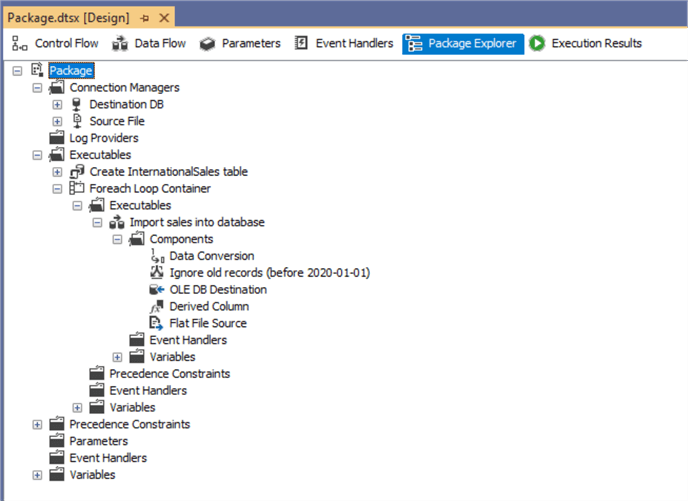
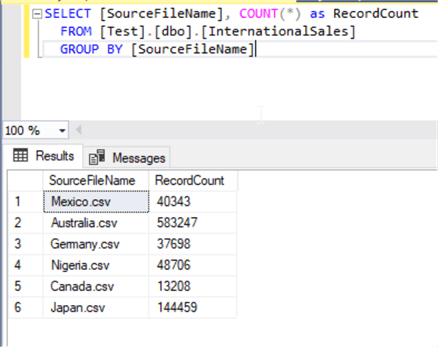
Finally, we can run the following query from SSMS to check how many records were imported from each file into the destination table.
SELECT [SourceFileName], COUNT(*) as RecordCount
  FROM [Test].[dbo].[InternationalSales]
  GROUP BY [SourceFileName]
We can note that six files were mentioned in the table.
Frequently Asked Questions
Yes. SSIS packages are usually developed in Visual Studio with the Integration Services extension installed. Make sure the extension version matches the SQL Server version you plan to target. If you are working with newer versions this article may help: Develop SSIS Packages with SSIS 2025.
No. SQL Server can be installed locally or on another server. SSIS only needs the right connection information and permissions. For learning, I usually prefer a local or test SQL Server instance because it is safer and easier to reset.
For a quick test it is fine. For a package that will be reused I would avoid that. File paths usually change between machines and environments. Variables and parameters make the package easier to move later.
Start with the flat file connection manager. Check the delimiter, check the column names, and check the data types. Also, check whether the first row contains headers. Most flat file issues come from metadata that SSIS detected in a way you did not expect.
It depends on the file and the target table. If the file has simple type issues, then SSIS transformations may be enough. If the data has many quality problems, then I would separate the loading step from the cleaning step. This makes the process easier to test and review. For related ideas see Techniques to Cleanse Bad Data in SQL Server.
Do not ignore them. Redirect them to another table or file so they can be checked later. This is better than failing the whole load without knowing which rows caused the issue. A good follow-up is Error Handling in SSIS Data Flow Task Part 1.
This usually comes down to environment differences. The package may use a local file path. It may also run under a different account. Permissions can be different too. I would check the connection managers and file paths first.
In general, variables are used to store values to reuse within several tasks or components.
Use parameters when the value should be passed into the package from outside. This is useful when the same package runs in development and production with different settings.
Use clear names for tasks and connection managers. Check the Progress tab when testing. Add logging when the package becomes more important. Do not wait until the package is already in production. For more on SSISDB reporting see Reporting with the SQL Server Integration Services Catalog.
After the package is tested, you can deploy it and run it from SQL Server Agent. Do not schedule it before testing the package with realistic data. A step-by-step walkthrough is available in Deploy and Schedule SSIS Package Step by Step.
A package can become slow because of large files. It can also be slow because of conversions or bad data flow settings. Start by checking where the time is spent in the package execution steps. Then review the data flow design before changing too many settings. This tip is a good next step: SSIS Performance Tuning When Designing ETL Pipelines.
For real projects I would use the SSIS Catalog. This gives you a better way to manage projects and environments. It also helps with logging and execution history. For more details see SSIS Catalog Deployment to Support Dev QA and Production.
Check the connections first. Then check file paths and permissions. Also, check package parameters and logging. Run the package with data that looks close to production data. Small differences between test data and real data can cause unexpected failures.
Next Steps
- Check out these resources:

Hadi Fadlallah is an SQL Server professional with more than 10 years of experience. His main expertise is in data integration. He’s one of Stackoverflow.com’s top ETL and SQL Server Integration Services contributors. Also, he is a university lecturer and writes scientific and technical articles on several blogs. On the academic level, he holds a Ph.D. degree in data science focusing on context-aware big data quality and two master’s degrees in computer science and business computing.
- MSSQLTips Awards: Trendsetter (25+ tips) – 2025 | Author of the Year Contender – 2023 | Rookie of the Year – 2022



Hi Hadi, can you share the source file Australiacsv so I can continue eith your nice post, thanks in advance.
Here are the data files for this exercise
https://www.dropbox.com/scl/fi/ovxs8osbhbixvxx7b1glk/counries.zip?rlkey=tzx1lan3ucgl4i8dzk4r2ebjy&st=4lgsvdeq&dl=0
Hi Hadi, can you please share the source file Australia.csv so I can continue your nice post, thanks in advance
Thanks for this amazing blog! The hands-on approach made it easy to follow along and get a solid understanding of SSIS in such a short time. I appreciate the clear explanations and practical examples—really helpful for getting started
Thanks for this awesome tutorial! The hands-on approach made it so much easier to grasp SSIS concepts in such a short time.
Hi Hadi, can you share the source file Australiacsv so I can continue eith your nice post, thanks in advance