Overview
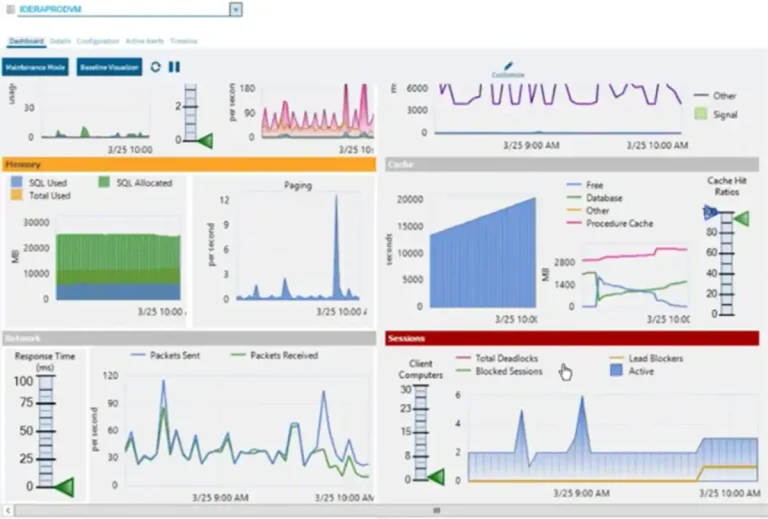
Starting and stopping a data collector set manually is the simplest way to gather data, but not always the most convenient. There have been many times when I have encountered an issue on a server that always seemed to happen at the same time of day (usually the middle of the night). It’s cases like this where you can use Performance Monitor to schedule the running of your data collector set so that you can look at the data gathered at a later time.
Explanation
When scheduling dates/times for your data collector set to run, it’s important to note that you will also need to define a stop condition. Without this, it would run indefinitely. To add a stop condition, we can right-click on the data collector set name and select “Properties.”

Once selected, the following window will open, where we can select the “Stop Condition” tab. In most cases, I set an overall duration, as shown below. There is also the additional “Limits” section, which allows you to define limits that give you the ability to split up the data collection in multiple files, either by duration or file size.

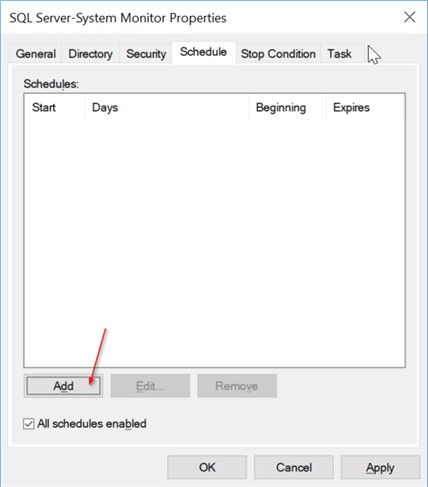
Once that has been added, we can go back to the “Schedule” tab and define when to start this data collector set. To create a new schedule, click the “Add” button, as shown below.
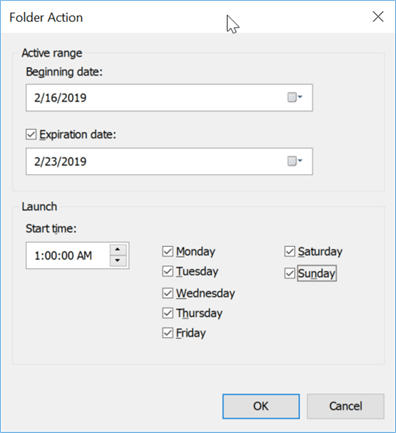
Another window will then open, allowing you to define when the data collection will start. In the example below, we are going to initiate a data collection every day at 1:00 am for a week. Note that it is not required to set an expiration date, and if it is omitted, the schedule will run indefinitely. Once you have the schedule defined, click “OK” to save it.
Stopping a Perfmon Scheduled Data Collector Set
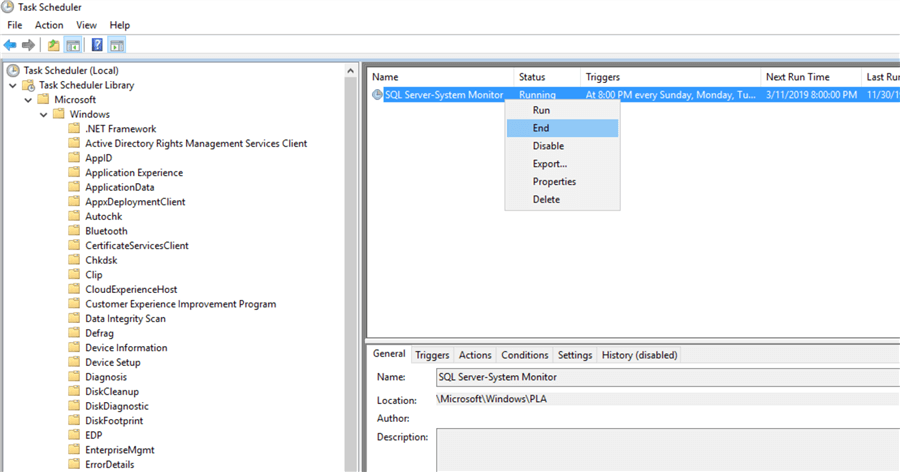
In order to stop a scheduled data collector set that is currently running, we have two different options. First, we can use the same method we used above when we started the data collector set on demand through Perfmon. The other method involves using the “Task Scheduler.” If we open “Task Scheduler,” we can see that under the “Task Scheduler Library” > “Microsoft” > “Windows” > “PLA” folder, we have a scheduled task that is defined to run the data collector set as specified in Perfmon.
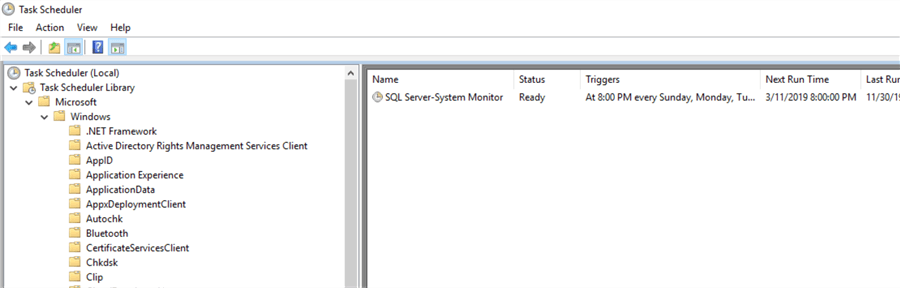
To stop a running data collector set, we simply right-click on the task name and select “End” (just as we would do for any other task defined in Task Scheduler). You can also disable tasks here or add other triggers. For example, we can schedule a startup trigger that is not available when scheduling through Perfmon and capture our counters for some time after a server reboot.
Frequency of Data Sample with Performance Monitor
Another important factor to consider with data collection is the frequency. If you are sampling very frequently, make sure to either set the duration of the data collector fairly short or set a limit on the file size. If the file gets too large, it can become difficult to work with. You can read the following link, how often should PerfMon sample, which provides a good guideline for setting the sample interval based on the frequency of the issue you are trying to troubleshoot. To change the frequency with which you are sampling the data, we need to open the “Properties” dialog of our data collector, as shown below. You can see in this screenshot, circled in red, where we can update this sample interval.

Additional Information
- Automate Performance Monitor Statistics Collection for SQL Server and Windows
- Setup Performance Monitor to Always Collect SQL Server Performance Statistics

Ben Snaidero has been a Database Administrator for just over 10 years. Starting out working mainly with Oracle he got into SQL Server in 2005 and has worked primarily with SQL Server for the last 3 years. His main focus with both Oracle and SQL Server is in the area of performance tuning.
- MSSQLTips Awards: Achiever (75+ tips) – 2018 | Author of the Year Contender – 2016-2017