Problem
In this article, we walk through the steps to install SQL Server 2022.
Solution
After downloading the installation media, launch the SQL Server Installation Center. This is usually the setup.exe file that is part of the download. Find SQL Server downloads here.
Click on the Installation menu on the left and select New SQL Server standalone installation or add features to an existing installation as shown below.

SQL Server 2022 Setup Steps
These are the installation steps and screen by screen for the SQL Server 2022 installation process.
- Edition
After showing pop-up info window that says that it is setting up the processes for the current operation, the SQL Server 2022 Setup window will open.
This window will present you with three options, where the last option is where you can find your product key for SQL Server Standard edition:
-Specify a free edition
-Use pay-as-you-go billing through Microsoft Azure, or
-Enter the product key
Below “Enter the product key” option, you also need to select one or both the licensing options, namely:
-I have a SQL Server license with Software Assurance or SQL Software Subscription
-I have a SQL Server license only
Do your selection based on your environment.
Click the Next button.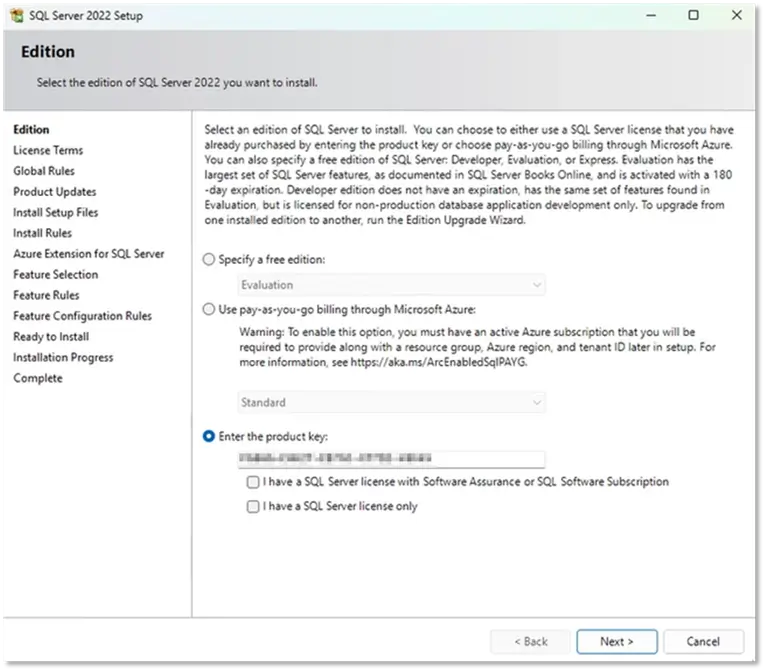
- License Terms
On the next screen, you will have to Accept the license terms and Privacy Statement.
Click the checkbox to indicate that you accept the license terms and then click the Next button.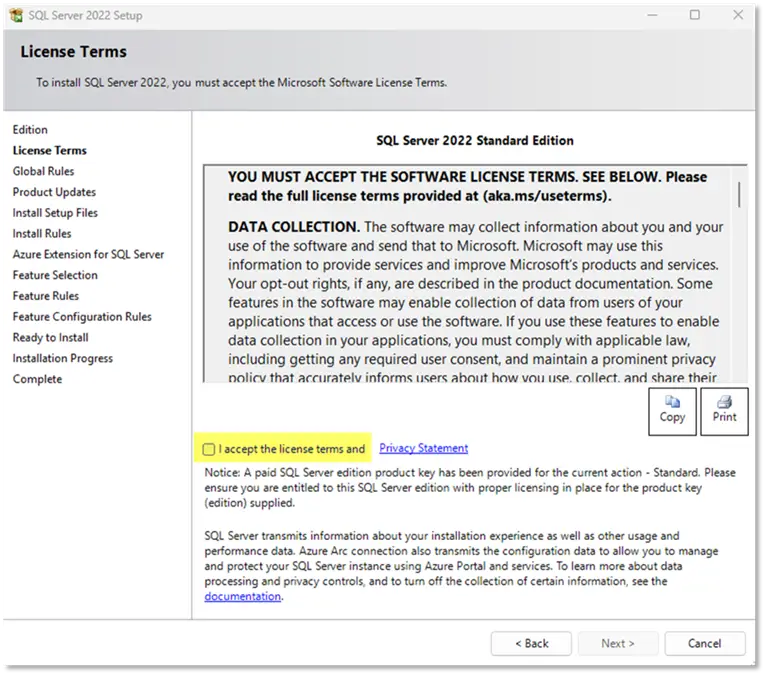
- Product Updates
Next, the installer will check for updates and give you feedback as to whether there are any updates or not.
Click the Next button.
- Install Setup Files
The system will check for any setup files that need to be installed.
Click the Next button.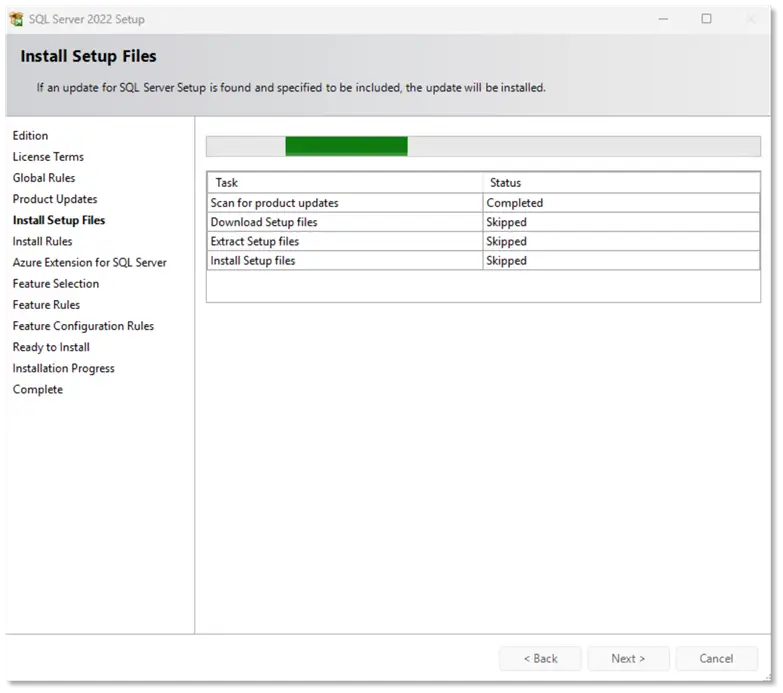
- Install Rules
The next screen will show the install rules and whether your system has passed them.
Click the Next button.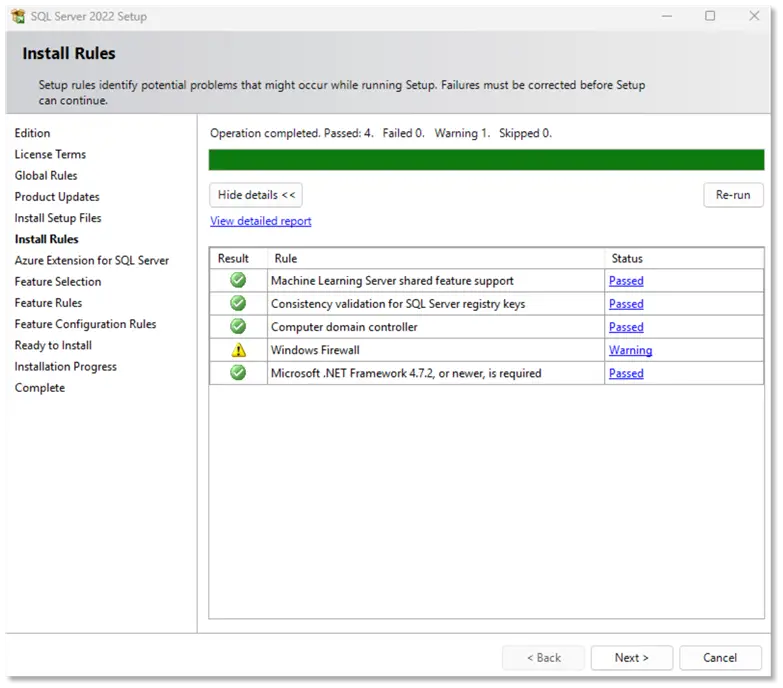
- Azure Extension for SQL Server
The next screen will then give you the option to use Azure Extension for SQL Server.
To do a standalone installation without any Azure extensions, you should uncheck the checkbox.
Click the Next button.
- Feature Selection
The next screen gives you the option to select different features of the SQL Server installation. In this case we will only select the Database Engine Services.
When selecting the Instance Feature, you can see the Feature description on the right side as well as Prerequisites for the selected features and the Disk space requirements.
Click the Next button.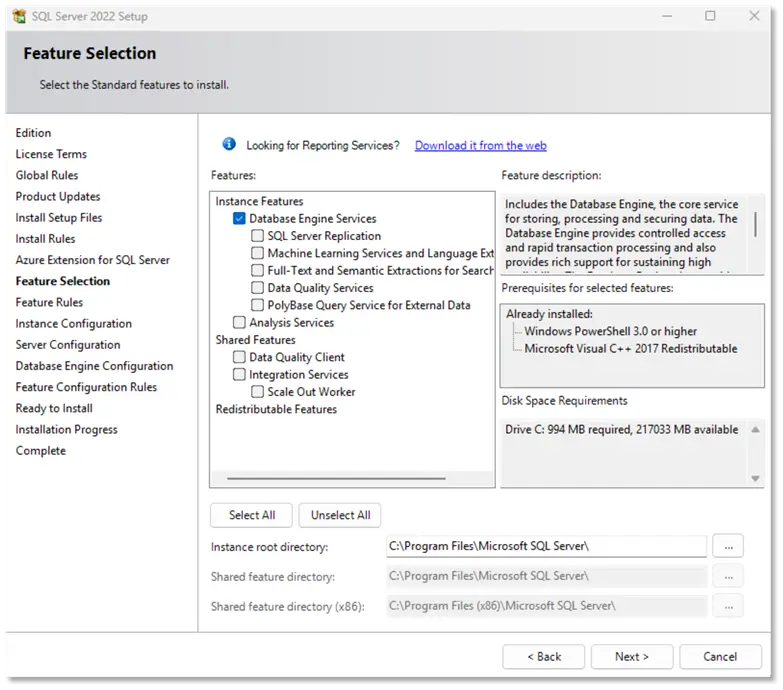
- Instance Configuration
The next window is the Instance Configuration screen, where you can name the instance or keep the default name (MSSQLSERVER) if no other instances are already installed on your server.
If another instance is already installed on the server and it has the name of MSSQLSERVER, you need to choose a new name, like SQLSTD2022.
Click the Next button.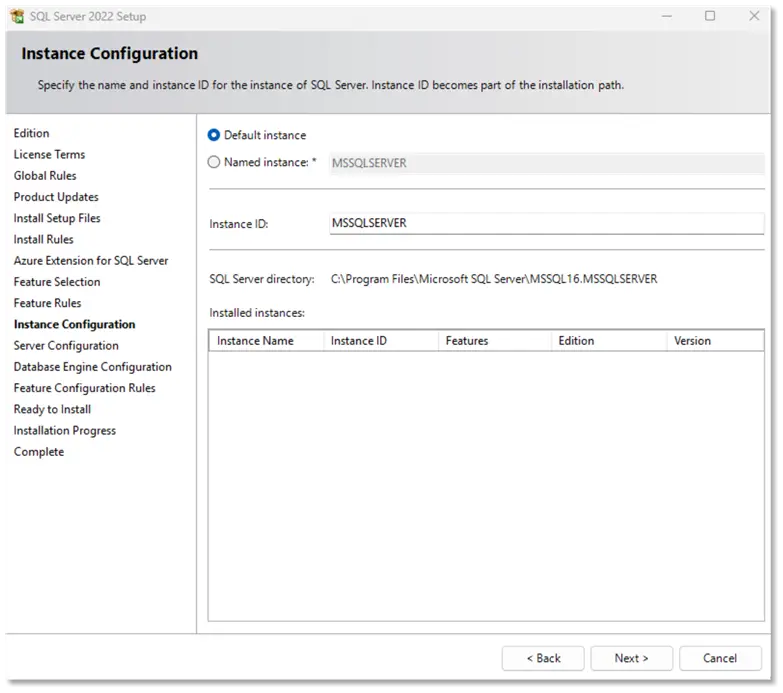
- Server Configuration – Service Accounts tab
On this screen, you will find that there are three services that will be installed:
– SQL Server Agent
– SQL Server Database Engine
– SQL Server Browser
You can change the Startup Type of each of the services to either Manual, Automatic or Disabled.
Click the Collation tab.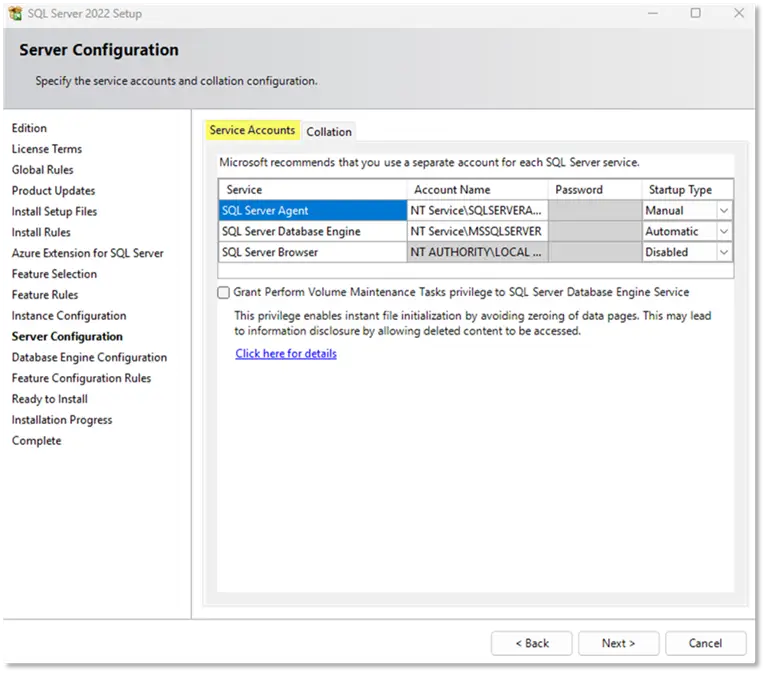
- Server Configuration – Collation tab
On the same window, you will see a Collation tab, where you can change the collation of the Database Engine. By default, the SQL_Latin1_General_CP1_CI_AS collation is selected.
To learn more about the SQL Server Collations, you can see the following tip: SQL Server Collation Overview and Examples.
Click the Next button.
- Database Engine Configuration- Server Configuration
This is where you choose the Authentication Mode, Windows Authentication mode, or Mixed Mode (SQL Server authentication and Windows authentication).
You also need to specify the sa password.
You can also click on Add Current User to grant the currently logged-in Windows account sysadmin privileges on the instance.
Click the Data Directories tab.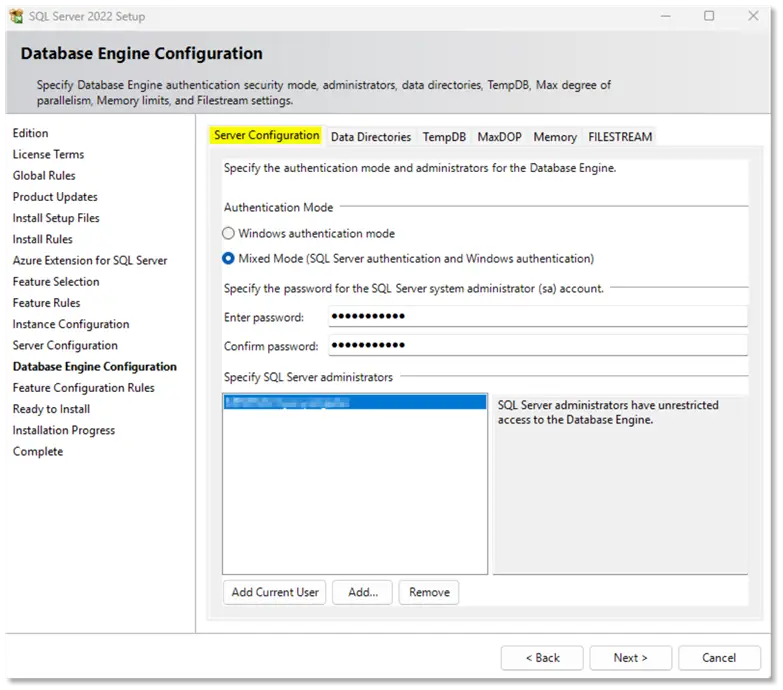
- Database Engine Configuration- Data Directories
This is where you would specify where to store the data and log files of your system and user databases as well as the backup directory for your server.
This is a very important part of the installation process for a production server, and you should make sure you have done some proper planning when choosing the Data, Log and Backup directories.
You can read about some of the best practices here: SQL Server Installation Best Practices as well as Hard Drive Configurations for SQL Server and SQL Server Default File Locations – Data, Transaction Log and Backup.
Next, click the TempDB tab.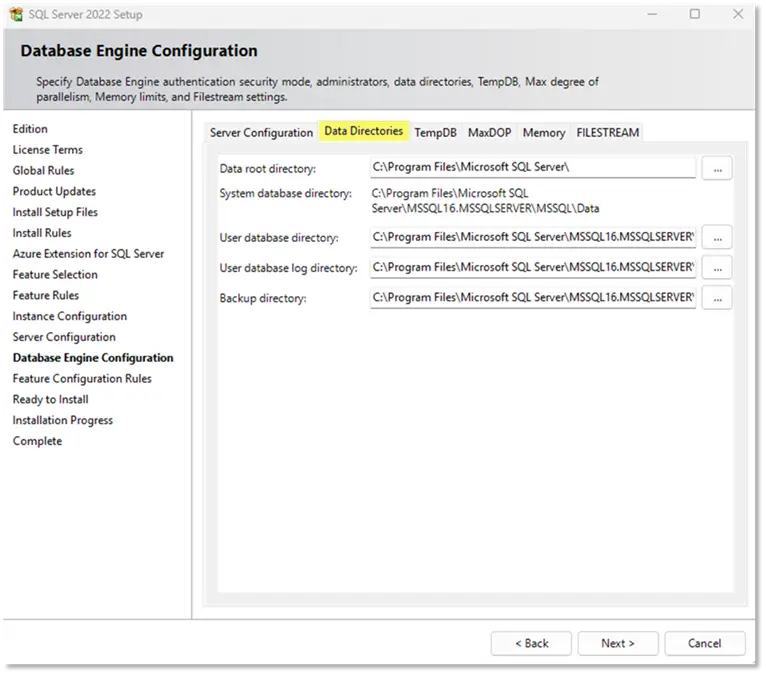
- Database Engine Configuration – TempDB
This is where you can change the TempDB database settings to suit your environment.
Next, click the MaxDOP tab.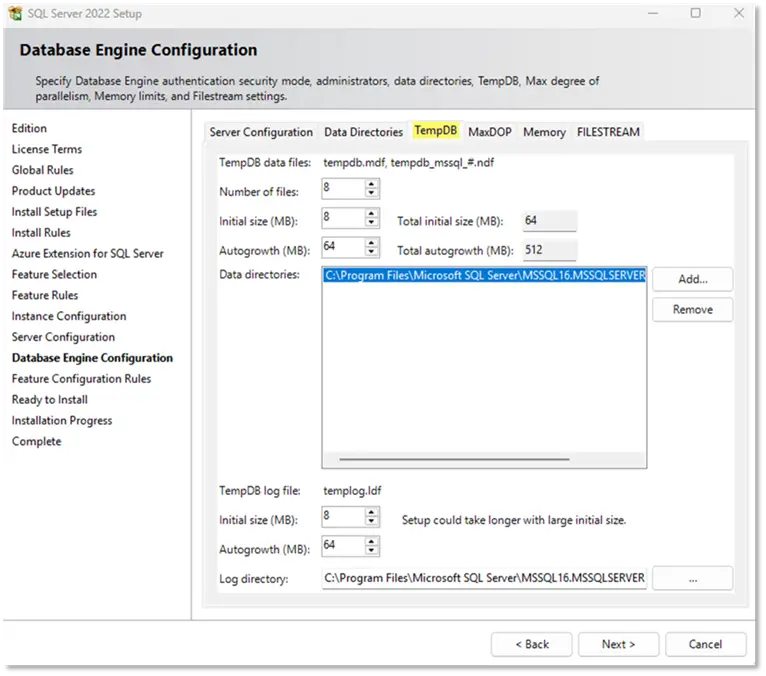
- Database Engine Configuration – MaxDOP
On this tab, you will be able to change the Maximum degree of parallelism which is detected based on the logical cores on the installation server.
Next, click the Memory tab.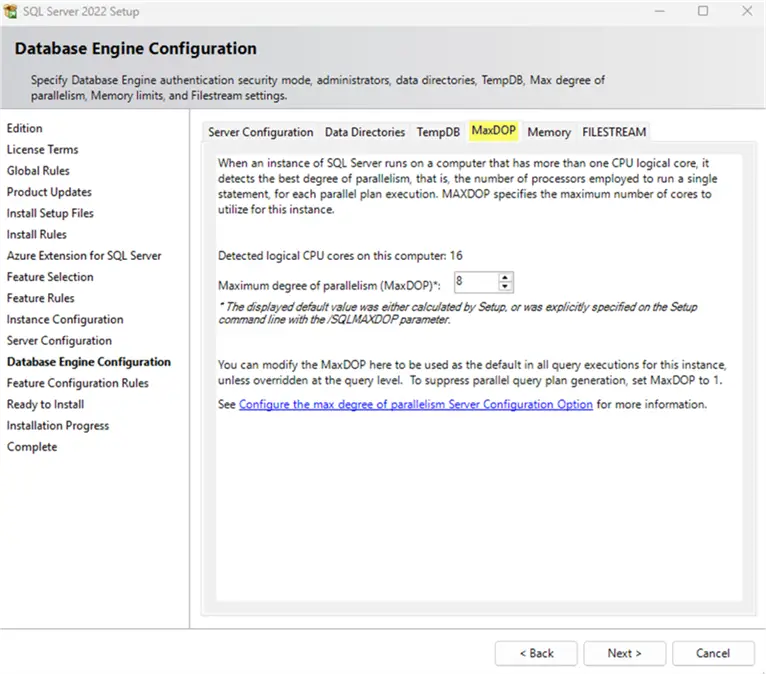
- Database Engine Configuration – Memory
On this tab, you will be able to change your Memory settings for the SQL instance.
Next, click the FILESTREAM tab.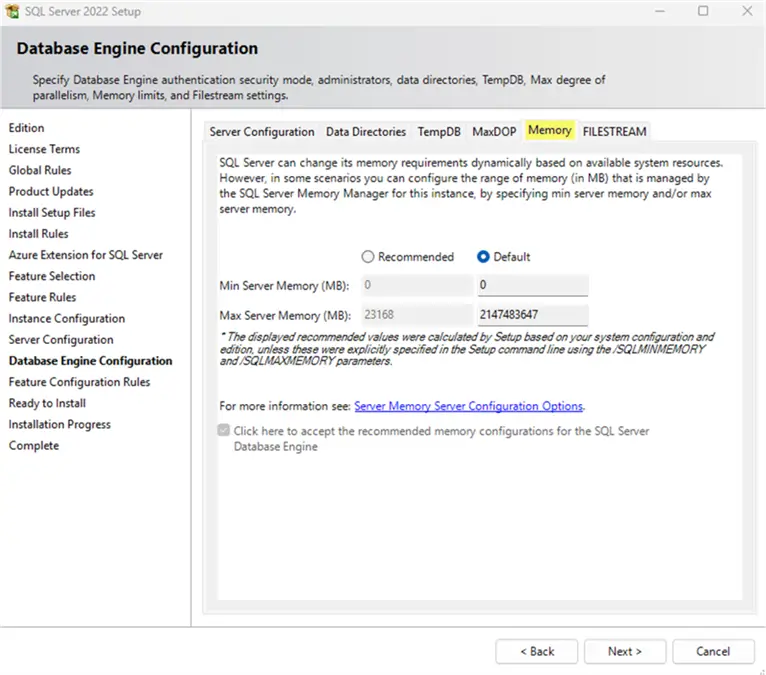
- FILESTREAM
On this tab, you have the option to enable FILESTREAM. This feature allows SQL Server to store large files, such as documents and images, in the file system while still linking them to the database. Only select this option if your system or application specifically requires it.
Click the Next button.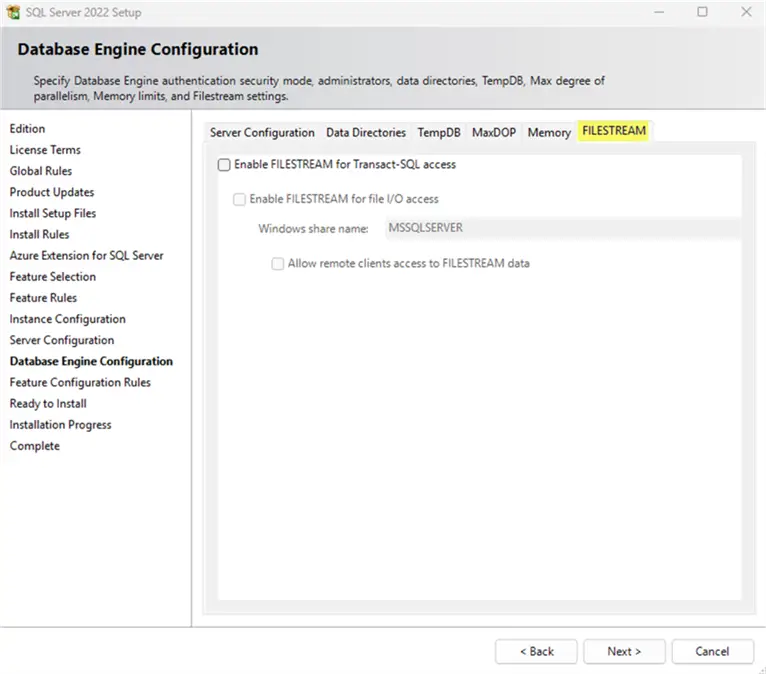
- Ready to Install
The next window displays a summary of the selections you made during the installation process. Review the information carefully to make sure all options, instance settings, and features are correct before you proceed with the installation.
If anything needs to be changed, you can still go back and adjust the settings.
Now you will have an Install button on the bottom right of the window. When you click on the Install button, the installation will proceed.
Finally, click the Install button.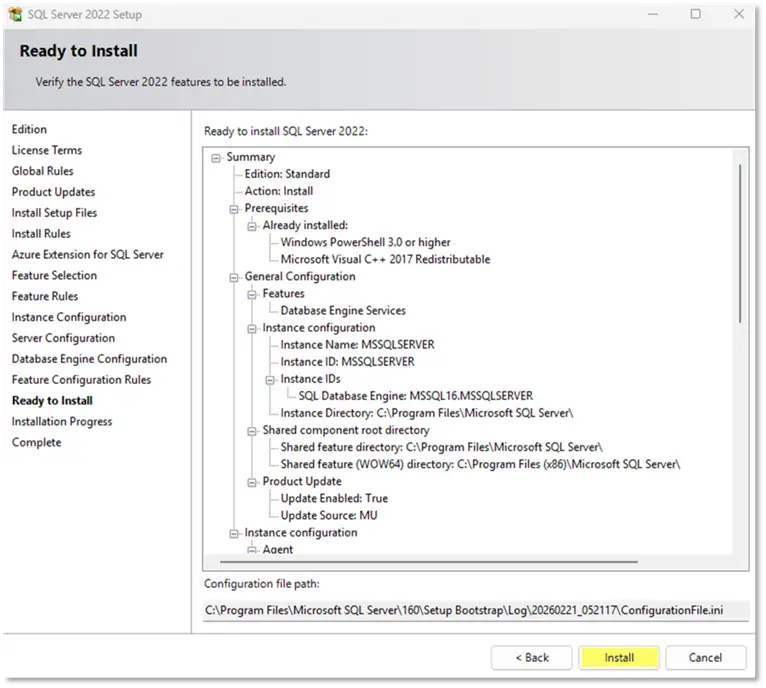
- Complete
Once the installation is complete, the final screen will display information about the setup operation and any recommended next steps. The status of each component should show “Succeeded.” If any item does not show this status, review the details before closing the setup.
Click the Close button.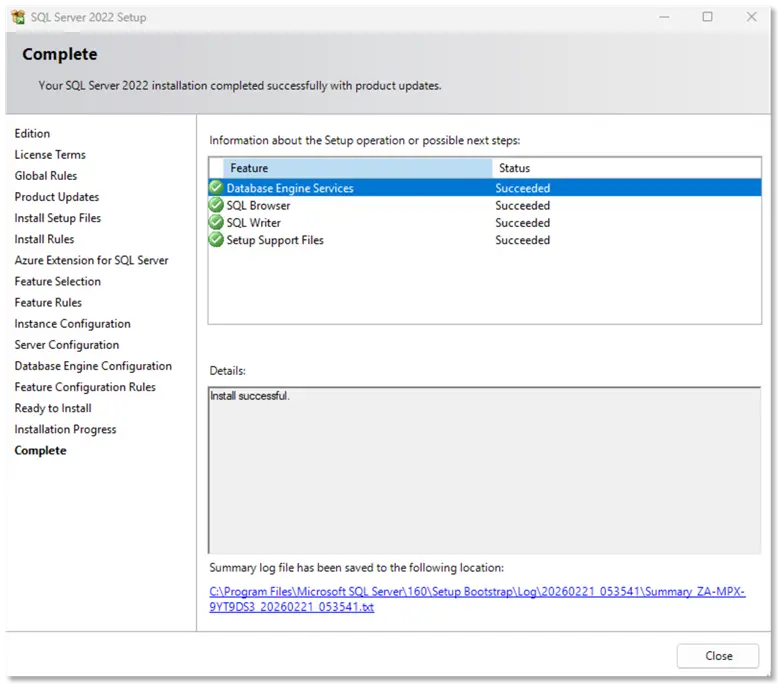
Summary
That is it. SQL Server should now be installed and ready for use or further configuration.
Next Steps
You can now close the window, and your SQL Server Standard Edition will be available.
If you have SQL Server Management Studio installed, you can now open it and connect it to your new SQL Server Standard Edition instance.
- In this tip, we have covered the Microsoft SQL Server 2022 Standard edition installation from installation media obtained from a software vendor.
- If you need to install older versions of SQL Server like SQL Server 2019, you can find the complete tip here: Download and Install SQL Server 2019 Standard Edition
- If you want more information regarding SQL Server installation, you can find it here: Install and Uninstall

Jan has years of experience in Information Technology which ranges from Unix Administration through System Administration and development, Web and Database Development and Administration and applying Agile methodologies. Jan has been working with databases since 1996 when he had his first exposure to Sybase databases. He got involved with SQL Server in the early 2000’s and had exposure to SQL Server 2000, 2005, 2008 and all the rest. Jan likes to find easy and secure ways to host data and has been using Sybase, SQL Server, and MySQL. He has a great passion for working with data and believe the best way to become an expert in a field is by teaching the subject.
- MSSQLTips Awards: Rookie of the Year Contender – 2022