Problem
How can I import my Excel workbooks into Power BI Online? Are there any options to export data from Power BI to a CSV file? If so, can you provide the steps to complete both tasks?
Solution
The Excel functionality in Power BI is not strictly limited to just the Analyze in Excel option which was outlined in the previous tip Analyzing Power BI data with Excel. Of course, if we have a local table we can easily import that data into Power BI. Power BI expands upon this functionality with the ability to import various Excel workbooks and worksheets covering local Power BI datasets and visualizations and also simply exporting your dataset to a CSV file.
In order to get started, we need to first verify we have Power Query and Power Pivot installed in Excel. If you have Excel 2010 or Excel 2013, you can download Power Query. For Office 2016 Power Query is “integrated” into the Data tab on the ribbon. Concerning Power Pivot for Office 2013 & Office 2016, the add-in can be enabled by going to File > Options > Add-Ins. For Office 2010, it is a little more tricky; you will need to download and install the Add-In. Instructions for completing that install for Excel 2010 can be found here.
Import Data to Power BI Online
Our first steps for this tip will go over some of details of getting regular Excel data into Power BI online. The process is remarkably easy, but there are some definite caveats and cautions as you work with the data. You can actually connect/import to Excel data all the way back to Excel 2007, but hopefully you will have a much newer version!
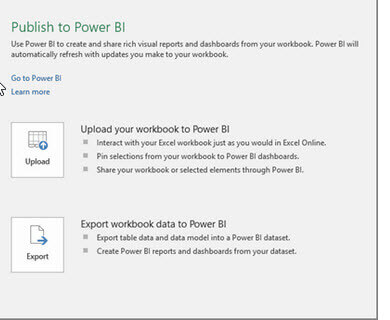
There are actually two methods of importing your Excel spreadsheet into Power BI online. The first method is to publish the worksheet to Power BI online via the Publish option. This method, as shown below, is convenient especially if you are already in Excel and you just want to quickly place the workbook into Power BI. However, this option is only available with Excel 2016 and only if you have access to save your Excel file to OneDrive for Business.

Using this method, after you upload the workbook to OneDrive for Business, you are offered two alternative methods for saving the data:
- Option 1 – Uploads the workbook directly to Power BI.
- Option 2 – Exports the workbook data to Power BI as a dataset.
The alternative method to getting your Excel file onto Power BI online is to use the Get Data option on the Power BI site. I actually prefer this option as it seems more intuitive to me and has less restrictions (i.e. it lets me load my Excel 2013 files which we are still in use at many organizations).


After clicking the Get button, shown in the above screen print, we are presented with a set of options, as illustrated below. At this point it would probably be a good idea to discuss these different options and the advantages and disadvantages of each. It would also be good to point out that when importing into Power BI online, we are essentially creating a new dataset on Power BI and not necessarily loading the entire Excel Workbooks.
- Local files – The Excel file in this case will continue to reside on your “on premise” local machine or file share. Only the dataset (and some local Power BI datasets and reports… more on that item later) is uploaded to the Power BI site.
- OneDrive for Business – This option actually loads the workbook into your Business OneDrive account, creates any related datasets and reports on Power BI online, and then creates a direct “sync link” between the online workbook and the datasets and reports. The “sync link” then updates the data about every hour.
- OneDrive for Personal Individuals – This option is essentially the same as OneDrive for Business except you will be logging into OneDrive with your personal account.
- SharePoint – This option also works similar to the OneDrive for Business option.
As you can see you really do have an array of choices on where to save the files.
However a few limitations do exist with the file upload process:
- File size is currently limited to 250MB.
- Only xlsx/xlsm files can be uploaded.
- Power BI prefers the data to be in a clean table format. If the data is not in orderly rows and columns, Power BI likely will not be able to import the data or will import an empty dataset.

Selecting the Local File method presents us with even more decision points, as illustrated next. We can either just import data into Power BI or we can upload the entire workbook into Power BI. Using the first option keeps the file local which allows for easy editing on your desktop. However this option also requires that you refresh the data either via a manual refresh or by setting up a scheduled refresh.

You can only schedule an automated refresh if the workbook contains a Power BI data model or if the data table is linked to a data source.

Now would also be a good time to emphasize the importance of using good naming conventions in your Excel workbooks. The name assigned to an Excel table will be the name that is used in the Power BI dataset; likewise the column names from the table become the field names in the dataset.

At this point the dataset can be used to create a report in Power BI.

Now moving on to the second upload method, Upload your Excel file to Power BI, this functionality actually imports the entire workbook into Power BI. As you see in the below illustration, the workbook is placed in the Reports Area of the Power BI menu. Furthermore, notice the Excel thumbnail appears next to the name of the file.

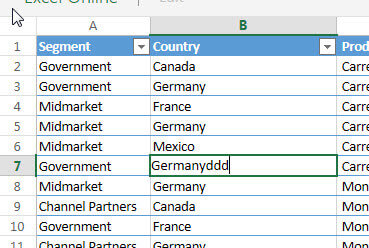
You will also notice that the file allows you certain edit and filter functionality, quite similar to what you would be able to do with the online version of Excel.
You also have the ability to select cells or an object within your uploaded workbook and Pin it to an existing or new dashboard.

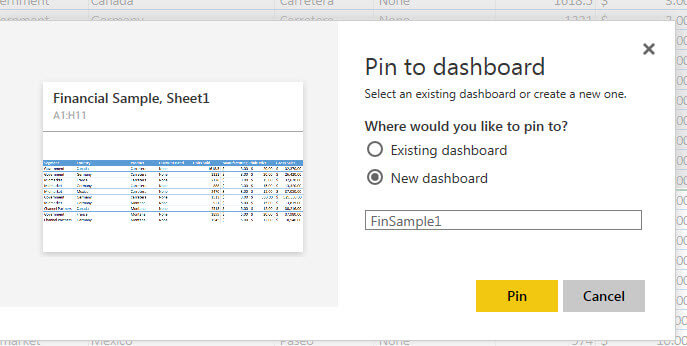
As you can see below, the cell range selected was pinned to new dashboard called FinSample1.

Up to this point, we have been working with a simple Excel workbook with a single table. What if we exploit the Power Query and Power Map functionality in Excel by adding a Sales Model Power Query dataset and then building a Power Map visual, all within Excel?


Using the Import option, the dataset is loaded into Power BI online and can be used to create new reports.

However, we also see that the Power BI automatically added our PowerMap to the Reports section of Power BI online. From here we can edit the map (report) by adding items such as a filter or we can pin it to a dashboard. That functionality is very convenient. 


