By: Daniel Calbimonte | Comments (5) | Related: > Azure
Problem
I have a csv file in Azure Blob Storage and I want to import to my local SQL Server. Is that possible? What tools do I need to import the data?
Solution
Yes, in this new tip we will use the SQL Server Integration Services (SSIS) task named Azure Blob Source, which is installed with the Feature Pack for SSIS to connect to Azure.
We are assuming that you already have an Azure Storage Account and a Blob container. If you do not, please refer to this tip (Automatically upload SQL Server Database Backups to Azure with Integration Services) and follow steps 1 through 6. In that tip, our Azure Storage Account was mssqltips and the Blob container is bc1.
Requirements
- SQL Server 2016.
- The SSDT installed.
- An Azure Subscription.
- Internet Access.
- Microsoft Azure Storage Explorer installed (MASE).
- Feature Pack in SSIS for Azure installed.
- An Azure Storage Account a Blob Container created (see our tip Automatically upload SQL Server Database Backups to Azure with Integration Services).
Getting Started
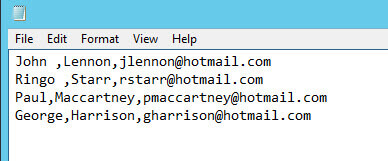
- Create a csv file name file.csv with the following content:
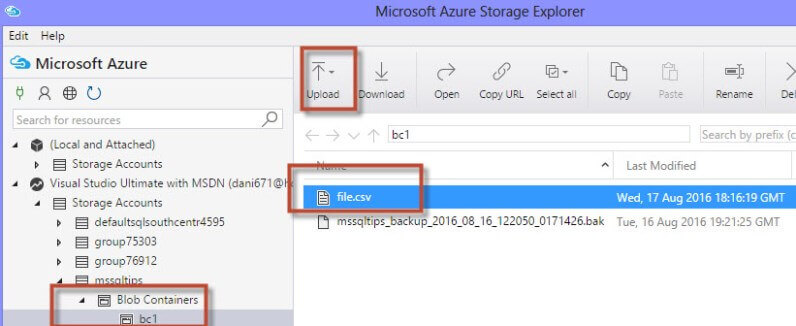
- Using MASE, upload the file.csv of step 1 to the Azure Blob container bc1 created in the earlier tip:
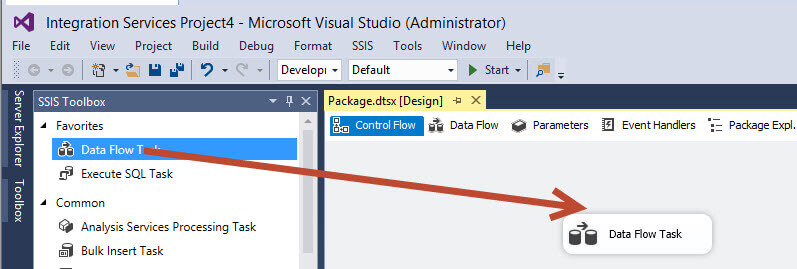
- Using SSDT, create a SSIS project. Drag and drop a Data Flow Task to the design pane:
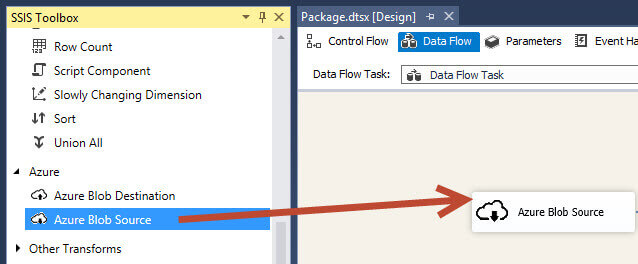
- Double click Data Flow. Drag and drop Azure Blob Source. This is a new task included in the SSIS Feature Pack for Azure installed as part of the prerequisites. This task will be used to connect to the csv file in Azure:
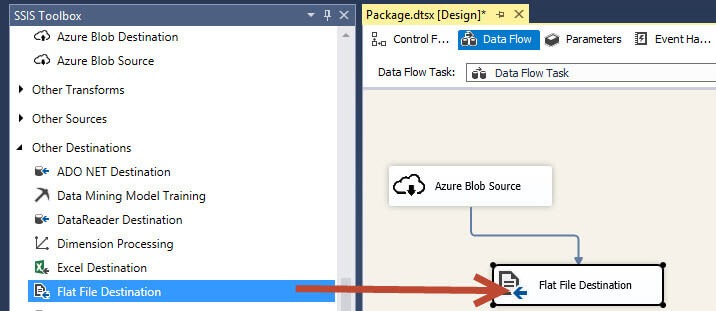
- Drag and drop a Flat File Destination and join this task with the Azure Blob Source:
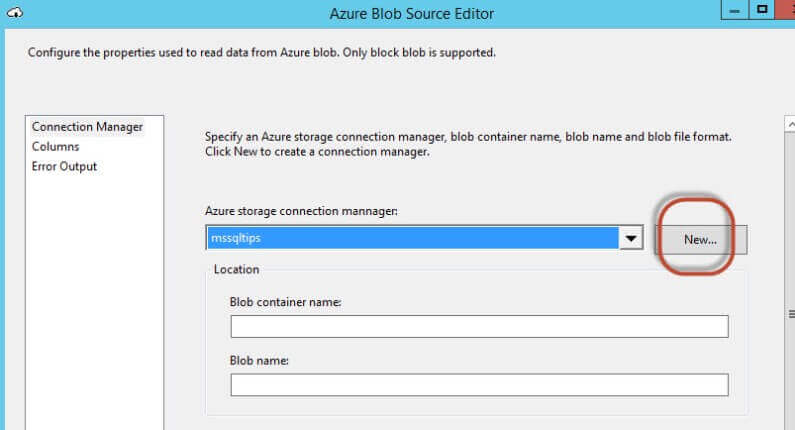
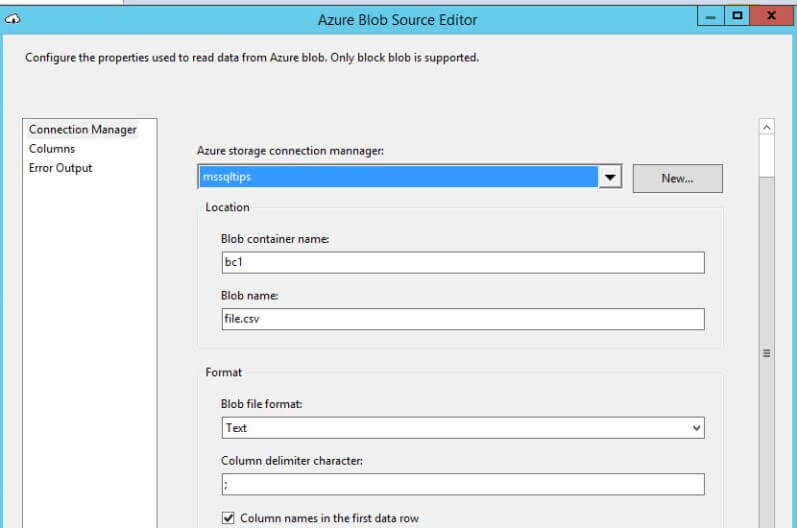
- Double click the Azure Blob Source and press New to create a new Azure storage connection:
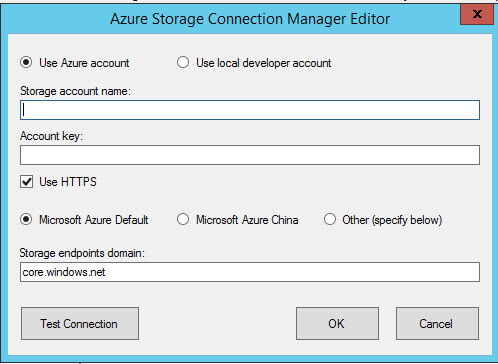
- To connect, you need a Storage account and an Account key:
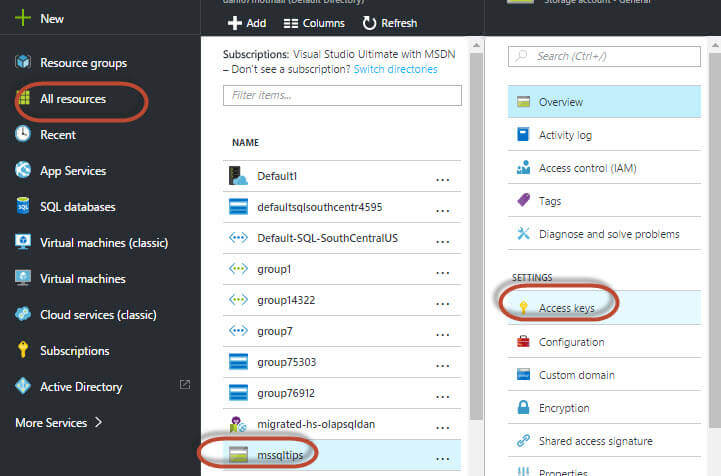
- In your browser, go to Azure Portal and then to All resources > mssqltips (or your Storage Account if you used another name) > Access Keys:
- Copy the Storage account name used and the key1:
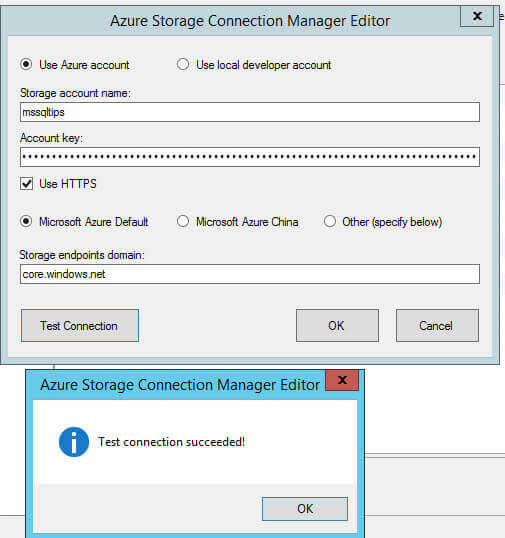
- Paste the Storage account name and the key1 of the step 9 in the Azure Storage Connection manager in the Window of step 7 in SSIS and Test the connection:
- The Blob container name is the name of a Blob Container created in Azure using MASE. In that container is where the file .csv is located. The Blob name is the name of the file. We will use ";" as the column delimiter because this csv file is separated by semicolons as you can see in step 1:
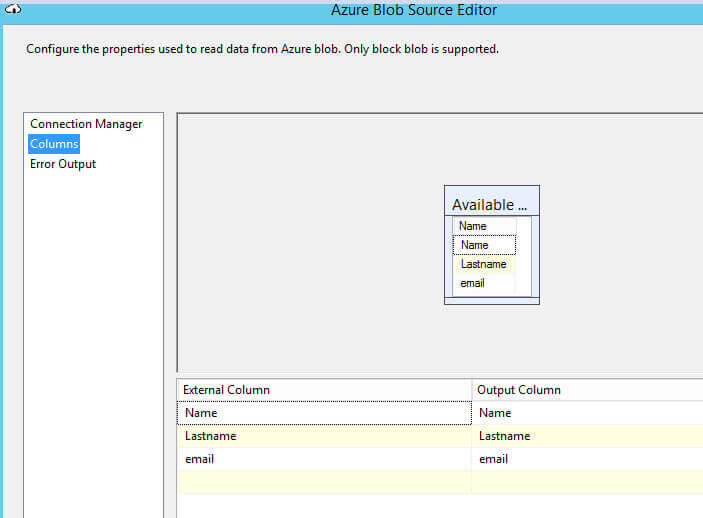
- Click Columns to check if the columns were recognized:
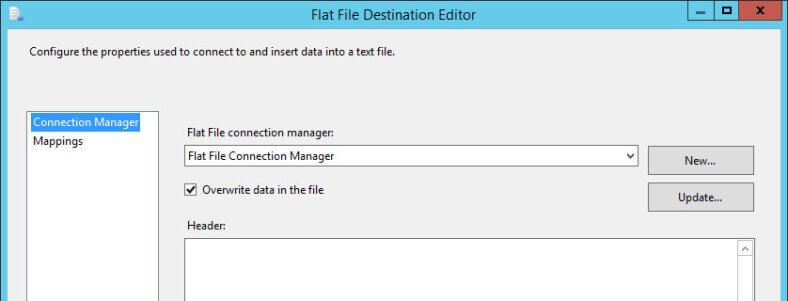
- Save the properties and go to Flat File Destination Task:
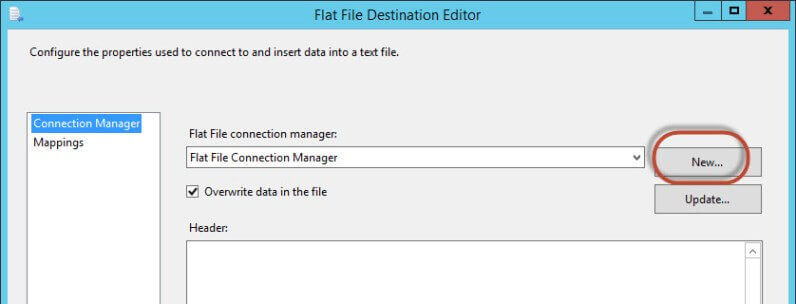
- Press New to create a new connection:
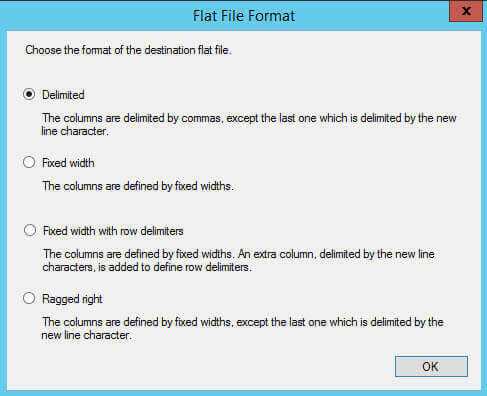
- Select Delimited Flat File Format:
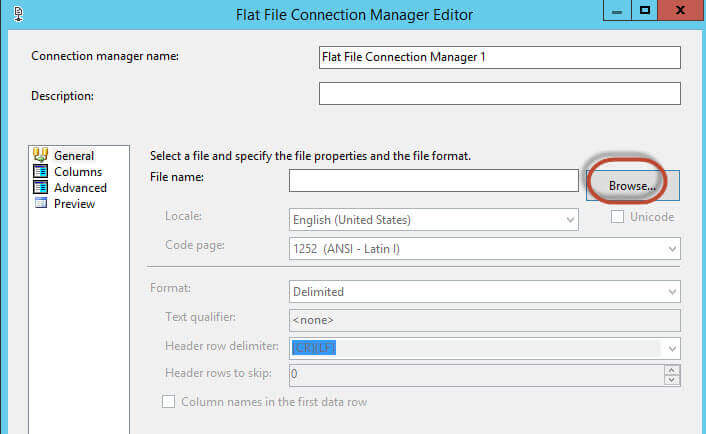
- Press Browse to specify the destination file name and path:
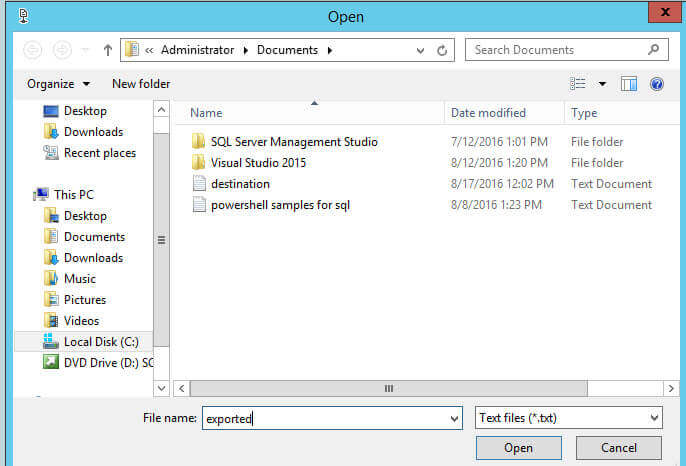
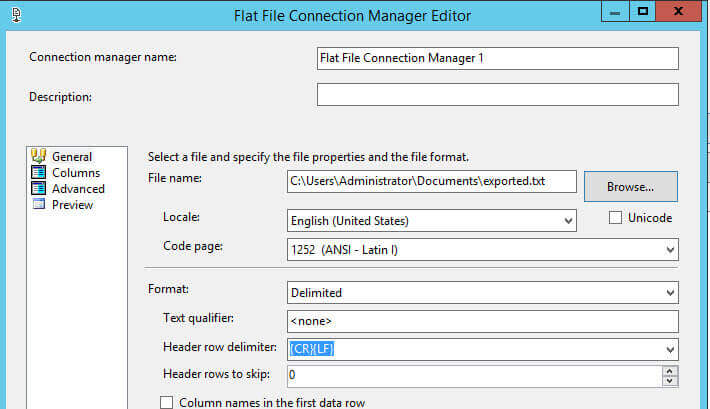
- Specify the path and name of the file:
- In this example, the destination file will be exported.txt:
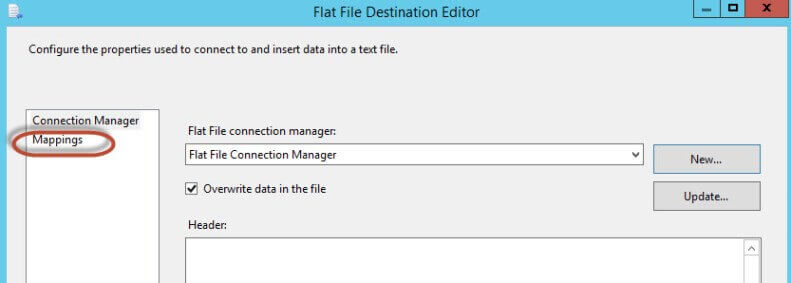
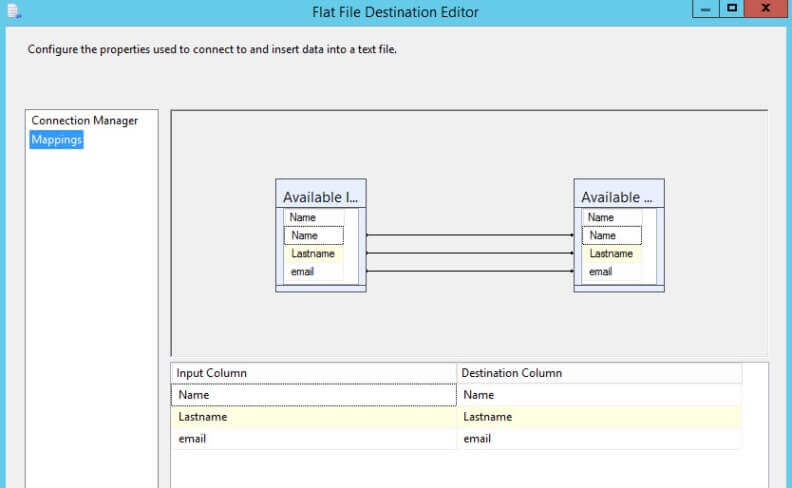
- Press Mappings to map source columns with destination columns:
- By default, the destination columns will be the same, but you can change them here if you want:
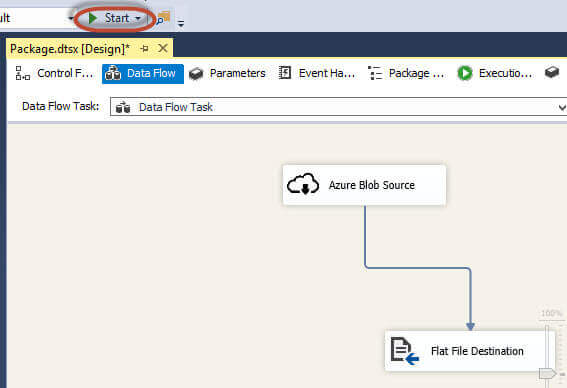
- Start the package to copy the Azure information from the csv file:
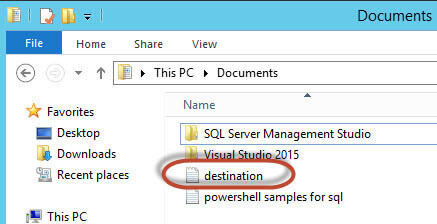
- If everything is OK, a new file will be created in the path specified in step 18:
- Open the txt file created:
Name;Lastname;email
John ;Lennon;[email protected]
Ringo ;Starr;[email protected]
Paul;Maccartney;[email protected]
George;Harrison;[email protected]

Conclusion
In this tip, we copied the data from a csv file stored in an Azure Storage Account to a local txt file using SSIS. For this, an Azure storage account and a container were needed. We used the new feature pack for SSIS that includes new tasks for Azure.
Next Steps
For more information, refer to the following links:
- Azure Feature Pack for Integration Services (SSIS)
- Move Data to or from Azure Blob Storage using SSIS connectors
- Azure Blob Source
- Check out the following resources:
About the author
 Daniel Calbimonte is a Microsoft SQL Server MVP, Microsoft Certified Trainer and 6-time Microsoft Certified IT Professional. Daniel started his career in 2001 and has worked with SQL Server 6.0 to 2022. Daniel is a DBA as well as specializes in Business Intelligence (SSIS, SSAS, SSRS) technologies.
This author pledges the content of this article is based on professional experience and not AI generated.
View all my tips


