Problem
We are planning on deploying a SQL Server 2016 failover clustered instance (FCI) for local high availability. From my understanding, a SQL Server FCI requires some form of shared storage subsystem. However, the servers that we purchased for our failover cluster nodes only have local storage. How can we install and configure a SQL Server 2016 FCI without shared storage?
Solution
To continue this series on Installing SQL Server 2016 Failover Clustered Instance on a Windows Server 2016 Failover Cluster Without Shared Storage, we will look at installing SQL Server 2016 Failover Clustered Instance on a Windows Server 2016 Failover Cluster (WSFC) with Storage Spaces Direct (S2D). In Part 2, you have learned how to configure the WSFC network adapters to properly handle S2D traffic. You’ve also enabled S2D and created disk volumes for the SQL Server database files. This tip will walk you through installing the SQL Server 2016 failover clustered instance.
Installing a SQL Server 2016 Failover Clustered Instance (FCI) on Storage Spaces Direct
NOTE: Starting with SQL Server 2012, there are two ways to install SQL Server on top of a WSFC – the traditional SQL Server failover clustered instance (FCI) and SQL Server Availability Groups (AG). Installing a SQL Server FCI requires shared storage or an emulated form of shared storage. SQL Server AG does not require any form of shared storage. In fact, you can use a standalone instance or a SQL Server FCI to configure SQL Server AG.
A common question that is frequently asked when dealing with a SQL Server FCI is, “can I convert a standalone instance to a SQL Server FCI and vice versa?” The answer is “no, you can’t.” If you want to convert a standalone instance to a SQL Server FCI or vice versa, you will have to treat it like a database migration process. So, before you proceed with this step, be very sure that a SQL Server FCI is what you really need. This series of tips is for installing a SQL Server FCI – not a SQL Server AG – on top of a WSFC.
In this section, you will install a default instance of SQL Server 2016 FCI on S2D. If you have installed a SQL Server FCI in the past, you know that the installation process will require a drive letter or a volume mountpoint - both using a form of shared disk. While the installation process for a SQL Server FCI using some form of shared storage and using S2D is quite similar, the difference lies in defining the storage subsystem that the SQL Server FCI will use. For comparison, refer to this tip on installing a SQL Server 2016 FCI.
You will run the installation process on the first node of your WSFC.
- Run setup.exe from the SQL Server 2016 installation media to launch SQL Server Installation Center. Click on the Installation link on the left-hand side.
- Click the New SQL Server failover cluster installation link. This will run the SQL Server 2016 Setup wizard.

- In the Product Key dialog box, enter the product key that came with your installation media and click Next.

- In the License Terms dialog box, click the I accept the license terms check box and click Next.

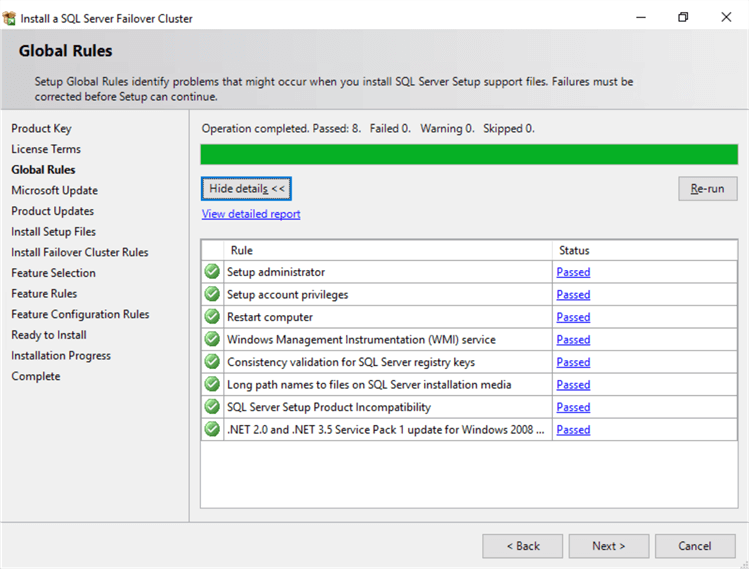
- In the Global Rules dialog box, validate that the checks return successful results and click Next.
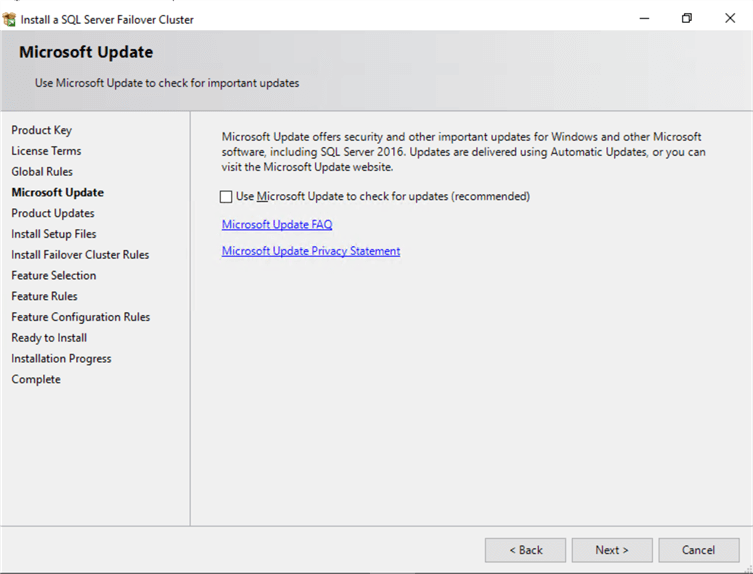
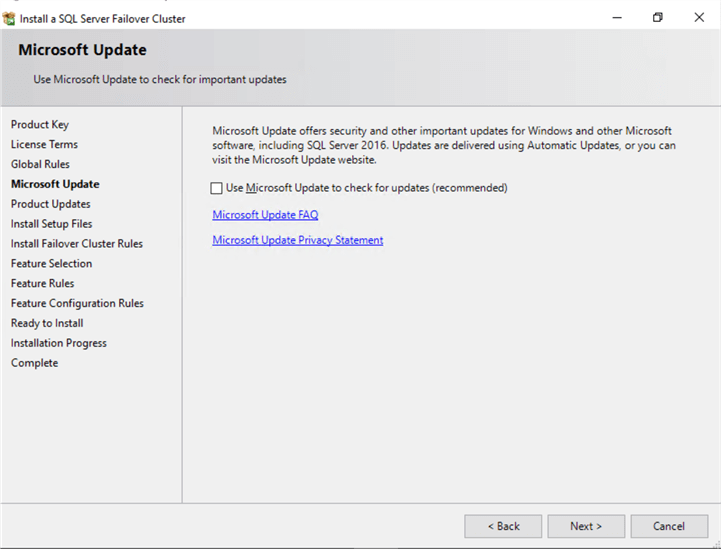
- In the Microsoft Update dialog box, you have the option to include SQL Server product updates like service packs and cumulative updates in the installation process. By default, it searches for product updates thru the Microsoft Updates service online, assuming that the server has access to the Internet. In cases where your servers do not have access to the internet, you can manually download the updates and store them on a network shared folder. You can, then, point the installation media to search the network shared folder instead. For this option, you will need to run setup.exe from the command-line, passing the /UpdateSource parameter. A more detailed approach to using this feature is outlined in this Microsoft documentation.
- Click Next.
NOTE: Another way to include SQL Server service packs and cumulative updates in the installation process is to create a slipstreamed installation media. Refer to this tip for the steps on how to do this.
- In the Install Failover Cluster Rules dialog box, validate that the checks return successful results. If the checks returned a few warnings, make sure you fix them before proceeding with the installation. Click Next.
Note that you won’t have the warning status for Microsoft Cluster Service (MSCS) cluster verification warnings described in this tip since the Failover Cluster Validation Wizard includes the S2D-related checks.

- In the Feature Selection dialog box, select the following components Database Engine Services and Client Tools Connectivity.
- Click Next.
Note that SQL Server Management Studio is no longer included in the SQL Server 2016 installation media and have to be downloaded separately.

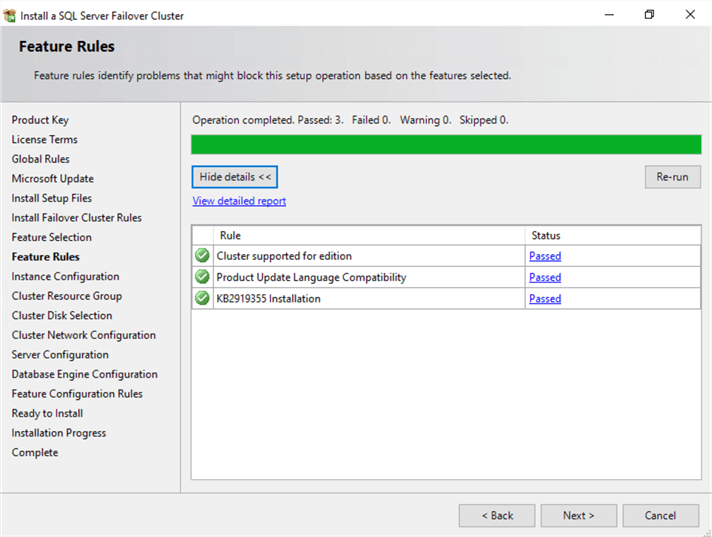
- In the Feature Rules dialog box, verify that all the rules have passed. If the rules returned a few warnings, make sure you fix them before proceeding with the installation.
- Click Next.
- In the Instance Configuration dialog box, enter the SQL Server Network Name. This is the name that the client applications will use to connect to this server. A couple of things need highlighting in this section. By default, the instance name is used as the Instance ID. This is used to identify installation directories and registry keys for this specific instance of SQL Server – very helpful when you want to run multiple instances in a WSFC. It applies to both the default instance and named instances. For a default instance, the instance name and instance ID would be MSSQLSERVER. To use a non-default instance ID, you should specify a value in the Instance ID box.
- Click Next.

- In the Cluster Resource Group dialog box, check the resources available on your WSFC. This tells you that a new Resource Group will be created on your WSFC for the SQL Server FCI. To specify the SQL Server cluster resource group name, you can either use the drop-down box to specify an existing group to use or type the name of a new group to create it. Accept all the defaults and click Next.

- In the Cluster Disk Selection dialog box, select the available disk groups that are on the WSFC for the SQL Server FCI to use. Click Next. This is where you’ll see the value of renaming the shared disk resources as done in Part2 of this tip series. Notice that these are the disk volumes created using S2D.

- In the Cluster Network Configuration dialog box, enter the IP address and subnet mask that your SQL Server FCI will use. Be sure to deselect the checkbox under the DHCP column as you will be using static IP addresses. Click Next. Again, this is where you’ll see the value of renaming the cluster network resources as done in Part 2 of this tip series.

- In the Server Configuration dialog box, provide the credentials for the SQL Server service accounts in the Service Accounts tab. Make sure that both the SQL Server Agent and SQL Server Database Engine services have a Startup Type of Manual. The WSFC will take care of stopping and starting these services.
- Select the checkbox Grant Perform Volume Maintenance Task privilege to SQL Server Database Engine Service – this is new in SQL Server 2016. This enables Instant File Initialization for SQL Server as highlighted in this tip. Because this is a local permission assigned to an account, you need to explicitly do this on all of the nodes in the SQL Server FCI.
- Click Next

- In the Database Engine Configuration dialog box, under the Server Configuration tab,
- Select Windows authentication mode in the Authentication Mode section. If required, you can change it later after the installation is complete.
- Add the currently logged on user to be a part of the SQL Server administrators group by clicking the Add Current User button in the Specify SQL Server Administrators section. You can also add Active Directory domain accounts or security groups as necessary.

- In the Data Directories tab, specify the location of the data files, the log files and the backup files.

NOTE: This is where installing a SQL Server FCI on traditional shared storage versus on S2D differ. In traditional shared storage, you would either use the drive letter of the shared disk or a volume mountpoint that is also mounted on a shared disk similar to the one describe in this previous tip. With S2D, the SQL Server installation media will automatically pick up the path of the cluster shared volume (CSV) that S2D uses - in this example, C:\ClusterStorage\SQLDATA.
Do not be confused. Unlike when using traditional shared storage where you cannot mount a shared disk volume on the C:\ drive, CSV will automatically use the C:\ClusterStorage folder. Be sure to document this location and configuration so that other SQL Server database administrators in your team will know that this is a SQL Server FCI that uses S2D and not a standalone instance.
Also new in SQL Server 2016 is the specific tab for TempDB configuration. You can set the number of tempdb data files, initial size and autogrowth settings of both data and log files as well as their corresponding locations.

Note that, starting with SQL Server 2012, you have the option to store your tempdb database files on a local disk in a WSFC. In this example, while the path to the tempdb database files point to C:\ClusterStorage, this is no longer considered local disk from the point of view of the SQL Server FCI even though they are physically local to the servers.
- In the Feature Configuration Rules dialog box, verify that all checks are successful. Click Next.

- In the Ready to Install dialog box, verify that all configuration settings are correct. Click Install to proceed with the installation.

- In the Complete dialog box, click Close. This concludes the installation of a SQL Server 2016 FCI on S2D.

At the completion of a successful installation and configuration of the node, you now have a fully functional SQL Server 2016 FCI running on top of S2D. To validate, open the Failover Cluster Manager console and click on SQL Server (MSSQLSERVER) under Roles. Make sure that all dependencies are online.

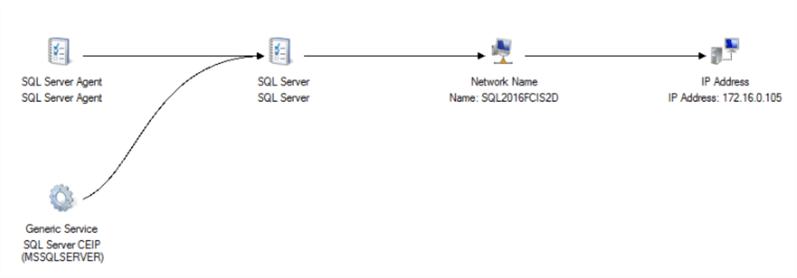
NOTE: If you look at the list of resources for the SQL Server FCI, notice that there are no storage dependencies unlike what you see when you use traditional shared storage similar to this tip. This makes failing over a SQL Server FCI to another WSFC node faster since the SQL Server cluster resource no longer has to wait until the storage dependencies are online before it goes online. This is how the Cluster Dependency Report looks like for the SQL Server FCI using S2D.
However, this doesn’t mean that the SQL Server cluster resource no longer depends on a storage resource. Keep in mind that your SQL Server databases - system and user databases - will be stored on the disk volumes on S2D. If those disk volumes become unavailable due to hardware failures, your database files will become unavailable and prevent SQL Server from starting.
Also new in SQL Server 2016 FCI is the additional cluster resource named SQL Server CEIP (MSSQLSERVER) or the Local Audit for SQL Server Usage Feedback Collection feature. This additional cluster resource/role inside the SQL Server cluster resource group does not directly impact the SQL Server FCI. By default, failure of this resource does not cause a failover of the entire SQL Server cluster resource group. However, you still need to monitor whether this resource is online or not. A more detailed discussion of this feature will be covered in a future tip.
Although we do have a fully functioning SQL Server 2016 FCI, it is not highly availability at this point in time because the SQL Server binaries are only installed on one of the nodes in the WSFC. To make it highly available, you still have to add the second node of the WSFC to the SQL Server FCI.
SQL Server 2016 Failover Cluster Instance Installation on S2D – Install Secondary (Failover) Cluster Node
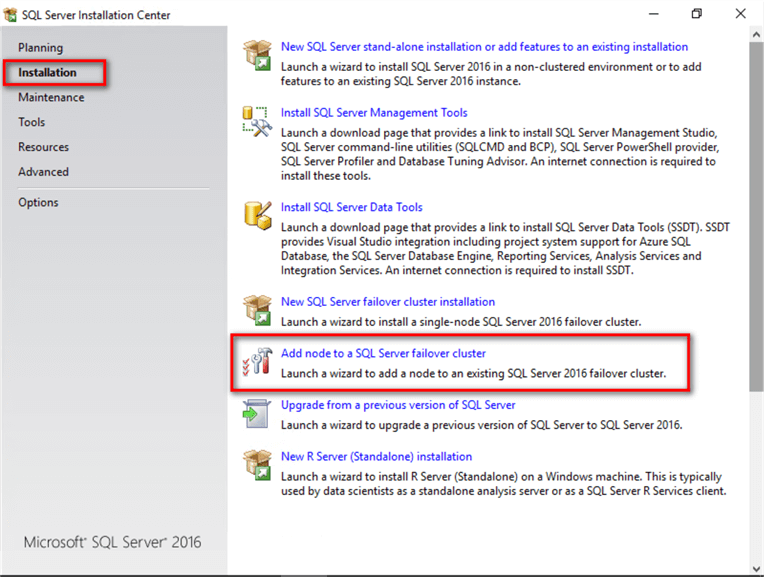
Now that you have a working SQL Server 2016 FCI on S2D, you make it highly available by adding nodes. To add a node to an existing SQL Server 2016 FCI,
- Run setup.exe from the SQL Server 2016 installation media to launch SQL Server Installation Center. Click on the Installation link on the left-hand side.
- Click the Add node to a SQL Server failover cluster link. This will run the SQL Server 2016 Setup wizard.
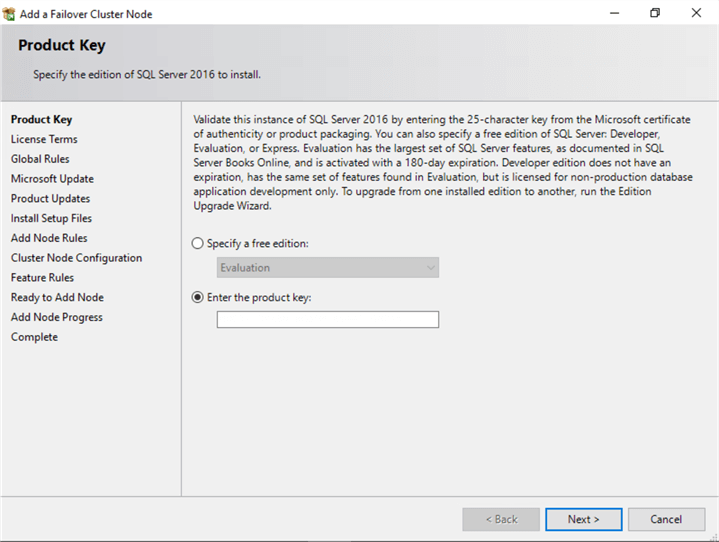
- In the Product Key dialog box, enter the product key that came with your installation media and click Next.
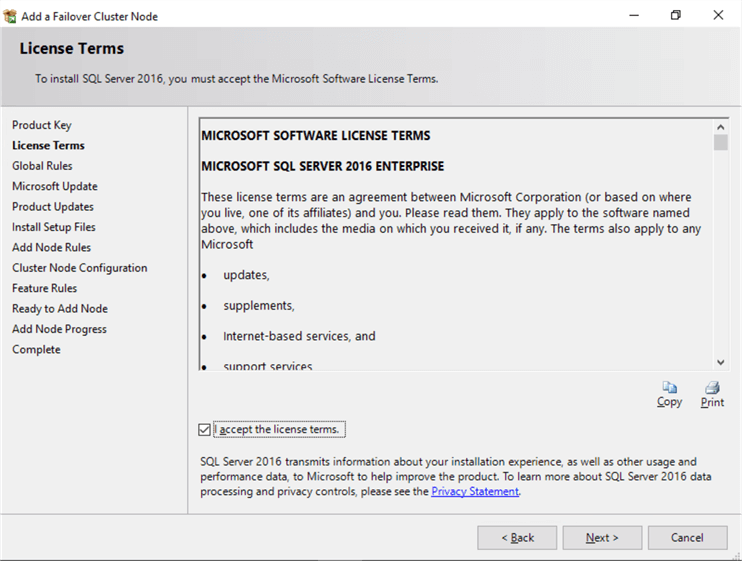
- In the License Terms dialog box, click the I accept the license terms check box and click Next.
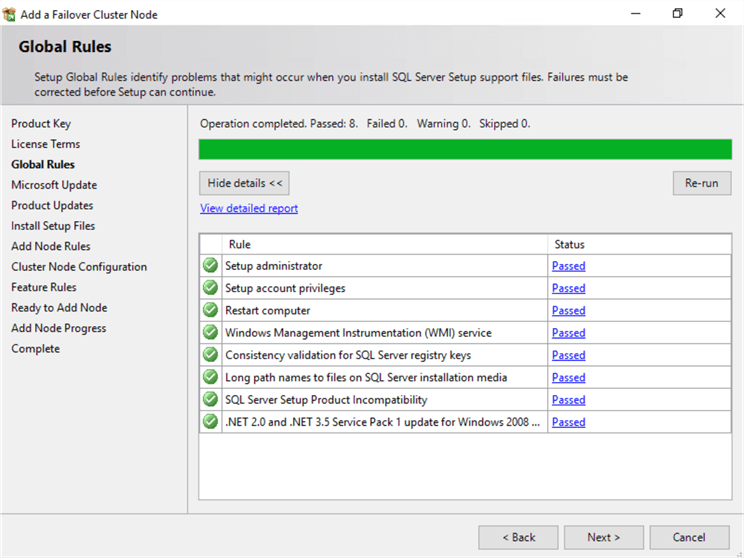
- In the Global Rules dialog box, validate that the checks return successful results and click Next.
- In the Microsoft Update dialog box, click Next.
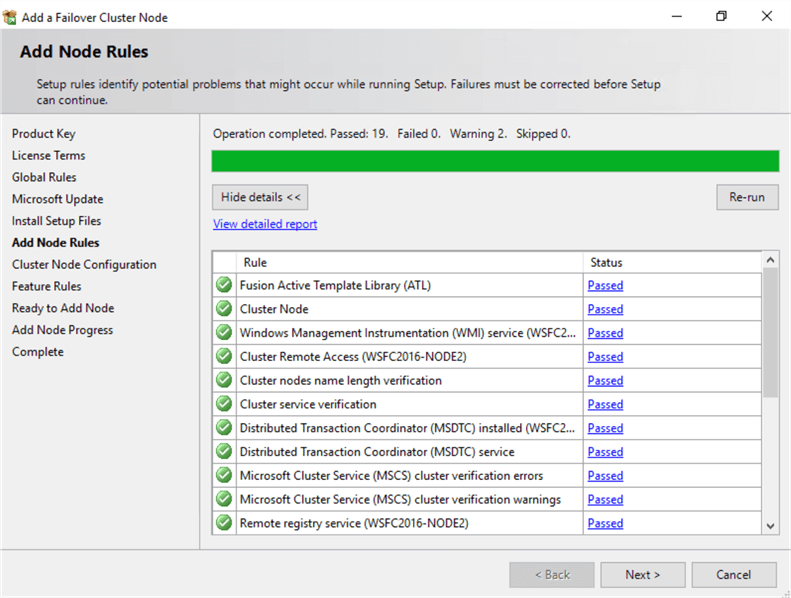
- In the Add Node Rules dialog box, validate that the checks return successful results. If the checks returned a few warnings, make sure you fix them before proceeding with the installation. Click Next.
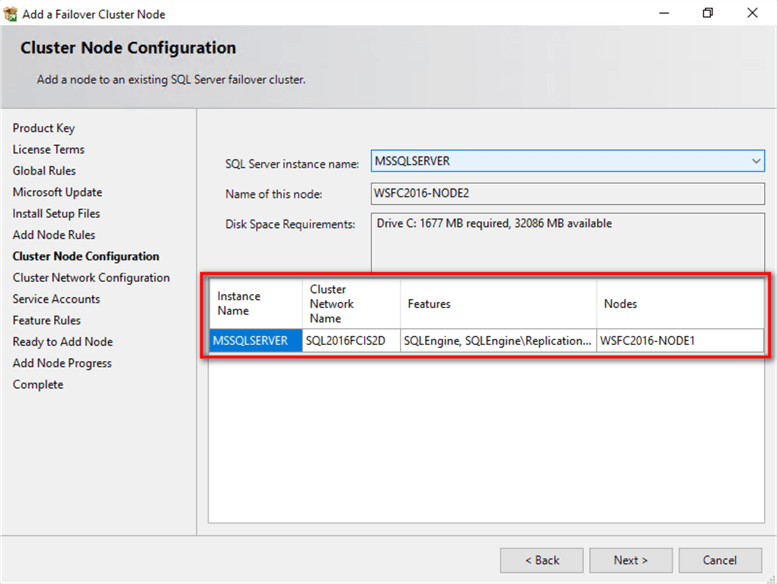
- In the Cluster Node Configuration dialog box, validate that the information for the existing SQL Server 2016 FCI is correct. Click Next.
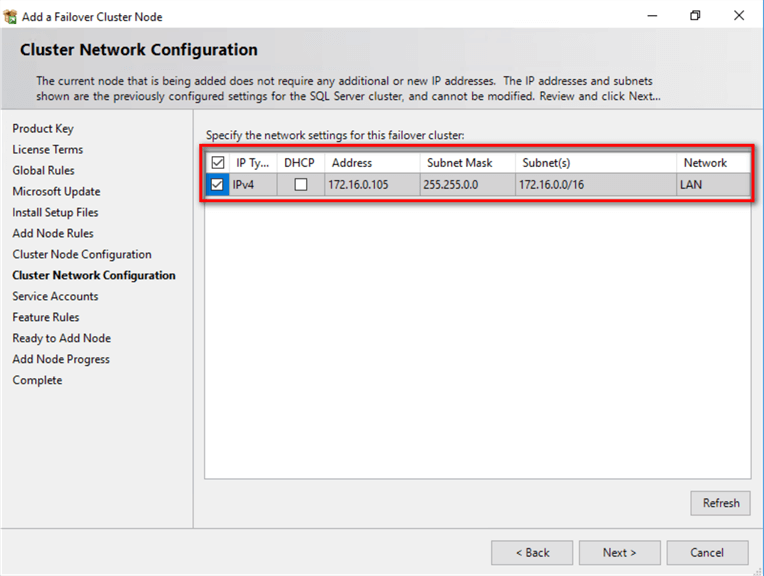
- In the Cluster Network Configuration dialog box, validate that the IP address information is the same as the one you provided earlier.
- In the Service Accounts dialog box, verify that the information is the same as what was used to configure the first node. Provide the appropriate credentials for the corresponding SQL Server service accounts.

NOTE: Pay close attention to the order of the SQL Server services especially when you use different service accounts. In the previous section, you see the SQL Server Agent service come before the SQL Server Database Engine service. Here, it’s the reverse – the SQL Server Database Engine service comes before the SQL Server Agent service. Be sure not to mix those two up.
- Select the checkbox Grant Perform Volume Maintenance Task privilege to SQL Server Database Engine Service to enable Instant File Initialization for SQL Server as highlighted in this tip. Because this is a local permission assigned to an account, you need to explicitly do this on all of the nodes in the SQL Server FCI.
- Click Next.
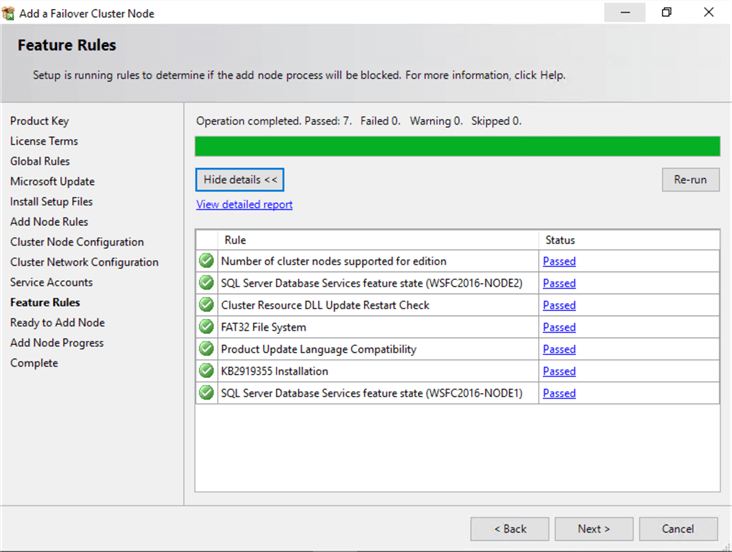
- In the Feature Rules dialog box, verify that all checks are successful. Click Next.
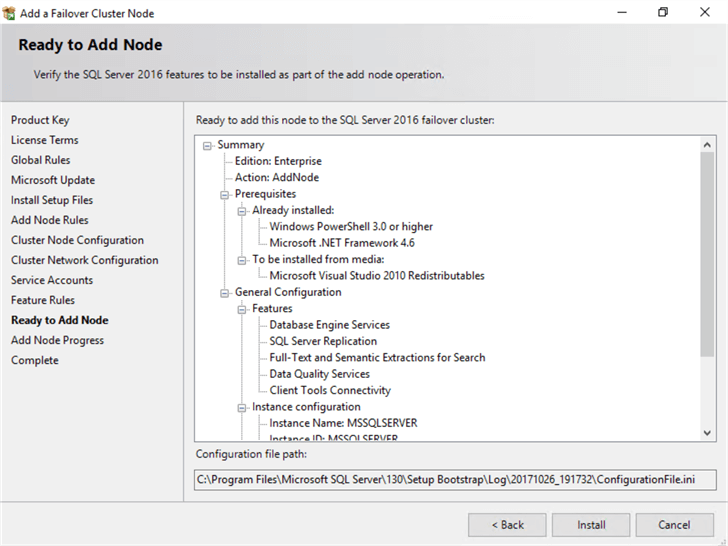
- In the Ready to Add Node dialog box, verify that all configuration settings are correct. Click Install to proceed with the installation.
- In the Complete dialog box, click Close. This concludes adding a node to an existing SQL Server 2016 FCI on S2D.

- To add more nodes to the SQL Server 2016 FCI, simply repeat steps #1 to #13.
Validating SQL Server 2016 FCI Installation on S2D
At the completion of a successful installation and configuration of the node, you need to validate whether the SQL Server 2016 FCI will failover – either automatically or manually – to all of the available nodes.
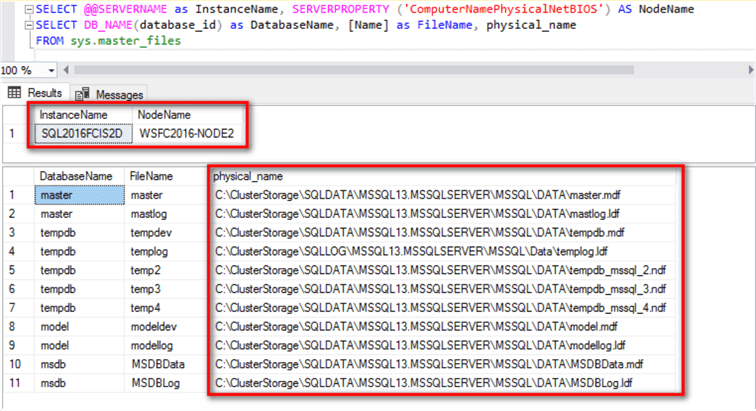
Because the SQL Server FCI was installed leveraging S2D, the database files will be stored disk volumes mounted on the C:\ClusterStorage. A simple way to validate this is to run a simple query to check the file locations of the system databases. Refer to the query below and connect to the SQL Server 2016 FCI.
 SELECT @@SERVERNAME as InstanceName, SERVERPROPERTY ('ComputerNamePhysicalNetBIOS') AS NodeName
SELECT DB_NAME(database_id) as DatabaseName, [Name] as FileName, physical_name
FROM sys.master_files
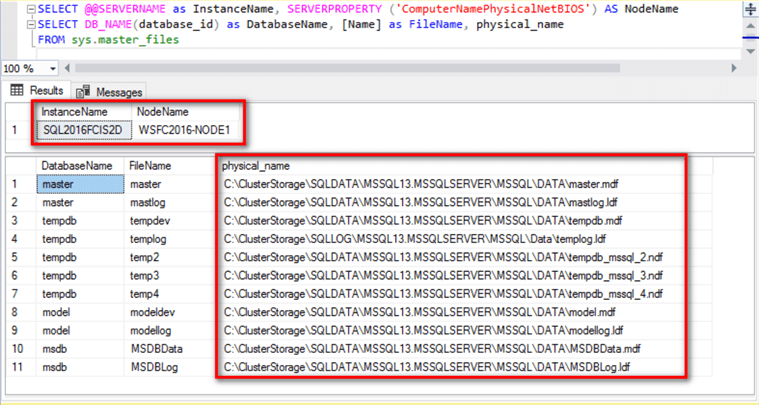
Manually failover the SQL Server FCI to the other node and rerun the same query. You should see the same paths for the database files even on the other node.
In this tip, you have installed SQL Server 2016 on a Windows Server 2016 Failover Cluster, leveraging S2D for the database files without using shared storage.
Next Steps
- Check out Part 1 and Part 2 of this tip series.
- Review the previous tips on Step-by-step Installation of SQL Server 2016 on a Windows Server 2016 Failover Cluster – Part 1, Part 2, Part 3 and Part 4
- Read more SQL Server Clustering Tips

Edwin M. Sarmiento is the Managing Director of 15C, a consulting and training company that specializes on designing, implementing and supporting SQL Server infrastructures. He is a Microsoft SQL Server MVP and Microsoft Certified Master from Ottawa, Canada specializing in high availability, disaster recovery and system infrastructures running on the Microsoft server technology stack ranging from Active Directory to SharePoint and anything in between. He is very passionate about technology but has interests in music, professional and organizational development, and leadership and management matters when not working with databases. Edwin lives up to his primary mission statement: “To help people and organizations grow and develop their full potential.”
- MSSQLTips Awards: Champion Award (100+ tips) – 2017 | Author of the Year Contender – 2020, 2017